Jump to content
  • Welcome To Mopar1973Man.Com LLC

    We are a privately owned support forum for the Dodge Ram Cummins Diesels. All information is free to read for everyone. To interact or ask questions you must have a subscription plan to enable all other features beyond reading. Please go over to the Subscription Page and pick out a plan that fits you best. At any time you wish to cancel the subscription please go back over to the Subscription Page and hit the Cancel button and your subscription will be stopped. All subscriptions are auto-renewing. 

Outside rear view mirror loose


Recommended Posts

Am having a world of problems with the left hand outside rear view mirror. I shut the door and it moves and changes positions... then drive and hit a bump and yes, it changes positions again. Am getting tired of having to open the window every few minutes and reposition it so I can see.


Evidently the guts inside are getting loose (just shy of 150,000 miles) and its not holding position.


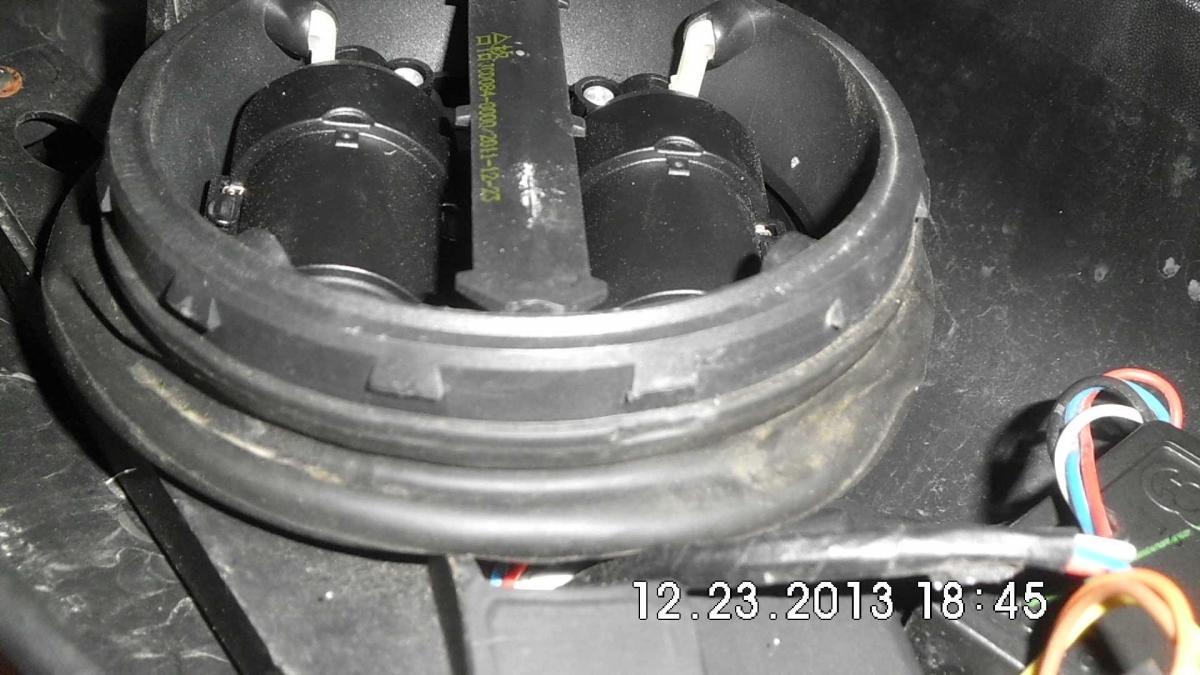
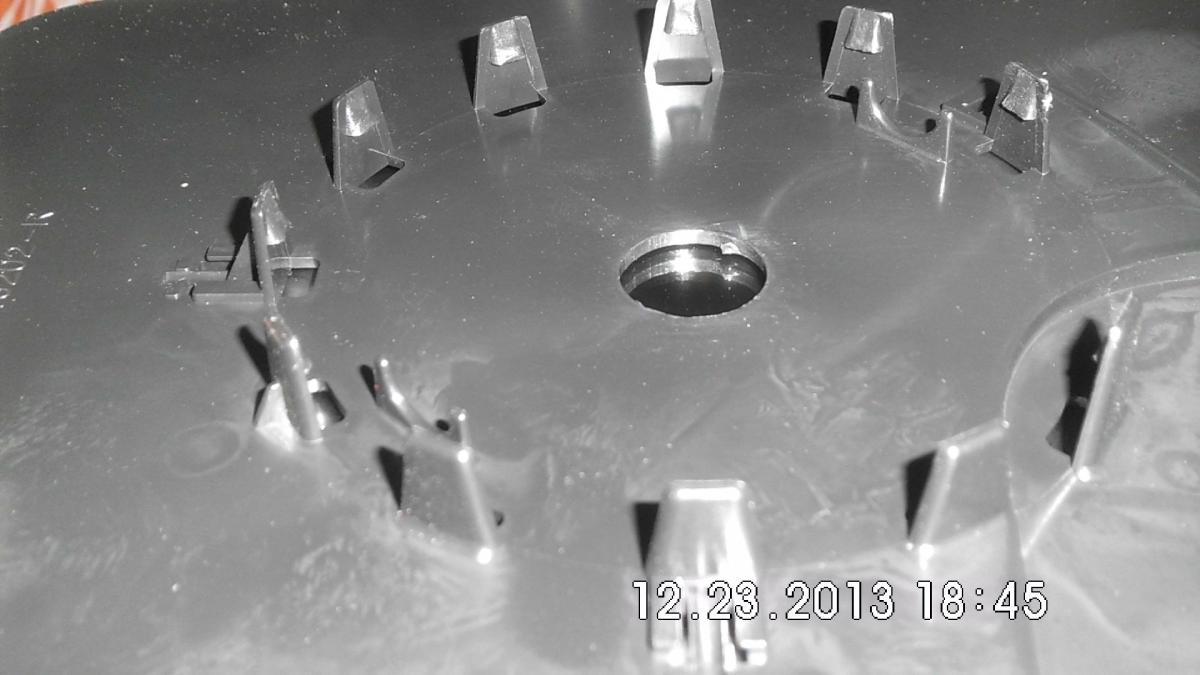
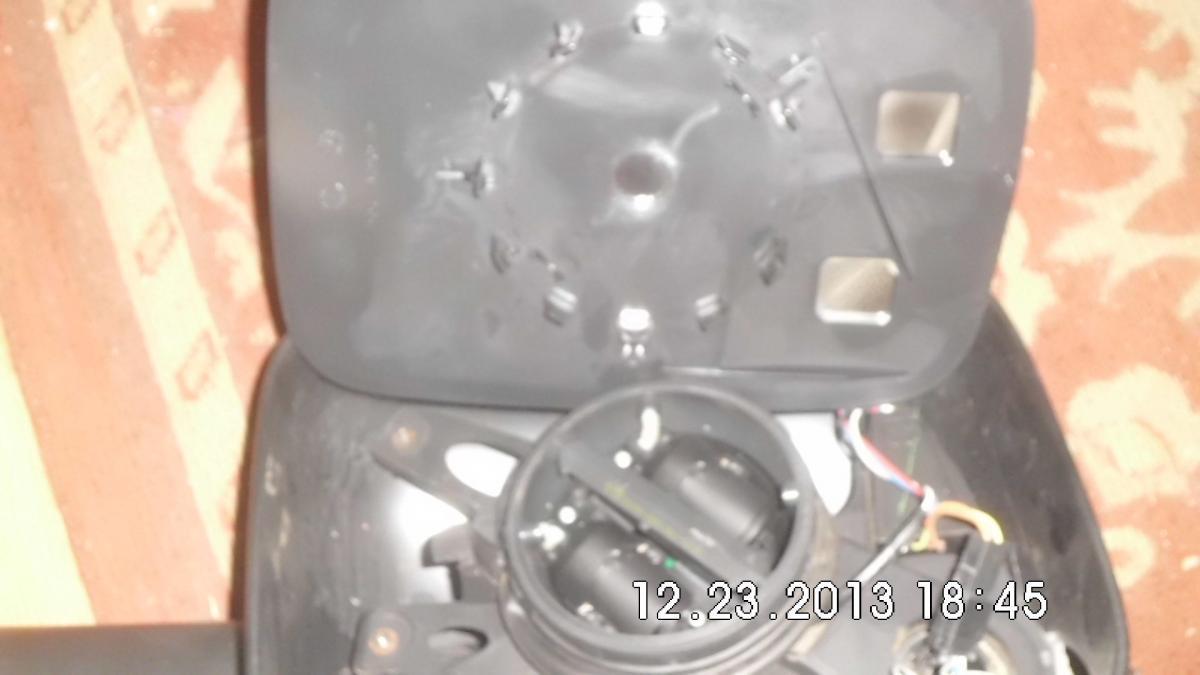
Anyone ever taken these apart and tightened them? This is the "towing mirror" version that lies flat or horizontal most of the time but can be rotated up 90 degrees for towing.


Thx,


Joe

Link to comment
Share on other sites

  • Staff

I had a sun visor keep doing that. It would swing down with evey vibration in the road. I put rubber cement/ contact cement on the steel shaft and slide it back on. Once the cement dried it stays up and still can get adjusted down when I need it.


It's the same non water base stuff (hot stuff) used for laminate countertops. If you can reach in there with a wire and get some in there or just drip it inside some. It would take a while to dry in cold but you could tape it in the mean time.


I think this way would put just enough bind on it to stay and still be adjustable.


On edit.... I just remembered having the glass replaced on one of mine. Once you get the glass off there are large access holes, maybe about an inch or so, thru the plastic that the glass mounts to. I remember the glass shop had to use a small scraper to take the glass/ break off in pieces as he pried it off. He was wearing goggles :thumb1:

Edited by JAG1
Link to comment
Share on other sites

post-338-0-73282400-1387842379_thumb.jpgpost-338-0-20021800-1387842428_thumb.jpgpost-338-0-61390300-1387842444_thumb.jpgWell I could not find the old manual oe mirror but I do have an after market power mirror. IIRC the mirrors attach the same. All I did was reach in with with a thin bladed slotted screw driver and popped the tabs off of the inner part of the mirror. It cam off very easily. 


  • Like 1
Link to comment
Share on other sites

*Updated, with PICS*, because I was too pissed off to take any, but I decided tonight to fix my passenger side tow mirror, on the wife's 03. Her mirror was loose, and wouldn't lock in place, it kept drifting in while driving, and was annoying as all get out, so I decided to fix it tonight, before I picked up my 30 ft travel trailer tomorrow. Let me tell you a little about how they work.

1st, I took the mirror off the truck, easy enough. take out the screw in the top of the door trim, and remove the three 10 mm nuts on the backside. disconnect the electrical, and remove mirror from the truck. There will be a piece of foam insulation between the mirror and the door, remember to save that to put it back on. *I didn't add pics of this part, but this is probably the easiest part to do. I can't really take pics right now anyways, since the wife's out of town with the 3rd gen. 

Now, moving on to the slightly harder part.I discovered that the plastic trim on the mirror arm will come apart. I'm not sure if I actually needed to do this, but it definitely came in handy (I'll get into that in a minute). the front side just clips on, so if you're careful, you can pop the clips on it, and pull it back a little. Don't do what I did, and remove it completely, since there's a ring that goes around the mirror head-it'll break(it actually wasn't that bad, and with the mirror reassembled, you can't tell, but I wouldn't have done it if I had known it was a solid ring  

*some of these pics aren't going to be exact, due to the fact that my test dummy mirror is a little banged up and missing some stuff...but hopefully this will at least help show you what's what*
DSCN1238.jpg


here's where the tabs are supposed to be....
DSCN1239.jpg


Second, take the back of the mirror off. Theres 4-5 torxhead screws, you'll need a bit to get to the one by the mirror head. You might not see this one, so at this point, flip the mirror up, and you'll see which one I'm talking about.

*This mirror in the pics, is a Koolvue, so it has screws, instead of torxheads. Everything else is the same though.*
DSCN1240.jpg


(I popped the round cover off the bottom of the mirror before I did anything else) This is the cover to the pivot assembly.
DSCN1241.jpg


DSCN1242.jpg


Here's where it gets really freakishly hard. 
inside the pivot point on the mirror arm, when you look in, you'll see a round retainer clip with locking tabs, holding it to the actual hinge. You'll need to take this off in order to reseat the ball bearings inside the arm. (NOTE!!!!!:::THERE IS A HEAVY DUTY SPRING BENEATH THIS, SO IF YOU DO TAKE IT OFF, BE CAREFUL, BECAUSE THE SPRING WILL SHOOT OUT AT YOU!) ask me how I know...
DSCN1243.jpg


DSCN1245.jpg


Once that locking tab is off, and the spring has shot out and hit you in the face, you can now pull the rest of the hinge out, reseat your bearings, and put it back together.......NOT! 
The problem I ran into was that the spring needed to compress into the arm far enough for the locking ring to bite down on the hinge. This proved far more difficult that I originally thought, due to the wiring for the heated and power mirrors running through it.

What I eventually did, and i should have done this in the first place, was cut the wires, and pull them out of the way. Don't even bother trying to work around them, as all you'll do is tear them up. Just cut them, and resplice them later. I resoldered mine, and used heatshrink on the individual wires, and then taped them up when I was done. 
DSCN1244.jpg


*here's how the spring looks outside of the mirror*
DSCN1246.jpg


DSCN1247.jpg


*Also, this is the part that screws up...*
DSCN1248.jpg

*Here you can see the notches, where the ball bearings are supposed to catch the mirror, to hold it in place...*

DSCN1249.jpg


*This is the bearings, in the bottom half of the mirror, in their proper resting places. There's indentions in there, so you'll know exactly where the bearings are supposed to go.*
DSCN1251.jpg

 Once you've cut the wires, what worked for me was using a c clamp, and a large enough socket that the socket would fit around the hinge. This is key. if the socket won't fit around the hinge, it will NOT push the locking tab far enough down for it to bite. It took me about 15 minutes to get this on, as the cclamp kept slipping off the socket. Once it bit down, though, it was easy from there. 

DSCN1252.jpg


DSCN1253.jpg


DSCN1255.jpg


DSCN1256.jpg


DSCN1258.jpg


I resoldered the wires, put the mirror back together, and tested it, and it works fine. 

*One last thing...When I had this ring out, I went ahead with a pair of needlenosed pliers, and bent the tabs back down a bit, to make sure they'd bite the post again.*
DSCN1257.jpg


*I didn't actually fully assemble this one, since there's really no reason to*

Edited by dennhop
Link to comment
Share on other sites

A couple of notes from other questions I got:


You need to take the mirror off the truck before performing this repair-you end up pushing and pulling on the mirror too much to trust that it won't break something while it's on the truck.


There's no way of trying to reset the bearings in the mirror by fishing some sort of wire in between without taking the mirror apart...the mirror has to  be taken apart to get past the spring and ensure the bearings are in their proper detent.

Link to comment
Share on other sites

  • 2 weeks later...

Thanks for the update and photos. Not sure what happened to the formatting on the text but believe I understand what to do.


Looks like a pretty good sized job but need to have the mirror stable! Will post back when I get time to fuss with it.


Thanks,


FT

Link to comment
Share on other sites

Thanks for the update and photos. Not sure what happened to the formatting on the text but believe I understand what to do.


Looks like a pretty good sized job but need to have the mirror stable! Will post back when I get time to fuss with it.


Thanks,


FT

I think I got the text fixed...not sure what happened there either, but it didn't look like that when I first posted it...should be a bit easier to understand now.

Link to comment
Share on other sites

×
×
  • Create New...