Jump to content
Posted

I've had this truck for about a year now. Ups and downs like every 2nd gen but overall I am very happy with this truck. Prepare for picture overload. Quick run down. A buddy posted this truck for sale on fb the day before the transmission decided to die in my grand prix (shocker). I bought this as to be a dd/tow rig when needed. The truck is originally from Texas and moved around a bit. I did find the owner on fb that brought the truck up to Indiana/Michigan and he provided some history on it. The box was trashed from day one. The owner I bought it from did not own up to rolling the truck onto it's side which cause bed damage and some door push in at the bottom. Nothing too crazy on the cab, door or fend. Box took the most of it. The engine, transmission and tcase are of unknown origin as Kurt (guy who brought it up to the north) sold it as a roller. It is a 180hp engine, 47re and DHD tcase. No clue how they found the correct drivetrain to stick back in it but they did. Lucky me. From day one this truck was weak. Even for a stock 12v. Ended up being the injection pump yayyyyyy. I got lucky and found a 180hp pump that had been gone through. Runs pretty well now. I will be going through the transmission to support my needs and have most of the parts already. Replacement/fixed stuff I have gone through; front brakes, ball joints, axle joints, track back, steering linkage, steering box, transfer case, front main seal, gauge wiring, dtt voltage box removal & wiring repair, thermostat, a/c line, water pump, stainless flex lines, led lights through out, projector retrofits, double din stereo, recovered head liner, 5% tint, two sets of wheels & tires and I think that is it. I am getting ready to do an axle swap to get better brakes as the single piston calipers are a JOKE. Now for the pictures and I'll try to get them in order.

20170112_201331_zpsi1u67cr7.jpg

20170112_220333_zpsvziqldpw.jpg

20170122_080021_zpsuahfp1nv.jpg

20170212_172738_zps123nvrap.jpg

Snapchat-2143295889.jpg

20170402_130647.jpg

Snapchat-1497090915.jpg

Snapchat-1969539037.jpg

received_1311489312273016.jpeg

20170514_115752.jpg

20170415_094556_zpszsznewzz.jpg

Snapchat-1785786964.jpg

20170520_195120.jpg

20170416_121328.jpg

20170522_075156.jpg

received_1455289511226328.jpeg

20170214_183017.jpg

20170604_181140.jpg

20170610_105834.jpg

20170506_105028.jpg

20170506_105044.jpg

20170305_191237.jpg

20170702_145327.jpg

20170613_123131.jpg

Snapchat-1217777914.jpg

20170224_072912.jpg

20170228_073822.jpg

20170228_202843.jpg

Snapchat-22139117.jpg

20170301_071521.jpg

Snapchat-742354225.jpg

Snapchat-666060563.jpg

20170331_084220.jpg

received_1345305162224764.jpeg

20170329_192225.jpg

received_1345308088891138.jpeg

received_1345375585551055.jpeg

20170729_220300.jpg

20170729_222934.jpg

20170820_201735.jpg

keep.jpg

received_1643399802415297.jpeg

20180128_193926.jpg

received_1643413685747242.jpeg

20180128_193936.jpg

20180203_081715.jpg

20170702_162017.jpg

  • Replies 131
  • Views 18.3k
  • Created
  • Last Reply

Top Posters In This Topic

Most Popular Posts

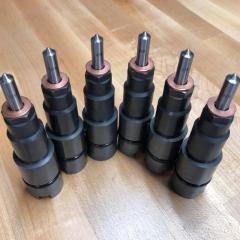
  • Ppump truck moves more fuel than a vp.   I am going to use a new Cummins piston pump with a 973-1 valve spring upgrade. Which I actually got last week along with a new filter head.   

  • My SIL has a hunting dog just like that. When your back is turned, distracted working on the truck she steals hats (2 or 3 brand new) and now a set of prescription glasses. If you give her an egg she

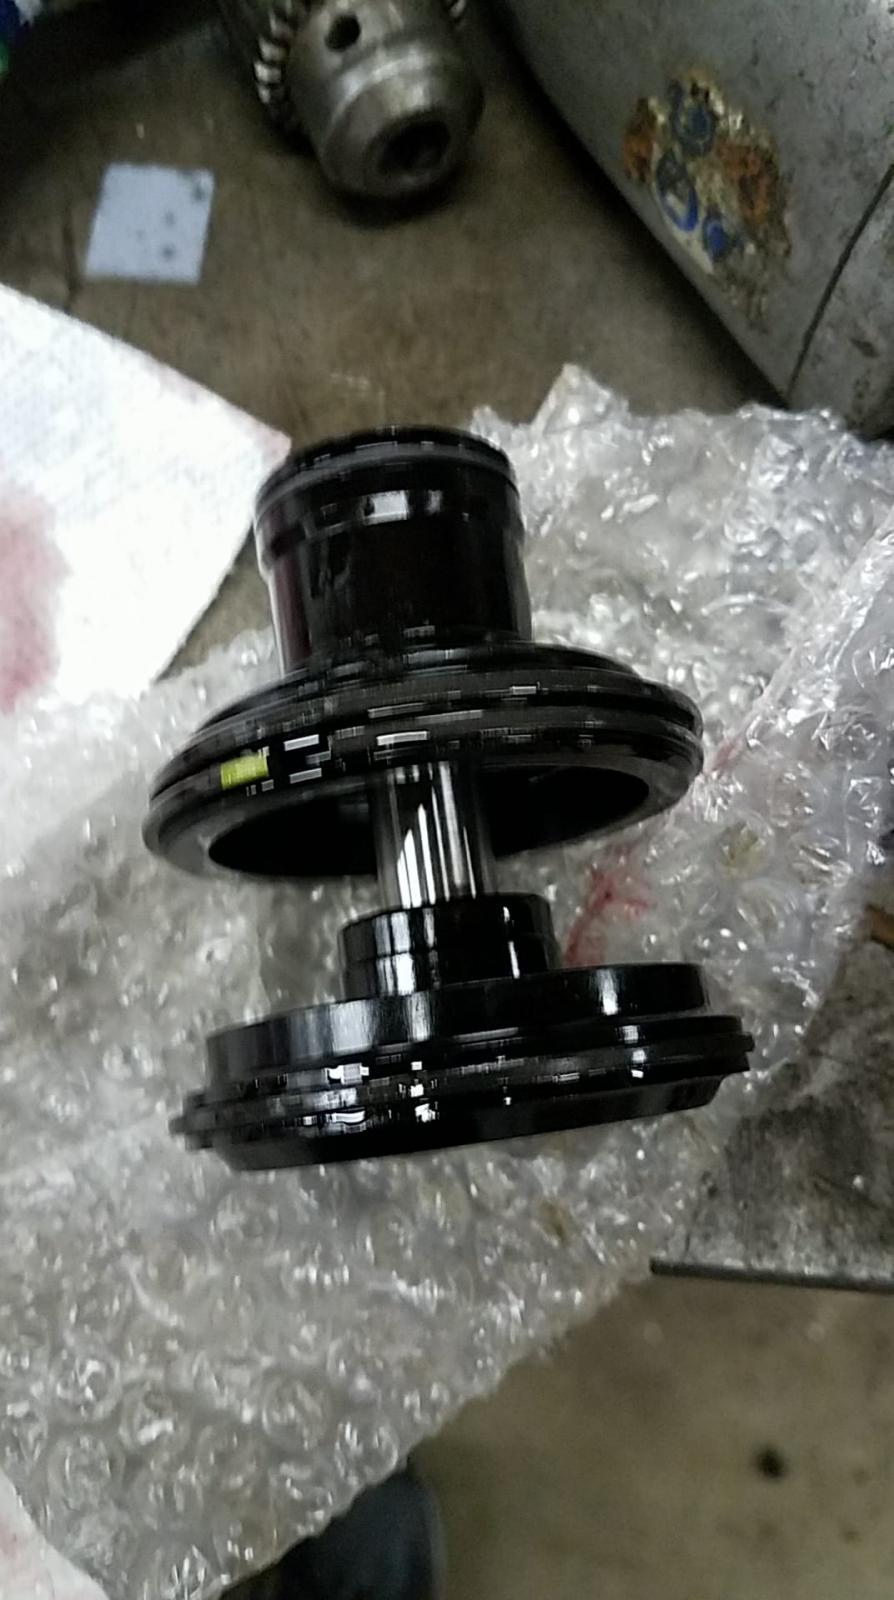
  • Welp the head is back on. Studs are installed. As well as the new injectors.. Got a couple little quirks to fix but I'll get to it. Cleaning out the oil coolant mix SUCKED. Took me about 6 hours to ge
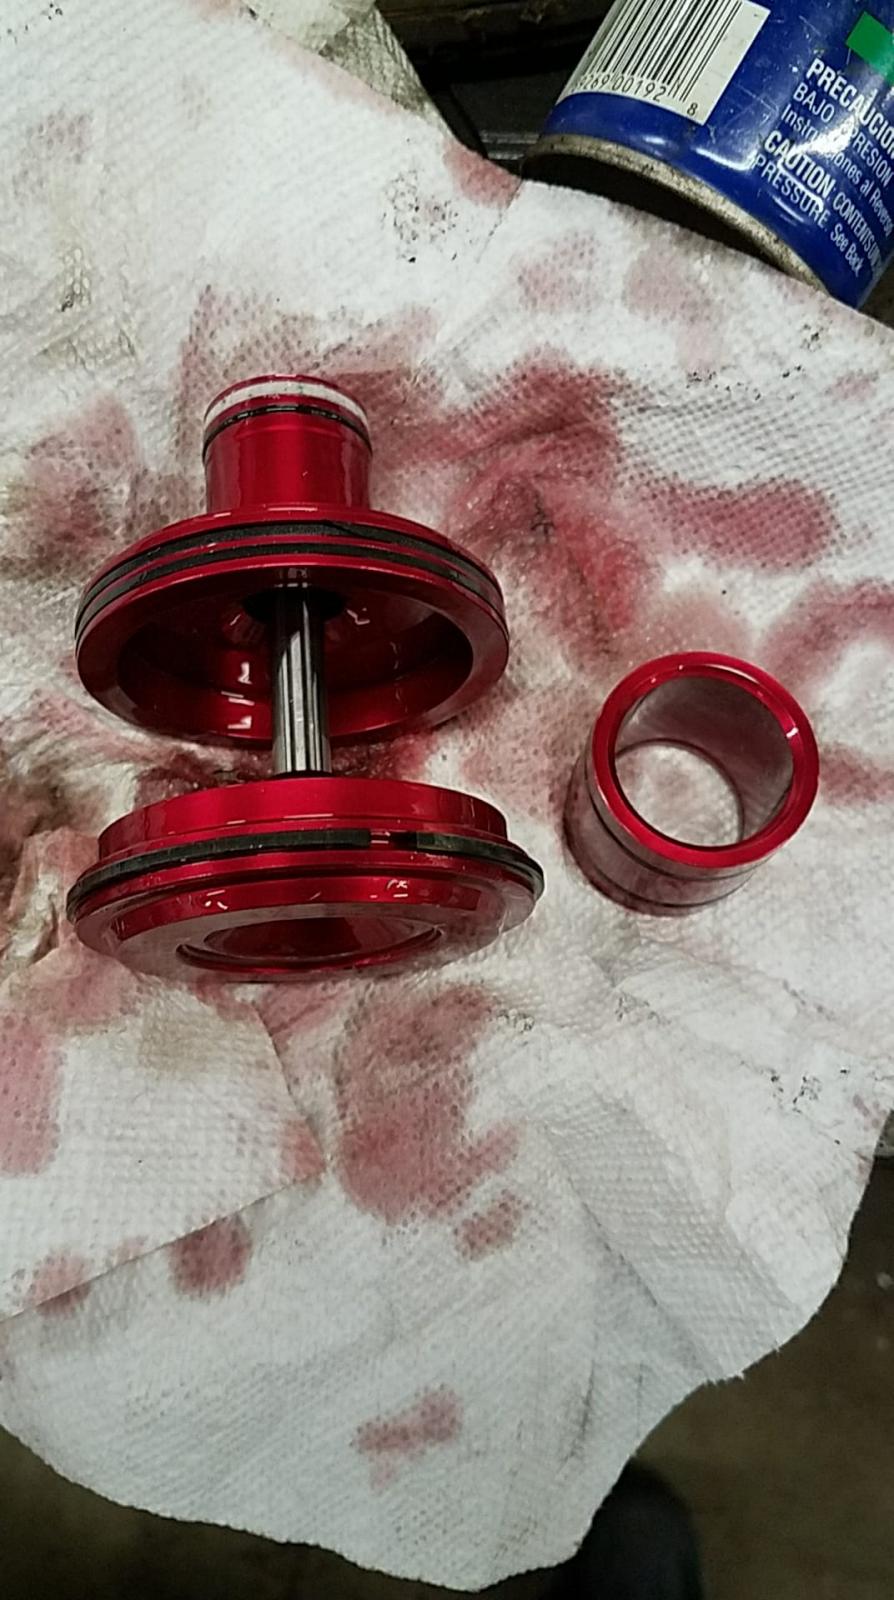
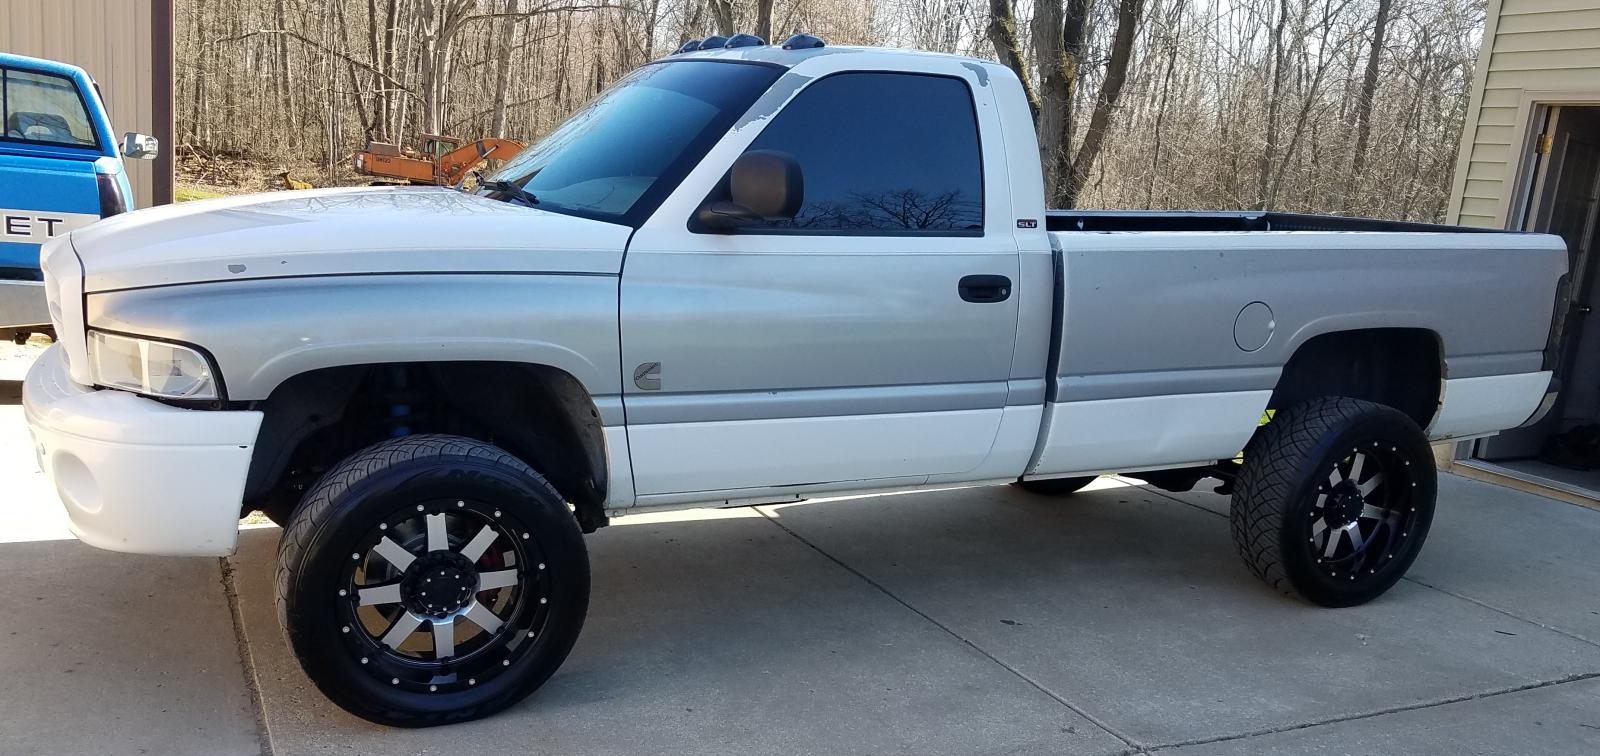
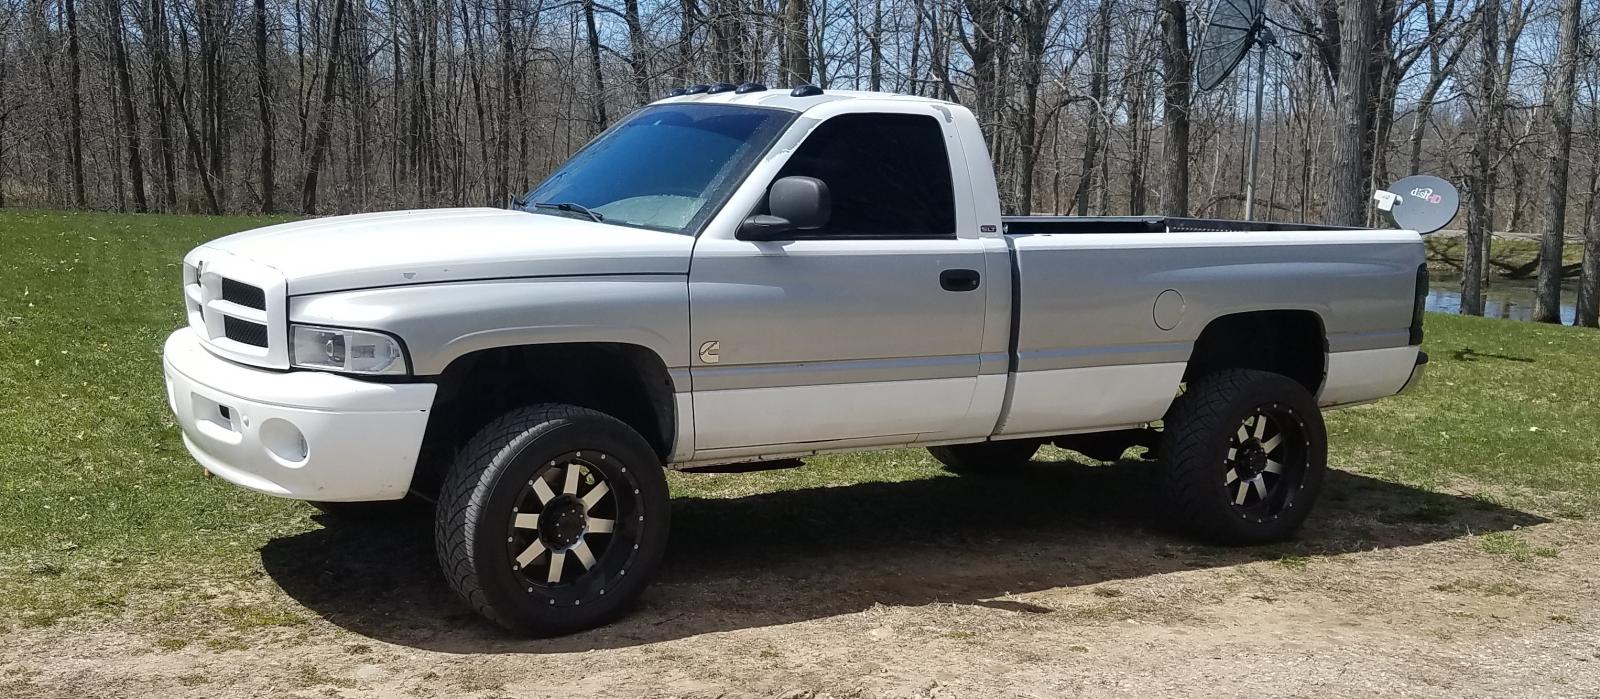
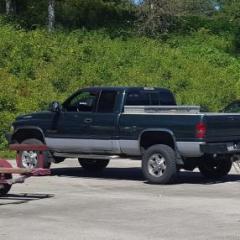
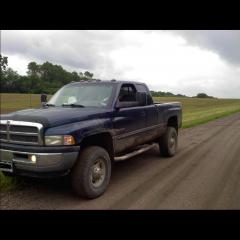
Posted Images

Featured Replies

3 hours ago, jlbayes said:

You do one stud at a time so as to not lose your clamp load on the gasket.

I'm guessing sequence is not important, meaning you don't have to go inside out in circular pattern on head studs. Just start at one end and work your way to the other? I can see it being important only on the initial head gasket install, not when doing one stud at a time.

I'm don't want to rain on Jacob's parade or cause conflict by posting another opinion, but I'm sure he'd be fine with the procedure I'm about to post as well.

This is from Josh (jmd025) on Cummins Forum... I'm currently in the middle of this procedure on my 12V.


""Assuming a new gasket:

Verify head and deck flatness and straightness are within spec

clean sealing surfaces with razor

Using WD40 and Wet sanding paper , and a sanding block the width of the head/deck start at 100 grit very lightly, then 600 grit, then 1500 grit polishing both sealing surfaces evenly

Clean up sealing surfaces and mess from wetsanding. (obviously oil and water in the block with need flushing) Also blow clean all stud holes.

Ill try to only use the New Cummins gaskets with the additional reinforcement tabs and set the gasket and head very gently with a engine lift to avoid any shearing movements between the head and gasket.


Install head studs. there is a lot of ideas about bottom tapping, and screwing the stud back up a partial turn from the bottom of the hole, i personally just didnt let the stud bottom out. ARP lube top threads. ARP lube washer flats, APR lube Nut flats.

Torque in Cummins pattern in equal steps up to your final torque, taking a break between each torque step to allow studs to cool back to room temp (if you've never done this, they get hot while torquing them down).

Once final torque is achieved (hopefully manufacturer specs, there is really nothing to gain IMO by exceeding them, in some cases it is actually detrimental to clamping force due to stretching the fasterner outside of its working range), button everything up and fill block with water ( i fill through a heater hose held as high as possible ) and Plug in block heater over night. Disconnect the Block heater in the morning and let the engine go back to stone cold.

One at a time , in Cummins sequence, loosen a nut/washer off a stud, RELUBE, and torque back up to final torque in one smooth sweep. Continue until all 26 are retorqued. Plug in block heater over night. Disconnect block heater in the morning and let engine go back to stone cold.

One at a time , in Cummins sequence, loosen a nut/washer off a stud, RELUBE, and torque back up to final torque in one smooth sweep. Continue until all 26 are retorqued.

change the fluids and drive the truck.

Hopefully if you do this you understand how to use a torque wrench and hopefully understand what fasterner "break away " torque is, and why you cant set your torque wrench to 125 ft lbs and "check to see if they are still torqued" by clicking the wrench on the nut. Hopefully

Just my .02 , gathered from convos with engine builders i trust""


^^^^ I bookmarked that 4 years ago, and thought to myself, "I'm gonna need that one day." And sure enough...

Edited by Texas CTD

16 minutes ago, Texas CTD said:


Hopefully if you do this you understand how to use a torque wrench and hopefully understand what fasterner "break away " torque is, and why you cant set your torque wrench to 125 ft lbs and "check to see if they are still torqued" by clicking the wrench on the nut. Hopefully

So if I set my torque wrench to 125 ft lbs what can I expect?

1 hour ago, dripley said:

So if I set my torque wrench to 125 ft lbs what can I expect?


If you have a fastener hand tight, and you set you're torque wrench to 125 ft/lbs, and you sweep up til it clicks in one motion, with proper lube and a properly calibrated torque wrench, you're at 125 ft/lbs.


If you have a fastener torqued to 125 ft/lbs, and you want to "re-torque" the way of the interwebz, you set your torque wrench to 125 ft/lbs and click it. Unless a fastener has lost considerable pre-load due to heat/cool cycles, it won't move, and your torque wrench will click... It takes more than 125 ft/lbs of torque to get that already tight fastener moving, due to static friction, so actual pre-load on that fastener is lower than what your wrench just told you.


By removing the nut and washer to re-torque a head stud, you lose the static friction, and lube the snot out of it to minimize kinetic friction during the re-torque to be as accurate as possible.


May not be the best scientific explanation, but that's what I have experienced messing around with torque wrenches a little.


Jacob might say otherwise. lol

  • Author
19 hours ago, rogerash0 said:

Any advantage to 14mm studs and do all blocks need machine work to run em?


None in 98% of applications. Yes as stock they are only 12mm.


18 hours ago, dripley said:

I looked at their site and all I saw was for 03 to 11 trucks. Is that what you used? 


Yes. :thumb1: I called and spoke with them so they had an idea of what I was doing (axle swap). He questioned me at first but then understood I was aware they may not work. However they worked great. Just had to shorten my hard lines on the rear axle.


18 hours ago, Dieselfuture said:

I'm guessing sequence is not important, meaning you don't have to go inside out in circular pattern on head studs. Just start at one end and work your way to the other? I can see it being important only on the initial head gasket install, not when doing one stud at a time.


Correct. As the gasket is already compressed/seated/bedded. I start at the back as it is the worst to do lol.


15 hours ago, Texas CTD said:

I'm don't want to rain on Jacob's parade or cause conflict by posting another opinion, but I'm sure he'd be fine with the procedure I'm about to post as well.

This is from Josh (jmd025) on Cummins Forum...


I modified mine a bit from Josh's process. :thumb1:


15 hours ago, dripley said:

So if I set my torque wrench to 125 ft lbs what can I expect?


It will just click with minimal to no movement.


13 hours ago, Texas CTD said:


If you have a fastener hand tight, and you set you're torque wrench to 125 ft/lbs, and you sweep up til it clicks in one motion, with proper lube and a properly calibrated torque wrench, you're at 125 ft/lbs.


If you have a fastener torqued to 125 ft/lbs, and you want to "re-torque" the way of the interwebz, you set your torque wrench to 125 ft/lbs and click it. Unless a fastener has lost considerable pre-load due to heat/cool cycles, it won't move, and your torque wrench will click... It takes more than 125 ft/lbs of torque to get that already tight fastener moving, due to static friction, so actual pre-load on that fastener is lower than what your wrench just told you.


By removing the nut and washer to re-torque a head stud, you lose the static friction, and lube the snot out of it to minimize kinetic friction during the re-torque to be as accurate as possible.


May not be the best scientific explanation, but that's what I have experienced messing around with torque wrenches a little.


Jacob might say otherwise. lol


No objections, very correct. You do not want to try and use breakaway torque as an accurate measurement on any fastener.  Unless you are trying to measure it lol.

Edited by jlbayes

Had a question on studs. If you reuse studs do you still need to retorque them, or are you not supposed to be using studs. Or is the retorque more for the head gasket and not for stretching a stud. Reason I'm asking is on my truck I have A1H11 studs from PO, I reused them and the read online that they don't require retorque. I wasn't sure what to torque them down to so I went to 135. One thing I did do is after everything was torqued down to specs to final torque, I went through the sequence and loosened up each one relubed it and retorque right back down to final 135. I've done this before on other vehicles and never had a problem but just want to get your expertise opinion. 

If you reuse studs and torqued them correctly the first time, there is no need for a retorque, as the stretch is already out.