PilotHouse2500
Yearly Subscription
-
Joined
-
Last visited
Everything posted by PilotHouse2500
-
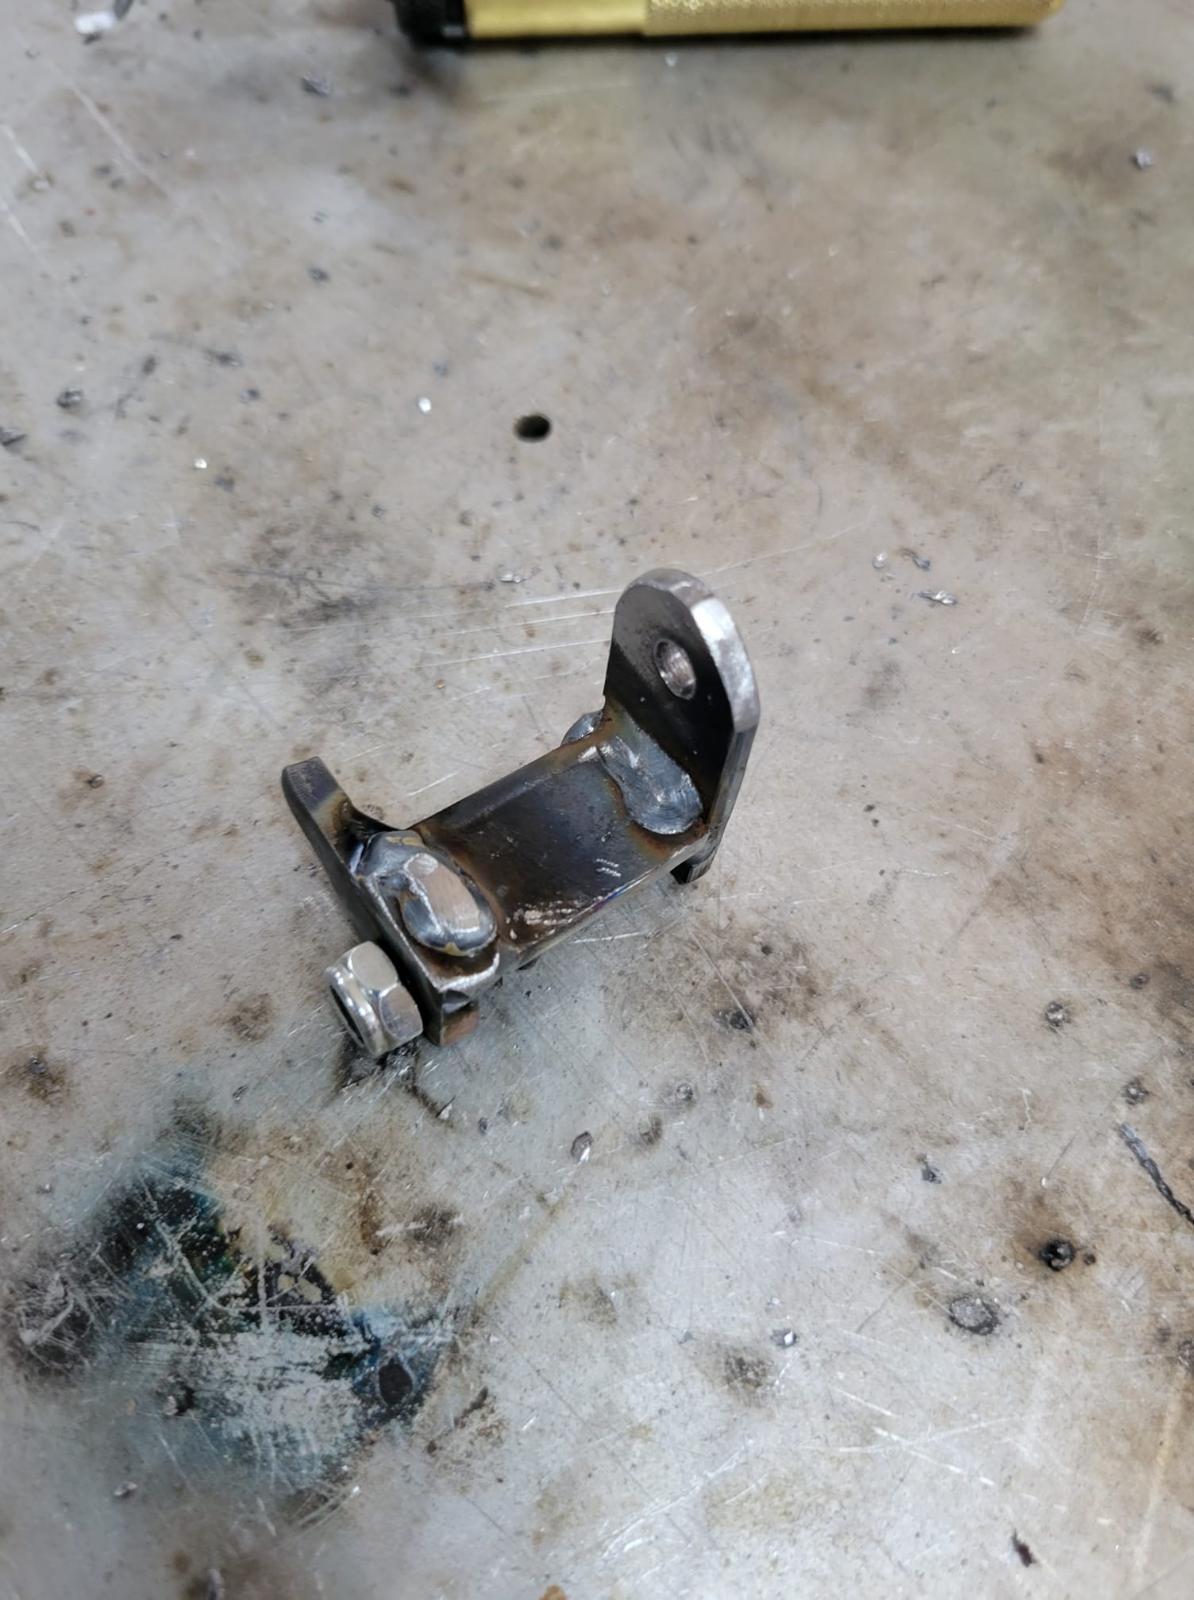
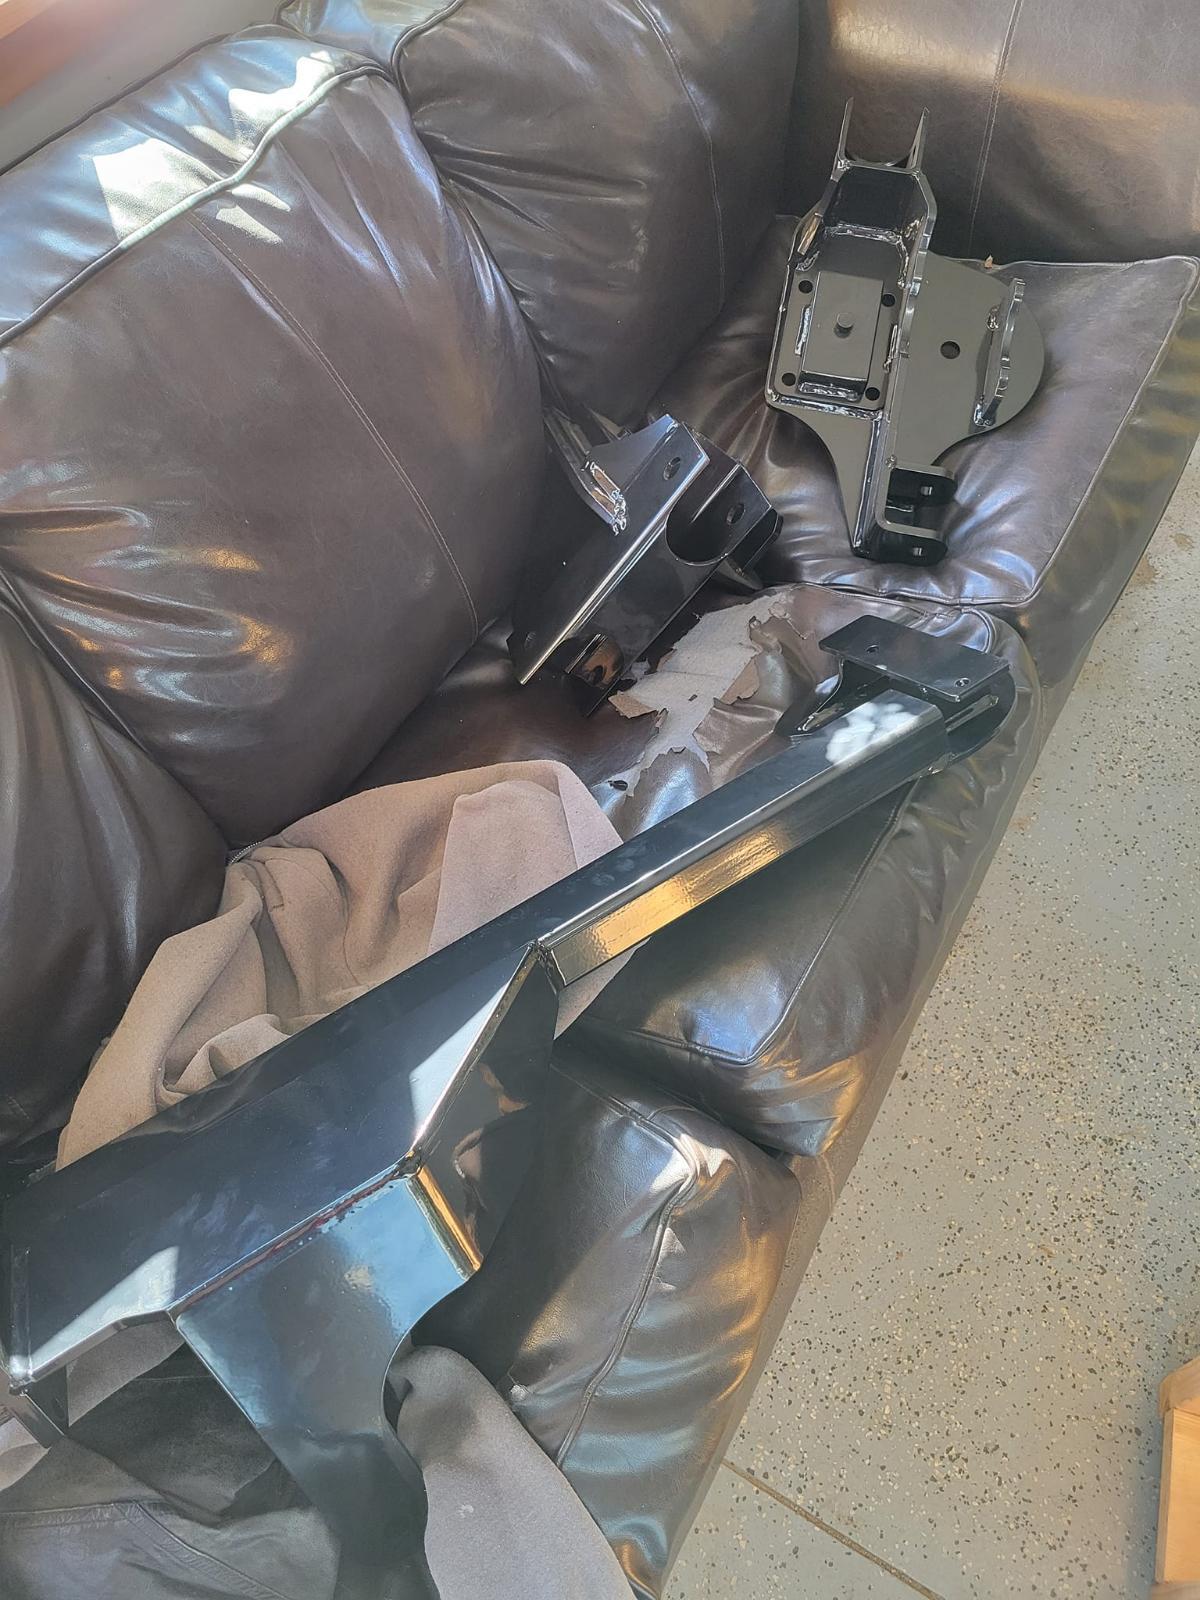
SC mountings all done!
-
thanks...spring is here tho and soon I will shift back to wood working to pay for this build...
-
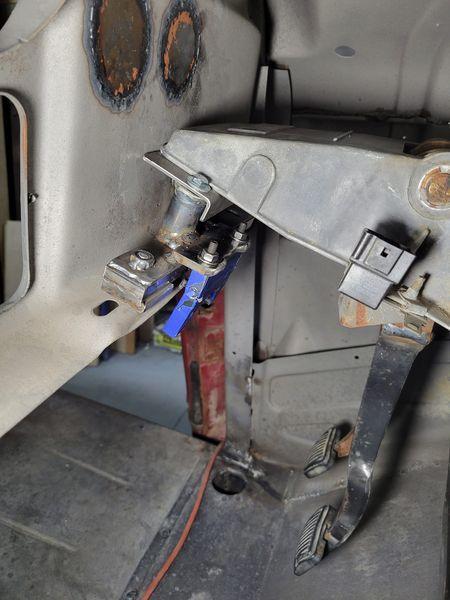
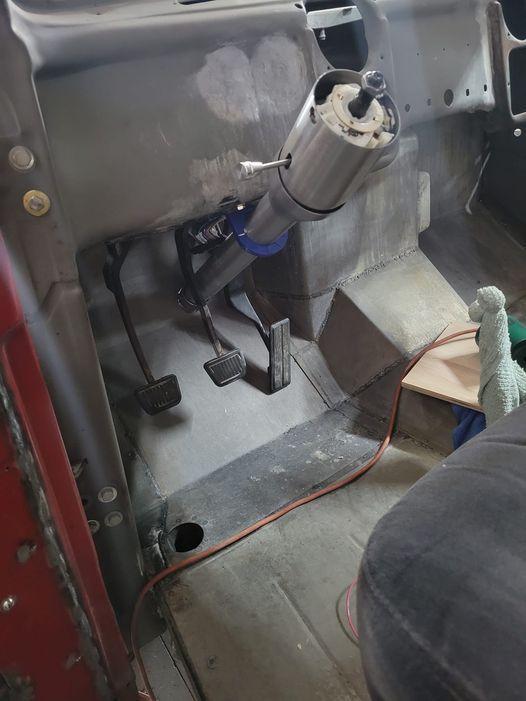
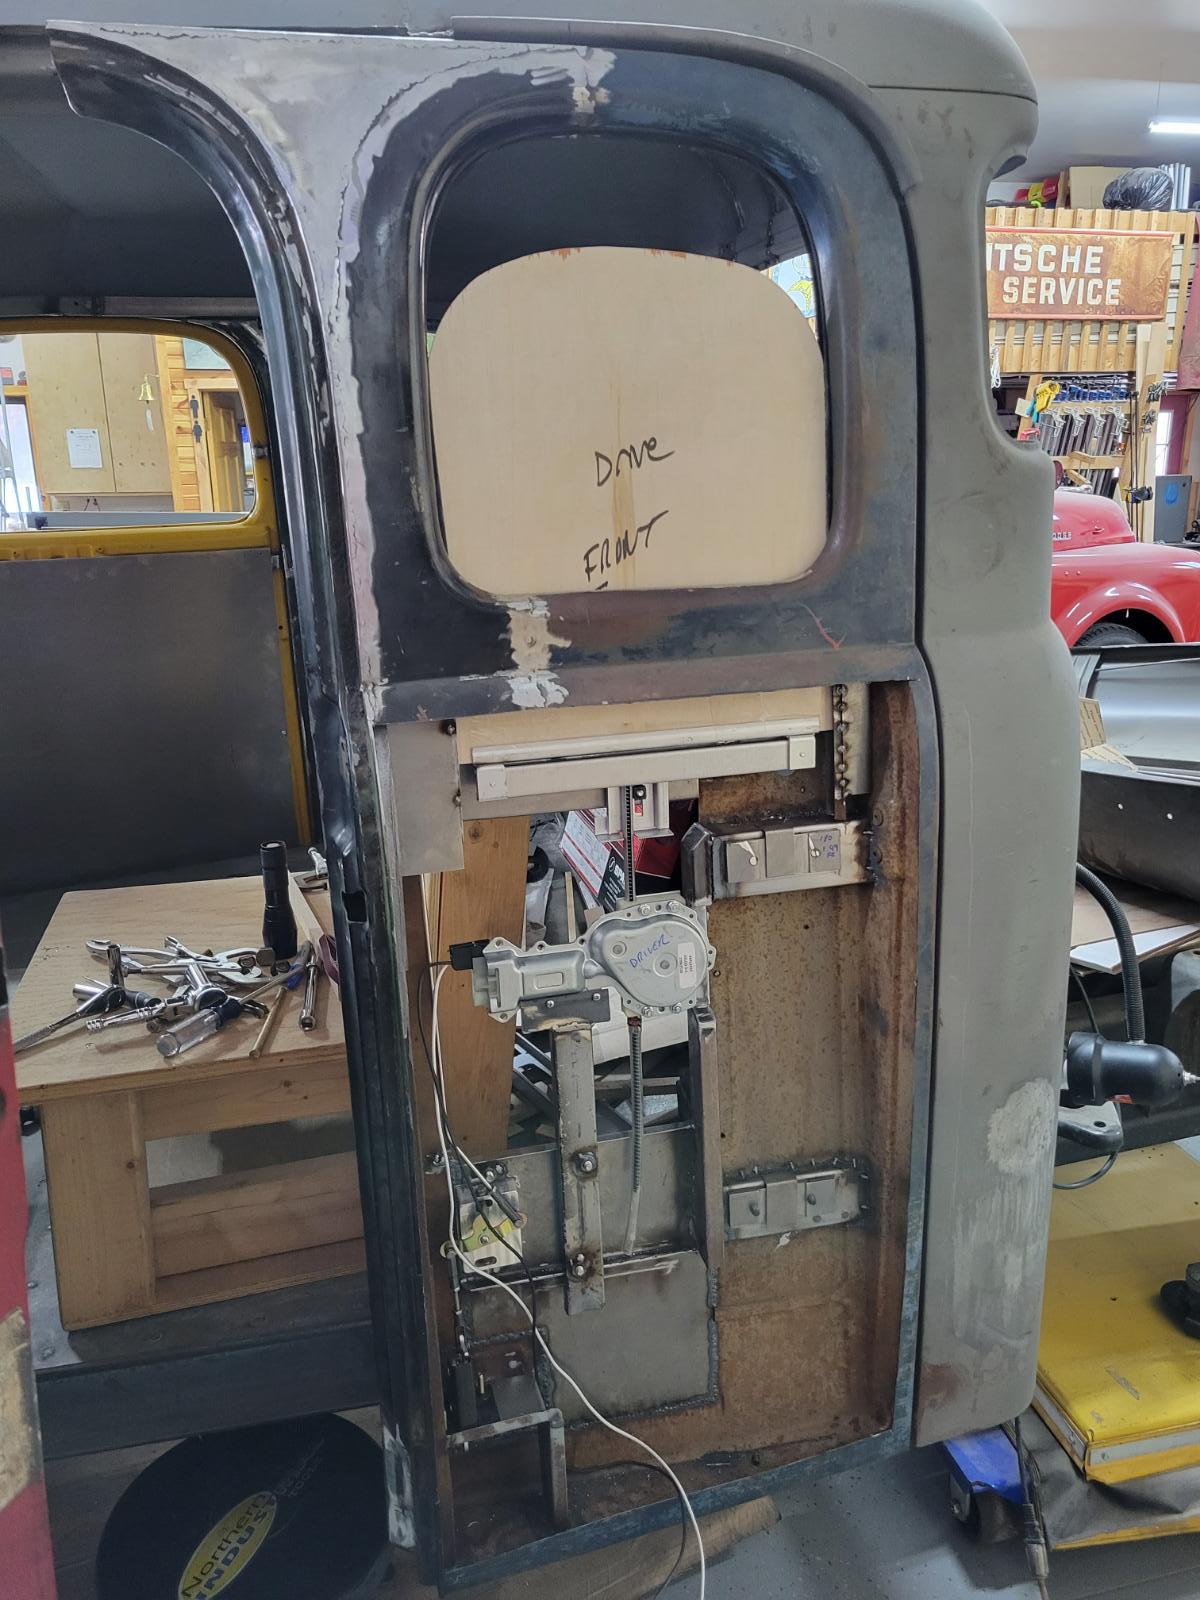
week's end work and weekend work: Finished passenger side door handle/bear claw actuation system Built and installed brackets to hold power lock actuators Modified the locking bear claw bits to lengthen them to pass behind the window track Modified brake pedal to allow for teh SC to live where it was Built and installed SC dash bracket/installed SC
-
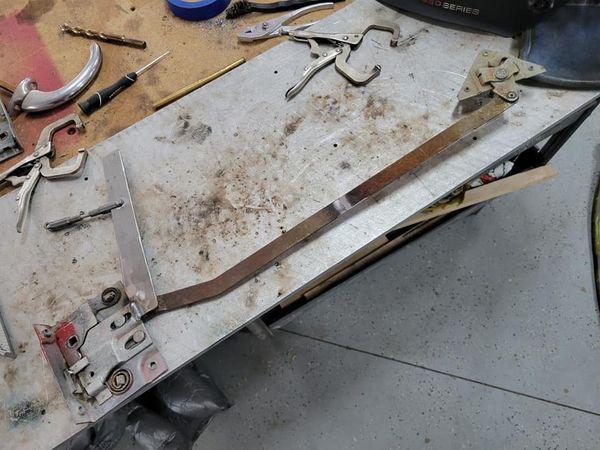
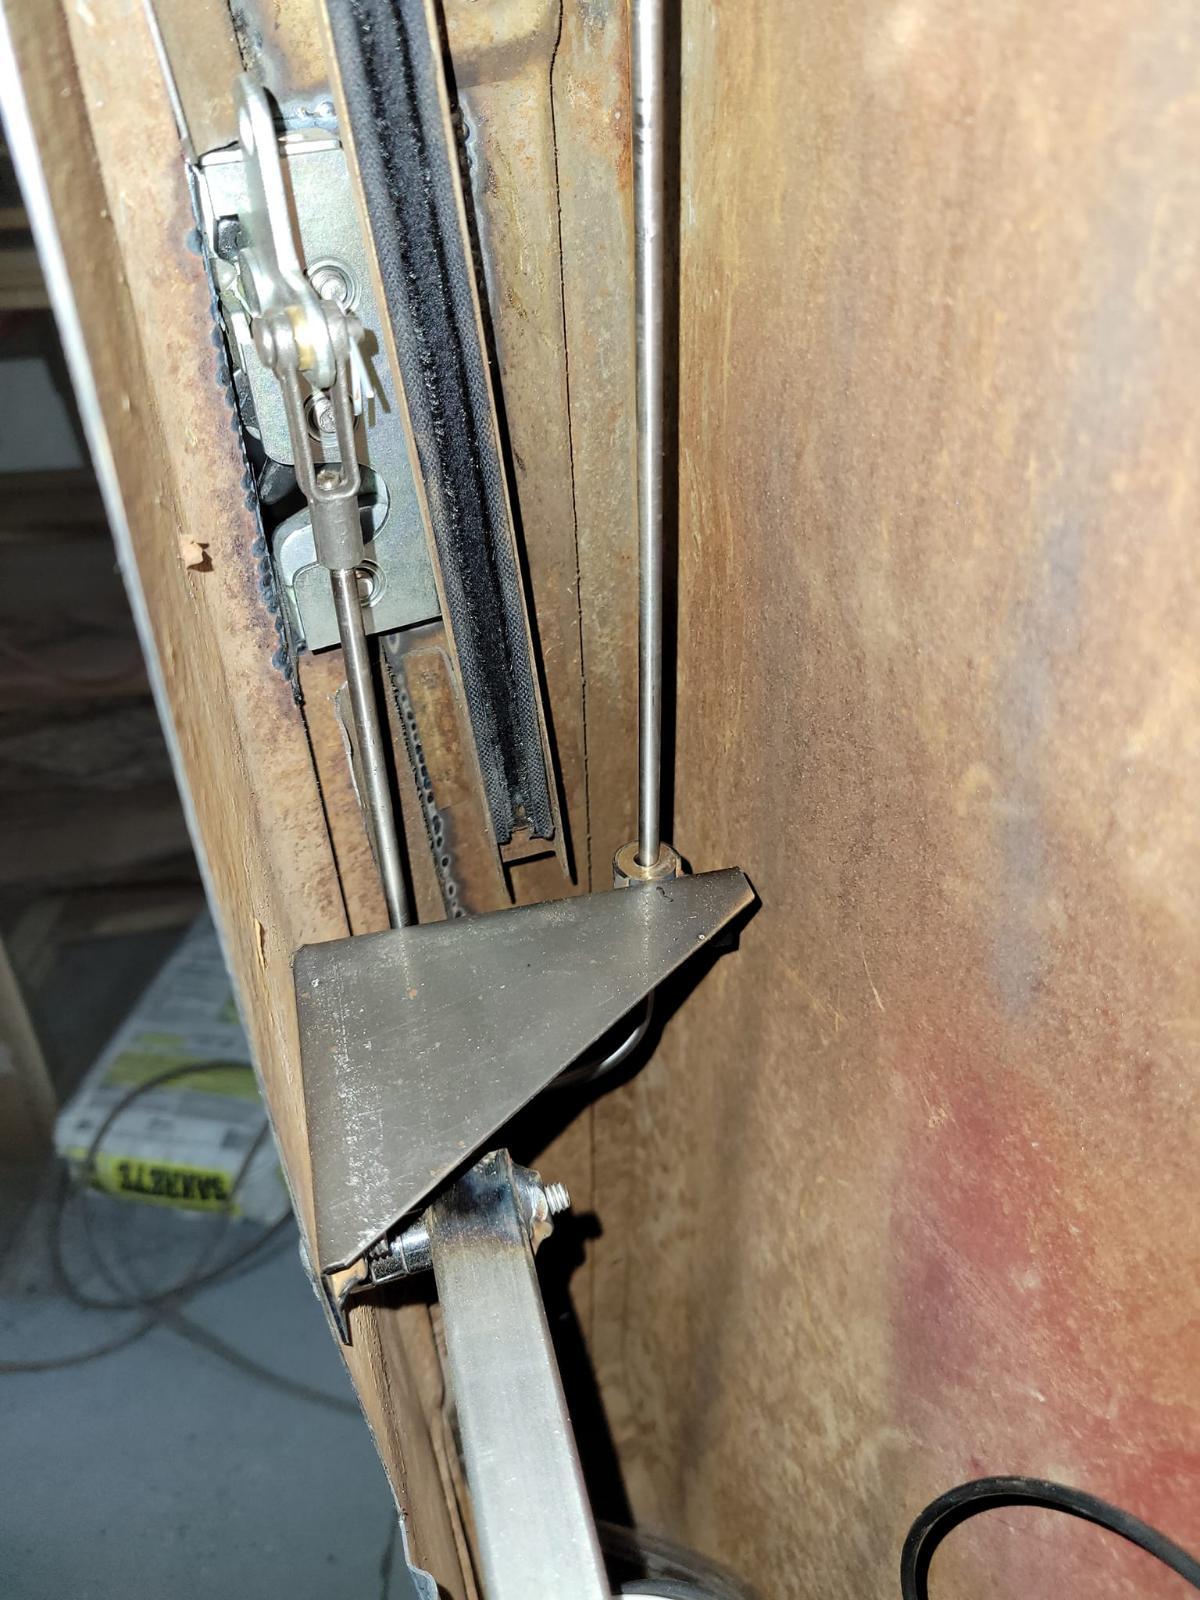
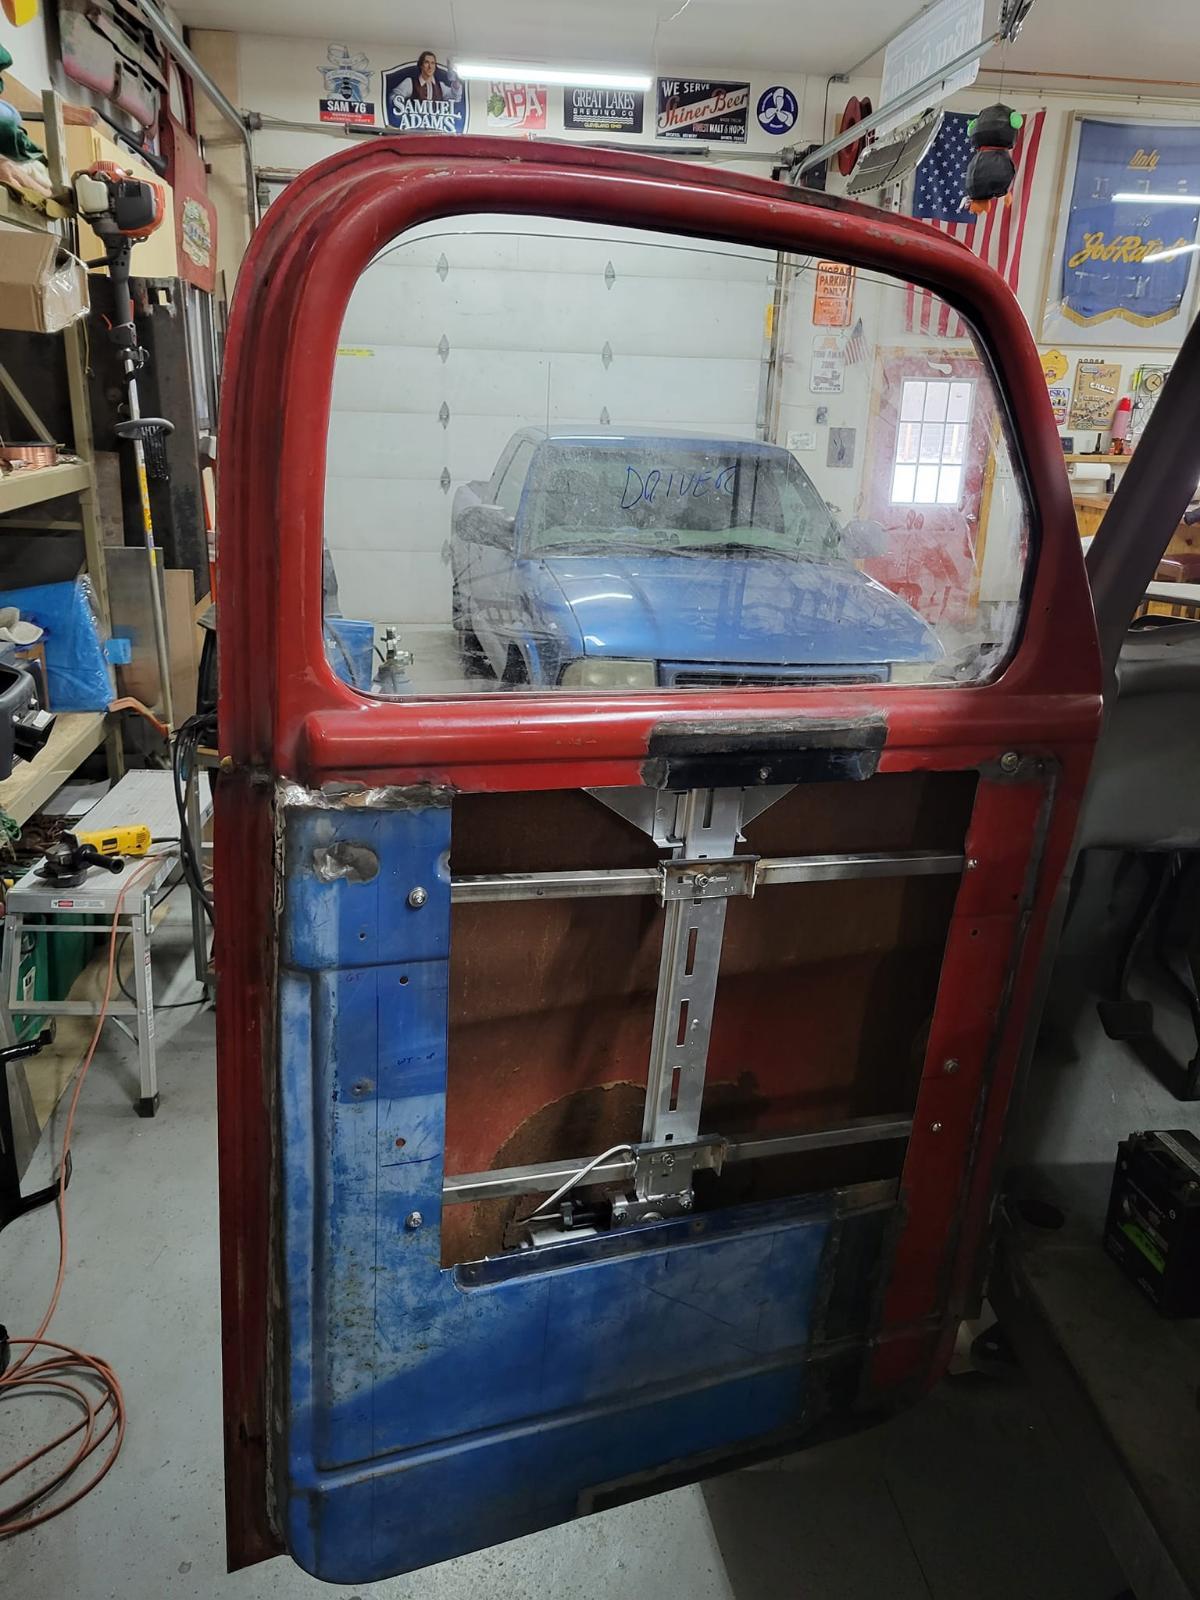
Weekend's work: Modify the door linkage to use the inside handle where I want it and keep the sliding parts where they need to stay w/o hanging up. Also the bearclaw connector addition. 7766.mp4
-
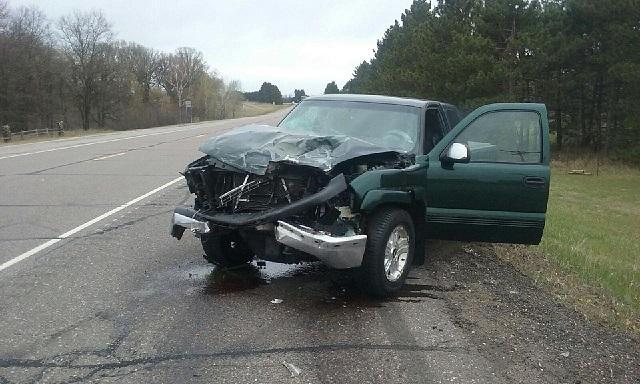
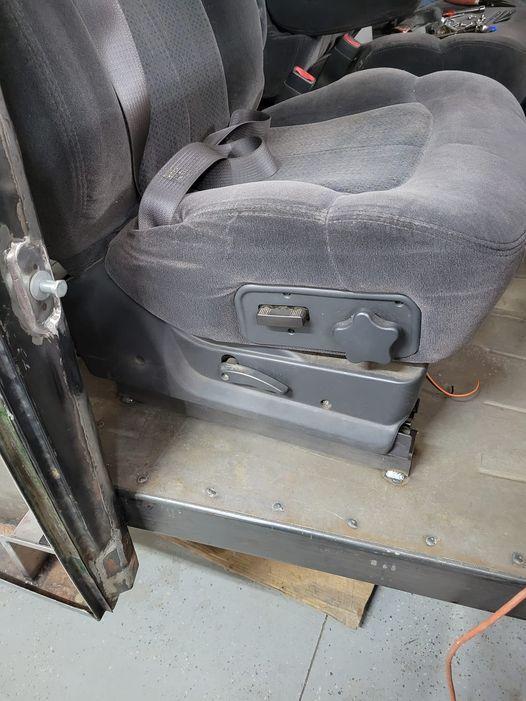
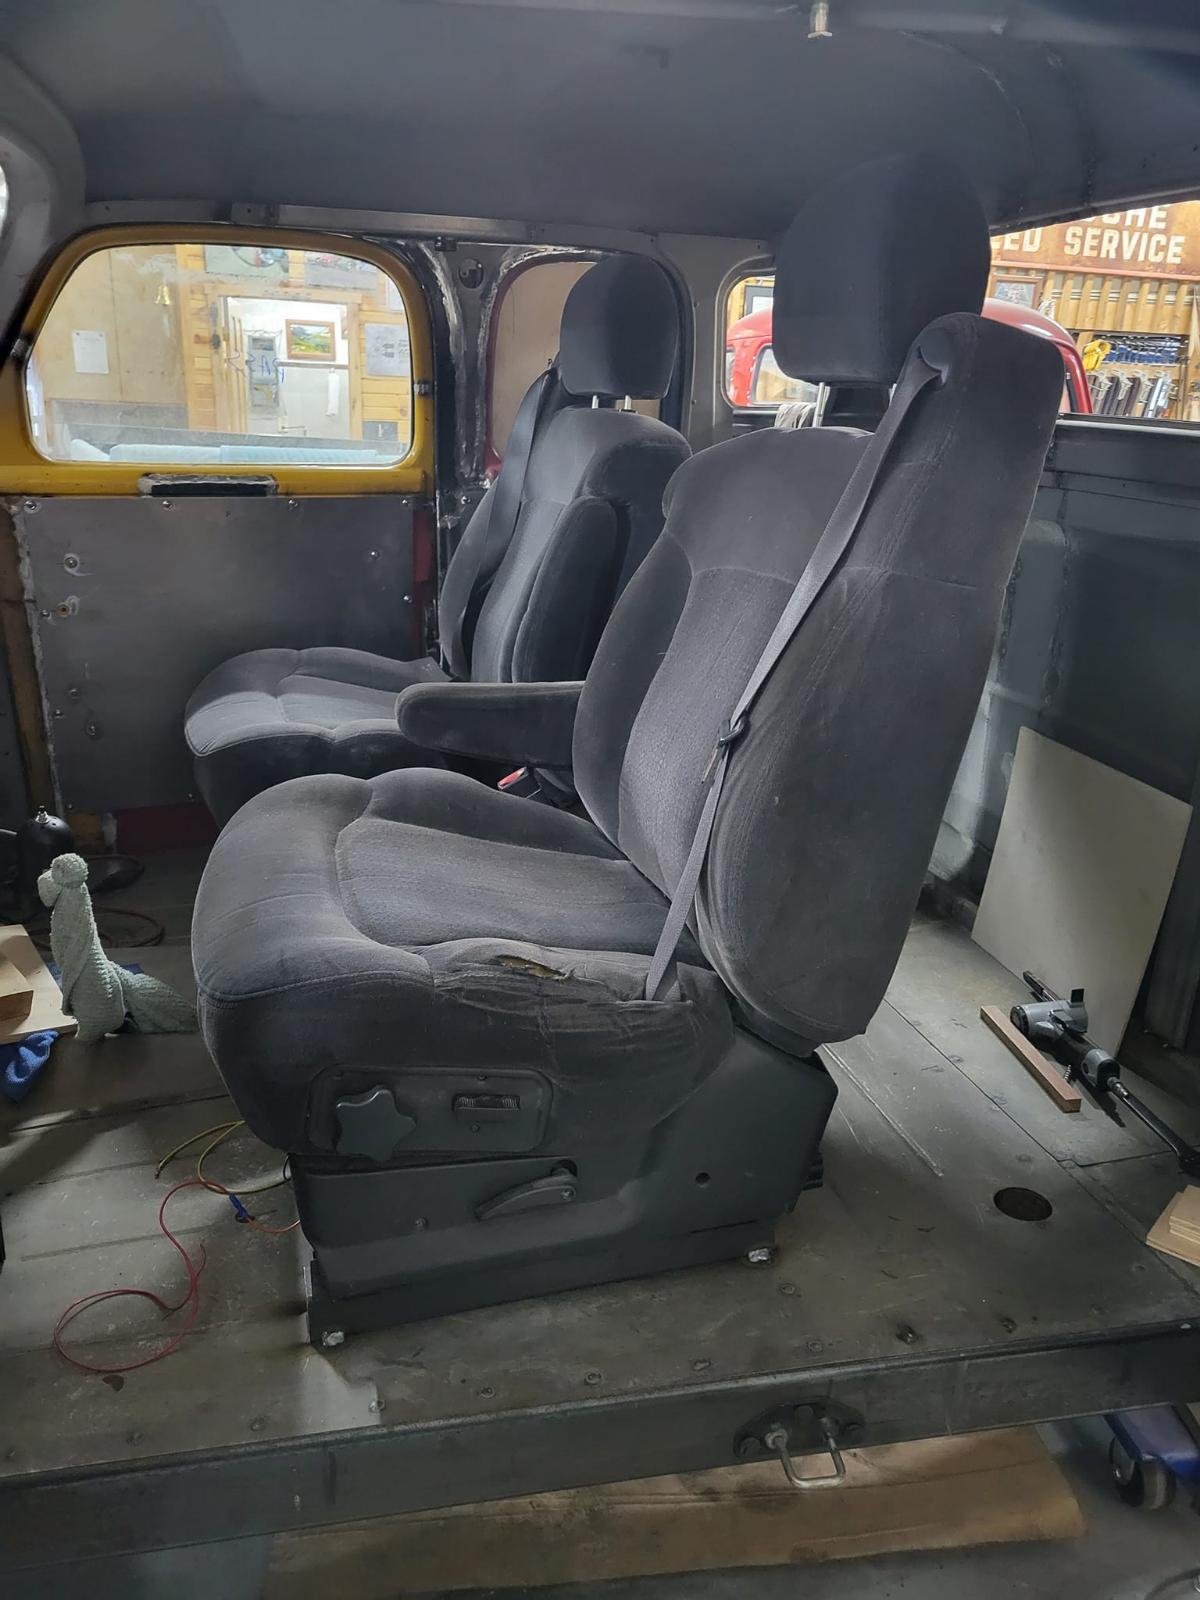
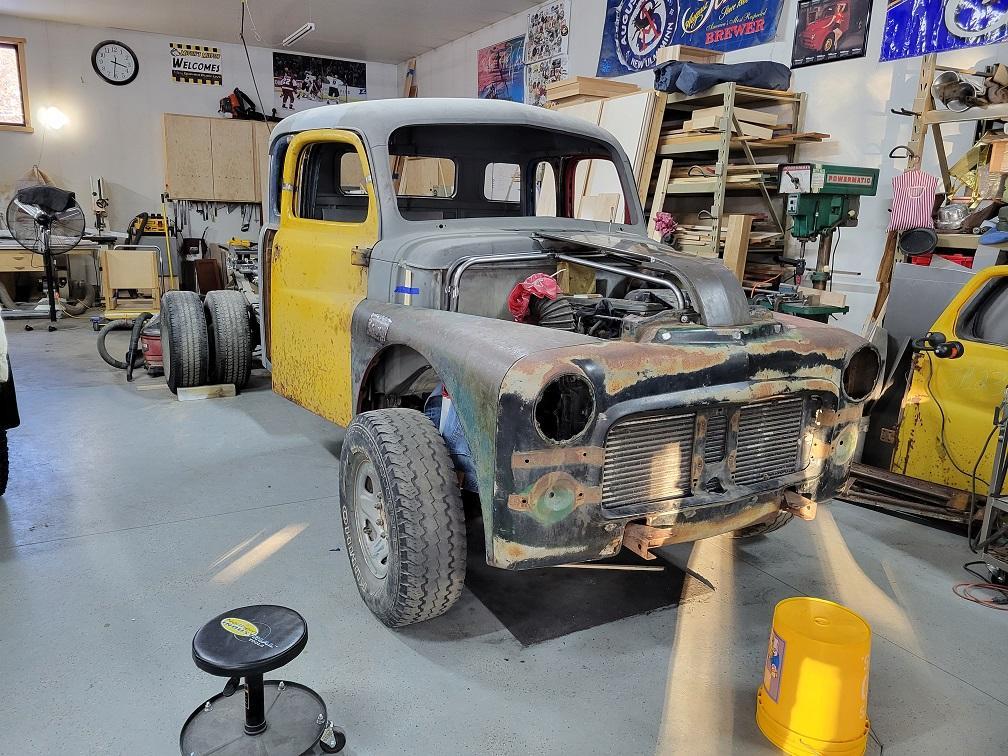
Seats are actually out of an 03 Silverado (actually my buddies truck were were in a 65MPH accident in last year...got em cheap) And I'll refoam and recover them as well as replace the seatbelt bits. No rear seats...just a 1.5 cab not a 2x size. Truck will be a flatbed so I wanted storage for security/weather protection. As I said above, I will reskin the seats. Rest of the interior will be a mix of fabirc/carpet, likely some wood bits and metal surfaces. Not too far down that road yet...I don't want it to be an echo chamber with all hard surfaces. The bearclaw latches and suicide hinges are all sourced from "hot rod" sites/Summit Racing. Of course putting them all in DOES require custom work to be done. Regardless a pile of the stuff I'm doing is custom becuase no one else is likely as insane as I am to do this stuff unless they do it for a living.
-
Passenger side.
-
driver seat mounted...
-
Oh she was happy, she got to be near dad and had a new soft spot to sit in while watching.
-
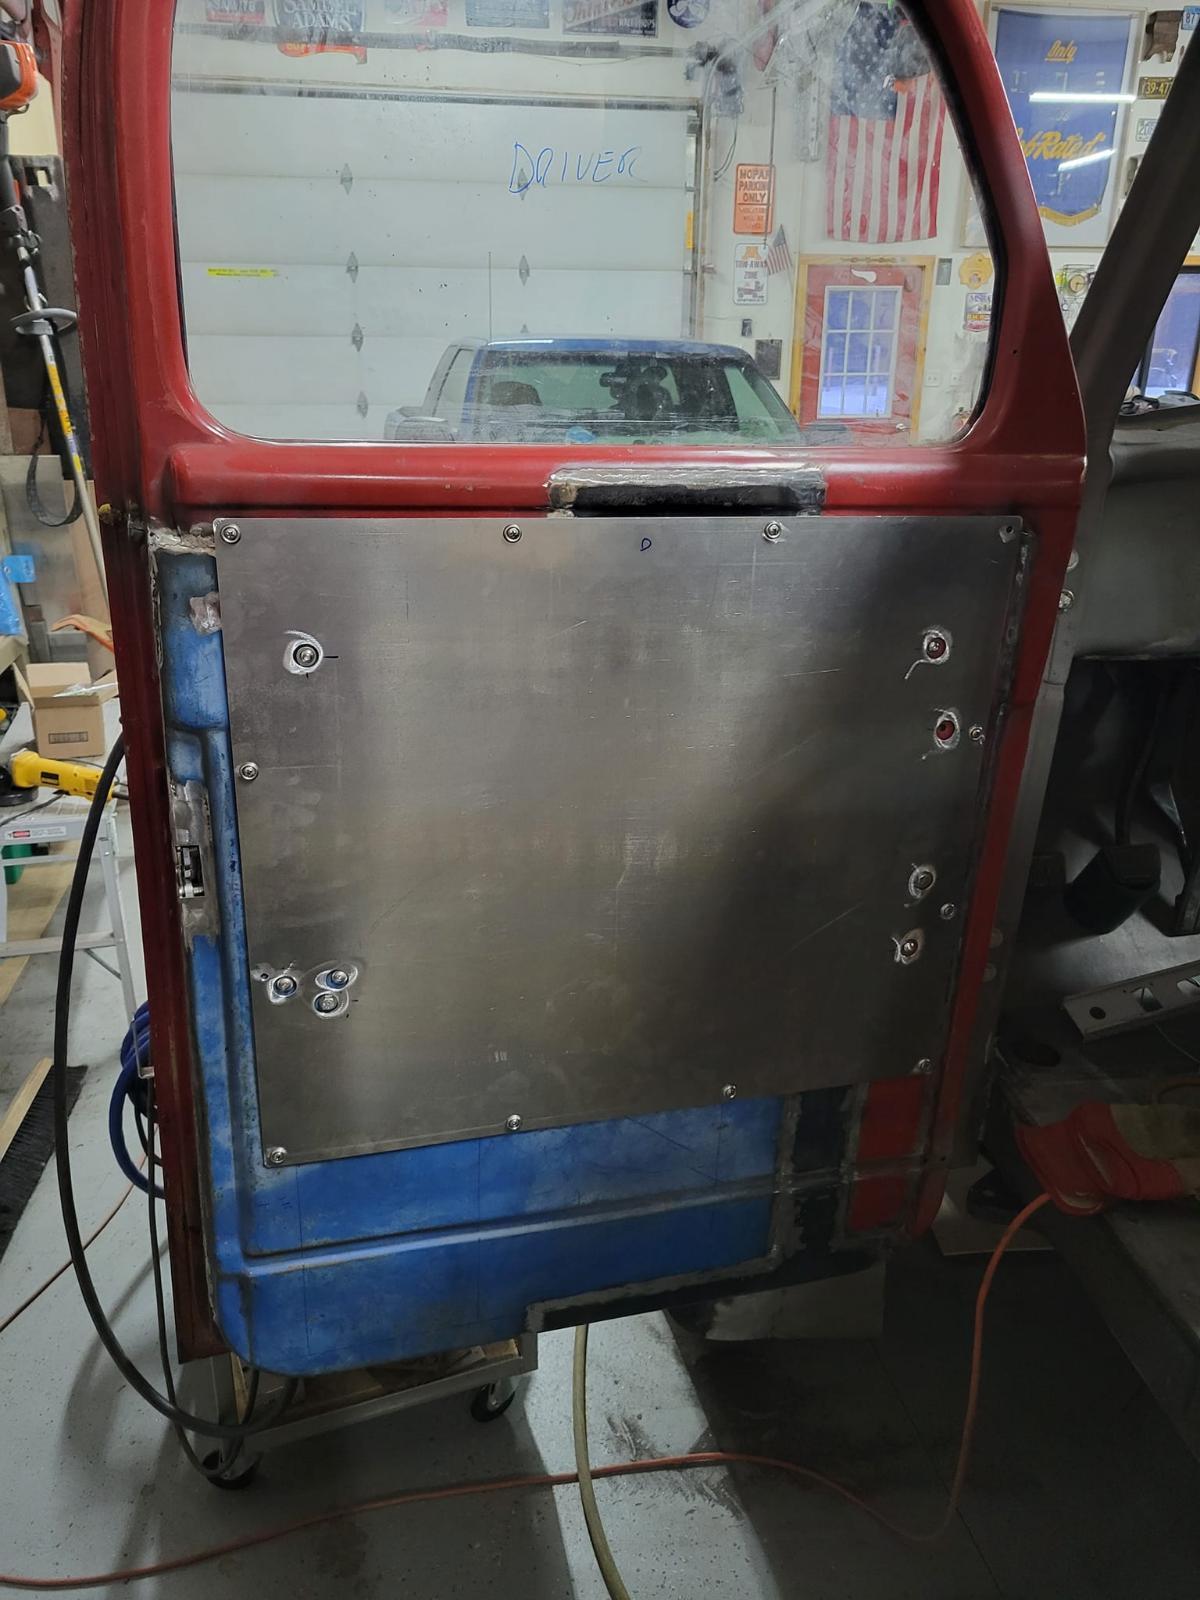
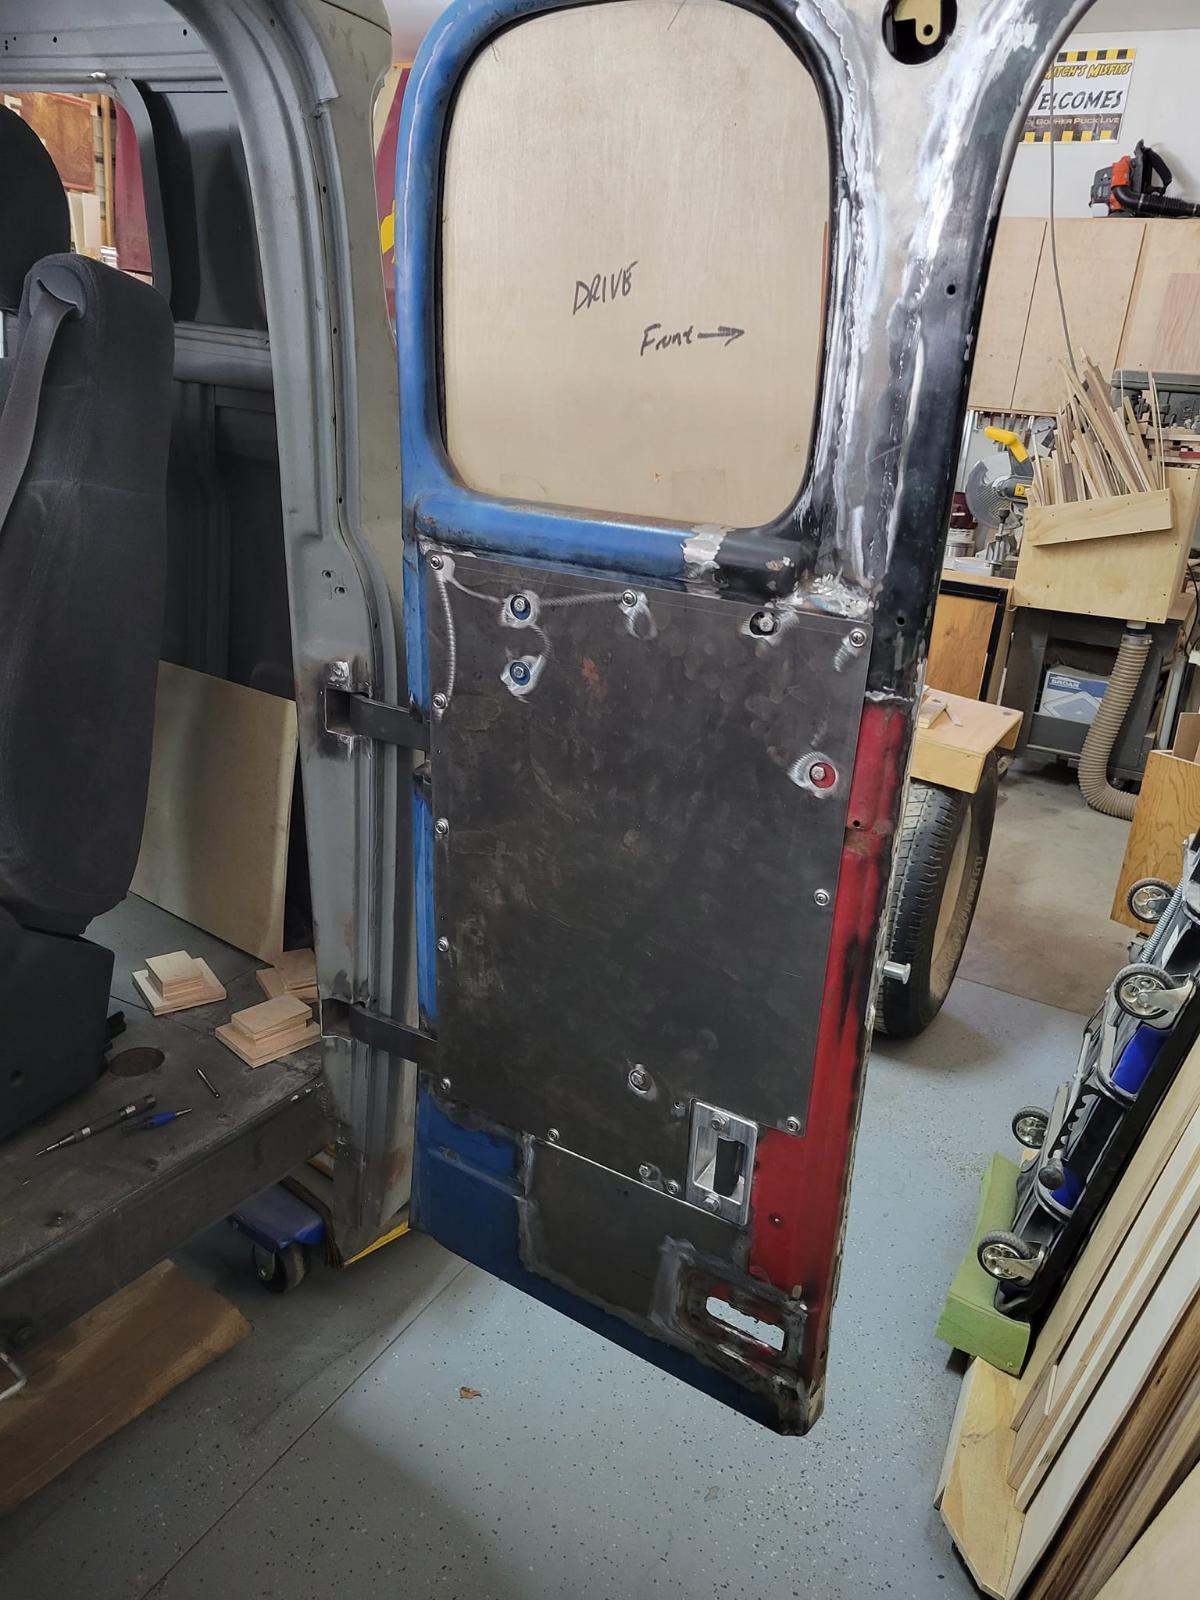
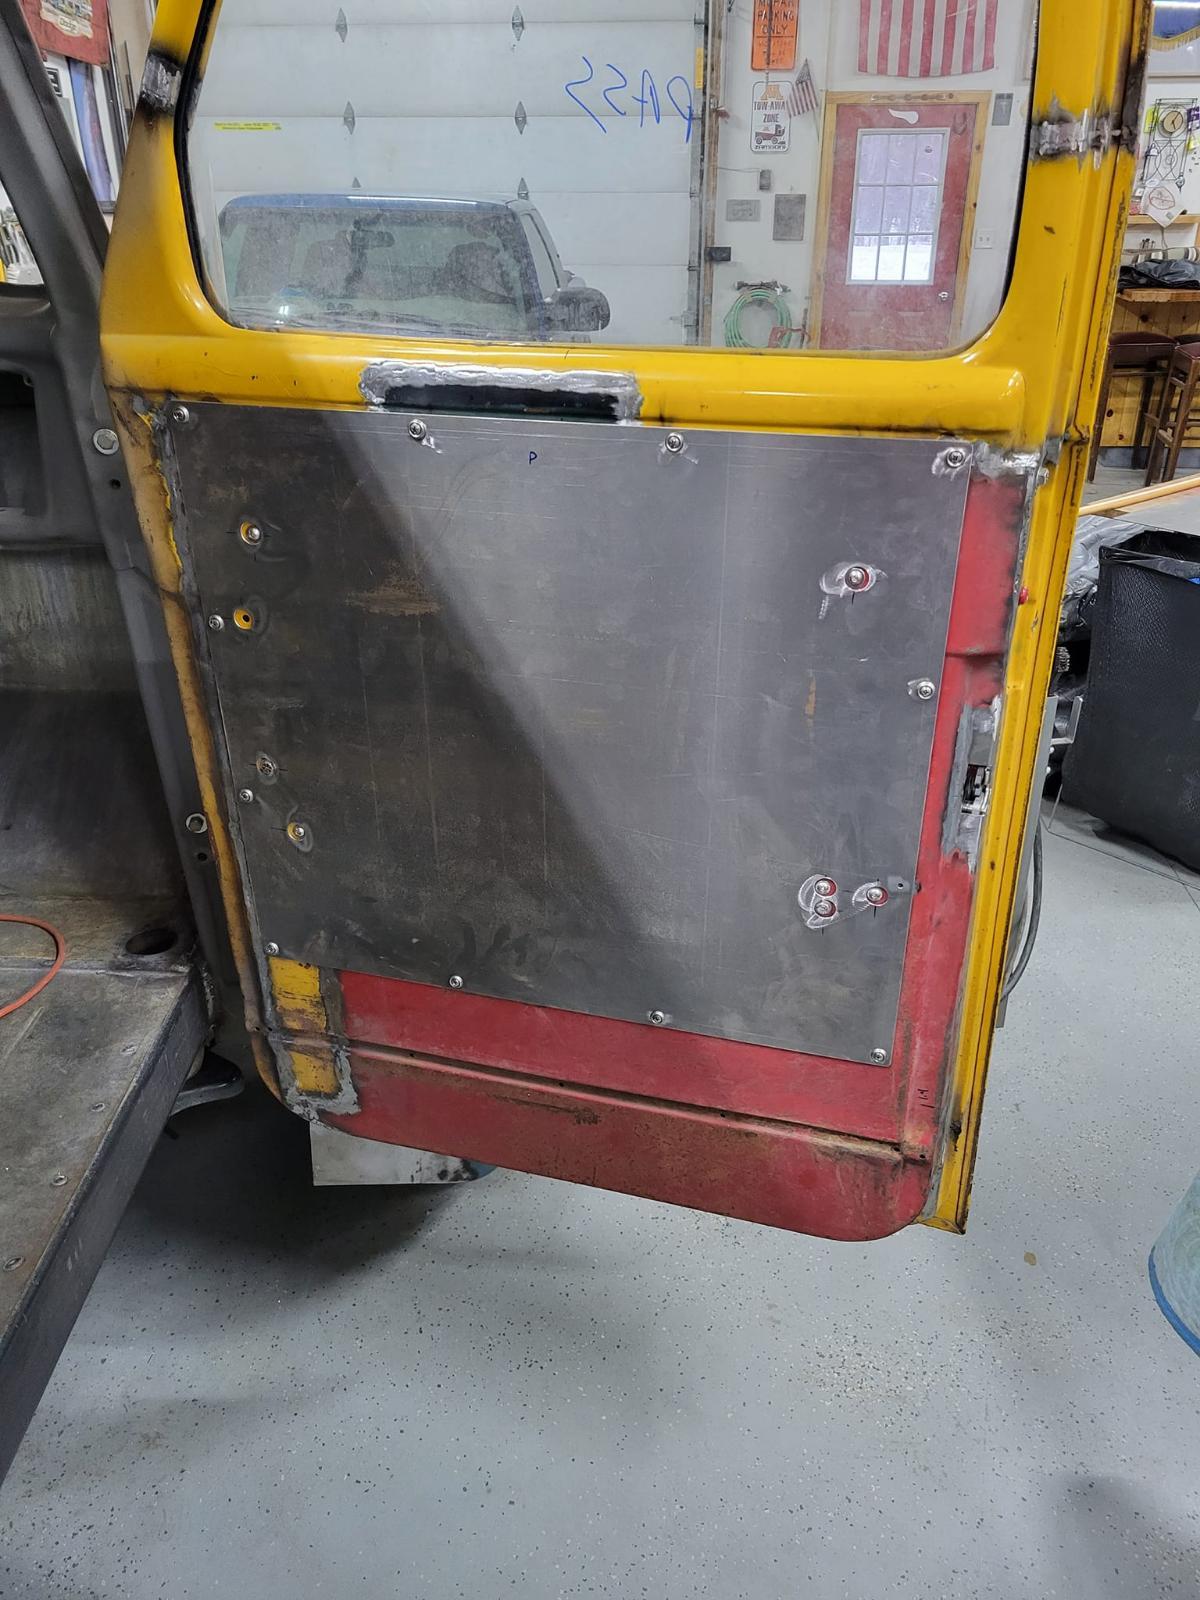
finished off the weekend's work last night. All the door inner pannels are done. My shop supervisor approved of the work.

-
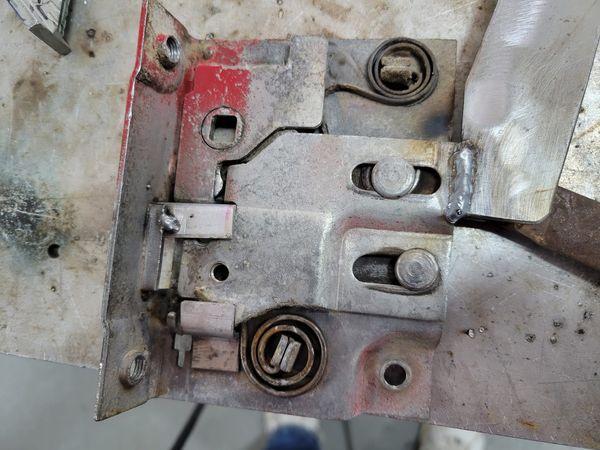
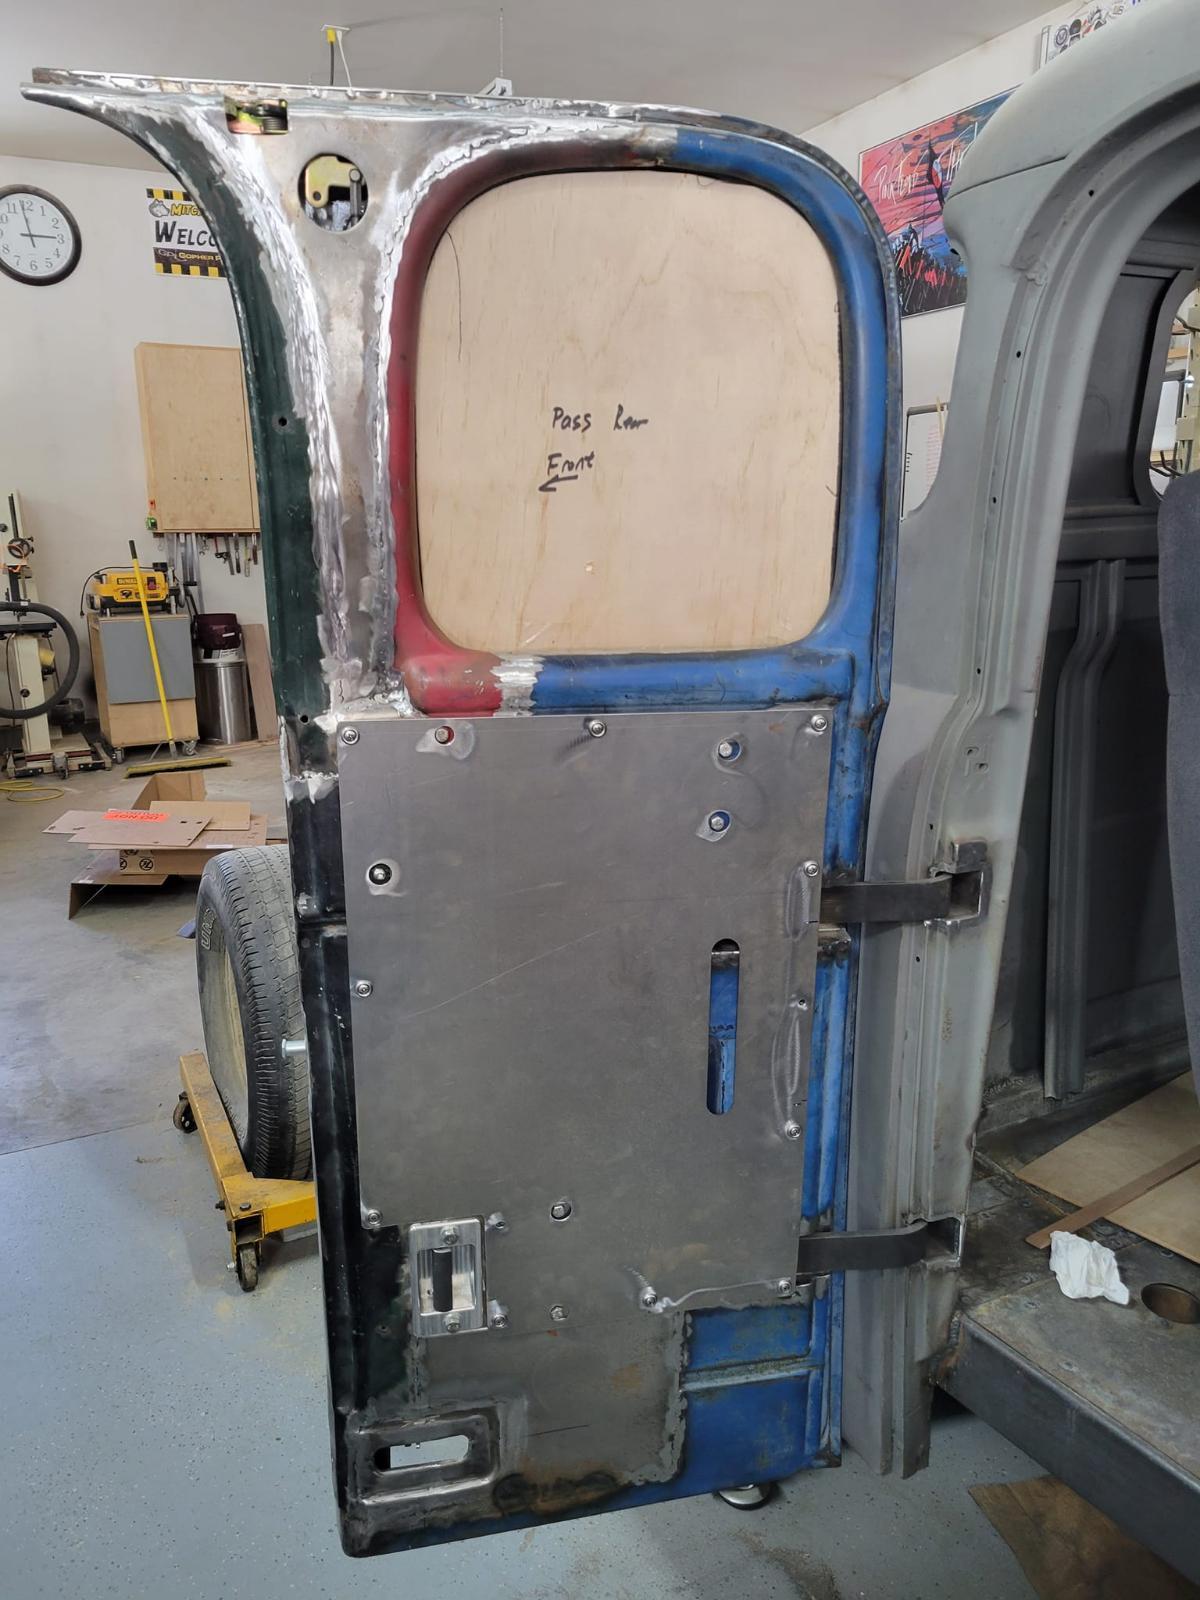
A few pics from Saturday. Yesterday was mostly prep to be able to finish stuff tonight (I hope). Dor latch guide and inner door panel.
-
I actually hope to drive it to CA for a show in April at my buddy's ranch at some point. I'd take diff routes out and back, so one way I'd likely go thru WA/OR.
-
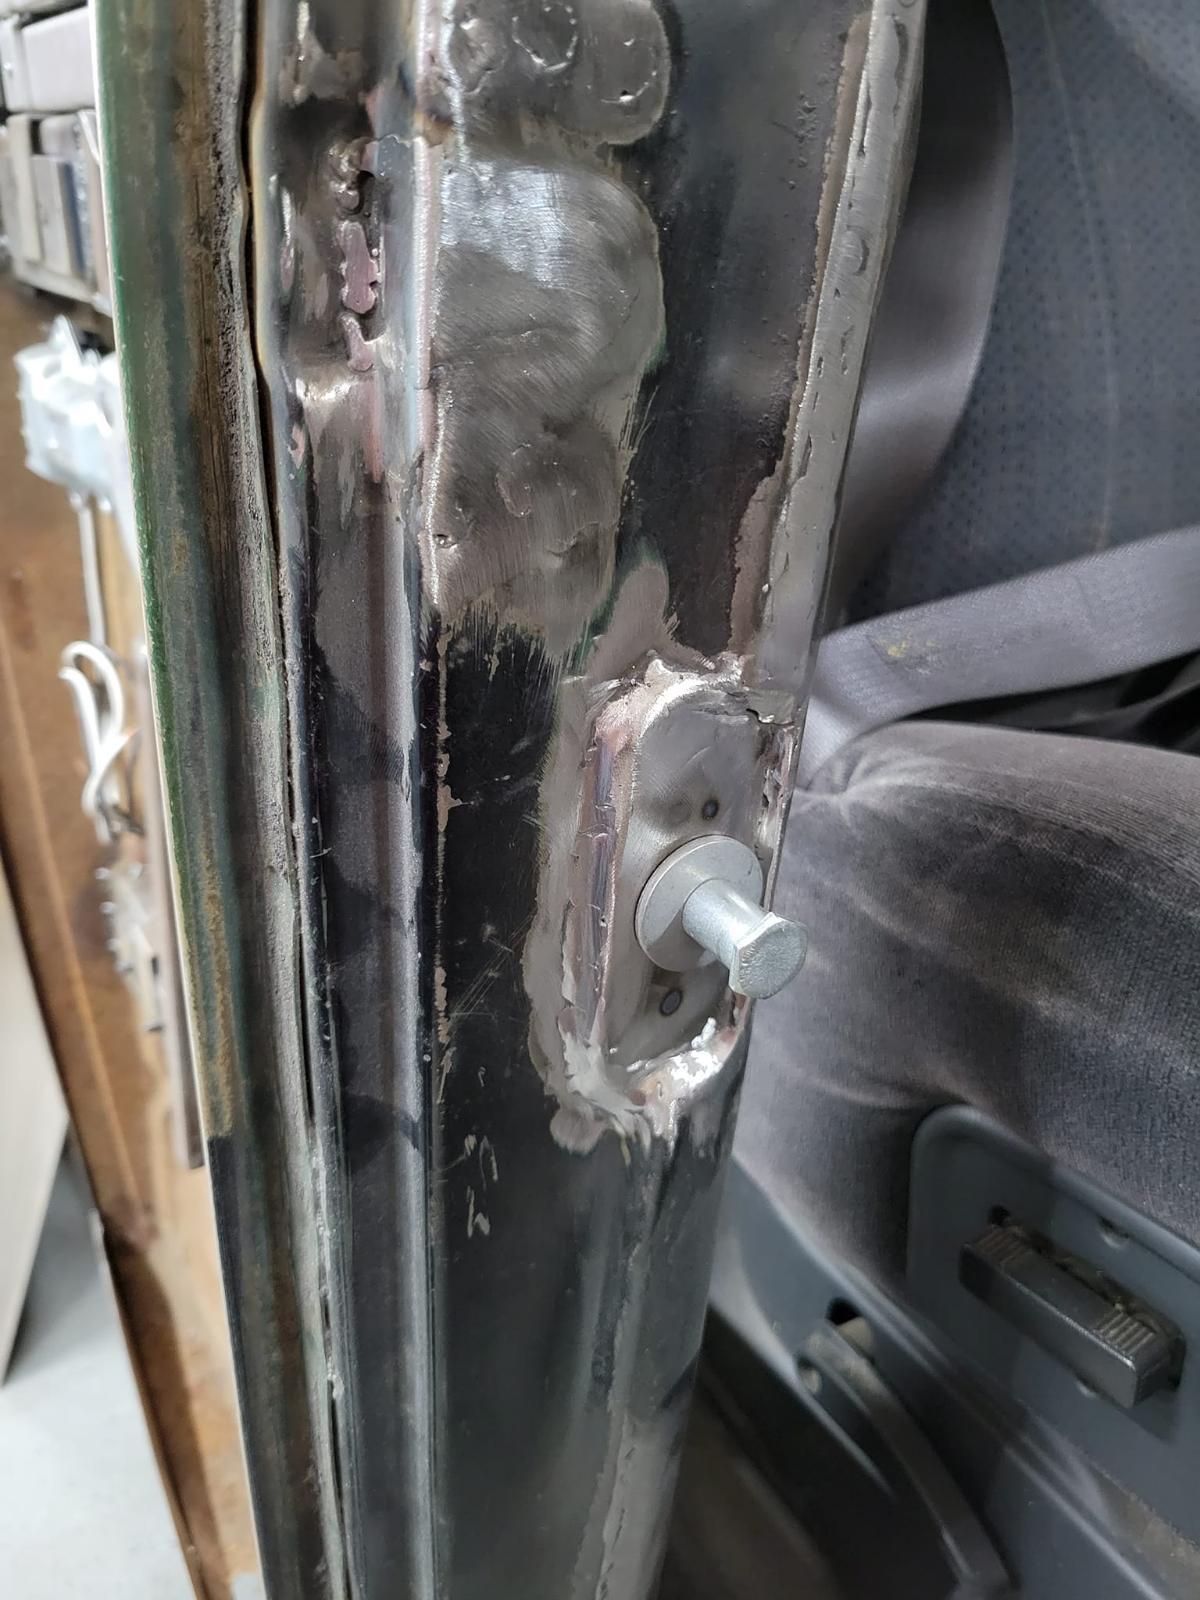
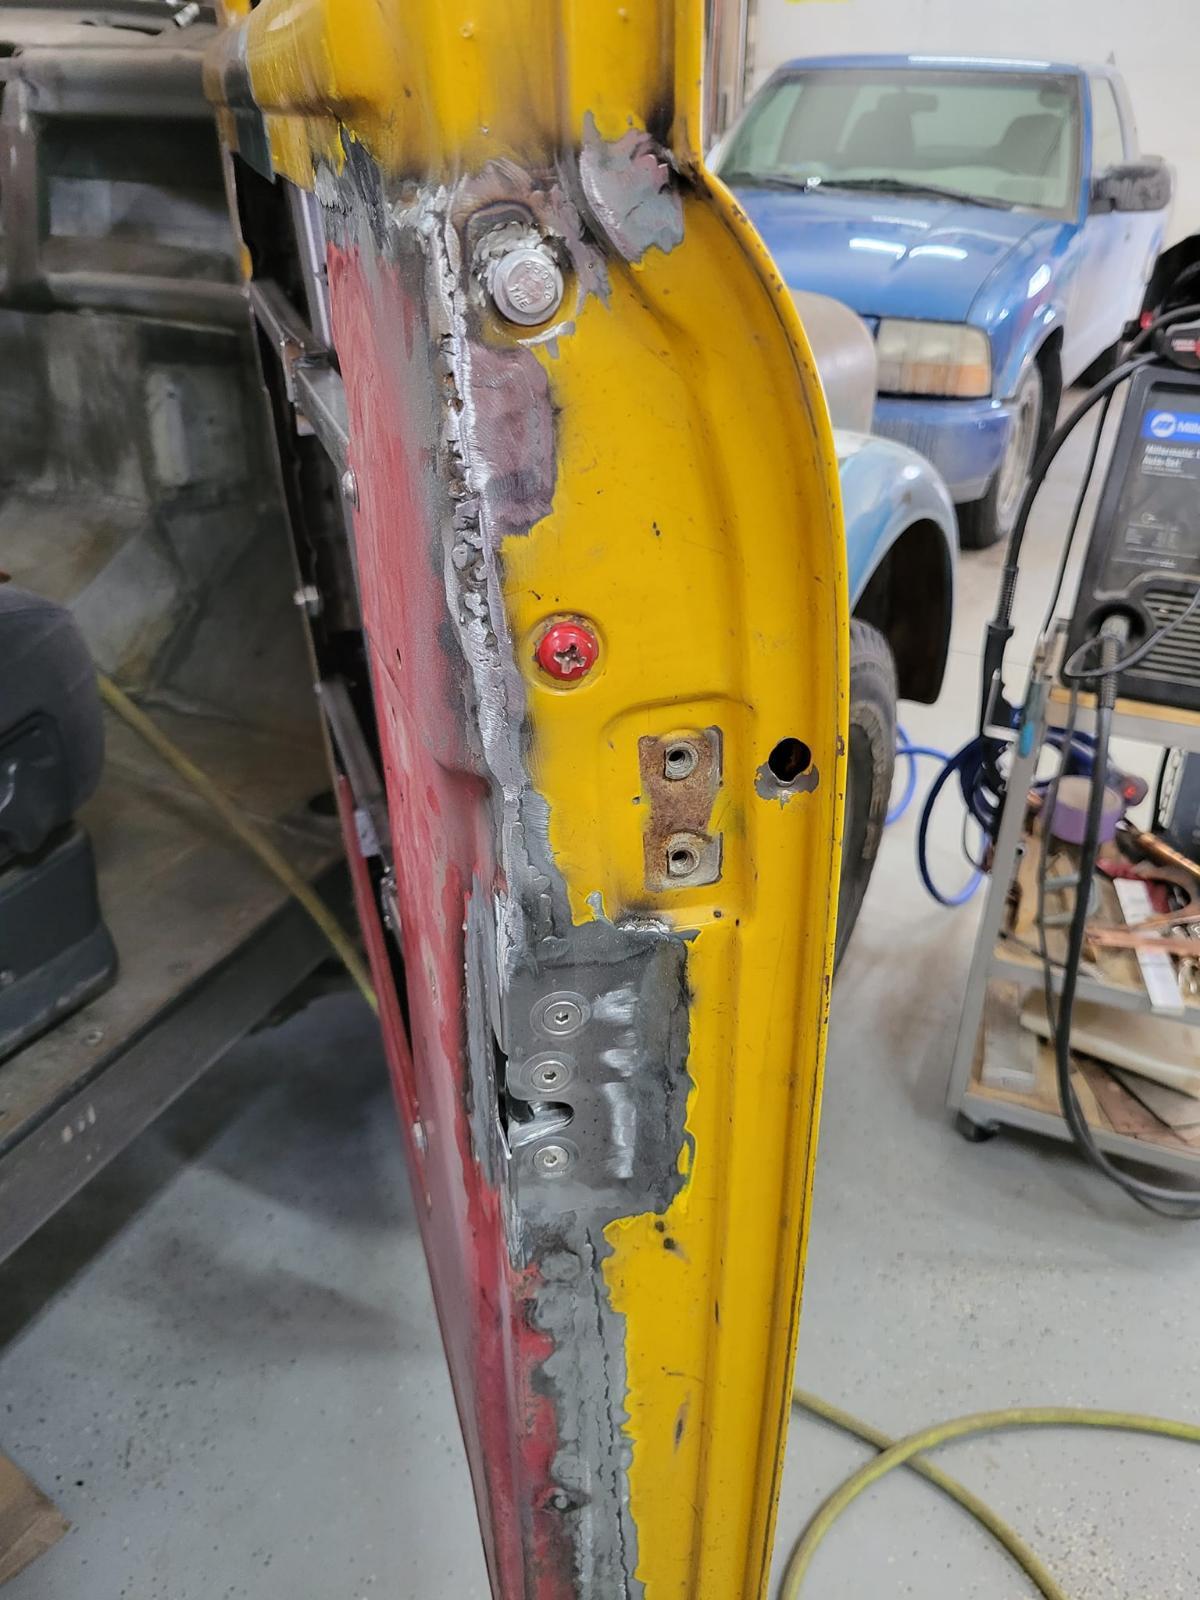
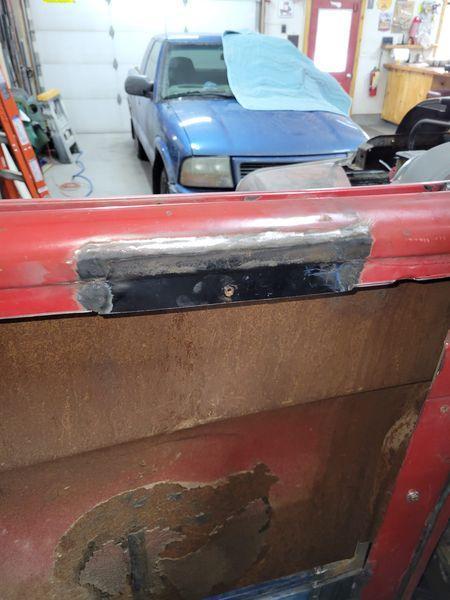
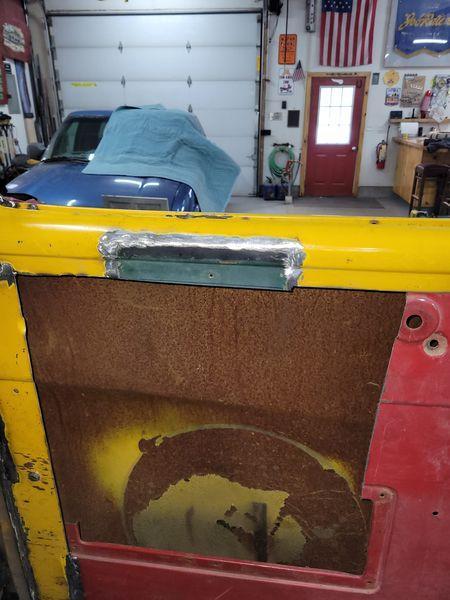
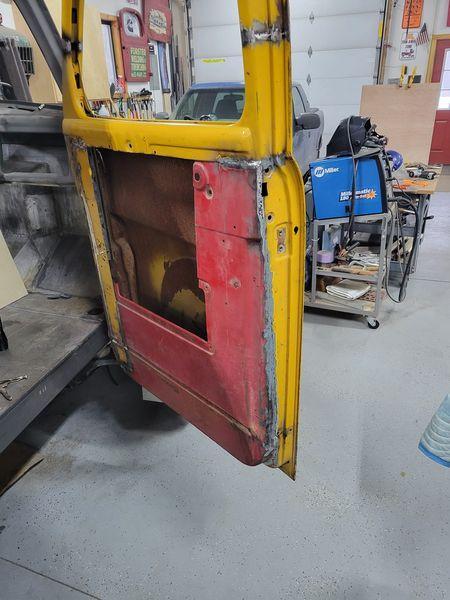
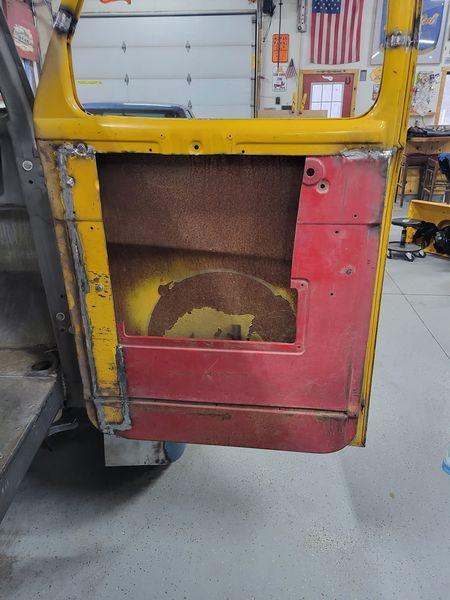
Front doors now latching. It's had to see the strike area but I welded in a 1/8" plate and blended to the jamb (some mud will help fill in the places that look ugly) and rounded and smoothed for a "original" look.
-
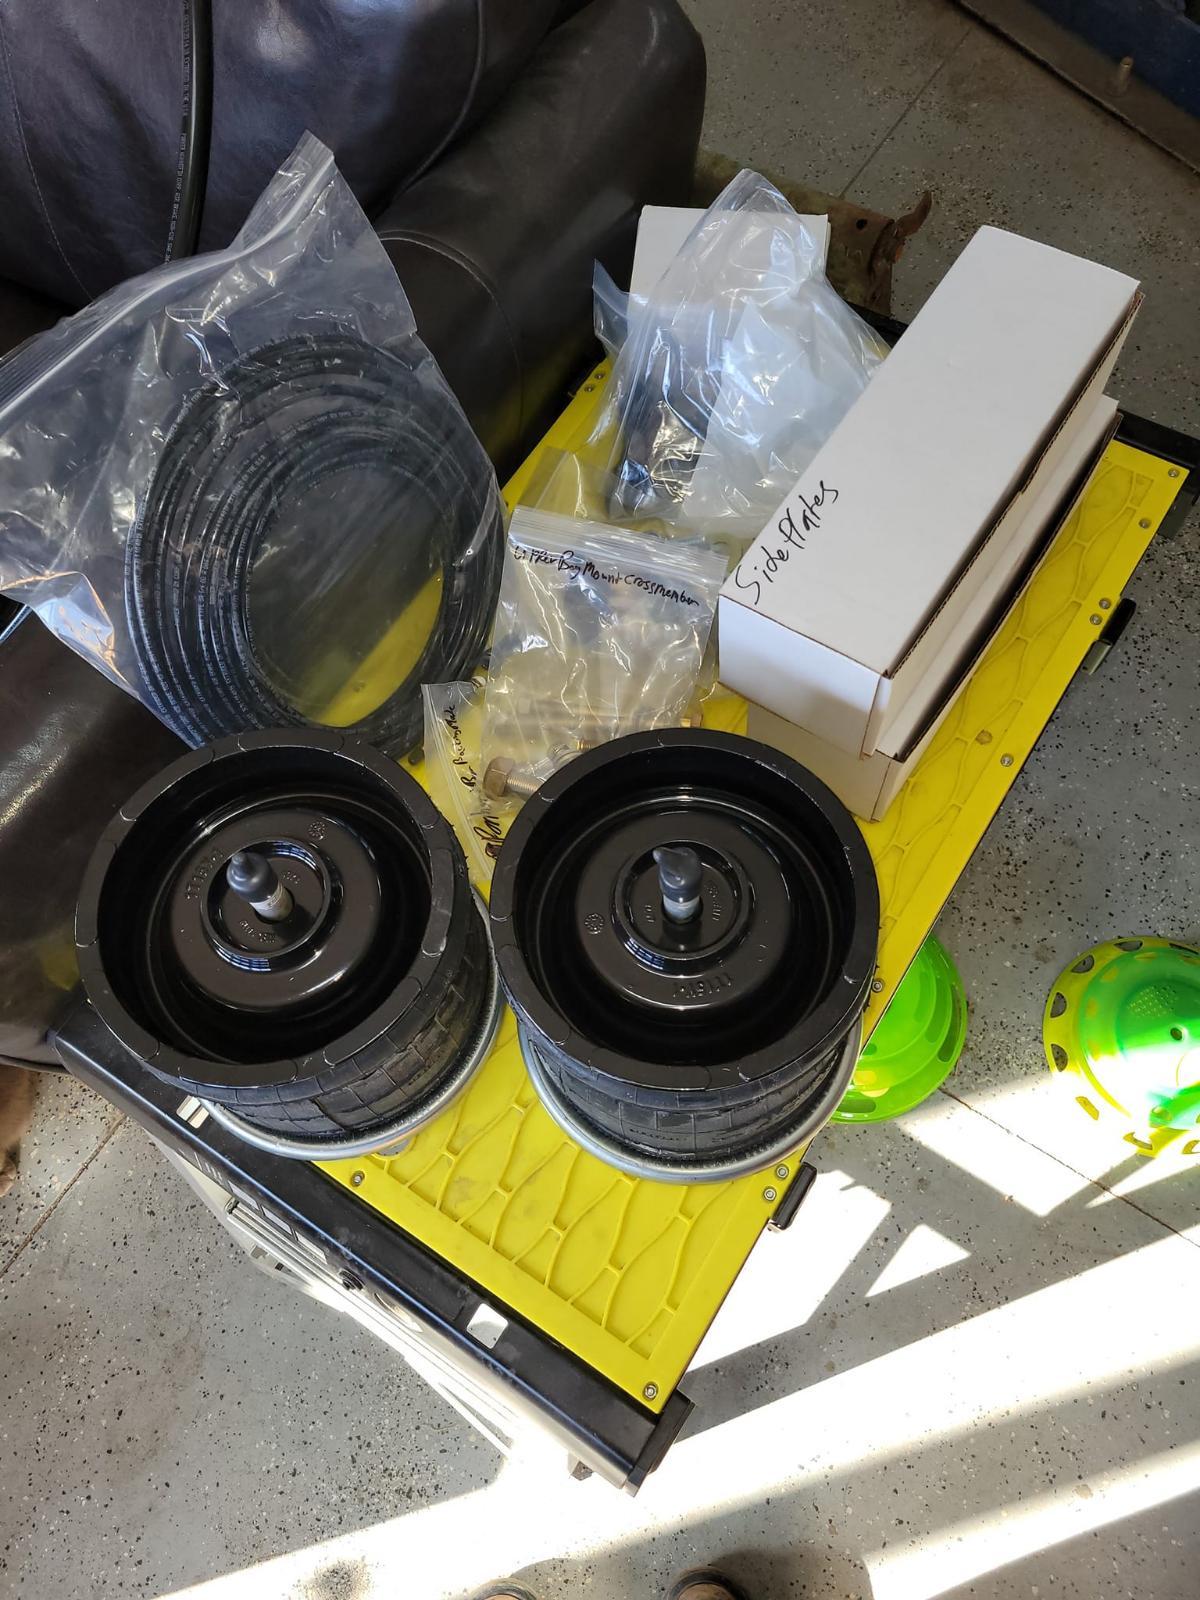
got some candy Friday, but won't install for quite a while....


-
And drivers side. Oddly the second time takes 1/8 the time! And seats placed in the cab for effect. The glass I'm using for mock up is old glass I got from another guy for use as templates. It's not temered it's lam glass. Final glass WILL have a tint. But gotta stay legal below 30% here...

-
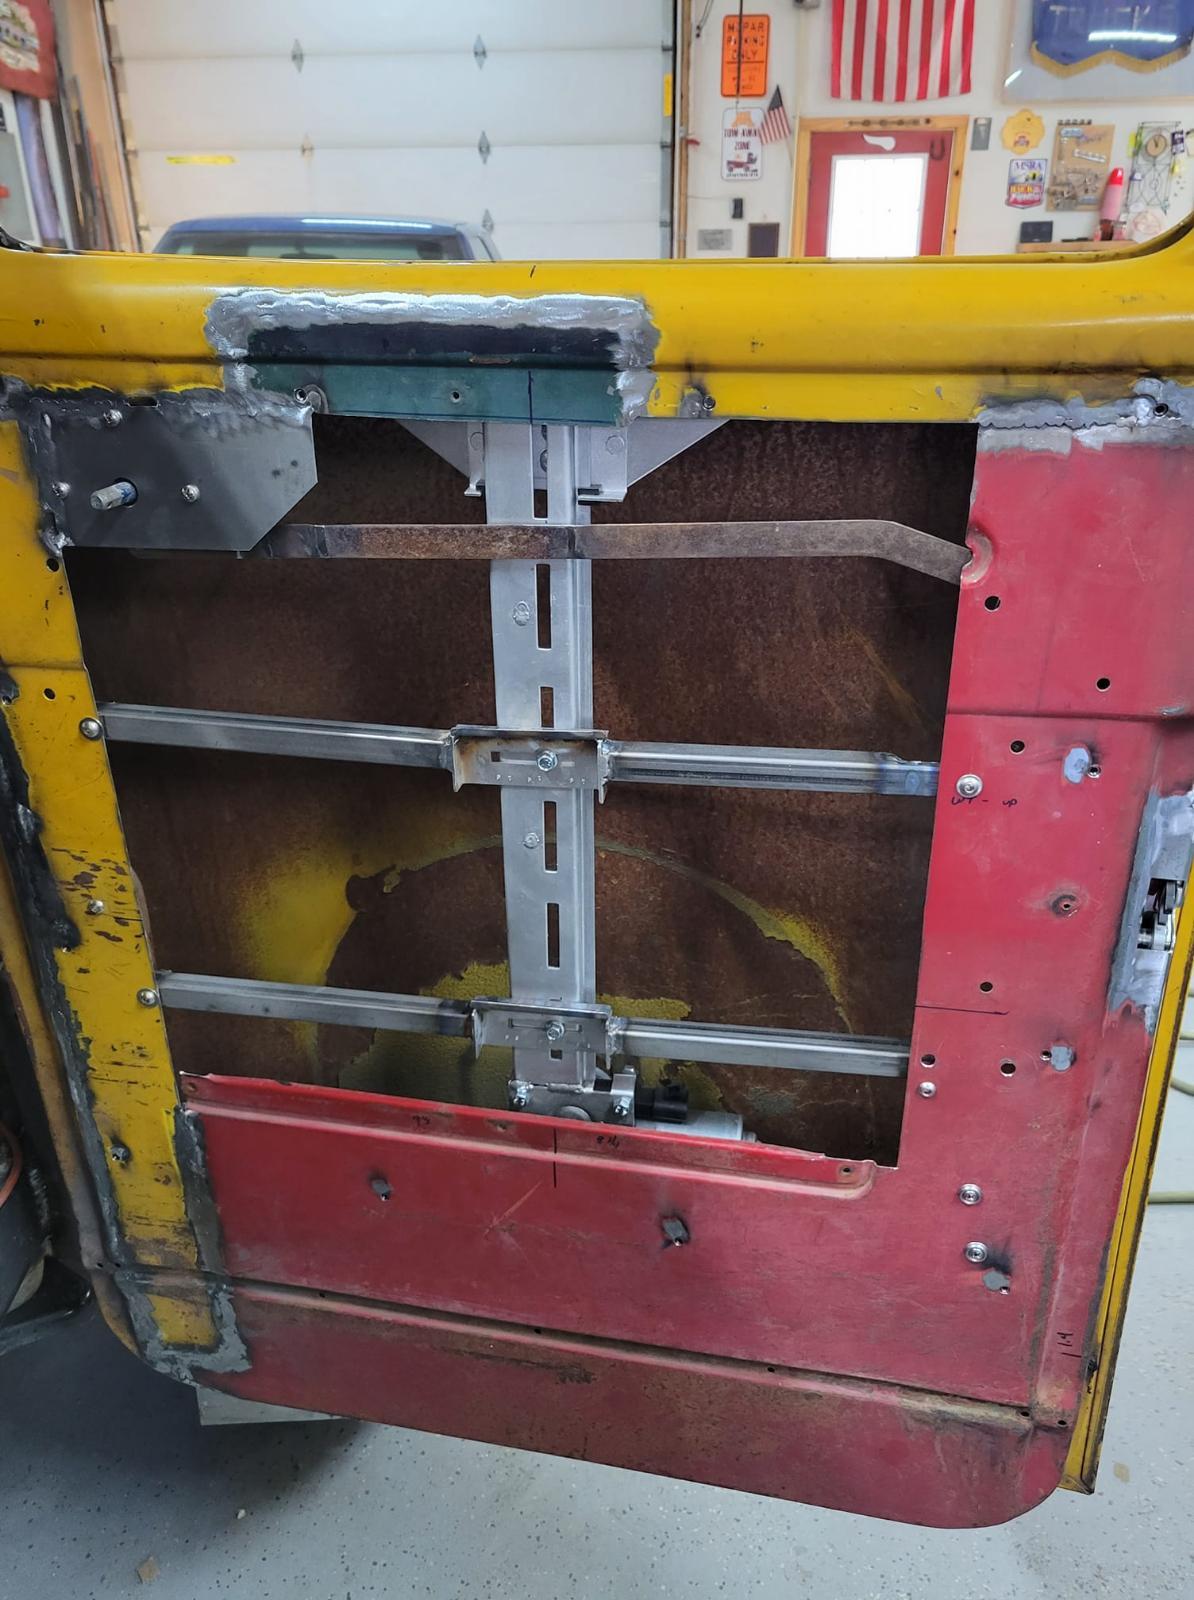
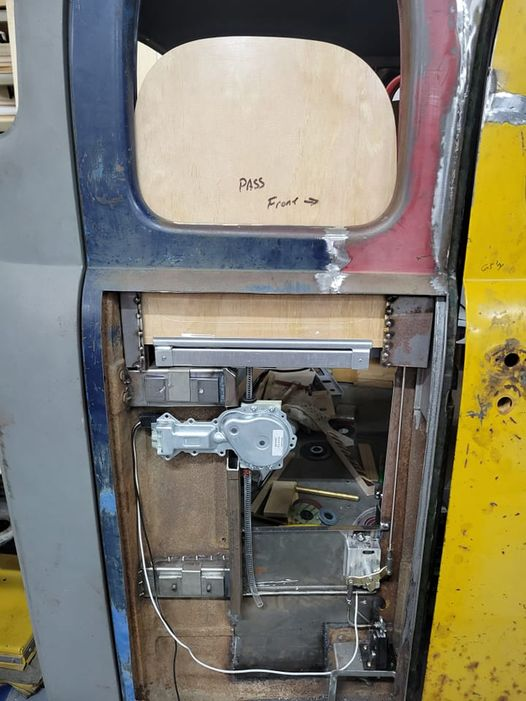
passenger power window in
-
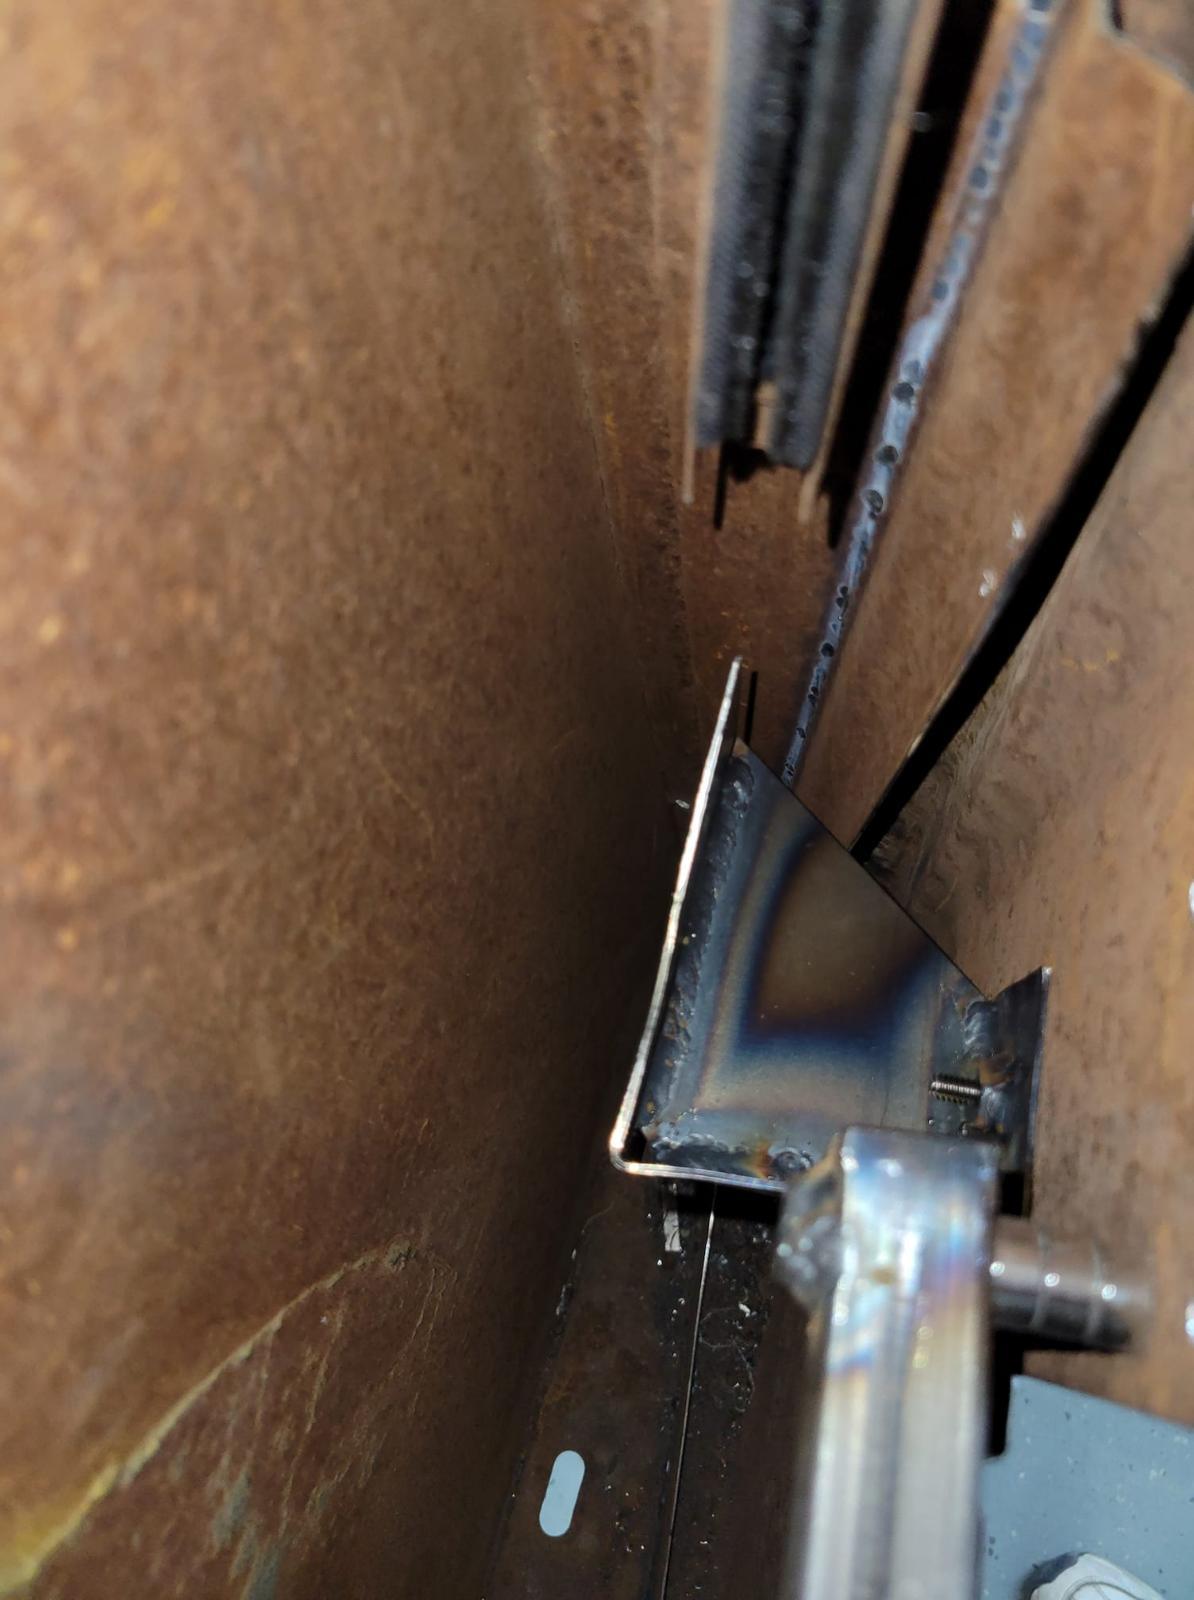
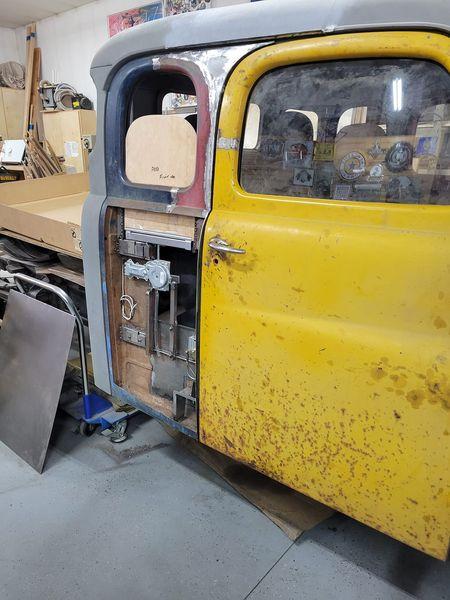
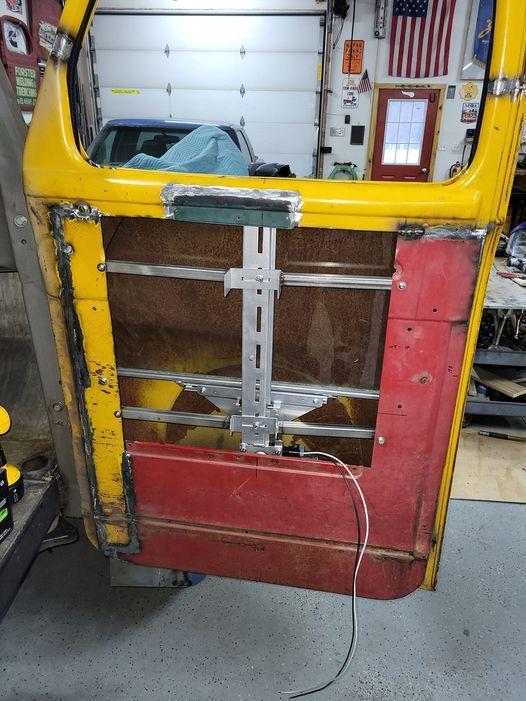
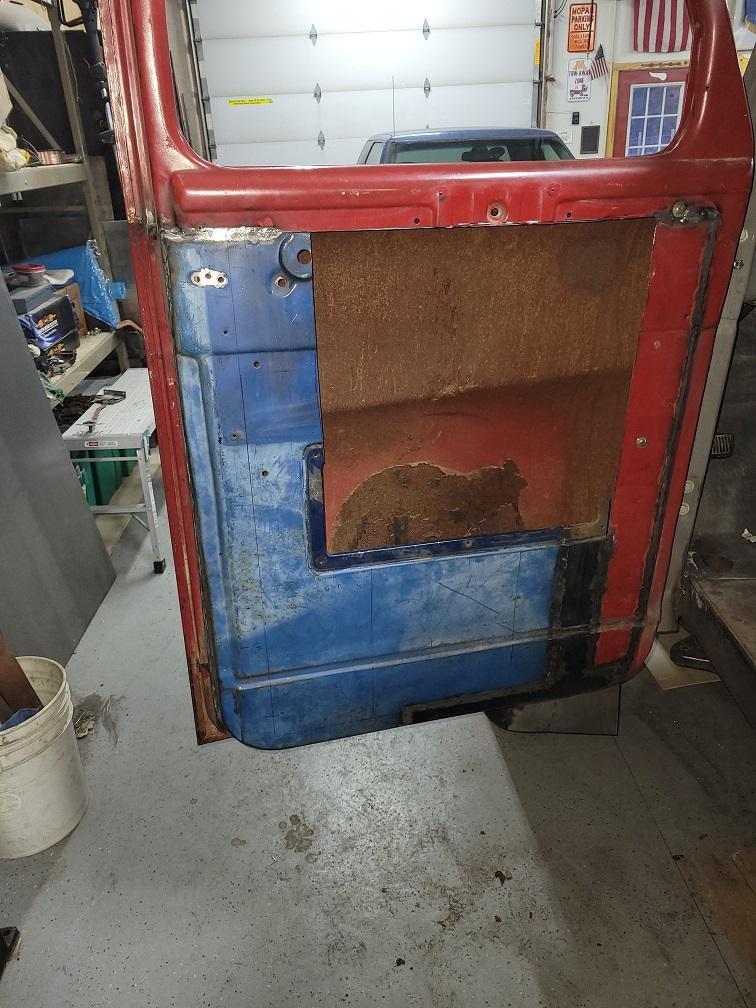
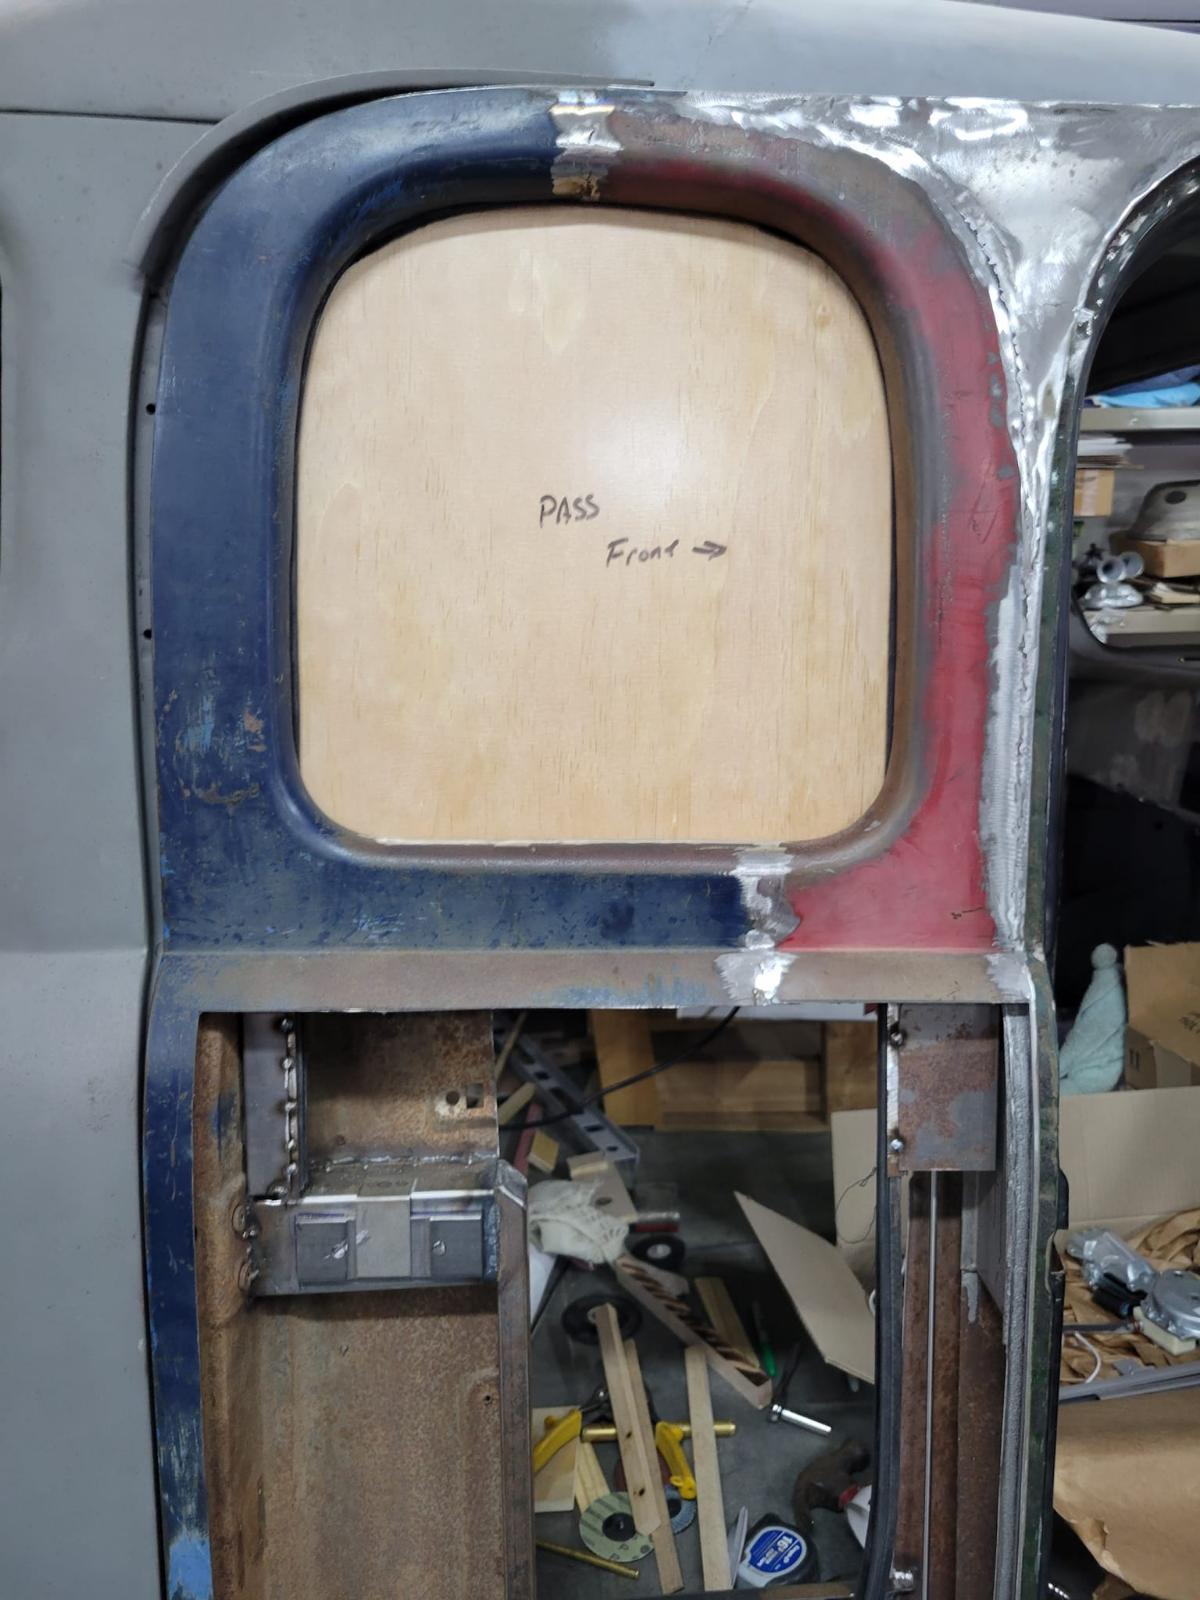
Cut out the B1/B2 inside door window sill details and replaces with bit from the B3/B4 donor doors for the project (little bumpy bits visilble in previous pics). I am especially proud of the driver side. No warp or heat deflection! Passenger side I got a little over zealous with the hammer and dolly in 2 spots prior to grinding the welds down.
-
and driver door...
-
preppping the front doors toward completion with adding more parts of doors to get to the final thickness.
-
Faster second time!
-
It now goes up and down with POWER!
-
Power windows for all the doors and a power cowl vent as well. You'll be waiting a LONG time my friend....I plan on driving this till either they take my license, diesel fuel isn't available or the rapture...whichever comes first.
-
Started work on the windows as I'm waiting till April to get my RAD delivered. 5316.mp4

-
picture proof I got it all stuffed in there...
-
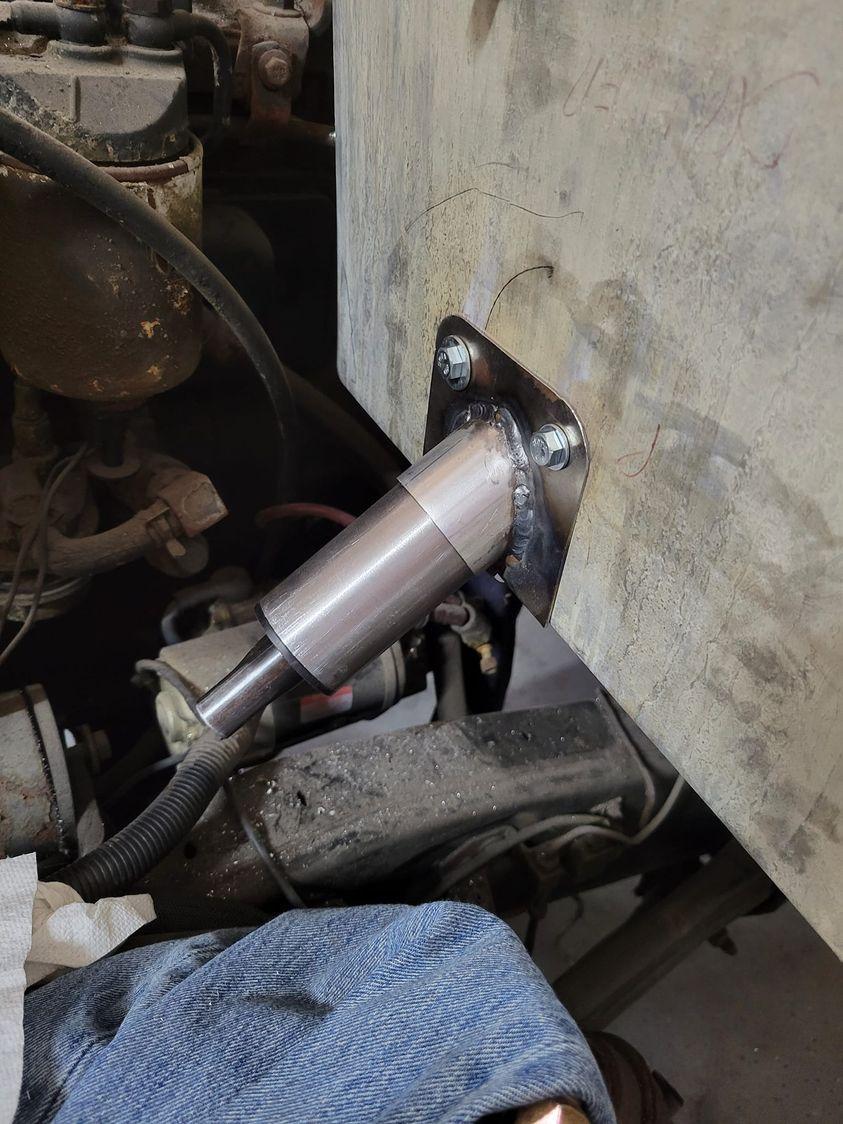
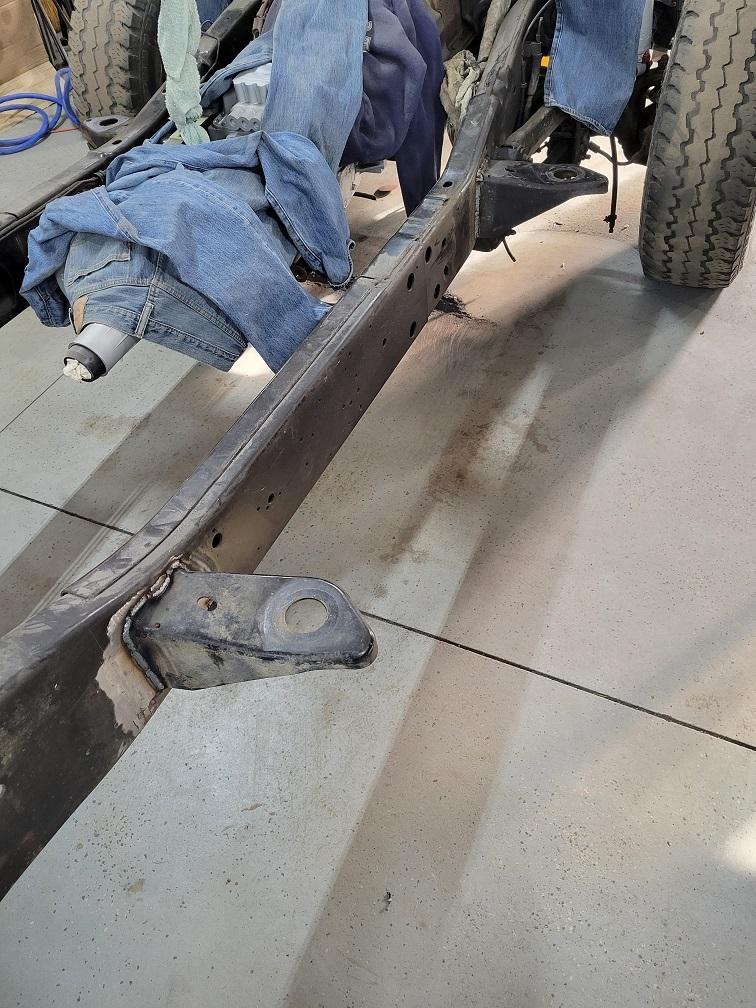
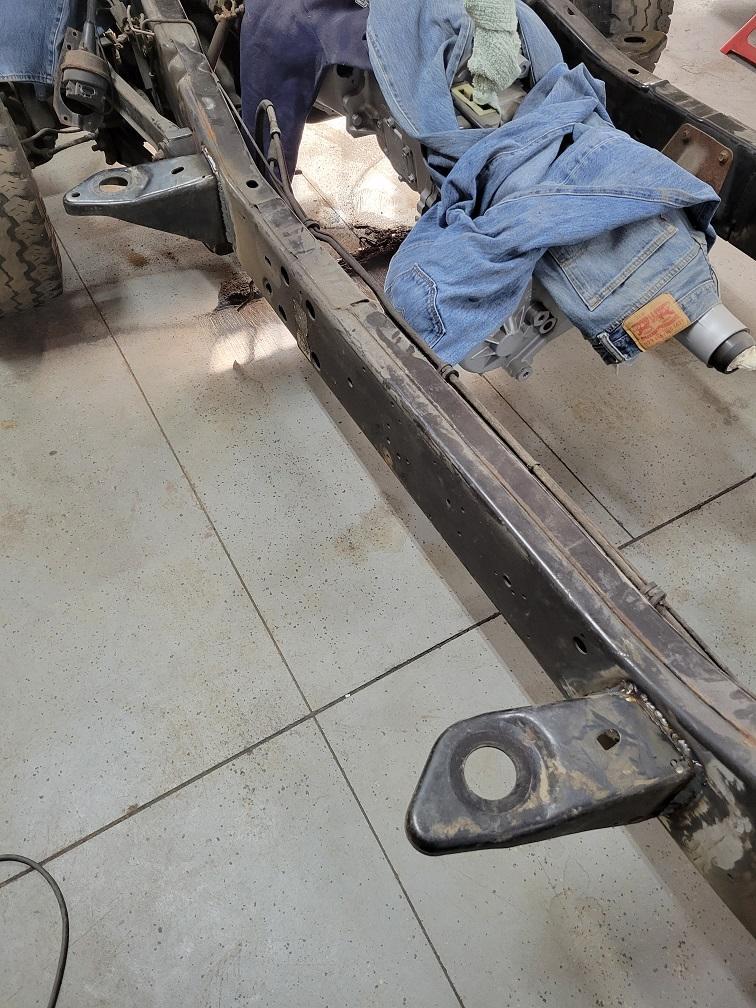
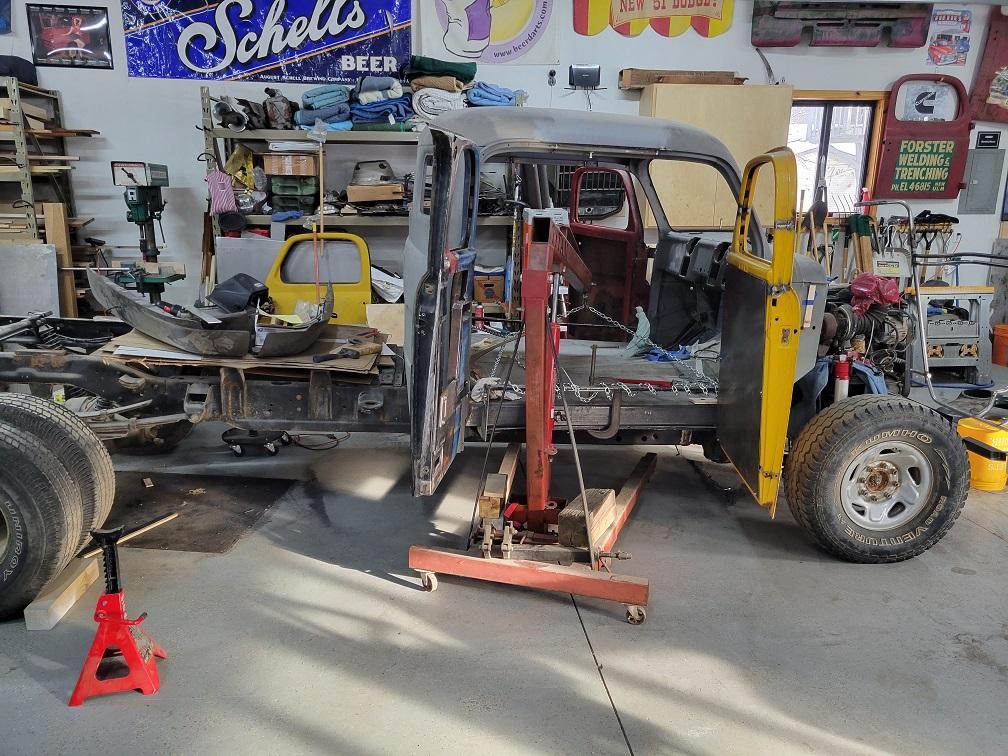
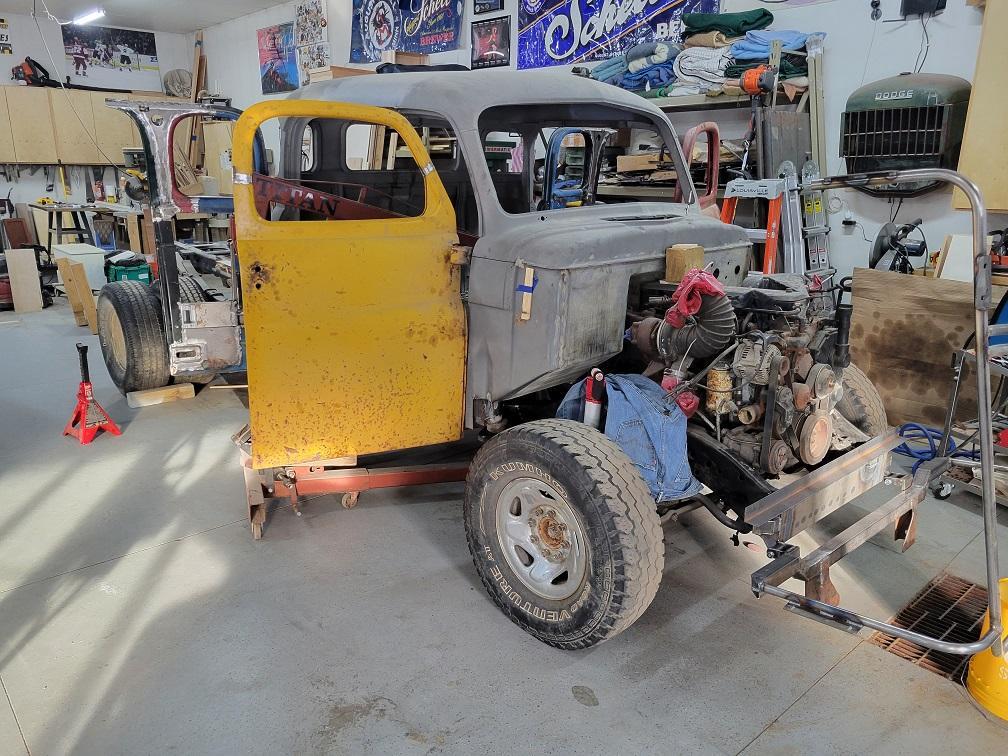
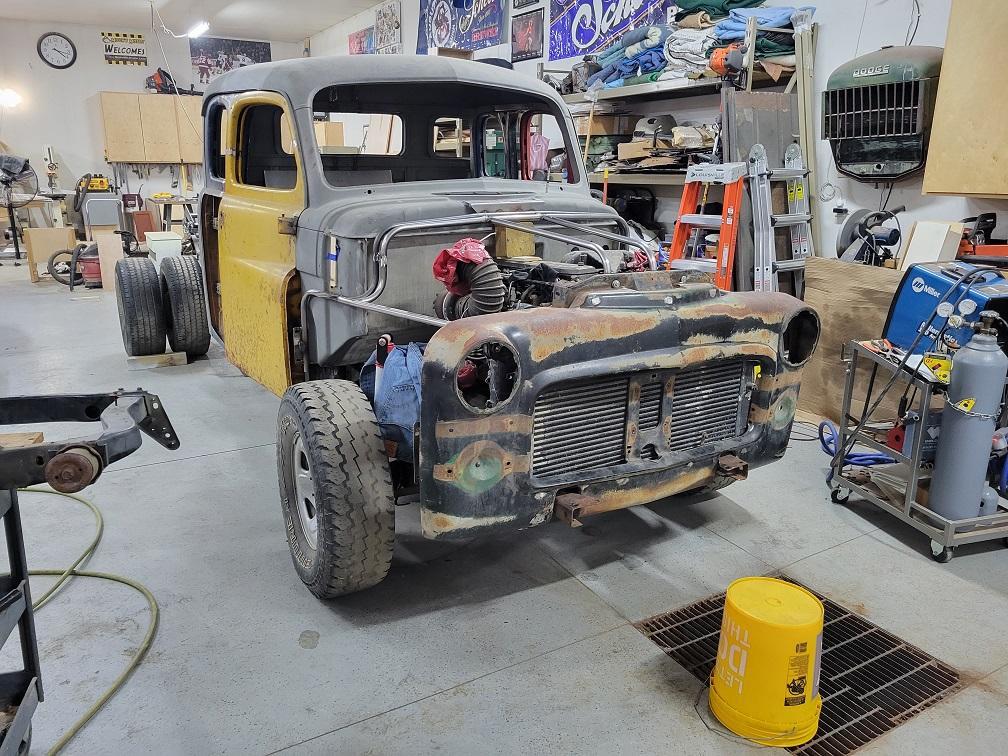
Some major surgury on the truck. After much consideration I decided I needed to move the body forward about 1.5". This entailed cutting off the tip front and rewelding the hinge to a new point. Modification of the tip front frame also was done to allow for the height of the RAD. It also meant moving the cab mounts forward as well. I also cut out a bit on the front of the frame cross member and put in a 2" angle piece to get some more room. This SHOULD give me enough room to fit the RAD and CAC all up front where they belong. I will have to trim the grill bars a bit as well to get things to fit. As a side benefit, it should also center the wheel better in the fender if my math is right.


-
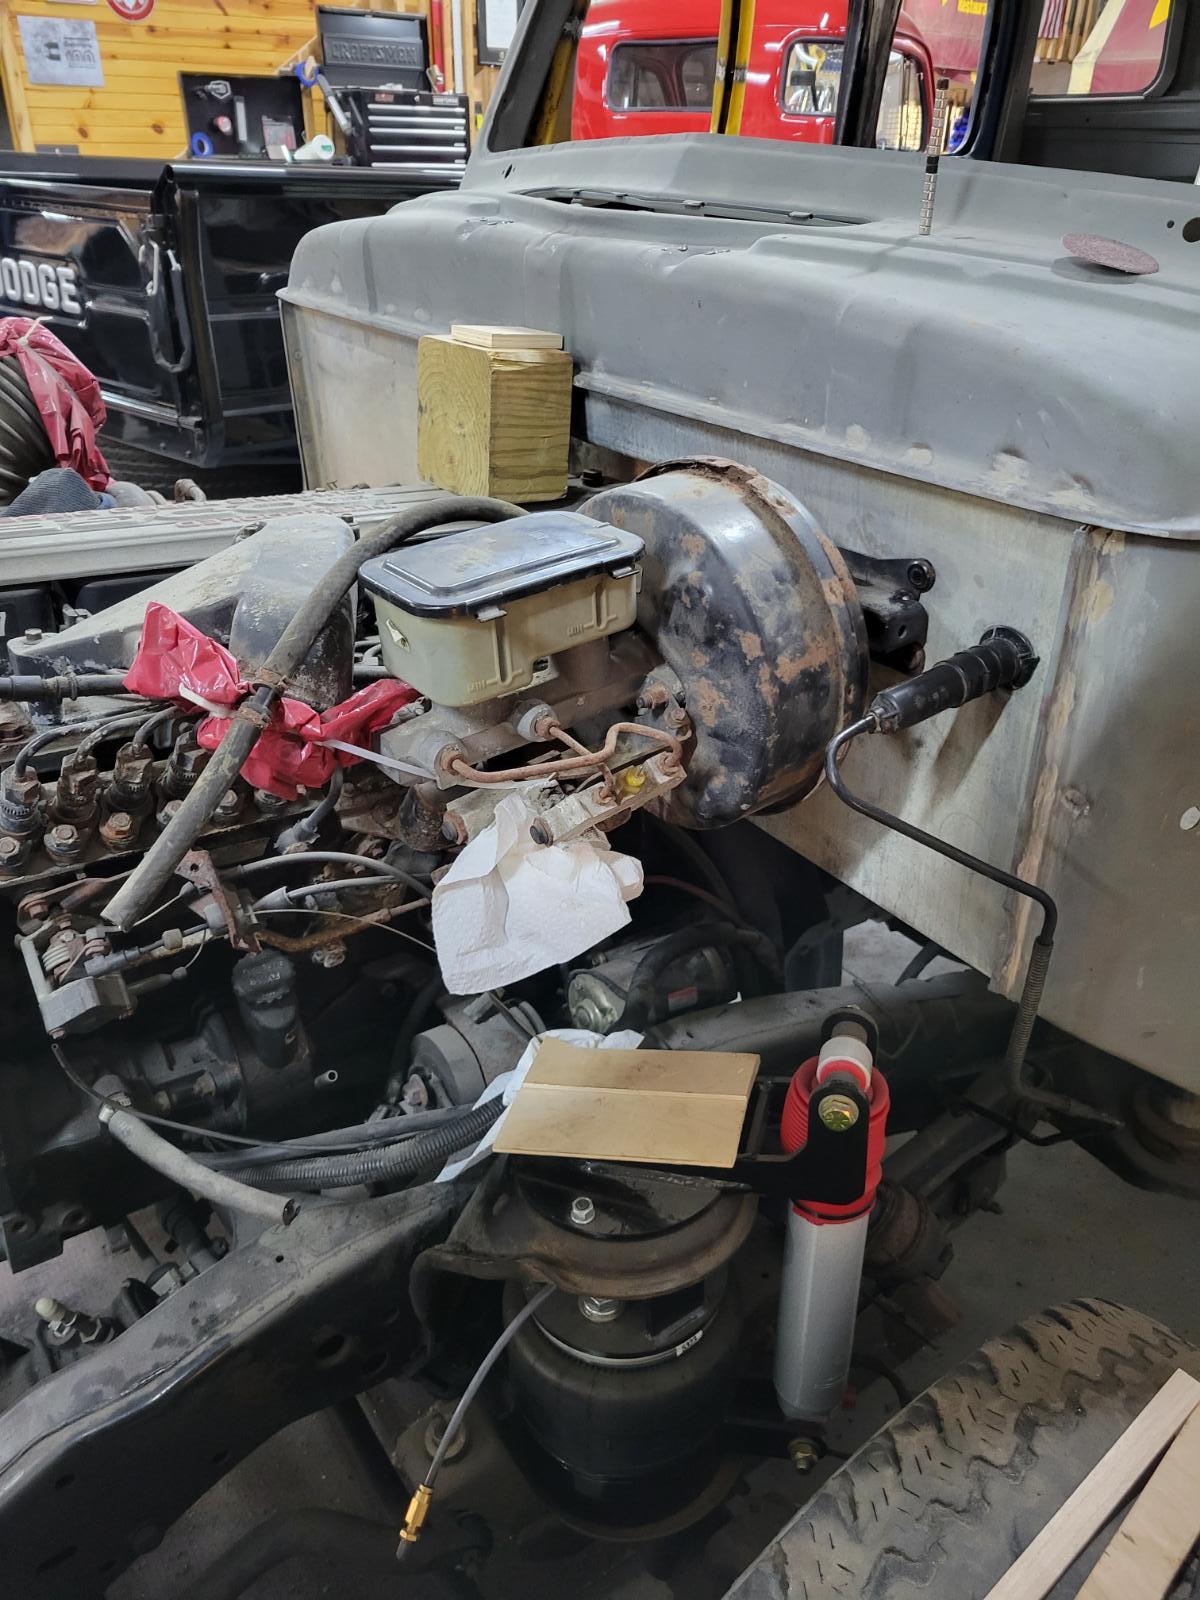
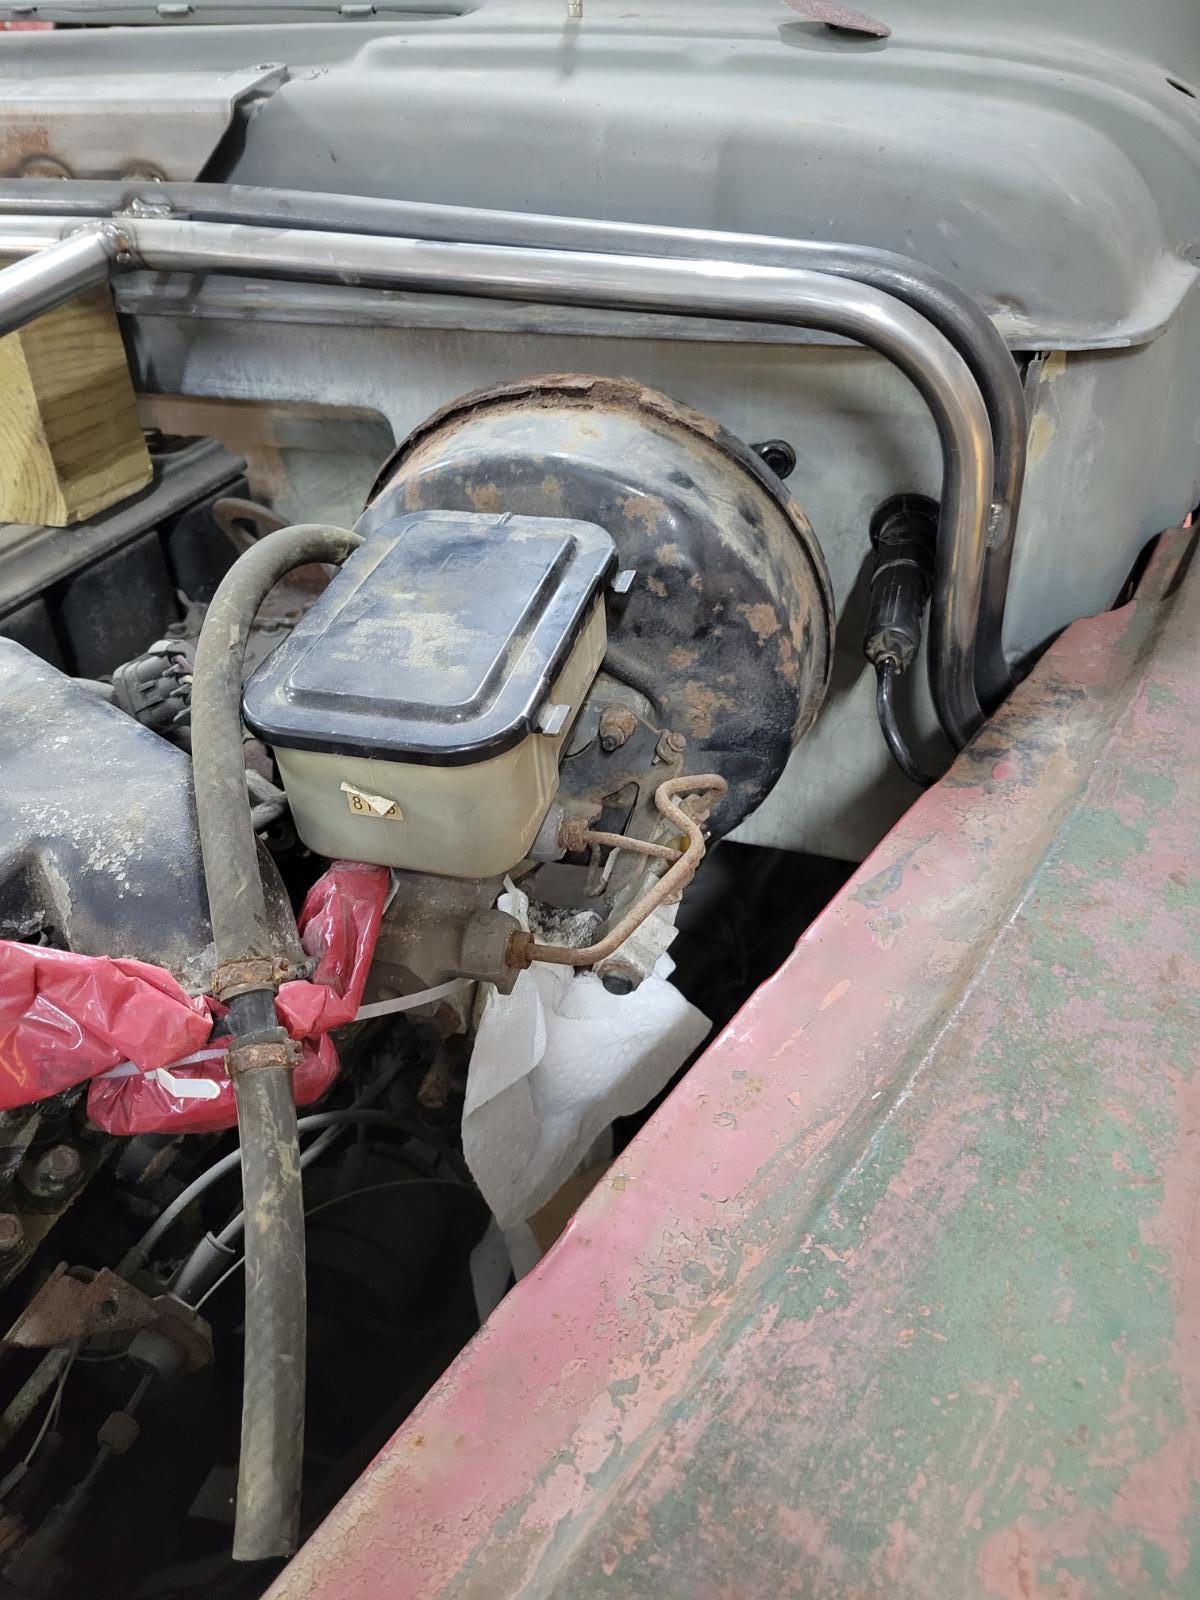
Returned from T-day earlier than planned, so I used it to mount stuff. Pedals and MC/booster now mounted. I did modify the booster mount to squeeze in there. Tight sapces! Booster is shot so at least I have a part to work with before I buy a replacement and mess with it.