Jump to content
Mopar1973Man.Com LLC
  • Welcome To Mopar1973Man.Com LLC

    We are a privately owned support forum for the Dodge Ram Cummins Diesels. All information is free to read for everyone. To interact or ask questions you must have a subscription plan to enable all other features beyond reading. Please go over to the Subscription Page and pick out a plan that fits you best. At any time you wish to cancel the subscription please go back over to the Subscription Page and hit the Cancel button and your subscription will be stopped. All subscriptions are auto-renewing. 

Fiberglass Topper cracks


Recommended Posts

My leer truck cap on my Dodge that I installed a fully welded steel ladder rack on top is stress cracking.  I work construction and tree farming so the rack was over built and overloaded probably more than once.

Now that you know what I did wrong I'll tell you what I want to do...  I found a quart of Toyota army green leftover from jamming out the truck before sending it to paint, so I figured might as well fix the topper and finally paint it to match the truck.  Last weekend I sanded most of the old paint off one side was done with 150 one side was 60(I'll explain in a moment.)  Now that the paint is stripped I'm seeing pretty deep stress cracks, and the fiberglass topper has a complete 1/8 inch skim coat of light weight filler.

Now explaing the sanding one side was done with 150 to investigate issues once the problem was found.  I talked with my dad and a couple of car guys and they all said sand it with 60 re resin the topper and smooth out with filler or grind off all the filler and repair the fiberglass that is cracked then rebuild filler.  

I plan to keep the rack so inside the topper we will be classing in metal arches to take the load down to the bed rails.  My concern is will I have massive amounts of block sanding if I sand to 60 a re resin it seems really rough.

14995209215432091566880.jpg

1499521037499124795683.jpg

149952106311812538785.jpg

Here are some more pictures I had someone suggest just using Kevlar reinforced filler and just filling in the cracks the side that got hit with 60 almost removed all the small cracks but the big ones on all 4 corners weren't affected

14995212710471995210120.jpg

1499521301026590456382.jpg

14995213279672131967959.jpg

  • Like 1
Link to comment
Share on other sites

So we opted to sand everything to 100 grit and at this point the first layer of resin is on I will block it out with 100 grit and apply a second coat as all the cracks didn't fill up all the way.  any thoughts are appreciated... after this I can't add any more pictures but will keep you updated with progress 


20170711_171147.jpg

20170711_171147.jpg

20170711_171155.jpg

Edited by WiscoRedkneck
Link to comment
Share on other sites

  • Staff

 You are a diligent hard working truck owner. That's what I think.:thumb1:


If it where mine I would look into laminating a sheet of aluminum  diamond plate to the top with rounding the corners. I would pick a gauge that easily forms to the slight round top. Doing the top only and glue the bejeebies out of it with Titebond and let the rack bolt the corners down.


Probly a bad idea from me, but would look into it anyhow.

Edited by JAG1
Link to comment
Share on other sites

as @JAG1 said, it looks like you really take car of your truck and want it to look its best.  I applaude you fot that.


The light weight filler you mentioned could very well be the gel caot sprayed in the mold when the cap was made.  I've been working for a boat manufacturer for 7 years in the tooling department making new molds for our products (finally a topic I know something about on this forum).  Fortunately for me I moved to the engineering dept so no more manual labor.  All I get to do is program two big CNC routers.


It looks to me that the gel coat is full of stress cracks.  If I was to do what you are, I would remove as much of the gel coat as possible.  You will never be able to get rid of the stress cracks.  The will eventually come back.  If the fiberglass is not cracked at all you have a good base to work with.  If the glass is cracked that can be repaired.


I would start with 40 grit and take all the gel coat off (or at least most of it).  After 40 grit I would use some filler and 80 grit to smooth the surface leaving as little filler as possible.  Then I woulld spay on tons of primer for fairing the surface (20 mils min).  It may take a coulpe of sprays of primer to get a fair surface (I like to spray a min of 30 on our plugs).  I would hand sand (block) from 80 grit up to high a grit as you want.  I would probably go to 400 wet prior to paint.  Using a tracer coat for fairing makes a huge difference for finding highs and lows.  We use Dykem (a machinist fluid)  thinned with about 10 parts of acetone.  Wipe it on the surface with a rag and it works great.  I've never used the black spray paint trick but that works good as well.


Good luck and I hope this heps.


L8tr

d

  • Like 2
Link to comment
Share on other sites

  • Staff

Man! SilverMoose you know your stuff. Sounds like a lot of work which at my age I start thinking of alternatives Like having the inside and outside coated with LineX bedliner to make the cracks strong and then paint with a matching Latex exterior paint. At least it would be easy touch up in the future and LineX texture hides a lot. But then again any of  my advice is just outside the box thinking.

Edited by JAG1
Link to comment
Share on other sites

  • Staff
1 hour ago, JAG1 said:

the inside and outside coated with LineX bedliner to make the cracks strong and then paint with a matching Latex exterior paint. At least it would be easy touch up in the future and LineX texture hides a lot. But then again any of  my advice is just outside the box thinking.

JAG1 you would LineX the floor in your house if your wife let you.

  • Like 2
Link to comment
Share on other sites

  • Staff

Thanks IBM for spilling the beans, but the stuff strengthen. Like my cracked escape hatch cover on the rv was cracking. I had it LineXed a long time ago and it held up for a long time till I built and aluminum hatch cover.

Link to comment
Share on other sites

7 hours ago, JAG1 said:

Man! SilverMoose you know your stuff. Sounds like a lot of work which at my age I start thinking of alternatives Like having the inside and outside coated with LineX bedliner to make the cracks strong and then paint with a matching Latex exterior paint. At least it would be easy touch up in the future and LineX texture hides a lot. But then again any of  my advice is just outside the box thinking.

I like your thinking:thumbup2:


Surprisingly the work ain't all that bad but you have to enjoy it.  Try hand blocking a 34 foot boat plug for 4 weeks. A little cap is nothing then


L8tr

D

  • Like 1
Link to comment
Share on other sites

  • Staff
3 hours ago, SilverMoose said:

I like your thinking:thumbup2:


Surprisingly the work ain't all that bad but you have to enjoy it.  Try hand blocking a 34 foot boat plug for 4 weeks. A little cap is nothing then


L8tr

D

I know your right. I remember when young nothing stopped me from getting things done and the work is just as fun as the completion.

Link to comment
Share on other sites

@SilverMoose thanks for the pointers and education, thanks for all the extra ideas as well really helps get the old brain rolling.

So I'm kind of pot committed with the resin over the gelcoat/filler but can still grind off if I have to.  

The biggest problem right now is I have 12 days to complete repairs paint topper and install.  I leave on the 25th and the 32 foot box I will be pulling will hurt my driving performance greatly with out the topper, not to mention I have a cooling problem that I have been fighting for awhile now and I thought I had it licked when I put the new clutch fan in but over 85° pulling hard it the gauge clears 190 :think:

On another note the resin filled all the small cracks and almost all of it gets sanded off during blocking now the big cracks in the corners I think are just going to have to be ground down to glass and re coated....  there's the topper and rack before I started sorry it's a bad picture 20170416_151731.jpg.908e80fe4af64de78bcaeb4274a3cc4f.jpg

And here is the other topper that got owned by a tree :(

Ignore the KN Sticker p.o. had that on there I just never removed it, the topper was electric blue but I rattled canned it black in two hours.


20161126_072522.jpg

Edited by WiscoRedkneck
Link to comment
Share on other sites

Ended up sanding off all of the resin in order to get it flat and took off a lot of gel coat in the process as well.  It's kinda funny looking since it's 2 different shades of gray now that I sanded a lot of the gel coat off will be filling cracks with seam filler that has small Kevlar strands in it the start building it up with primer 

Forgot these close up is in between rack mounts on drivers side still a few very small cracks (almost invisible with out a light) but they are filled with resin

20170715_173634.jpg

20170715_173658.jpg

  • Like 1
Link to comment
Share on other sites

  • Staff

It's pretty cool your doing this. I've found anytime I get involved with a lengthy project the outcome is far better than factory and something to be proud of. Usually people ask about it so it good conversation piece.  Others might say' it ain't worth it ' and go trade in, but I've found the hand made aspect is so far better..

Edited by JAG1
Link to comment
Share on other sites

1 hour ago, JAG1 said:

It's pretty cool your doing this. I've found anytime I get involved with a lengthy project the outcome is far better than factory and something to be proud of. Usually people ask about it so it good conversation piece.  Others might say' it ain't worth it ' and go trade in, but I've found the hand made aspect is so far better..

I tend to agree but I also believe that comes from you and I being self critical and we know what we want it to look like.

I planned to start building primer up today but ran out of reinforced filler and the parts store is out until tomorrow back to my holding pattern.:(

  • Like 1
Link to comment
Share on other sites

17 hours ago, JAG1 said:

It's pretty cool your doing this. I've found anytime I get involved with a lengthy project the outcome is far better than factory and something to be proud of. Usually people ask about it so it good conversation piece.  Others might say' it ain't worth it ' and go trade in, but I've found the hand made aspect is so far better..

What he said.:iagree:

  • Like 1
Link to comment
Share on other sites

  • 2 months later...

Never thought this project was going to take this long or be this difficult it's been a learning experience and so far what I found is everything that I've done I'm going to appreciate in the end.  I can tell you this I'm going to be very upset if this thing ever gets damaged.  

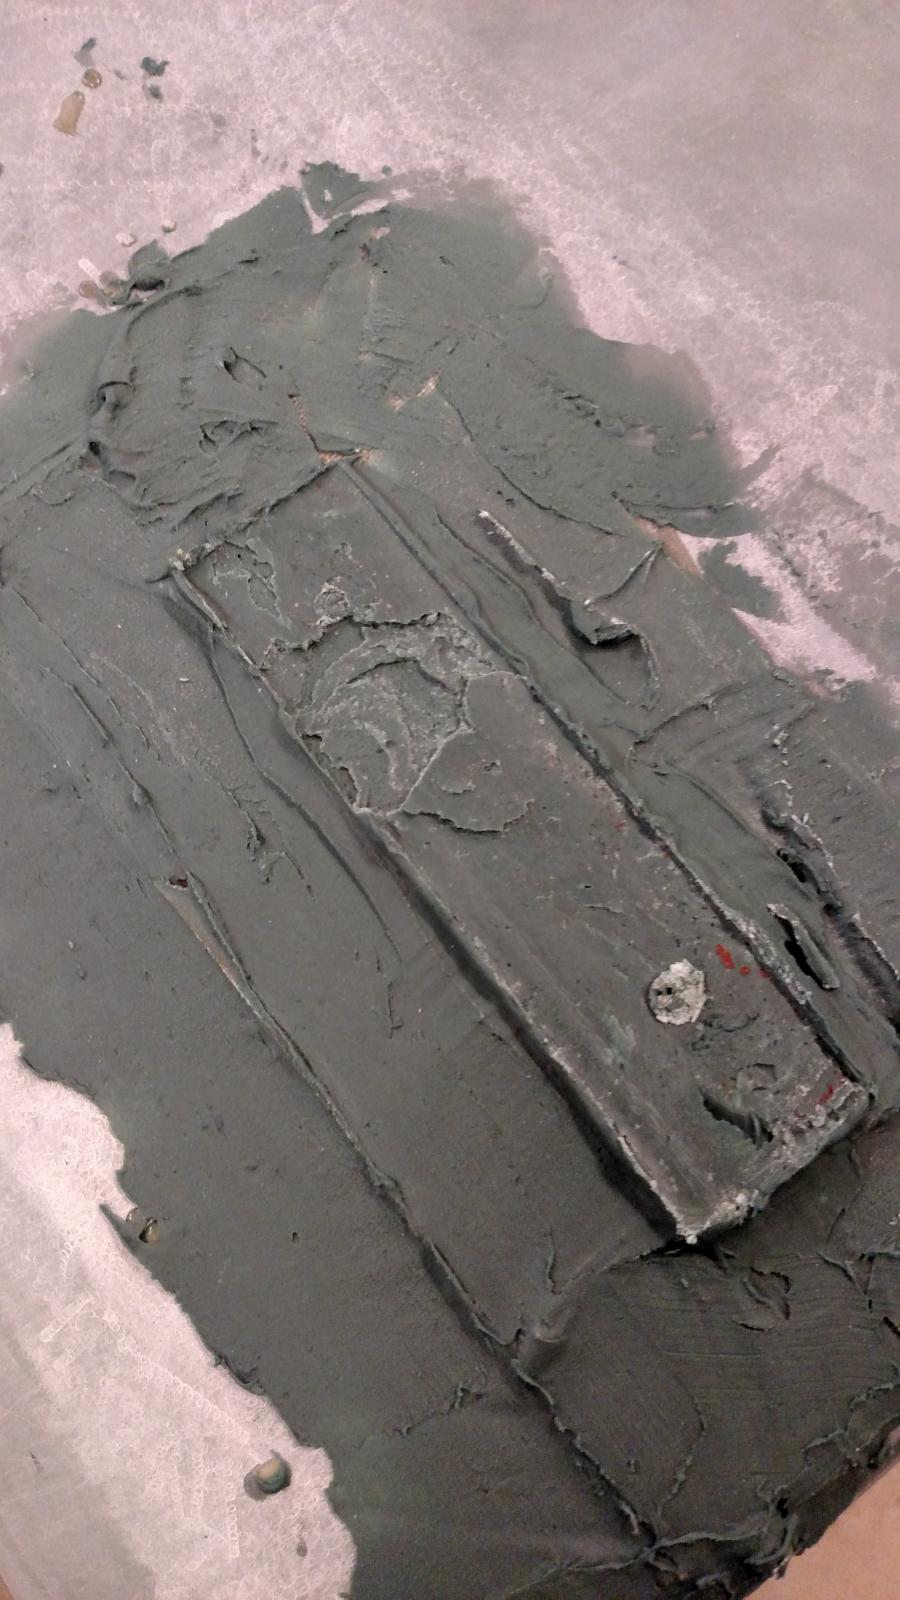
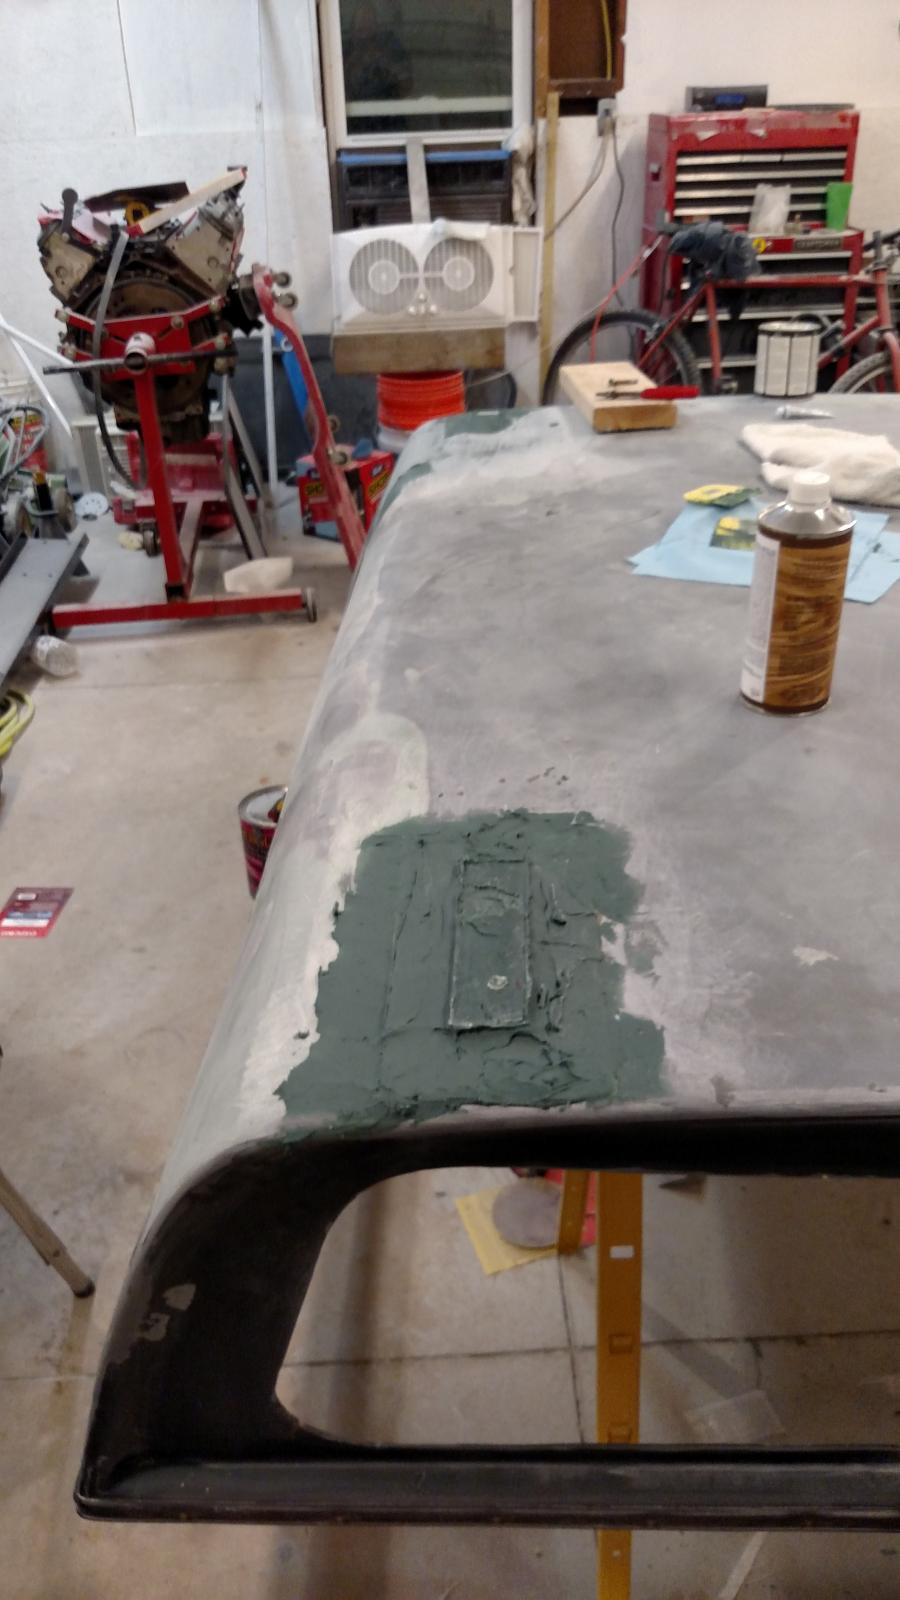
Since I posted last quite a bit has happened the topper in the back has been formed to the rear ladder rack feet. I have laid the fiberglass pads that will support the front foot pads, my dad and I plan on molding those foot pads this afternoon.  

I have the rest of everything shaped and smoothed out with 220 it's ready to continue building primer coats.

I have removed the third brake light and smoothed that out to increase topper strength since that was hacked in by the P/O.

There will be metal bow's that are glassed-in to the inside down the road to increase structural stability, I will be using 1708 biaxial fiberglass fabric it's a form of structural fiberglass. At this point we've added over 150 lb to the topper in both fiberglass and Kevlar reinforced resin based fillers.

15056835844062115198344.jpg

1505683457965-712796332.jpg

15056834180881903853502.jpg

1505683303516-1425521403.jpg

Edited by WiscoRedkneck
Link to comment
Share on other sites

Nice job what your doing, I too believe you will appreciate this much more with the labor of love you got invested, sometimes just adding that personal touch makes it much better than some factory knock off, and the time you get to spend with family doing it makes it that much better.  :thumbup2: 


on on a side note.. I've been wanting to build a custom head ache rack and diamond plate tool boxes to accommodate my fifth wheel set up. Got it planned out in my head but time is just not on my side 

Link to comment
Share on other sites

2 hours ago, 01cummins4ever said:

 Got it planned out in my head but time is just not on my side 

Thank you, it always seems like time is never on our side I got the front feet formed now I just have to body work and then and primer block sand, primer, sand repeat until your arm falls off :ahhh:and just maybe by next weekend I'll have color on the thing just a small task :thumb1:

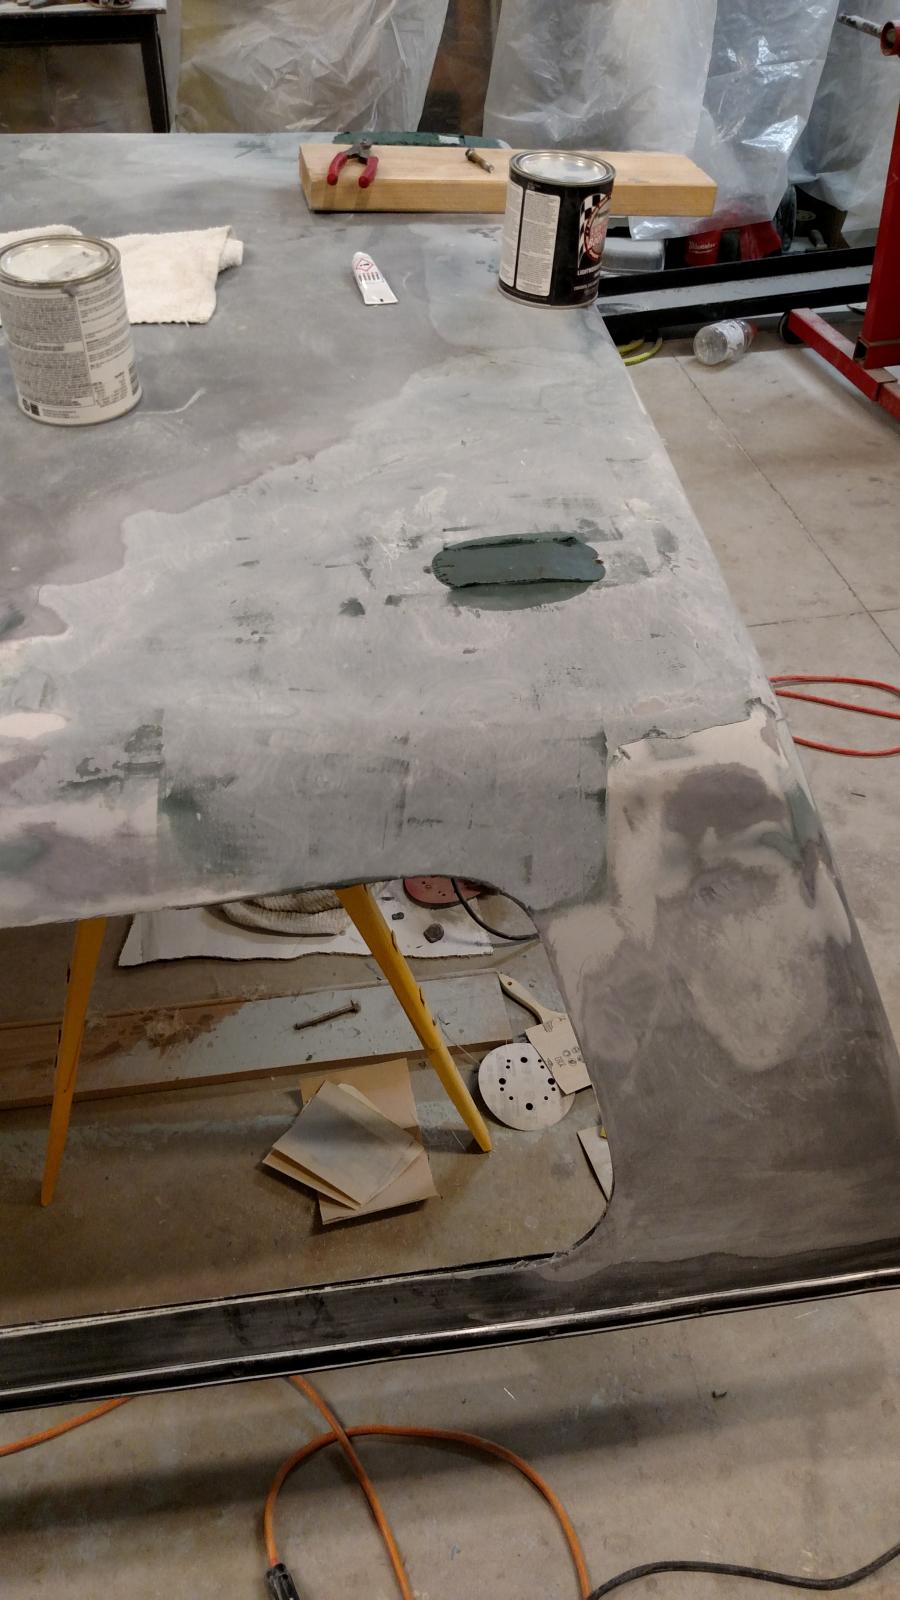
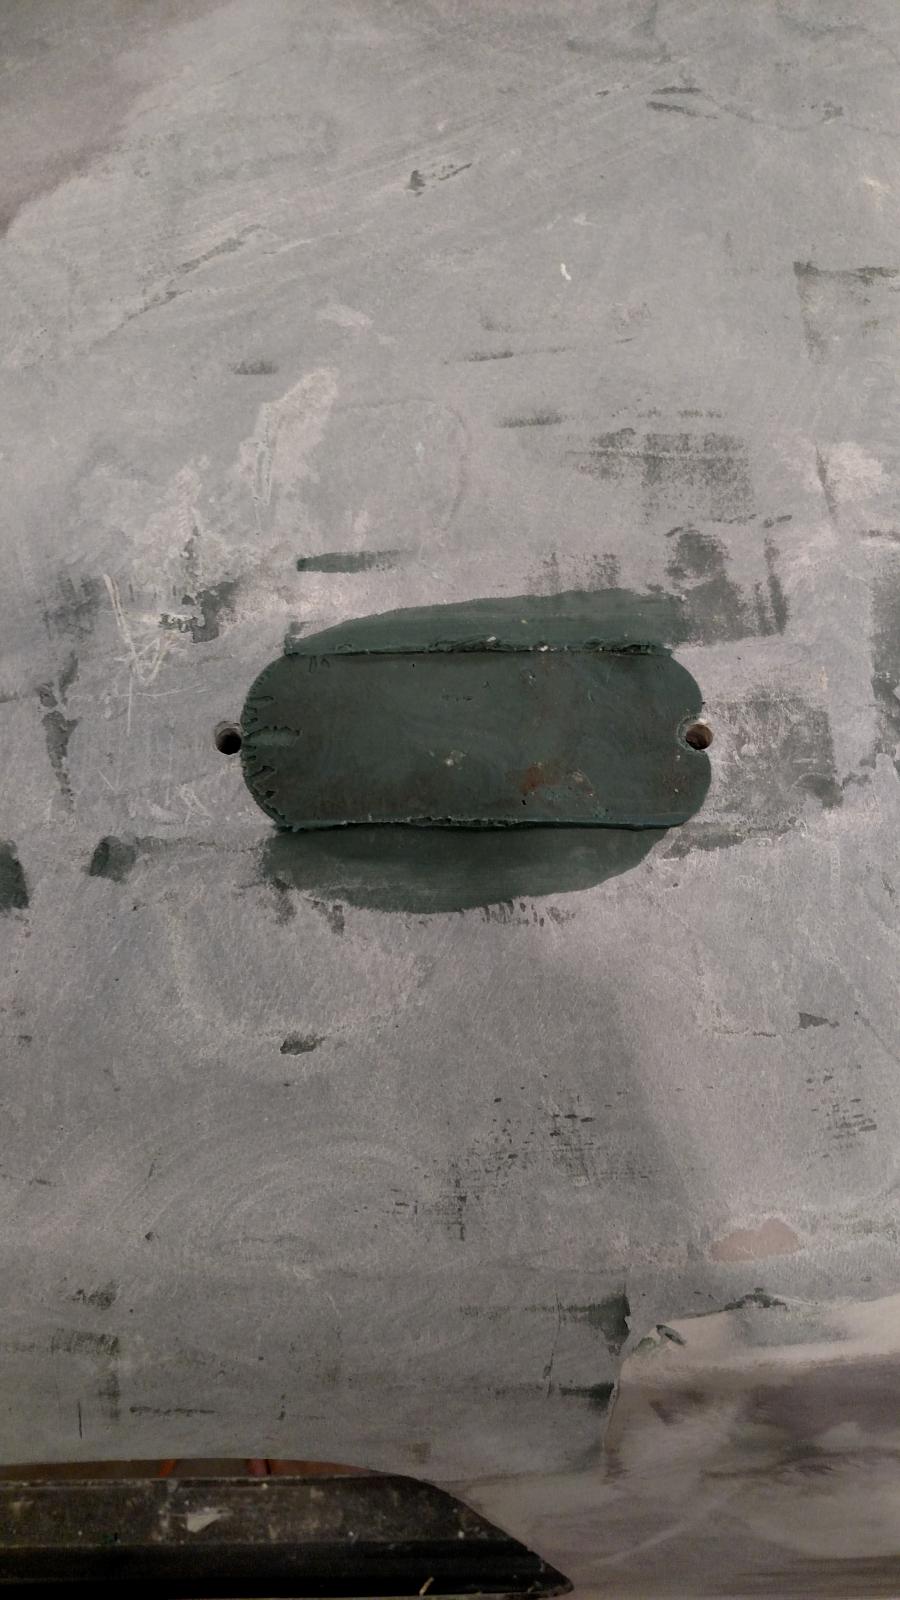
Here's the ugly side of bodywork enjoy the pictures :stuned:


1505706810945-163724454.jpg

1505706847196-1100978339.jpg

15057068664801446668692.jpg


The last two pictures are of the one that is just about finished

1505707144576114114113.jpg

15057071621961350614012.jpg

  • Like 1
Link to comment
Share on other sites

Good job. I admire the work you are putting into it. Keep it up. Cant do it in fiberglass like you are but can do it in wood for the house. I get a lot of satisfaction out of that, just as you must with the project.

Edited by dripley
Link to comment
Share on other sites

Looking real good. :thumb1:. Can't wait to see it back on the truck.  Looks like you are in the down hill stretch to the finish. 


Want to come to Florida for a few weeks?  We have a brand spankin new 32 foot hull mold that needs finishing.  :wink:. You should try tooling out tooling gelcoat.  It's like sanding ice. Hard as a rock.


L8tr

D

Link to comment
Share on other sites

×
×
  • Create New...