

JOHNFAK
Unpaid Member
-
Joined
-
Last visited
Everything posted by JOHNFAK
-
Added new vacuum oil to the vacuum pump prior as it was low. You mean try and pull vacuum against guages with guages shut off - and see if it drops also ? Yeah the high prssure was really hot out of the compressor to teh condensor. But obviously as you said its with static air and I never bothered to see how hot it gets anyway with freon ....... but was quite hot to touch ... would have to guess 200 F like an oil pan
-
Mike you got the kit# for the seals. ? Looking at this worst case. http://www.amazon.com/AGPtek%C2%AE-Portable-Refrigerant-Detector-sensitivity/dp/B0088NW14O/ref=cm_cr_arp_d_product_sims?ie=UTF8 Cant charge with nitrogen - my compressor is a cheapy that barely will push 100PSI with any volume. Worst case Ill fill up with r134a and uv dye and drive for 24 horus and try and detect. Or the leak detector. Just dont want to start replacing parts to find out real answer. most are < 2.5 years old.
-
Which 5" resonator ....... and how much difference did it make Yeah I have 5" stack right behind cab. Its loud ........ but not as bad as others I've seen. Just turn the music up or step on the accelator to get the twins spooling. I do have a vibration though ....... could be my drive shaft though it looks pretty good ........ really think its my 5" piping .......at certain speeds
-
So its been winter here, and during this period my wife backed into front of my truck. Quite a lot of damage to hers, almost not a scratch on mine. However summer is here an I go to put on AC and nada. So obvious thought is she damaged the AC condensor at front. I black light everything - cant see anything from the previous dye..... might be too old. I vacuum everything down. It goes from 28HG to around 25HG in around 4 hours. So must have a leak. So then I primed with compressed air to 100psi through high with system open (means both sides at 100). Couldn't hear any leaks. Sprayed with soapy water - that didn't do anything except make a mess of soapy water. So I added some UV dye ...... and with the system still at 100 I started truck to try and get compressor to cycle and move some dye around and maybe see a leak. Nothing ......(AC was cycling a few days back - just real often and not very cold). So right now just a mess of dye, soapy water and still no idea of how to track down leak. Surely there has to be a better way ....... ideas ?? *Side Note* When I started truck with 100psi in system the line between compressor and condensor got really hot. Obiously I never touch it under normal operation ....... so not sure how hot it gets ...... but seemed excessive.
-
Not quite following. The seal is seated/pressed. The valve rides inbetween - there is oil on the top of teh valve .... but it gets wiped "off" 99% by the seal as it drives down into the cylinder.
-
Who knows - PA truck originally. Could have been some moisture left in during some maintenance or work. most of the rest of it is obviously in areas that have no moving parts or oil contact .... directly behind the valve cover seal etc
-
Thanks guys. The link on valve overlap is from ryan ( ISX ). The video is from someone else that I found that just showed taking off the valve stem seals themselves. Its really not too bad ....... just need to understand TDC for each firing combo so you dont drop a valve. The rest is just how long it takes working by yourself. Up and down for tools (and breaks) etc. Probably for me it I hadn't hit 2 snags - a full days job. Basically 8-10 hours about 2x-3x the rate it takes me to do injectors (around 3-4hours). Im definately not quick. Hardest part is #5 and #6 cranking down the tool as not much room for a 1/2" drive socket and wrench socket (used an open end wrench) and then working on those collets and being very careful not to let fall down a pushrod hole or injector hole (had a cloth here in injector bore). Now I have to retap the injector hold down on #3 and finish #3 and #4. And button her back up and check lash. Tonight or tomorrow.
-
Went and got a 6mm 1.0 tap ....... too tired after today and late night with Kansas Basketball to continue - will hopefully finish after work tomorrow. So heres some details. I have a constant smoke at idle with this truck. Its not injectors and engine appears to be healthy on compression test as well as blowby. I had thought previously of valve steam seal but many people/threads had told me that its inlikely due to being under positive pressure on startup ....... so I had ignored till now. I was looking at my stem seals and noticed this on the MOST of teh exhaust seals. So time for it all to come off. TOOLS NEEDED 18mm for spring compression tool (cummins performance parts) 8mm for injector holddown 10mm for valve cover and rockers 19mm or 3/4 for injection lines pick magnet for picking up collets around stem good flashlight barring tool Remove valve cover. Remove lines. Bar engine over until #6 is in valve overlap (exhaust closes and intake opens). #6 + #1 are at TDC. Remove rockers. Remove injector crossover tube Remove injector Stick an allen key/screwdriver gently through injector hole and confirm piston at top (for peace of mind). Install compression tool onto injector holddown holes. Crank down GENTLY. Stop when starts to bind. Remove collets around valve stem seal very carefully using pick magent and put aside. Remove springs and retainer Remove valve stem seal using pliers as gently as you can. There is a video here. After this put springs back and compress back down and carefully put collets back on and uncompress to lock all four springs. TIP here is to pull on valve stem up to make sure fully up as it will want to fall down a 1/8th inch and cant get collets in. After all this is done, repeat down the firing order and bar engine over to get 2+5 at TDC, then 4+3. Once that is all done ....... reinstall all rockers. Bar engine completely over looking for any issues. Then set/check valves as per normal. Other Notes. 1) I found a camera with a 6mm video cable extension helped me bar engine over from underneath and I could see when piston was comming to TDC. Very accurate and helped working by myself. 2) I hit an issue at #2 where injector holdown hole had rust from moisture at bottom. So when I tried to thread the tool into it I couldnt. I tried to use a shorter bolt that was shorter and I think slighlty off in size. It pulled out and now I have the rethread the hole to ensure I can get a good clean hold for my tool without creating more damage/issues. 3) I couldnt think of how to measure valve stem guide issues - I just pushed side to side. It felt farily normal (low play) and consistent bewtween valaves -but I dont know Id say if you can change injectors and set valves you can change springs. Id give those a difficulty of 5/10. Springs around and 8/10 just due to time consuming and having to take so much care with the collets and working with TDS and back 2 pistons are hard etc.
-
Hit a snag. Are the injectors tor hold down bolts SAE 1/4" 28NF Or 6mm 1.0 threads Have to tap hole
-
Ok. I'll do a mini writeup with links info and pics but let me know if anything you want before she gets buttoned back up tonight.
-
Half way through replacing my valve stem seals. Let me know if anyone wants me to grab pics or wants any info.
-
Guess what I should have said is there is only so much you can do with a tuner. The i quad makes you feel like your doing mire ...... but it's nothing compared to twins a cam and some bigger sticks. Fuel and air and timing injection event. But unless your trying to get the extra 10% out of truck ...... and your happy to play with tunes again again snd again ..... have access to a track or dyno ..... for me it got old. Each to own ..... i get most people have more patience than me. Either way they are all good ...... Crap I even luke the power puck for the $$! Hard to beat.
-
Possibly ....... more details ;)
-
I quad was neat for its extra functionality and slightly more agressive tunes but after 3 months or so it's gets old. Juice CTS was my fave all around.
-
Good tip/feedback.
-
Shackle Flip did barely anything for me. Control arms - not much. Id put all my money into dealing with the rear. Hence the 3rd gen leafs/hanger. Ever ridden in a 3rd gen compared with a 24v ? Not expensive if you can weld good Danny (DOR) I believe is a good guy. He makes a good product. Bt he just dropped the ball too many times and you can NEVER get a hold of him for missing/wrong parts. Im talking MONTHS to get stuff resolved.
-
Honestly If I had it over again I wouldn't have spent the money. I dont feel my truck drives that much better. Of course Carli tell you you need there rear leafs. The ONLY guy that I know that ran them on a 24v said the same thing - couldn't tell that much difference. I cant really tell you what made the most difference. I will tell you I feel comfortable hitting a speed bump at 40mph ..... but I generally dont do that .... so The worst issue is bumpsteer as well as trying to control the smaller bumps - you cant if the suspensiondoesnt travel - like hitting a pothole. Thats almost completely in the tires - people dont tell you that though Long and short. If I could do over this is what I would do. Thuren 2"/3" Coils with his overland shocks or maybe some 7100's. 3rd Gen leaf/hanger conversion (lengthen the leafs) and move to a 3rd gen setup. Look to remove overloads if not towing. Steering Linkage Upgrade (OEM) Good Track Bar - probably DOR - he undoubtedly makes the best stuff - but I wont deal with him again. Steering Brace (DOR) BEST TIRES I COULD AFFORD Would have ridden better and saved myself some coin In all honesty I think the offroad/suspension stuff is hyped up. Now Im talking for regular people. If you do want to launch your truck over dunes and large ruts - then yeah I cant imagine what a properly tuned 3.0 or higher setup would do - probably insane and well worth it. But for a street truck - its just meh .....
-
DOR Rear Shackle Flip DOR Fully Adjustable Extreme bent Long Arms DOR Heavy Duty Steering Kit Bolt In DOR Steering Brace Carli 2.5 Pintop Shocks Carli 3" Coils Carli Stabilizer Thuren DYSKO front bumpstops BlueTop Quick Turn Steering rebuilt box Maaxlink Endlinks think thats about it .....
-
DOR longarms require the arm mount to be cut and removed. They provide you a new brace that ties into transfercase. This is what I run. Save your $$. I have $5k in suspension ....... and its just not worth it.
-
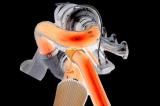
That was a pic of an injector hole. ^^ I couldnt get one of the cylinder as it was too dark and grainy. Much Much worse. Just an FYI of what I found. Like I said your model might be better - it would be nice to find one that worked - but for me it was $20 spent for nothing.
-
There's a very slight bend in the bar .... at least in most aftermarket ones been a while since I had oem. Make sure the bend on the steering link is rotated tp give max clearance. I wouldn't worry about a little rub..... but yours does seem a little more than that.
-
Driveshaftspecialist.com http://driveshaftspecialist.com/Aluminum%20html/TruckAluminum.html Or local custom ;)
-
It was a link to a $200 HT3B turbo for your new Primary Cant find it now ........ some reason the mobile website truncates the link on posting.
-
this HTML class. Value is http://sacramento.cr
-
Subd.
