Leaderboard
-
in Posts
- All areas
- Marker
- Events
- Event Comments
- Files
- File Comments
- File Reviews
- Images
- Image Comments
- Image Reviews
- Albums
- Album Comments
- Album Reviews
- Blog Entries
- Blog Comments
- Topics
- Posts
- Cummins Articles
- Cummins Article Comments
- Cummins Article Reviews
- Vendors
- Vendor Comments
- Vendor Reviews
- Ads
- Ad Comments
- Ad Reviews
- Policies
- Policy Comments
-
Month
-
All time
December 14 2009 - August 2 2025
-
Year
August 2 2024 - August 2 2025
-
Month
July 2 2025 - August 2 2025
-
Week
July 26 2025 - August 2 2025
-
Today
August 2 2025
- Custom Date
-
All time
-
Tractorman
Yearly Subscription11Points1,461Posts -
Sycostang67
Monthly Subscription4Points596Posts -
DunnerCummins24
Monthly Subscription3Points26Posts -
LiveOak
Yearly Subscription2Points867Posts
Popular Content
Showing content with the highest reputation since 07/02/2025 in Posts
-
Adding inline power steering filter with system flush update
On September 6, 2016, I wrote the article "Adding inline power steering filter with system flush" and posted it in 24 valve 2ed generation/Axles, Suspension & Brakes. This is the follow up to that article. Update...7/25/2025 It has been 8years 9months and 44,888 miles since I installed the Magnefine filter and flushed the power steering system, so it was time to flush the power steering fluid and replace the filter again. I used an oil syringe fluid evacuator pump this time to remove and refill the fluid at the power steering pump. The picture below shows the first time the fluid was removed from the system It took 5 remove, refill, and run engine for 4secounds to get the fluid to this clear color, about 2qts. Here is the filter cut open. It looks like the filter could last 60,000+ miles before changing. There was just a fine film on the magnet.2 points
-
Tracing disappearing oil
2 pointsObserving soot at the end of the tailpipe is normal for this era of truck, especially if you have larger than stock injectors. Disconnect the compressor discharge plumbing from the turbo and inspect for an oily mess. Then, disconnect the exhaust band on the exhaust side and inspect for the same. It is possible. The hone pattern intentionally put into the cylinder walls is used as a mild abrasive to condition the outer wear surface of the piston rings for the first 1,000 miles or so of driving. During this period of time, the best mating of the rings to the cylinder wall will occur, resulting in the least oil consumption and least engine blow-by. Using a slippery synthetic oil during break-in reduces the effectiveness of the abrasive characteristics of honing the cylinder walls - it will have a more likely effect of polishing the piston rings and the cylinder walls, resulting in more oil consumption and more engine blow-by. Try performing the oil cap rattle test for the poor man's method of checking engine blow-by. John2 points
-
Flashing WTS light
2 pointsJust remember just one wire pinched in behind part, bolt, or bracket could do it. I had one where the PCM burned up because one wire was rubbing on the trans dipstick tube and fried the voltage regulator.2 points
-
Flashing WTS light
2 pointsThey listed a ton of possible causes for failure to check. Basically every sensor on the truck, damage to the harness, TSB’s, faulty grounds, etc. The truck ran perfectly and has for the last ten years when I pulled into the garage so I had no clue what to even look at. I did check some of the harness and found one tiny hole in a wire possibly from a probe, it wasn’t close to touching anything but I wrapped it up anyway. If I have time this weekend I plan to go through the whole thing and check all the grounds and fuses.2 points
-
Strap to U-bolt conversion
2 pointsI ordered a front drive shaft from Torque King today. The sell strap and bolt kits for this application. https://torqueking.com/product/40709/qu40709-universal-joint-strap-and-bolt-kit-for-spicer-1350-or-1410-yokes/?searchid=1393311&search_query=driveshaft+strap+and+bolt+kit2 points
-
Strap to U-bolt conversion
2 pointsThe only thing I can suggest is contacting https://idahodrivetrain.com/ . You should be able to get information from them,2 points
-
Mysterious Knock on VP44 Truck – Need Help! No one can figure this out!
So far I have found nothing! It's not difficult, just time consuming. I have this old power supply that I'm using to help load test the wires! Good to know! Im a cheap *** and prefer to struggle my way through this LOL.2 points
-
Death wobble for the 1st time ever in a 2nd Gen Cummins
That is good news. I didn't catch this on my first read. That would definitely be a contributor to "death wobble". John1 point
-
Tracing disappearing oil
1 point:) I actually ordered blue silicone... 22mm I.D. as well as painted several metal components blue. After I got the hose off, it appeared to be silicone jacketed with something rubber, orange interior.... Reman RotoMaster HX35w should be delivered on Friday. Should be back up and running by end of day Saturday.... then the testing starts all over with hopefully NO oil consumption.1 point
-
Problem with idle cut off
1 pointHello, I took the vehicle, and so far, no problems have recurred. This is a crazy story... I'm so happy that my vehicle is working normally again.... Miracle.... Thank you very much for your help.....1 point
-
Flashing WTS light
1 point
-
Flashing WTS light
1 pointGot both turbos removed today and will be taking them in to get resealed while I figure out new drain lines. While I was in there I cleaned all the grounds and inspected the harness on the passenger side of the engine compartment. They all looked good except the one on the PCM had a little touch of green on the wire so I will most likely replace that one. I’m also unplugging and plugging all the connections as well. Would it be a good idea to smear some dielectric grease on the grounds? I did check a few on the other side before I ran out of steam. I off work this week so I will get out there again later.1 point
-
Tracing disappearing oil
1 pointI just uploaded the service manual for the HX35/40 Holset turbo... I used it for likely trouble shooting my turbo... though ultimately I couldn't get my turbo apart to look at the one item that I questioned... didn't want to damage mine which is going back as a CORE... I hate it... otherwise it is still quite tight for a 450k mile turbo... I think my failure was Piston Ring Seal, Turbine (number 13 on the schematic). Guessing that the soot from the break in period is what got me... Replacing my turbo with this one from Thoroughbred diesel. Was the best price/quality I could find. https://www.thoroughbreddiesel.com/h8350108r/ Some additional information, it definitely was heater hose 7/8" OR 22 mm I.D. I actually ordered a foot from amazon because I wanted to replace the oily section... not sure why it was oily but I took it ALL out cleaned it up and painting it all flat black.1 point
-
Tracing disappearing oil
1 point
-
Tracing disappearing oil
1 pointSOOOOO I am now 98% sure that it IS the turbo... I can rub a finger inside of the exhaust housing and VERY little carbon rubs off... but rub a finger in the tail housing and a noxious substance covers my finger and is hard to get off. Problem now is I have to put my old turbo back onto the truck, the A-Premium turbo can't be clocked far enough left because they have a rigid bracket NOT on the turbo housing holding it.. that bracket can not be moved. Last thing, while I have the whole turbo out, what do I need to order for the drain, it looks like just a piece of rubber hose... but it is oily so I'm replacing it. Suggestions on where to get a good reman turbo? right now I'm looking at Thoroughbred Diesel, they have a ROTOMASTER reman for $545 with a core, only problem is a 5 day lead time to get it.1 point
-
Tracing disappearing oil
1 pointSadly if it's not leaking on the ground it leaking internally and being burnt as fuel. Vacuum pump would leak on the ground Front / rear crank seal would leak on theme ground Tappet cover would leak on the ground. Valve cover would leak on the ground. Valve seals yup it would be burnt as fuel and only be seen after the engine sat all night and Valve stems would be wet with engine oil. Piston rings yup could burn the oil as fuel too but blow by would be noticed typically. There is one case here from @jlwelding that had a cracked piston that past blow by test. Only proper way to test is a compression test. Lower compression would point that out.1 point
-
NEED ASSISTANCE IMMEDIATELY AND ONGOING UNTIL RESOLVED
https://www.facebook.com/share/p/16ordx3xH9/ Yeah i returned to Facebook and started posting to share with my local community.1 point
-
Left turn radius much less than right turn
About to be in business much better than before.. got the drag link in and picture before hand, I gained a bit closer to center on the pitman arm. The old arm was also bent! Posting pics now Left is old one1 point
-
NEED ASSISTANCE IMMEDIATELY AND ONGOING UNTIL RESOLVED
Mark iand Hachi (his dog) is in my basement bedroom. We are all working together to get the mess cleaned up. Difficult at best working with a broken set of sockets and wrenches. I'll be doing videos soon and posting more to YouTube and Tiktok.1 point
-
Tracing disappearing oil
1 pointno movement in either direction on the currently installed turbo... I mean for 450k miles it is TIGHT!!!! but I also don't do stupid stuff like over boosting.. I'll take the "new" turbo out and see if my brain is just playing with my emotions.1 point
-
Tracing disappearing oil
1 pointIt doesn't look like there is any oil in the turbo section. You might pull the turbo off quickly. Now, inspect the ports on the turbo mount for oil in the manifold runners. If you can plug the oil supply temporarily, you could start the engine and check to see if any oil or smoke comes from the manifold. Optimal would be to pull the manifold off and look into each port for oil residue. You could use a bit of cardboard to hold in front of the ports and check for oil splatter out of each port. Don't rev the engine! Oh yeah, grab a die and chase those studs, and then buy a few stainless steel nuts, at least they will not rust, and make sure to anti-seize those good!1 point
-
2000 Cummins Surge/Dead Pedal
1 pointThanks for both your responses! Couldn’t trust it on our most recent camping trip so we ended up renting a tow behind and pulled it with my 21 Ram. I did use a multimeter when installing the APPS. I’ve had time lately to drive the truck more with the voltmeter rigged up and the trucks been driving great… zero issues. Was thinking and not sure if I’m on to something here. Was wondering what’s different with the meter hooked up and was thinking two things. Maybe a connector issue at the plug from the APPS and with the back probe in its making a difference? I think number 2 is more likely, now with the meter hooked up I’m giving the apps a ground, from my understanding the sensor grounds through the ECM? Wondering if I run a ground wire from the ECM to the battery or known good ground and see what happens? Today I took it for a quick boot with the meter unplugged but still drove fine but will need to do this more to see if there is a difference.1 point
-
Mysterious Knock on VP44 Truck – Need Help! No one can figure this out!
Sure did! Resistance tested and load tested every thing. No issues found. No crushed wires, no cut/damaged anything. The mystery continues!1 point
-
Mysterious Knock on VP44 Truck – Need Help! No one can figure this out!
Small update: Been real busy at work and general life events! Sorry! I got the Tesa tape in the mail today and finally had a minute to re-wrap my harness. I've never worked with this stuff before. It goes on easy and looks so professional, and apparently holds up well under engine heat. Only time will tell if that's actually true though! Look at all that old grimey, brittle and sticky plastic loom. Feels good to get that off of there!1 point
-
Tracing disappearing oil
1 pointI may do that with the old one.... just afraid to do it when I "need" the truck up and running.1 point
-
Flashing WTS light
1 pointREMEMBER do NOT remove all the paint from a ground location. With both of us here in Idaho salt off the highway will make the matel rust and fail for the ground. Make all bare metal is painted before reattach the ground. Really sucks that you find the wire just hanging from rusted chunk of metal.1 point
-
Flashing WTS light
1 pointI did find one loose ground wire that was covered in crud, cleaned and tightened to no avail. I need to pull my big turbo off to get it resealed and remove my inter cooler and piping to clean them out so I may as well start that and get a better look at the rest of the harness while I’m at it.1 point
-
Tracing disappearing oil
1 pointValve guides and valve seals can leak oil some but typical not much because normal both exhaust and intake are under pressure. Like Beast long run downhill like my last trip to Heaven's Gate then I see the blue oil smoke as I throttle up from the bottom of the grade. Typically that how valve guides oil leak is seen. No blow by issues but leak oil past at zero pressure moments like running downhills.1 point
-
Death wobble for the 1st time ever in a 2nd Gen Cummins
I would wait for him to drive the truck for at least a month plus a few hundred miles before I would consider it repaired. Many people who experienced death wobble have posted the repairs here on this site, only to experience the death wobble again weeks, or even months later. John1 point
-
Death wobble for the 1st time ever in a 2nd Gen Cummins
I got my Dodge into Les Schwab because my friend works there doing alignments. With the lower adjustable control arms set at 19.5" center to center, my caster is at 3.6° positive caster, my toe and camber were right on. We did tighten up the bolts first that hold the adjustable track bar upper mount to the left frame rail. That was loose which caused my death wobble.1 point
-
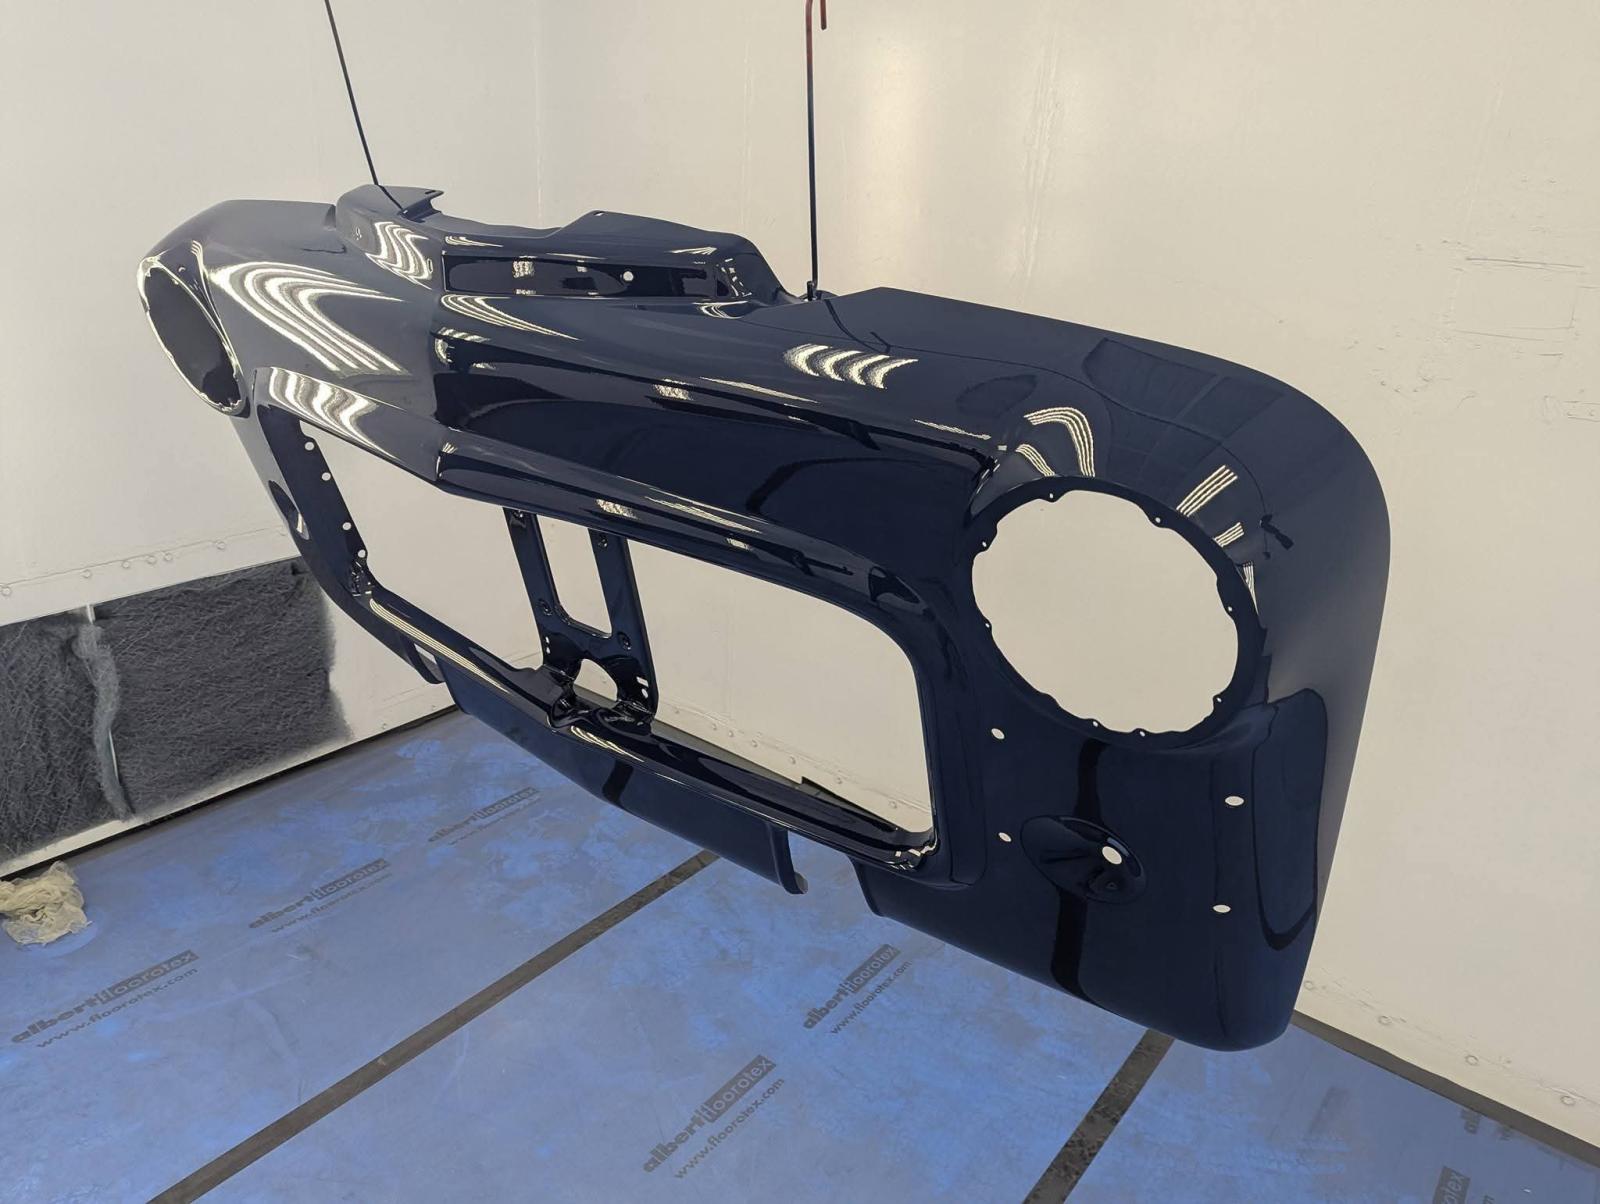
Pilothouse/RAM3500 build
1 pointMain color cab will be a dark blue, accent color of black. Tilt frame for hood will be a dark gun metal as will wheels. Engine Cumins red. Its been a long wait...but now the $$ starts to flow....OUT....1 point
-
Flashing WTS light
1 pointWere there any steps required for testing or repair on your side before the installation of the ECM for the first time? It sounds like there was more internally wrong with the ECM, but I still wonder if there was something in the wiring of the truck that could have created this issue?1 point
-
Death wobble for the 1st time ever in a 2nd Gen Cummins
Same method that I use. I have the engine running as well to allow the power steering to put a maximum amount of force to the linkages. Years ago, I set the caster to 4 1/2° positive. It was the best single steering performance improvement on my truck. John1 point
-
Flashing WTS light
1 pointCould you bring that over here so I can review what is going on? I'd love to help I need to know what they found to help you out. Stupid HOA rules.1 point
-
Crankcase oil volumes
1 pointGeno's sells the replacement dipsticks if needed. 2nd Gen Cummins have been 11 quarts for a long time. Its only when you switch to 3rd Gen the 12 quart oil system came to being.1 point
-
Mysterious Knock on VP44 Truck – Need Help! No one can figure this out!
Auto Computer Specialist does full wiring repairs and testing. Just a tidbit to aid in the adventure.1 point
-
2000 Cummins Surge/Dead Pedal
1 pointMy only problem is this test was designed for home person to test. If you pull the alternator and bench that is done under full load. Either way excessive AC noise will cause... VP44 damage (PSG, P1688 or P1689) ECM damage (P0606 but could be a all hi or lo volt codes of all sensors) PCM damage (P1698 code typically but also code have hi or lo volt code of sensors) AC noise puts a lot of stress on transistors and IC chips. On my truck it made the cruise control to wander +10 or -10 cycling past it's set point of 65 MPH. Either way AC noise pollutes the AC signals from HAL effect sensors like crank sensors or speed sensors like ABS.1 point
-
2000 Cummins Surge/Dead Pedal
1 pointThis is just my opinion here, so do not take this as fact. I have never been real concerned about maintaining a maximum specific AC voltage from the alternator. Nobody ever talks about this when diagnosing problems with vehicles that are not 2nd generation Dodge Cummins trucks. Why would they be an different? I am still running my original Bosch alternator (changed brushes twice, bearings once), but still have original diodes. I have checked for AC voltage at least three times in the last ten years. The readings have never be below .05 volts AC. However, I still am running with my original ECM, PCM, and a second APPS. The original APPS lasted for 289,000 miles until it failed (interestingly, with the same code as yours). The APPS I am now running is a Timbo and it has currently logged about a 113,000 miles. So, I can't say that this is absolutely not your problem, but I don't think that it is. Did you use a mulitmeter to check the idle validation switch activation when you loctited the throttle set screw? John1 point
-
2000 Cummins Surge/Dead Pedal
1 pointThat is a good way to test. Will be waiting to hear back. Also, have you verified that the mechanical set screw for the throttle cable is in good condition and that the throttle cable always returns to the mechanical stop when operating the throttle? John1 point
-
2000 Cummins Surge/Dead Pedal
1 pointSo I rigged up an analog volt meter and ran two wires through the firewall. Ones back probed into the signal wire and the other is from battery ground. I tried to drive the truck Tuesday and couldn’t even get it out of the driveway. So I figured this is a perfect time to test this with the truck acting up. I did also clear the codes. But I drove 35km to work and 35km back with zero issues, truck ran great. I did test it with key on engine off and took the APPS through its range on the voltmeter and it was perfectly steady without hesitation. Now I just have to keep driving it to catch it when it acts up and see what the volt meter does? Also all my AC voltage tests were at first startup so I checked it after driving home with everything off and it was .058vac.1 point
-
2000 Cummins Surge/Dead Pedal
1 pointYou will want to see .05V or less measured at the back of the alternator after the engine reaches operating temperature, no grid heaters operating, and engine at idle. My truck's ac voltage is .03-.04.1 point
-
2000 Cummins Surge/Dead Pedal
1 pointInteresting. I copied mine from my 2002 FSM, however your P0121 description actually seems more related to the symptoms that are occurring. What is the source of your information? John1 point
-
2000 Cummins Surge/Dead Pedal
1 point
-
2000 Cummins Surge/Dead Pedal
1 pointYou could do that - it could confirm what your scanner is saying. Also, you mentioned that you are getting the P0121 code. P0121 (M) Accelerator Position Sensor (APPS) Signal Voltage Too Low APPS voltage input below the minimum acceptable voltage. You could check this voltage (5 volts supply) at the same time to see if it is fluctuating while the symptoms occur. The condition of wiring and wiring connections (both positive and negative) are crucial on these trucks - so, yes, it is possible for this to be the problem. John1 point
-
2000 Cummins Surge/Dead Pedal
1 pointThis doesn't mean that the APPS is faulty - it just means that there is an output signal at idle when there shouldn't be. Need to know where it is coming from. More troubleshooting needed. Since I don't know what your level of skill is with electricity, I will just start with the basics. Let's say you wanted to check the condition of the crossover cable by using a voltage drop test. First, you would need to understand what would be normal for the test results. There are two batteries (wired in parallel) and a starter on your truck. The starter will draw at least 400 amps when cranking. This means that 200 amps will be supplied by each battery. Consequently, when the starter is operating, the positive and negative cable of the driver side battery and the positive (crossover cable) and negative cables of the passenger side battery will be handling 200 amps each. By design there will always be a voltage drop during the starter operation - there has to be, otherwise current would not flow. The maximum allowable voltage drop in a complete positive circuit is generally .5 volts and in a complete negative circuit is generally .2 volts. The positive circuit has a higher allowable voltage drop because there are usually more switches and connection points than in a negative circuit. Voltage drop measurements can be taken at different points with a voltmeter while the circuit is under an electrical load. Voltage drop tests taken without the circuit under an electrical load will show results that are meaningless. So, back to performing a voltage drop test on the crossover cable. This usually works best using two people. One person will be in the cab and will crank the engine as instructed for a specified period of time. Be sure to be safe - truck in neutral / park and park brake set. Remove the fuel pump relay (in the PDC) for the VP44. This will allow the engine to crank continuously without starting. Set your voltmeter to a manual DC voltage scale of two decimals - example: battery shows 12.67 volts DC on the meter. Do not use the floating scale. Place and hold the positive lead onto the passenger side positive post of the battery (the actual post, not the clamp). Place and hold the negative lead onto the eyelet at the other end of the crossover cable. Your meter should read 0 volts. Instruct the other person to crank the engine for 10 seconds (no interruption). A reading of .1 volts or less during engine cranking indicates that the crossover cable is in very good condition. A reading of .7 volts (for example) during engine cranking would indicate that the cable needs to be replaced. This voltage drop test allows you to see the true condition of the crossover cable while over 200 amps are passing through - a real life situation. John1 point
-
2000 Cummins Surge/Dead Pedal
1 pointI didn’t use the starter as load when doing the tests, are you able to explain that? Have you seen many Timbos go bad? All my wiring between APPS and ECM is good. Timbo is maybe just over 2 years old. Thanks for checking that out on yours.1 point
-
2000 Cummins Surge/Dead Pedal
1 pointIt sounds like you have confirmed that a false signal is being generated in the APPS output circuit. It would stand to reason that the engine rpm's would increase if a signal is present. Back to a previous statement of mine that was meant as a question - are you using the starter for a heavy electrical load when performing your voltage drop tests? By the way, my throttle APPS output always showed zero at idle on the OBDLink scanner. John1 point
-
New Life and New Body with issues...
Keep working the issues! I know there are several new sleep apnea options out there that are way less of a PITA than the standard old school options were.1 point
-
Ball joints and Control Arms, Suspension in general
Having replaced the control arms, I definitely suggest buying the whole arm. Also, go ahead and get the bolts if you can't have your truck down. Mine were rusted into the bushing sleeve and were destroyed during the removal process. I would like to get the kind with Currie Johnny Joints (or similar) but can't really justify the cost, even if I built them myself. I used MOOG arms, they seem to be doing well over 50k miles later. Hard to go wrong with Timken. I used the most expensive that NAPA had, and that was 75k miles ago.1 point
-
Ball joints and Control Arms, Suspension in general
I did a set of AC Delco ball joints over 200k miles ago and still running on them at 460k miles and still tight. (Personal opinion below here) The leveling kit does require adjustable control arms being the thrust angle is now wrong. As you level the front axle your changing the caster angle and also as it is lifted the factory track bar is fixed length and pulls the axle to the driver's side. Need adjustable control arms and an adjustable track bar too. Wide tires tend to eat ball joints up pretty quickly being the leverage angle of the wider tires increases the stress on the ball joint hence the quicker failure rate. Sadly, even expensive ball joints will not last with wide tires and/or lift kits. Physics is in control at this point. Doesn't matter what brand of ball joints or axle bearings you use it will fail quicker as long as the leveling kit and wide tires are used. It's the nature of the beast and the only way to fix the problem is to remove them and go back to stock. Yup, I know I'm still trying to get all the stuff pulled off Thor on my 2006 being the previous owner install wide tires and a 2-inch leveling kit and it's eating the front axle up and turning into a mess. No adjustable control arms or track bar so the thrust angle is still screwed up. Eating the tires up and wearing out ball joints and tie rod ends and already dumped $520 of wheel bearing in last summer. What I've done was bought a set of factory steel 17-inch wheels and go back to 265/70 R17 tires and now I got to get time to pull the leveling kit out so it doesn't look like a squatting truck taking a dump. Beast is all stock and everything last forever... Ball joint, tie rod ends, brakes, shocks, brakes, etc. Why do I know this stuff??? I had a 1972 Dodge Power Wagon (Old Blue) before Beast. I actually destroyed the front axle 12 different times with wider tires and lift kits. I only owned the truck for 120k miles and made it into junk in under 5 years. I blew up wheel joints constantly, ate wheel bearings all the time, and had to repack them monthly, steering absolutely sucked. Power steering gear boxes failed all the time. Then the power steering pumps wore out prematurely. I made a promise to my parents and myself that I would never do modifications that would cause this kind of damage. To date, my front axle suspension and steering are still factory tight and drive like a dream single finger at 80 MPH on Beast. All I can say is understand the physics of what you are doing and why and you'll see why the failure rate is higher.1 point
This leaderboard is set to Boise/GMT-06:00