
LorenS
Yearly Subscription
-
Joined
-
Last visited
Everything posted by LorenS
-
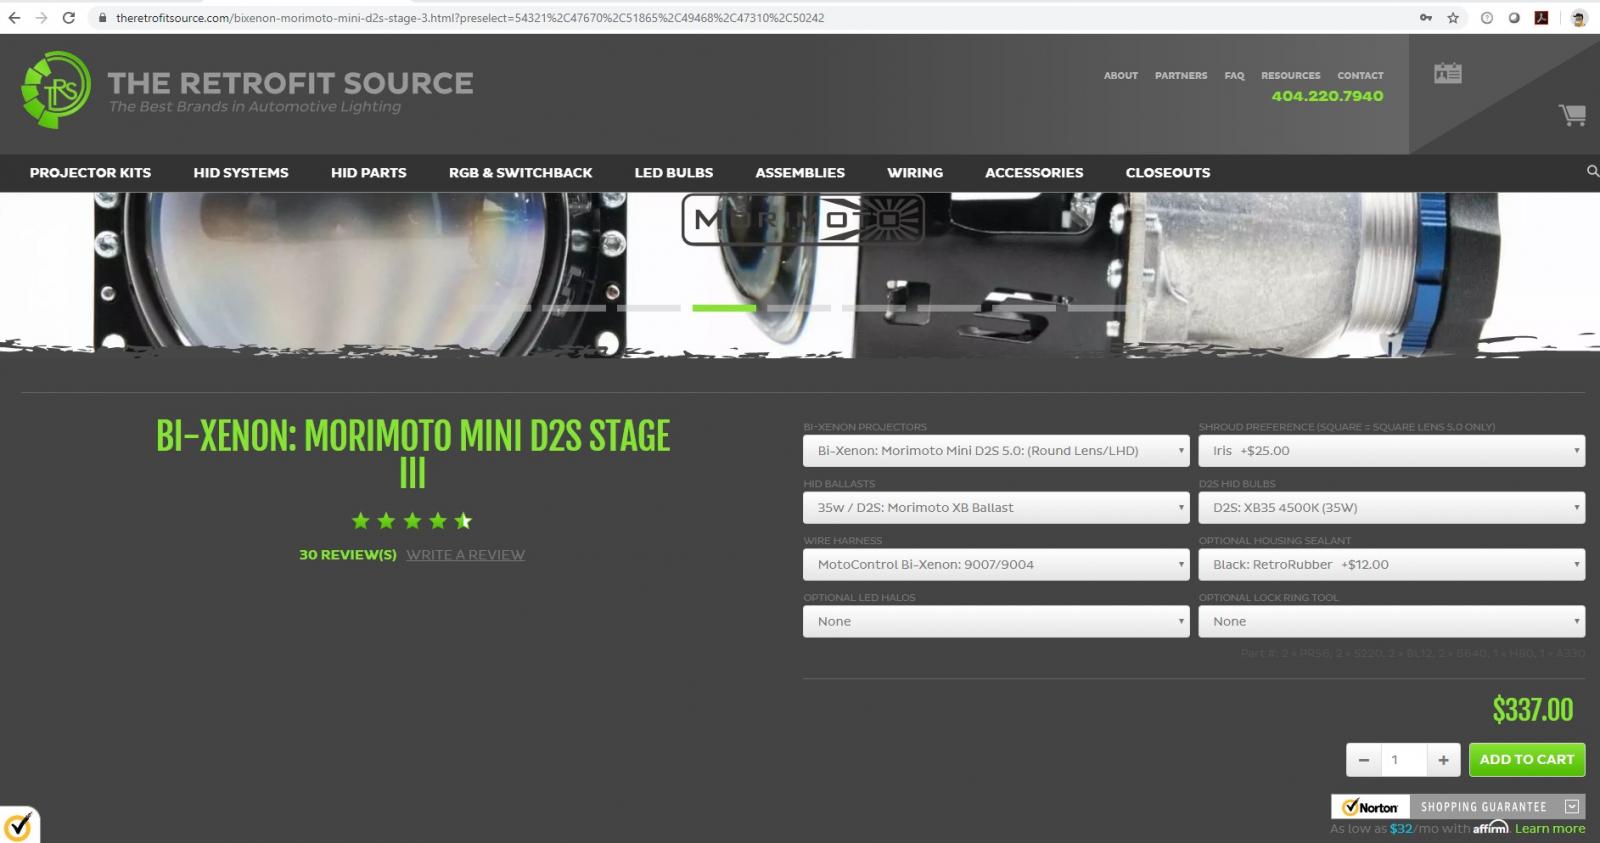
If you already have housings, wish to upgrade to D2S Projectors, own a Dremel, and have time to complete this task, I recommend purchasing the kit shown in the photo (pick your own options for shrouds and bulb color). I bought my "IRIS" shrouds for $7 $15 because they were factory seconds or blemished. I couldn't see how they were blemished, so that was money saved. You may be able to get away with not using the glue; it's WAY more than you need. The seconds aren't listed in the "closeout" section of the website, you have to go to the HID Systems dropdown menu, then click on the Shrouds page. Some shrouds have an option of a "B" grade, some don't. Also, follow the Retrofit Source advice to preheat oven to 275 and "cook" for 7 minutes. They will come apart much easier than the 170 degrees and 30 minutes advice which kicked my butt even after cooking longer and a little hotter. I bought the lockring tool, it's not worth the price. I had to trim off the old bulb mounting plastic (used 100 grit on an orbital sander to go slow and steady), then enlarged the hole with a drum sander on my Dremel.
-
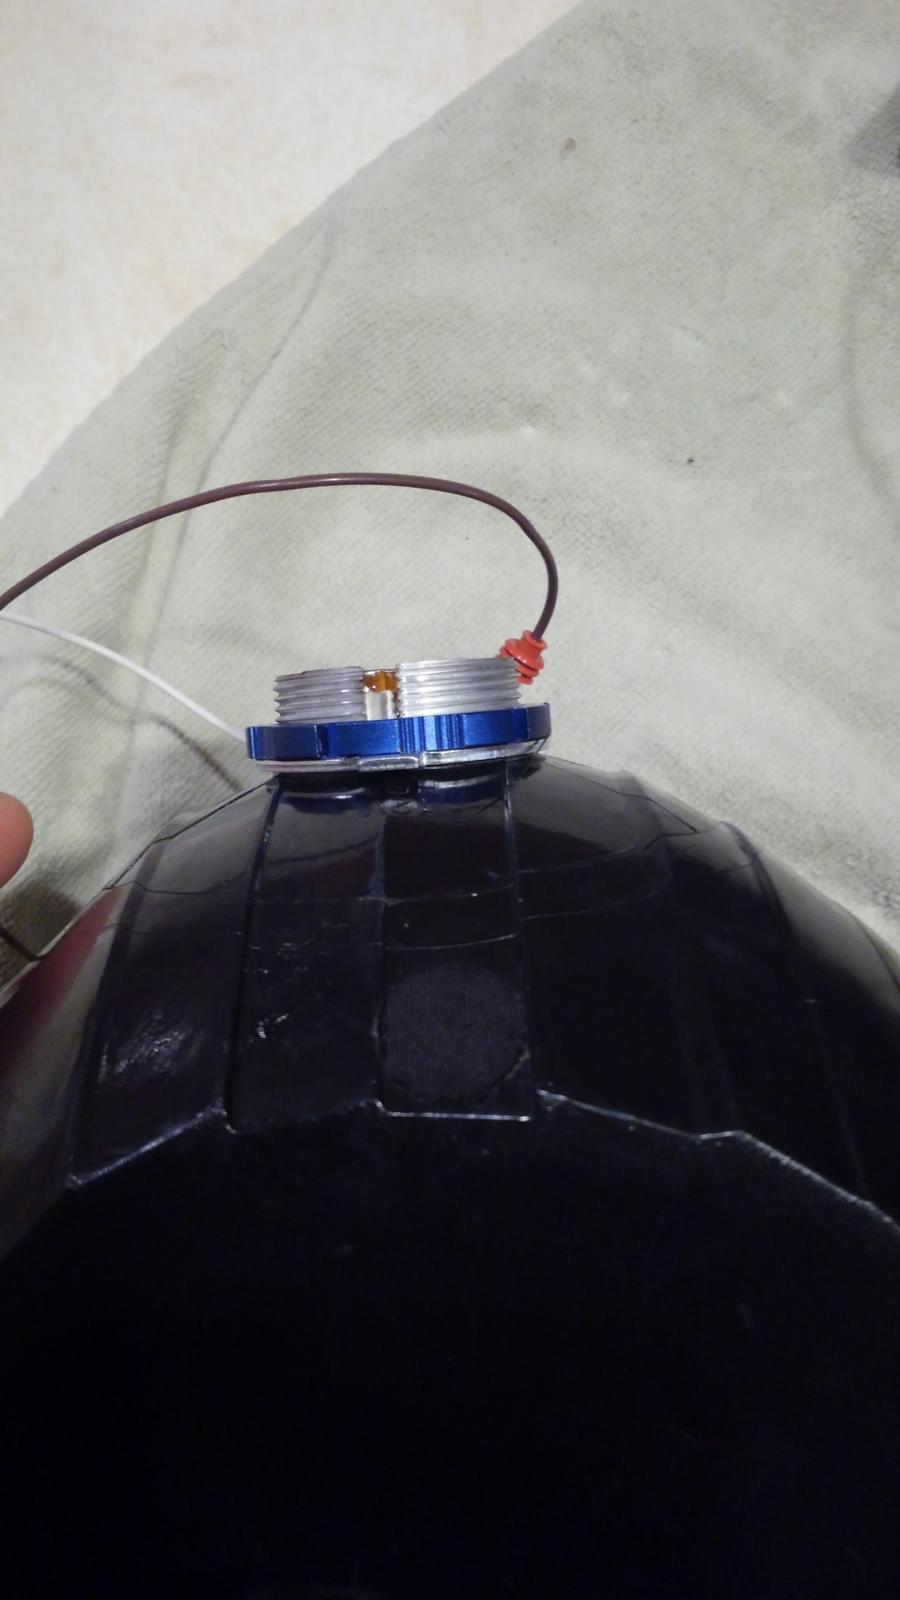
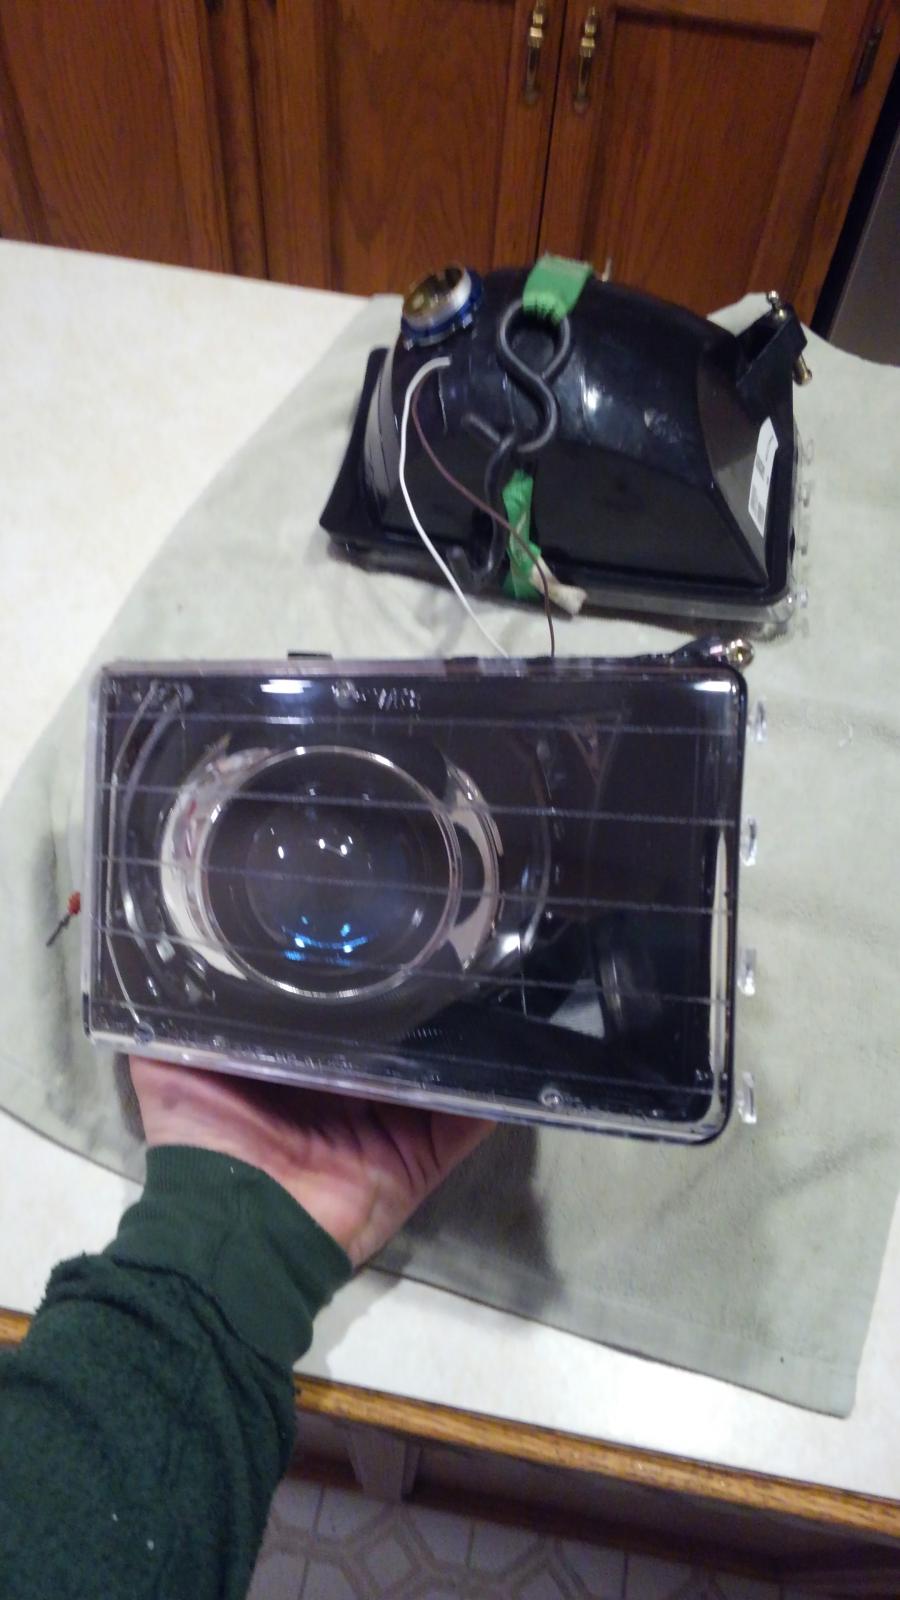
If I had to do it all over again from scratch, that's likely what I'd do! However, let's say an errant rock blasts my housing sometime in the near future, I'm sure not going to buy all new HID hardware. After reading the directions on the fancy box of Morimoto butyl rubber cement, I learned that they recommend preheating the oven to 265 degrees and baking the housings for 7 minutes to soften their glue, then remove from the oven (with gloves!) and gently squeeze and either weigh it down or clamp in some fashion while it cools/hardens. If I ever buy another set of housings, I'll try that "hot and fast" method to separate the lenses. I absolutely butchered the ones I did today trying to fight still-fairly-stiff cement. Once heated as directed, the new cement squeezed out of the housings like cold latex caulk! Some of it was like chewing gum on July asphalt, whoops. BTW, that fancy box says it's enough to do two headlight housings. I can't imagine what size of lights they mean; for a cruise ship? Battleship? Light house?! It's enough to do at least 6 housings, and wouldn't be surprise if it's 10. Side note, the D2S base wouldn't fit through the stock light bulb hole, so I used the Dremel with a fairly coarse drum sander "bit" and wallered it out some. Also, I basically had to completely remove all of the light-bulb socket, down to the housing, so that the threads protruded far enough. I also bought "IRIS" shrouds as they were $7.50 (factory seconds, or returns) and smooth - I was looking for something that belongs on a preacher's Volvo, and had considered scuffing them and spraying with some high temp flat/satin black. However, these shrouds don't really shroud much on our trucks, other than from the front. Looking in from the side you can see a lot of the projector hardware back there. Maybe it's the way the D2S version 5.0 is built compared to version 4, but I don't see it being a big deal to adjust after install. I will have to remove the bulb and likely even the housing from the truck, but there's a tabbed washer under the blue aluminum retaining nut (see photo in above post), and it's easy to hold that tab in position while putting final torque on the retaining nut. The huge silicone "grommet" that goes between the projector and the housing (inside the housing) does a pretty good job of keeping things from moving unless you want them to, and serves as a bit of a lock washer. I don't believe a lot of torque on the retaining nut will be needed to keep the projector from vibrating out of position. Hopefully I can get these bad boys on the truck tomorrow at lunch or after work. EDIT: I added two photos showing the passenger side D2S which needs to be rotated some, and the stock headlight. The photo makes the stocker seam respectable - it is not.
-
I can hearby declare that trying to separate ANZO housings using the oven at 170 degrees is a fool's errand. The glue doesn't want to soften much, and it's recessed just enough to make it nearly impossible to separate with a putty knife. They're again in the oven reheating and if this go-round fails my next option is the Dremel... Edit: I cranked up the oven to 175 as measured by my trustworthy digital thermometer and let them go about thirty more minutes. It was still a bit of a fight. My oven is a convection unit. I found it worked easiest to start on the short side that would be towards the outside of the truck, then once I got some separation I put a shim in there to put tension on the glue and then put it back in the oven while I did the same to the other light. From there it wasn't too bad.
-
I'm not yet sure. One of my stock type housings has a crack at the bottom, though hasn't let in any water. The only parts of the HID system that is "leftover" is the two bulbs. Probably just set them on the shelf or ship them to the guy from another thread that's got a leaking set but needs to save up to buy new ones.
-
As usual, I should've listened to Mopar1973Man and Me78569 from the beginning. So, today I reinstalled the old halogens and tomorrow plan to start installation of my D2S projectors. $142 for new ANZO housings $160 for the Morimoto 9007/9004 kit to put HIDs in housings that aren't designed for them (included brain boxes, ignitors, etc.) $227 for the Morimoto D2S projectors, bulbs, some overpriced glue, and the trim ring gizmos So, $529 and I still have to do the work! I suggest just buying the right thing like Mike and hdpwipmonkey did.
-
Does this mean you get an "extra" set of bulbs throwing light when the brights are on? Having seen what Mike's D2S setup does for light, do you think your setup on high beams would throw better/more light than the larger D2S projectors? I imagine it'd draw more power on high beam operation than the D2S setup, but I imagine most folks wouldn't care about that. Tomorrow before the Super Bowl I plan to throw my single-bulb housings in the oven and separate the housings, hopefully install the projectors, too. As usual, should've just taken your advice from the very beginning!
-
@hdpwipmonkey thanks for sharing, get well!
-
Regarding cost of oil, in my travels to northern Iowa and Minnesota I have found T6 to occasionally be on sale. Coupled with the Shell $7/gallon rebate they ran last year I got T6 for $2.25 per quart when purchased in 10 qt. jugs! Coupled with the Donaldson filter my oil analysis (including TBN) came back great at 10k miles, so I stick to that - it's also about the time I need to add more oil, so I change it. I put my oil sampling port on the filter housing so that may affect the grading of my engine's health, but that is THE oil going to my engine! I do about 2,400 miles per month.
-
Is it tomorrow yet? Looking forward to seeing your setup! I expected my D2S shipment by now, kinda bummed.
-
I'm talking about an interstate exit ramp in an industrial area! I sucked air and still had 6 gallons in the tank. Somehow coasted to the diesel pump, had fun cracking injector lines so it'd start. The intake sock is gone. What I'm talking about is a super fine, blue-green material, fine like silk, that was glued to the bottom of the "sump" portion of the fuel basket; even from the factory I don't believe it's tight to the bottom, but held up 1/4 to 3/8" by the basket 'stand off'; I could be wrong about that. I wish I'd taken photos! Can't find a photo or video online showing what I mean. Good idea.
-
The screen that was on the suction tube I left off, and am running a frame mounted coarse filter to catch big chunks. However, there was a super fine screen/mesh on the very bottom of the fuel basket gizmo. So fine I would expect that its purpose was to allow diesel into the basket, but too fine to let in water. Now that all fuel in the basket can run out the bottom and into the tank, if I go downhill the fuel all runs to the front of the tank and away from the fuel pickup; there isn't a small reserve left in the basket! Maybe I can mostly close off that opening with some very soft aluminum rivets and sheet material.
-
When I took my cage out to clean, the super fine mesh/strainer on the bottom of the cage came off, so now I REALLY have to make sure I have over a 1/4 tank of fuel so I don't suck air. A replacement cage at RockAuto is $343 (Spectra SP7062M). Anyone have experience with this and how to repair? I don't know what kind of screen that is, or what glue would hold up. I didn't think about it at the time, but it now seems weird that the draw straw with built-in return port just sprays the fuel back into the top of the tank instead of providing a means of returning it down low in the tank. I bet my fuel is chock full of air when I get down below 1/2 tank!
-
Thanks, Dripley, guess I'll just take off the hose!
-
I recently had my tank down to clean/install draw straw. There was a vent-line looking connection that was plugged with crap, but nothing on the end of the line; I put a new piece of 5/16" fuel hose on it and made it into a loop to at least slow ingress of crap as the tank breathes. Is there a special vent that's supposed to be there (like with a roll-over shutoff gizmo), or just a standard breather? Or....? Lots of things missing on my truck, including the puke bottle! Didn't even know that was a thing until I saw MoparMan's PVC pipe trick.
-
@Mopar1973Man is this the NAPA unit you use? The photo seems to be EXACTLY the same as the AC Delco Professional unit at RockAuto. Based on your recommendation, it's what I'm going to buy if I have the right one. https://www.napaonline.com/en/p/NCZ2724229?partTypeName=Track+Bar+-+Front+Susp&keywordInput=track+bar NCP2724229 is the part number.
-
Is the passenger side convex? "Objects in mirror..." and all that? The thing I hate most about the aftermarket Dodge-style flip up mirrors is that the passenger side is flat. It's just about useless, and the goofy, corner convex mirror is too small and positioned in the wrong spot! I added a stick-on convex mirror and it helps, but sure do miss the heated mirror function when I forget to put Wal-mart bags on my mirrors when a storm comes. I actually like the stick on mirror performance enough that I plan to take it off and replace with the biggest convex mirror I can find. That flat mirror is useless. The 'sport' mirrors are useless when pulling a box trailer. "Weave left, then weave right and look in mirror." Repeat until someone actually gets the hint your turn signal means something and lets you over.
-
That's why I thought, but I would've swore I read at a vendor's site that it did matter. Going senile at 40...
-
Yes, I forgot to mention that. And I plan to get something warmer than 5k Kelvin! Not much, but some. I like yellower(?) light. Maybe my eyes are different than everybody else's. The kit I bought has HID bulbs that fit in 9007 sockets, which may be why they don't project the light worth a darn in 9004 sockets (they are different, right?). Since the bulb is separate from the adapter, I rotated the bulb in the adapter to make it work in a 9004 socket.
-
Per usual, @Me78569 is correct. The lights shoot light way up high out to the side. I plan to buy some D2S 5.0 projectors very soon. Will likely put the halogens back in today. If I could do it all over again, I would TRY this setup for a 99-02 non-sport (94-98 Sport setups seem to be compatible, too): 1. ANZO 111196 housings. These come with H7 halogen bulbs for the low beams and 9005 for the high beams - the ANZO website says it comes with a wiring harness adapter to connect to our 9004 input. $216 at RockAuto, plus shipping. 2. The Morimoto H7 HID conversion kit for $150: https://www.theretrofitsource.com/hid-systems/h7-morimoto-elite.html It may still turn out like trash, but it's what I would try if I still had stock-type headlights and wanted an upgrade. Personally I would not hack into my wiring for the Halos and LED "look at me" lights. Why that is not incorporated into the harness adapter they supposedly provide, I have no idea.
-
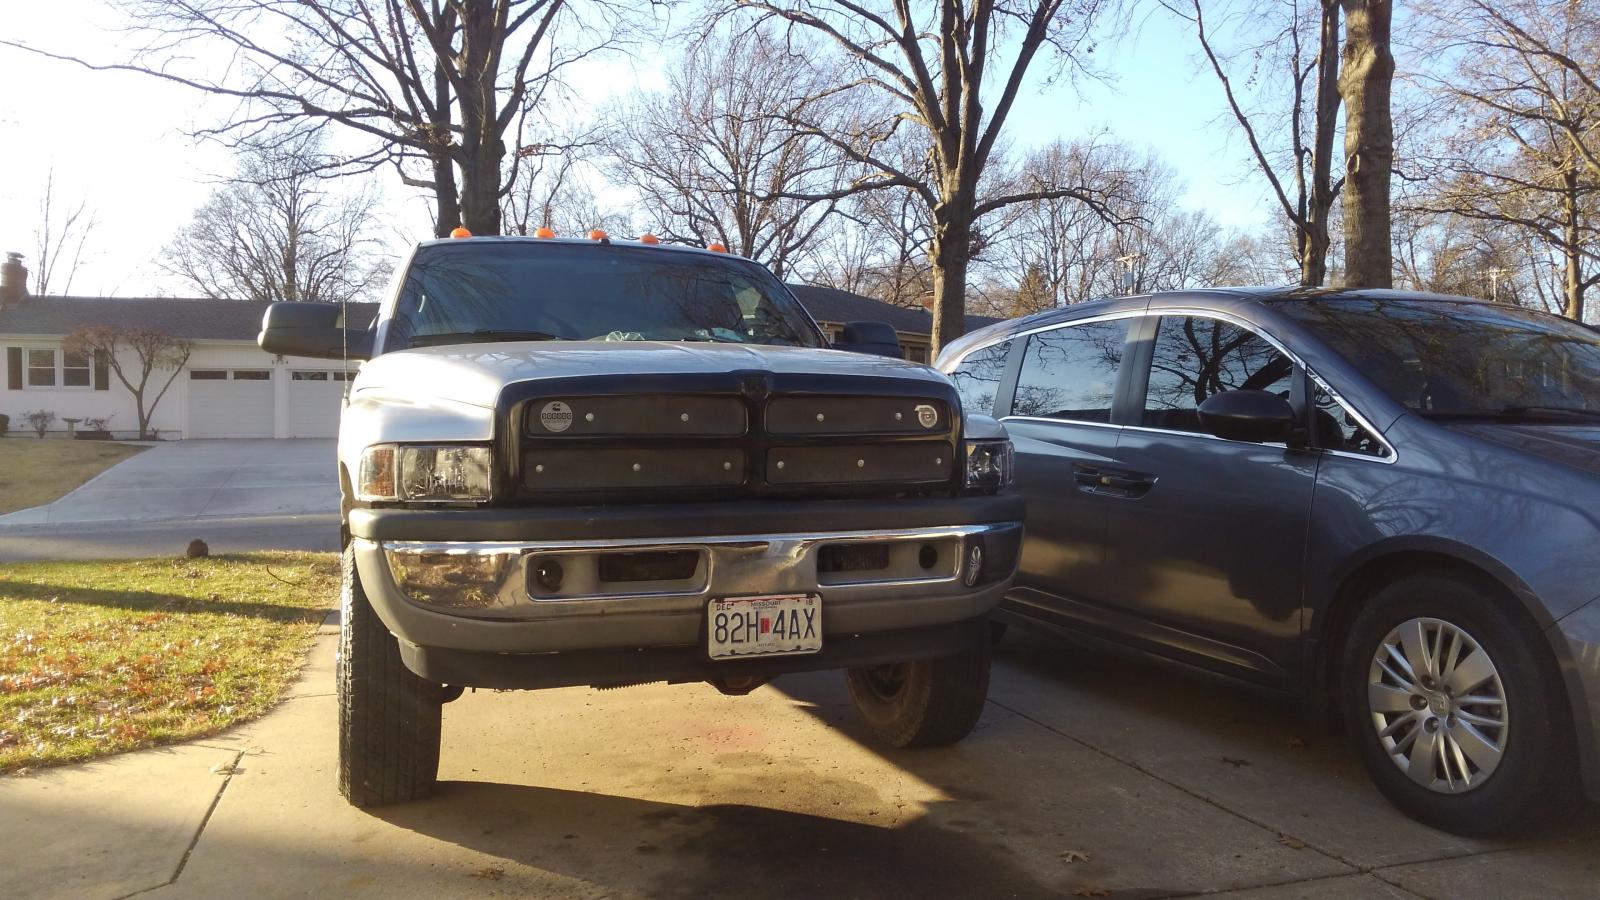
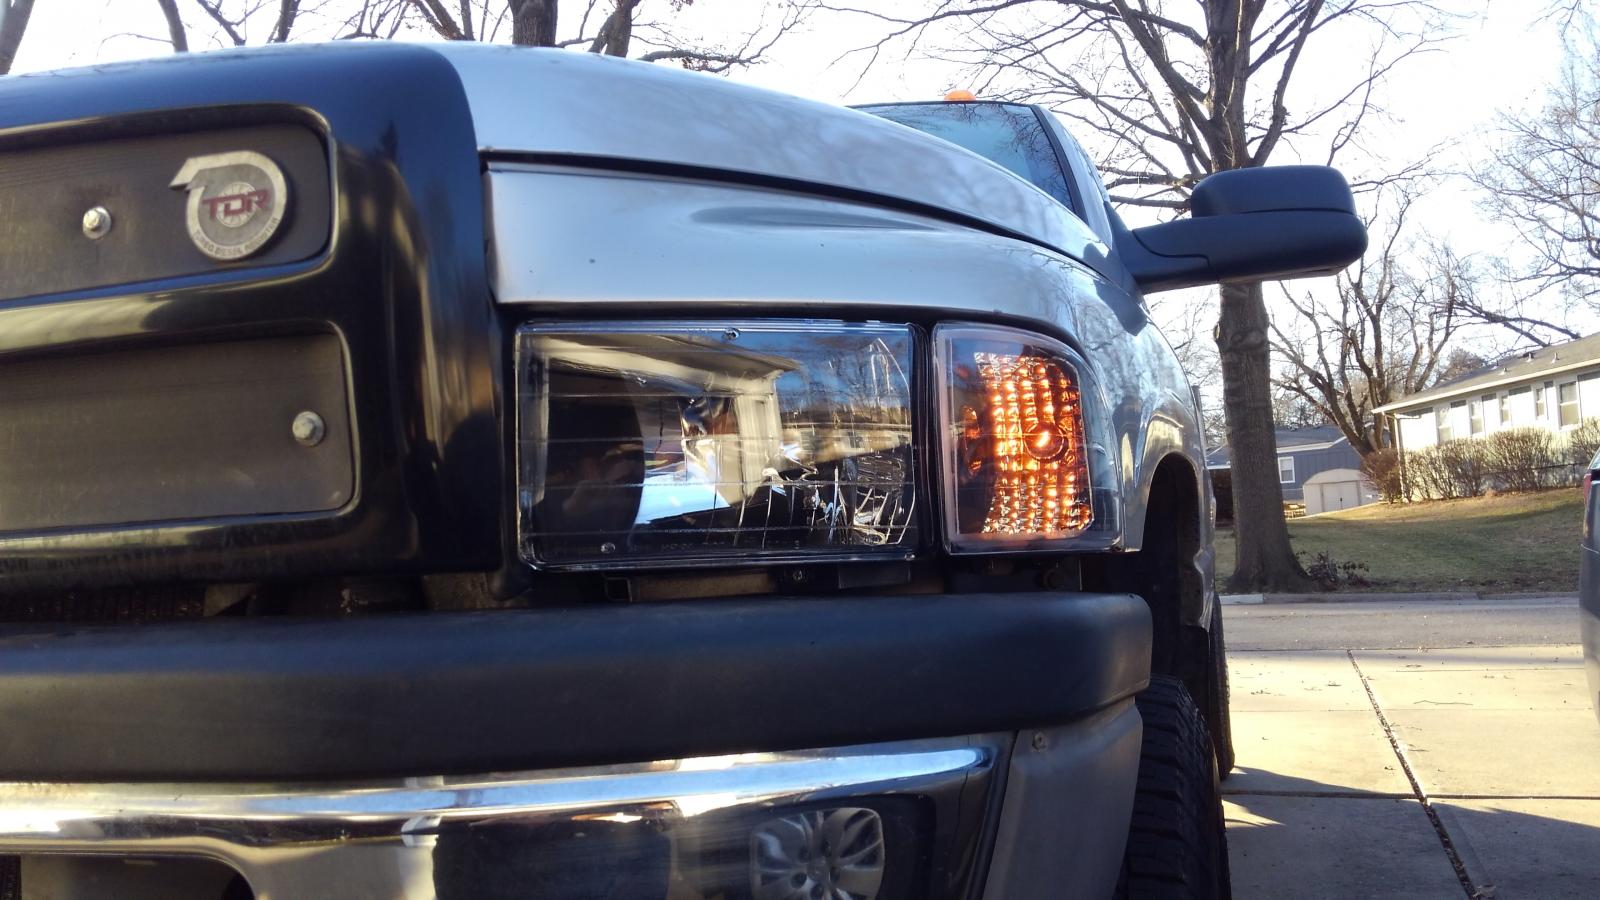
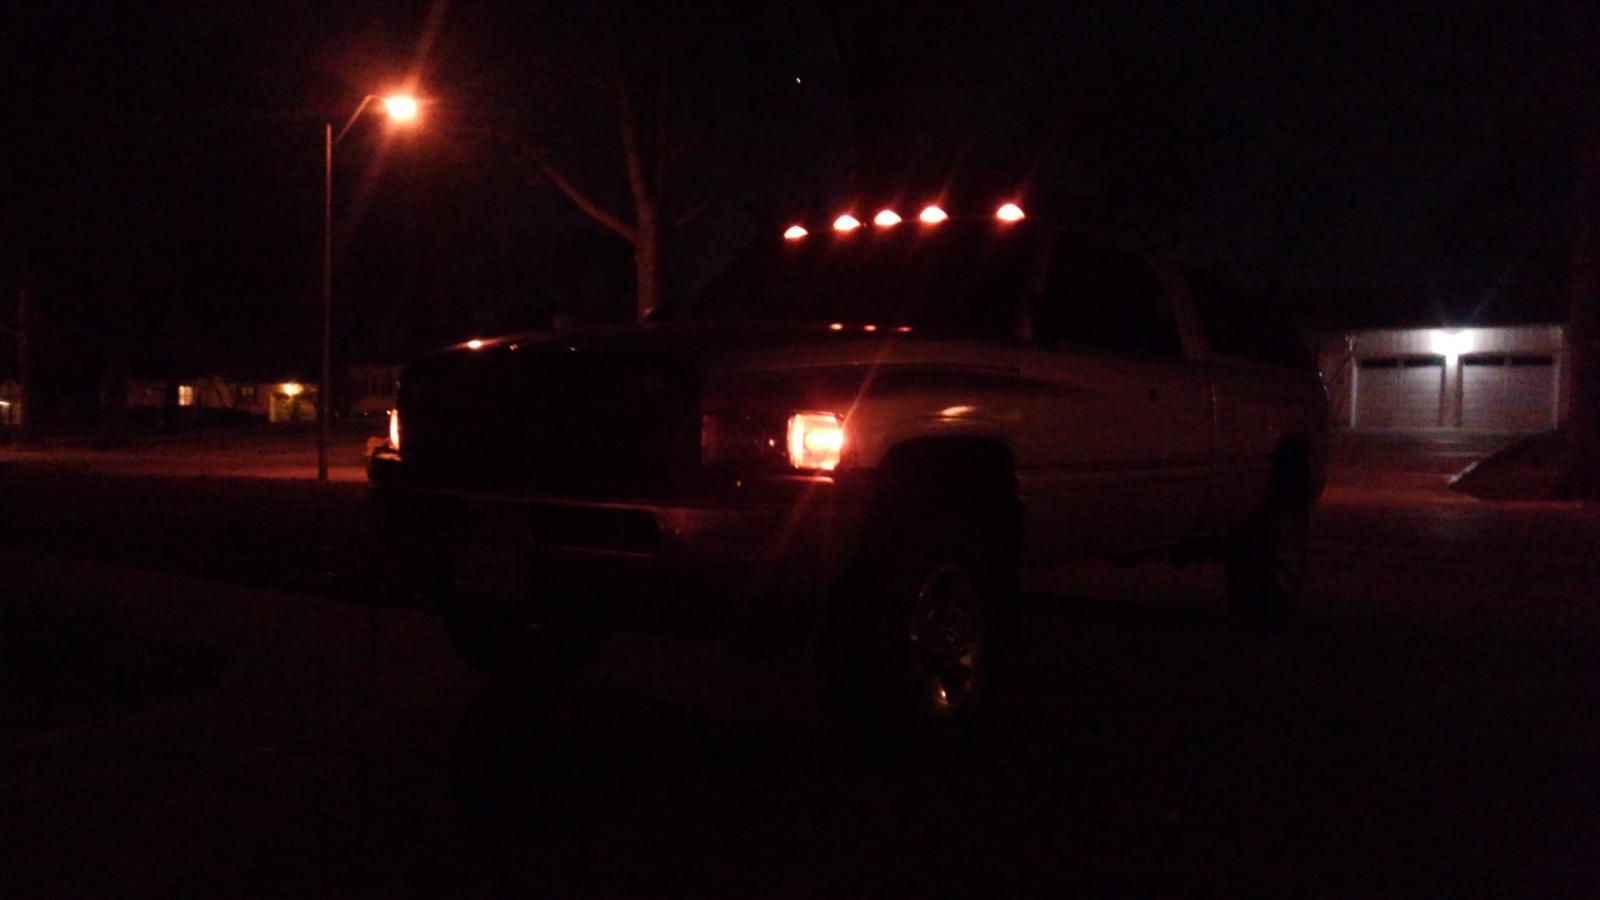
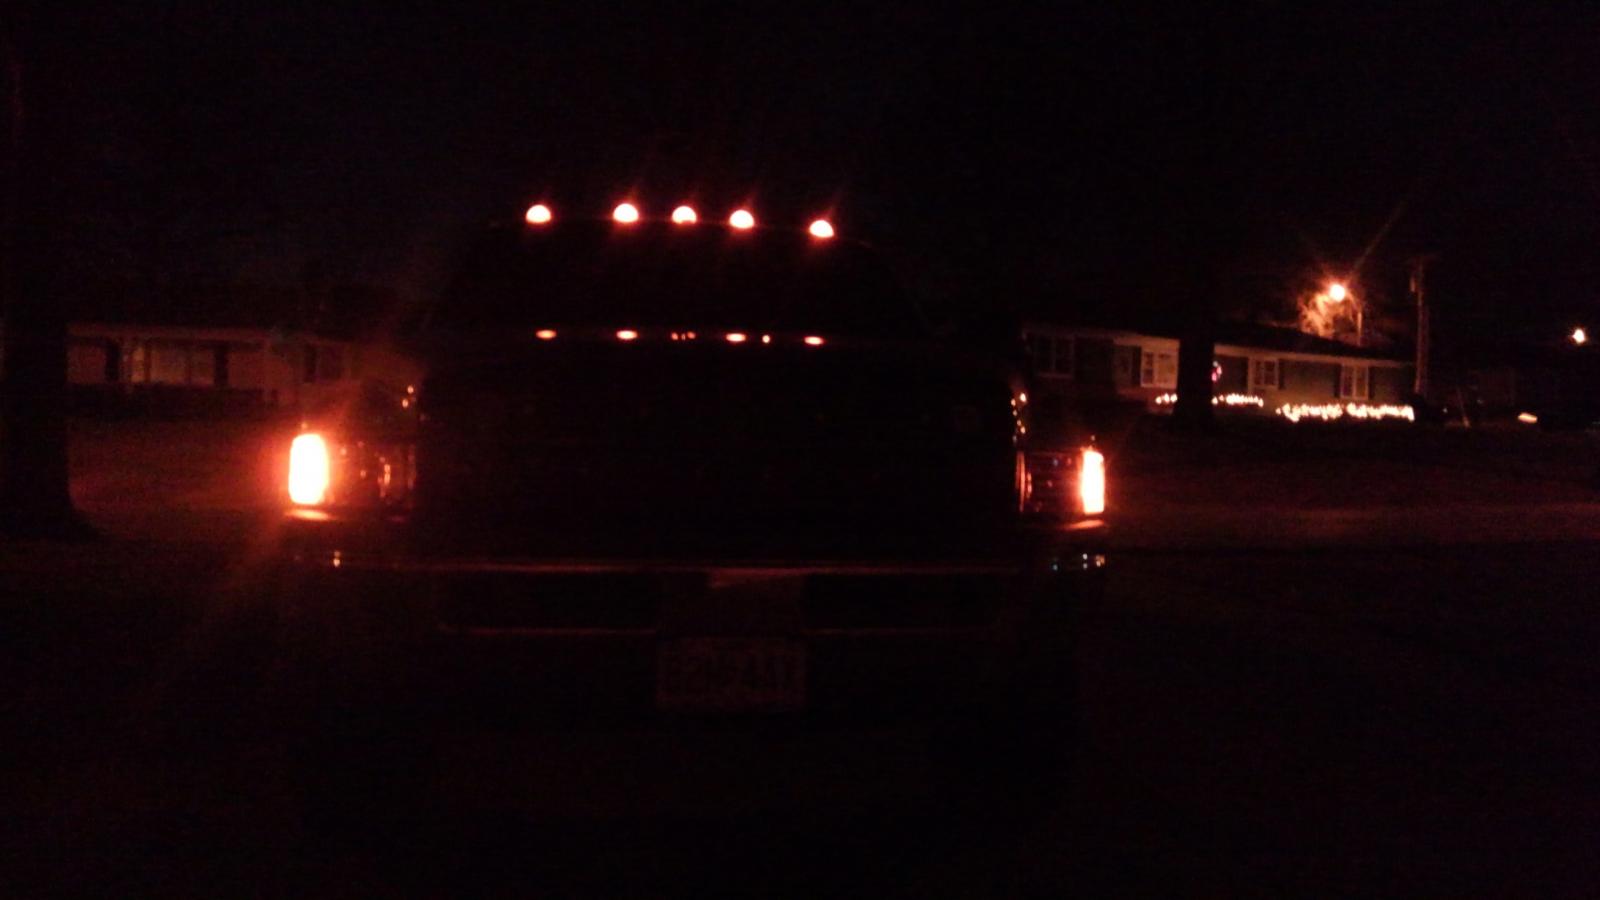
No headlights on in pictures where I am facing the truck. I thought you also wanted photos of the parking lamps so I took those. "Oncoming traffic" headlight photos I plan to get January 2nd, tomorrow.
-
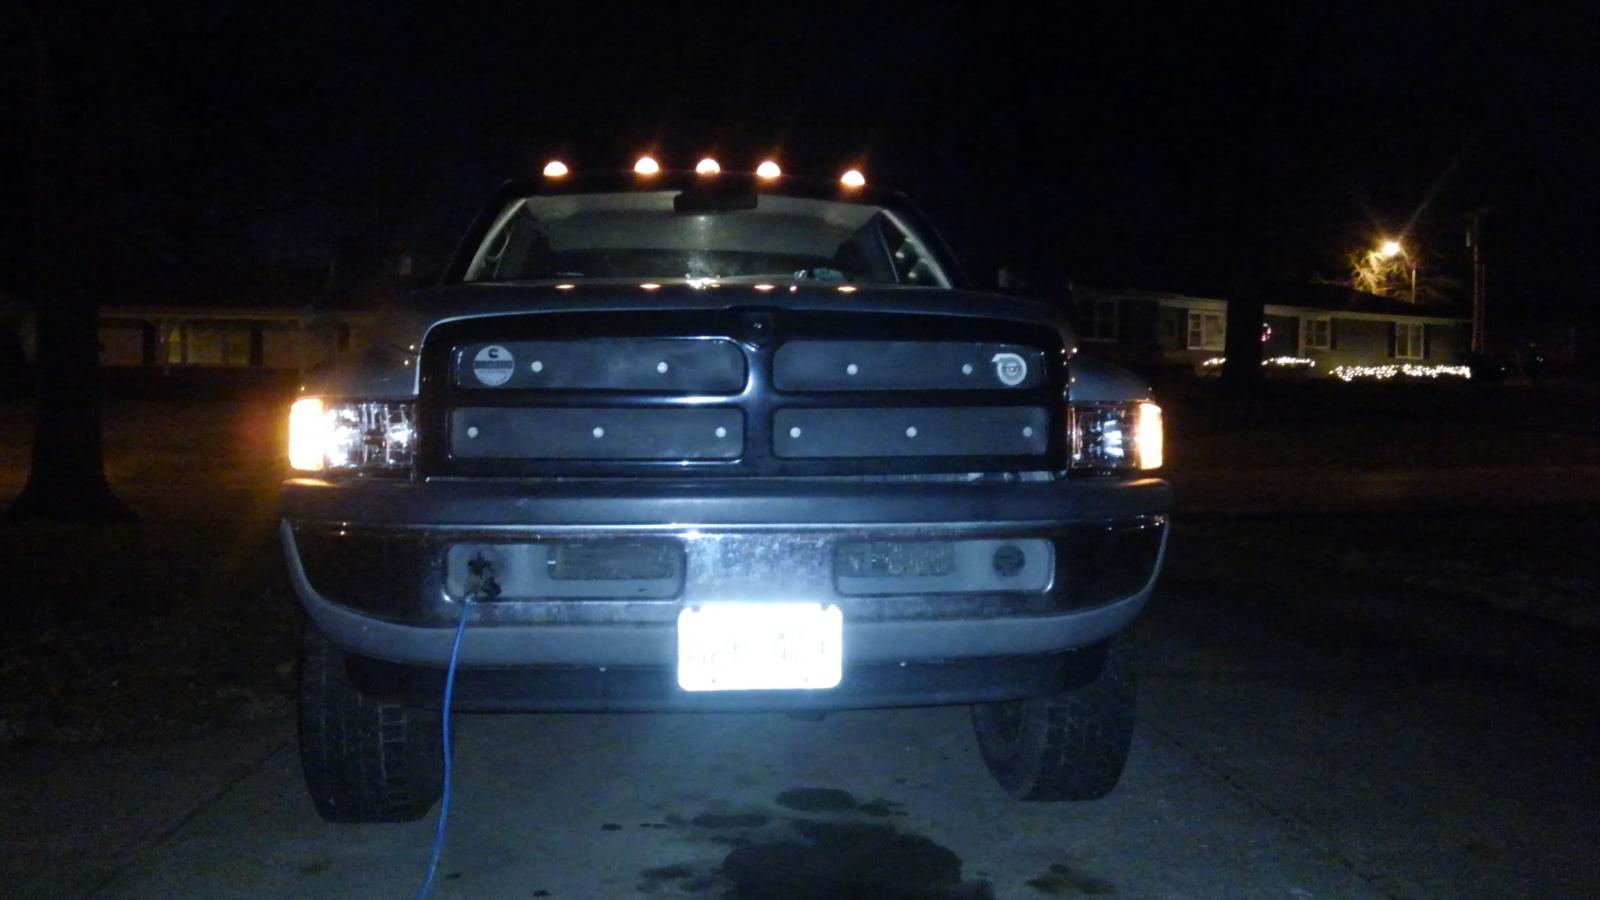
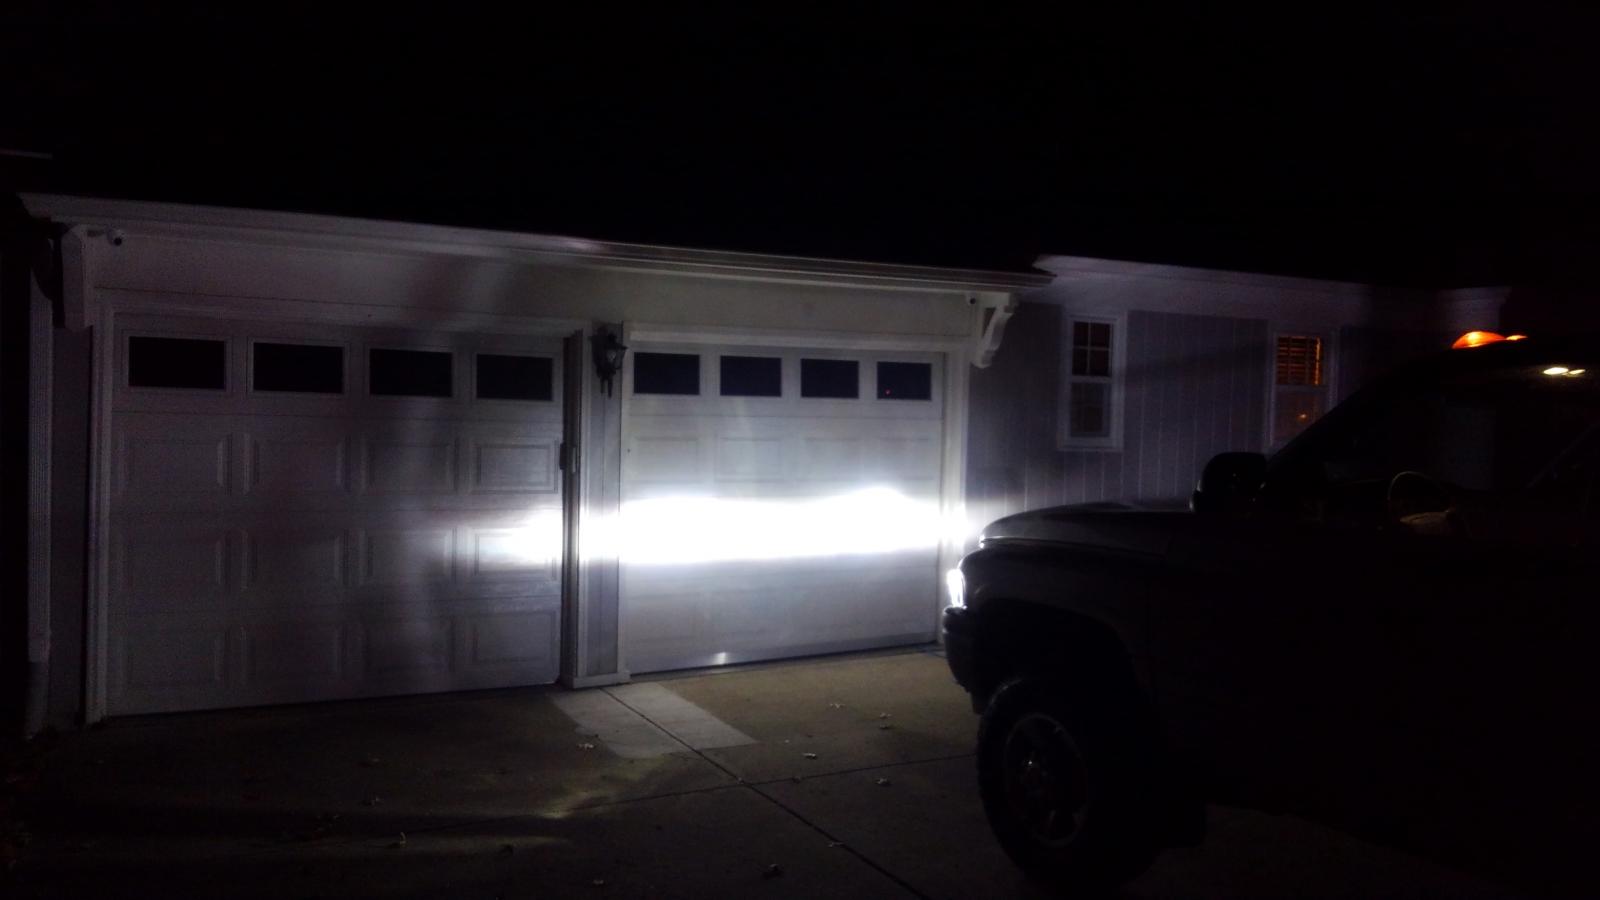
"from the view of oncoming traffic is what I want see since you used HID vs the LED that I used." I'll try to get that tomorrow evening as I leave work. I added some photos to the post above.
-
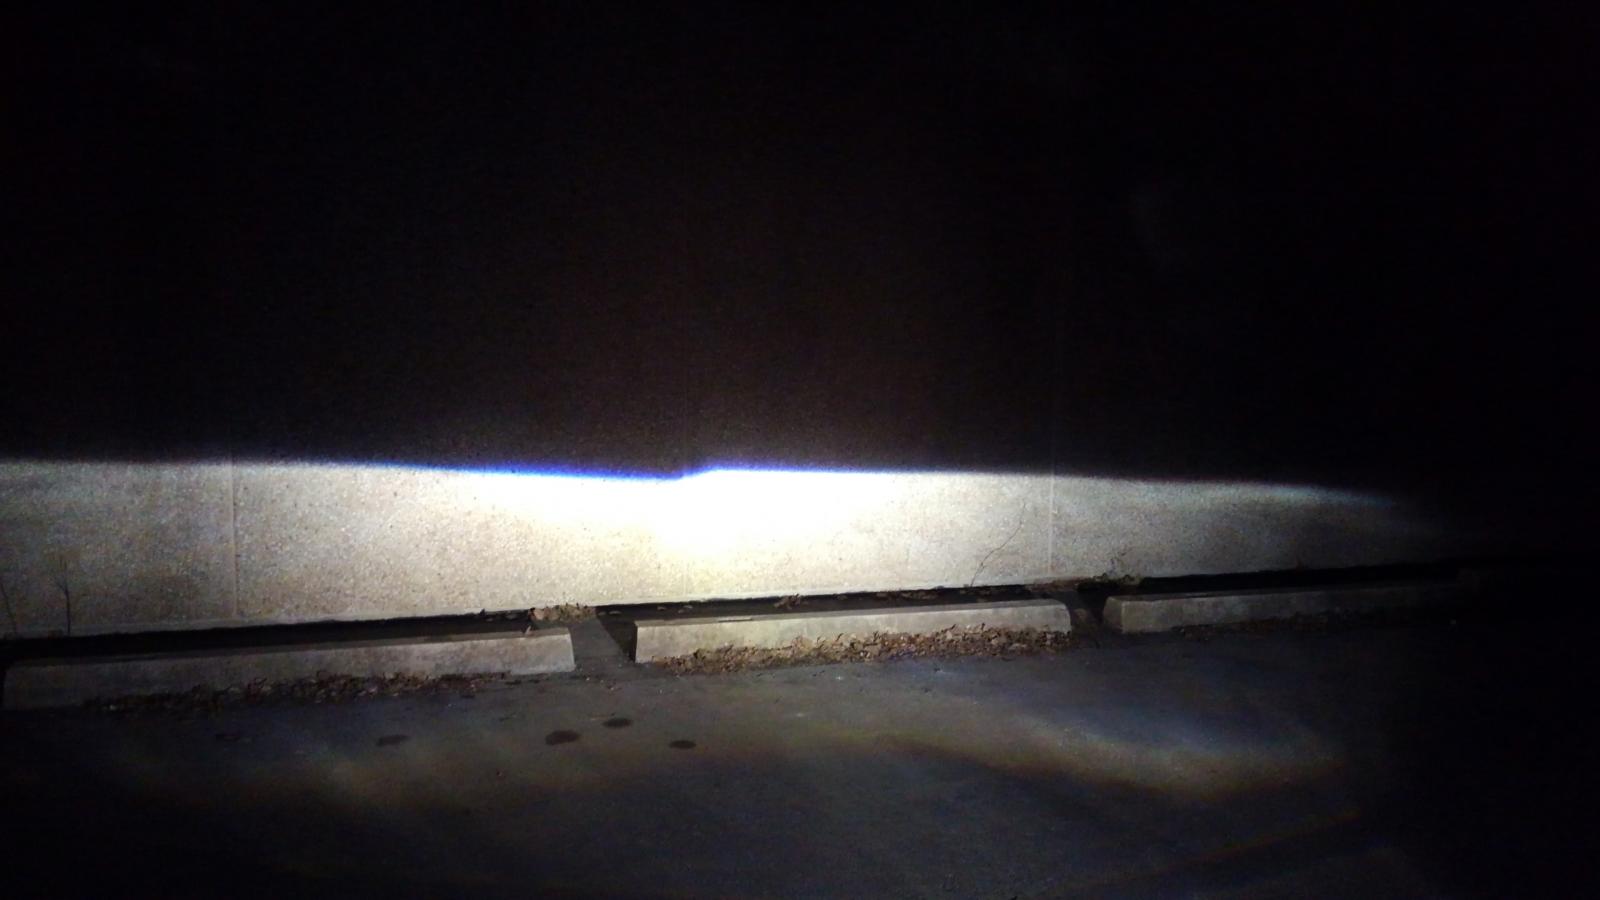
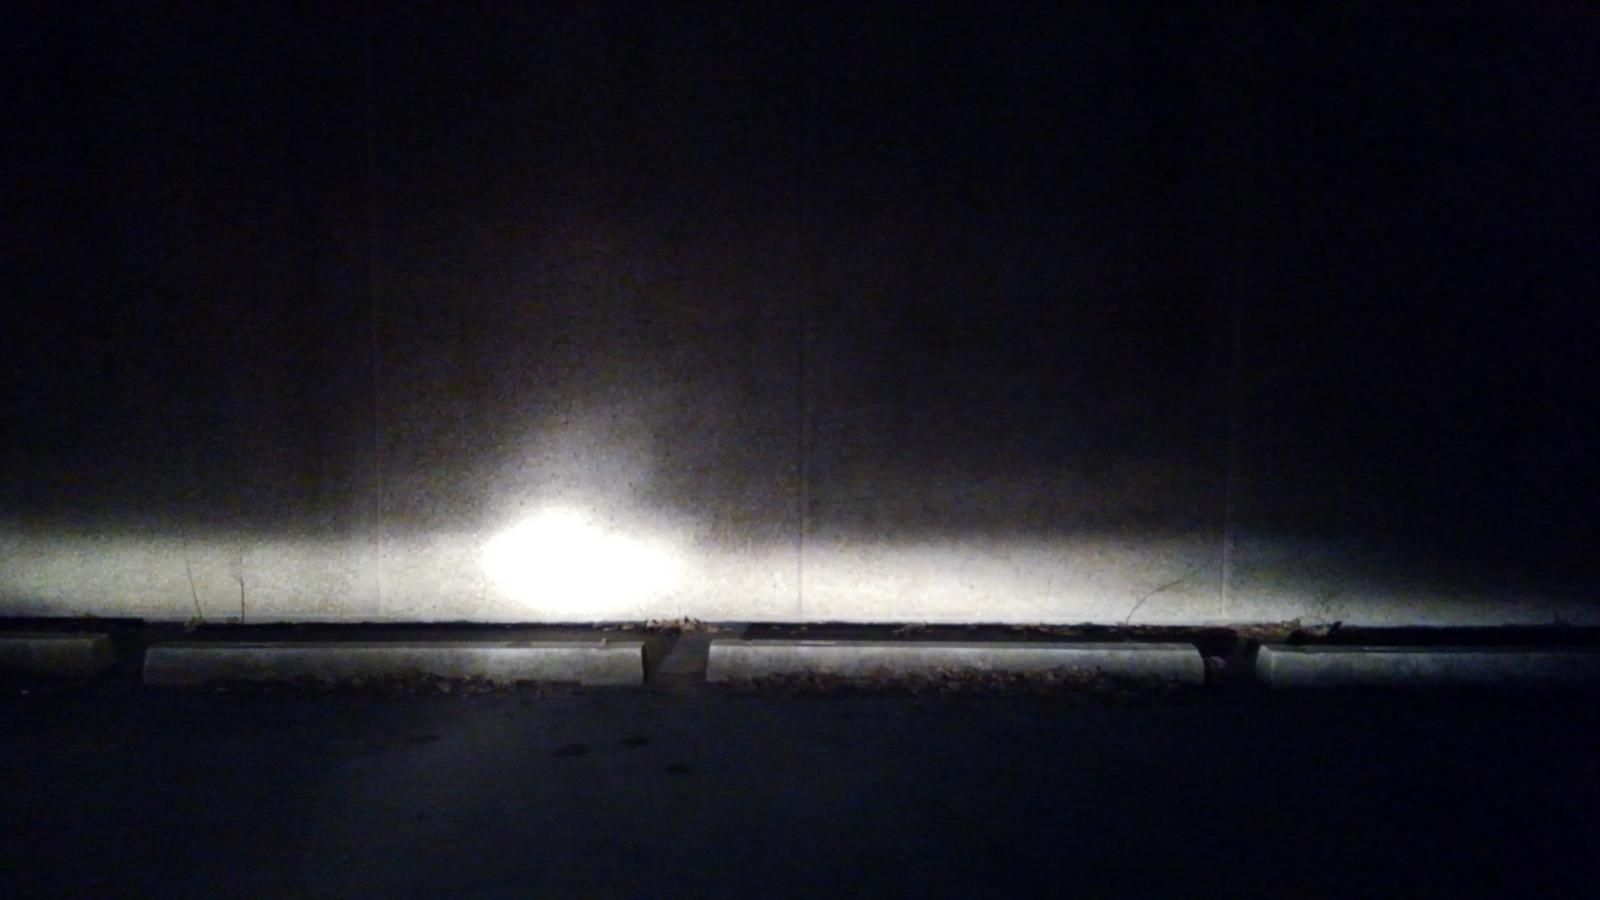
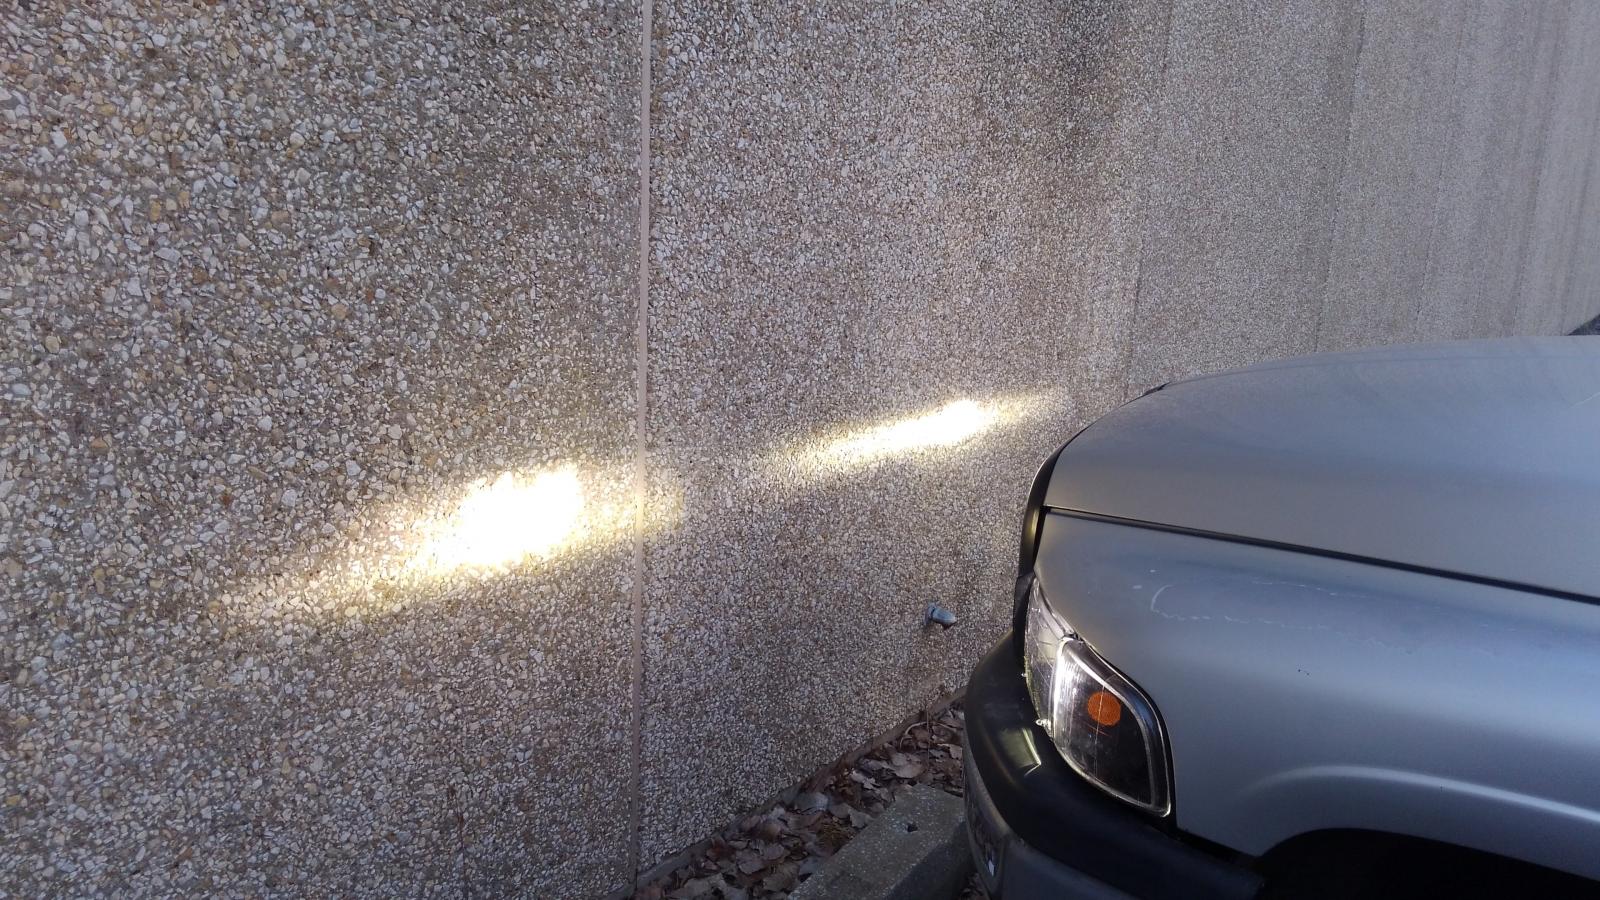
Rather useless I suppose since it's in the he sun, by here's a pic of the front. I have amber bulbs and there is the amber reflector. Will try to get better photos tonight. Added photos, will try to get some tomorrow at a tall wall to make sure I don't blind folks driving up there.
-
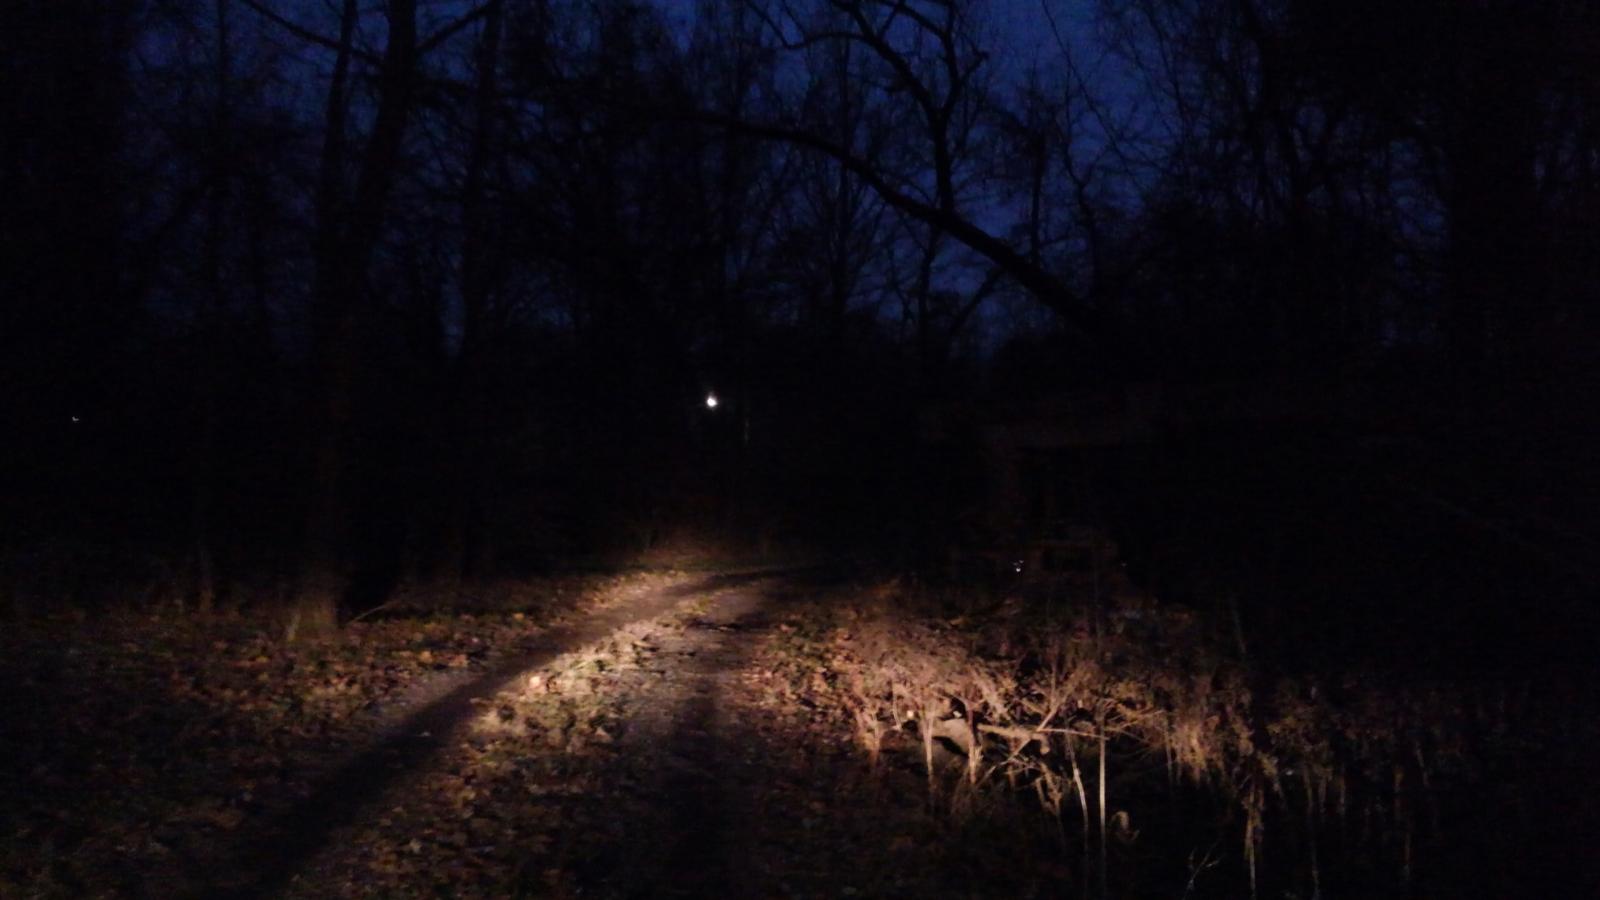
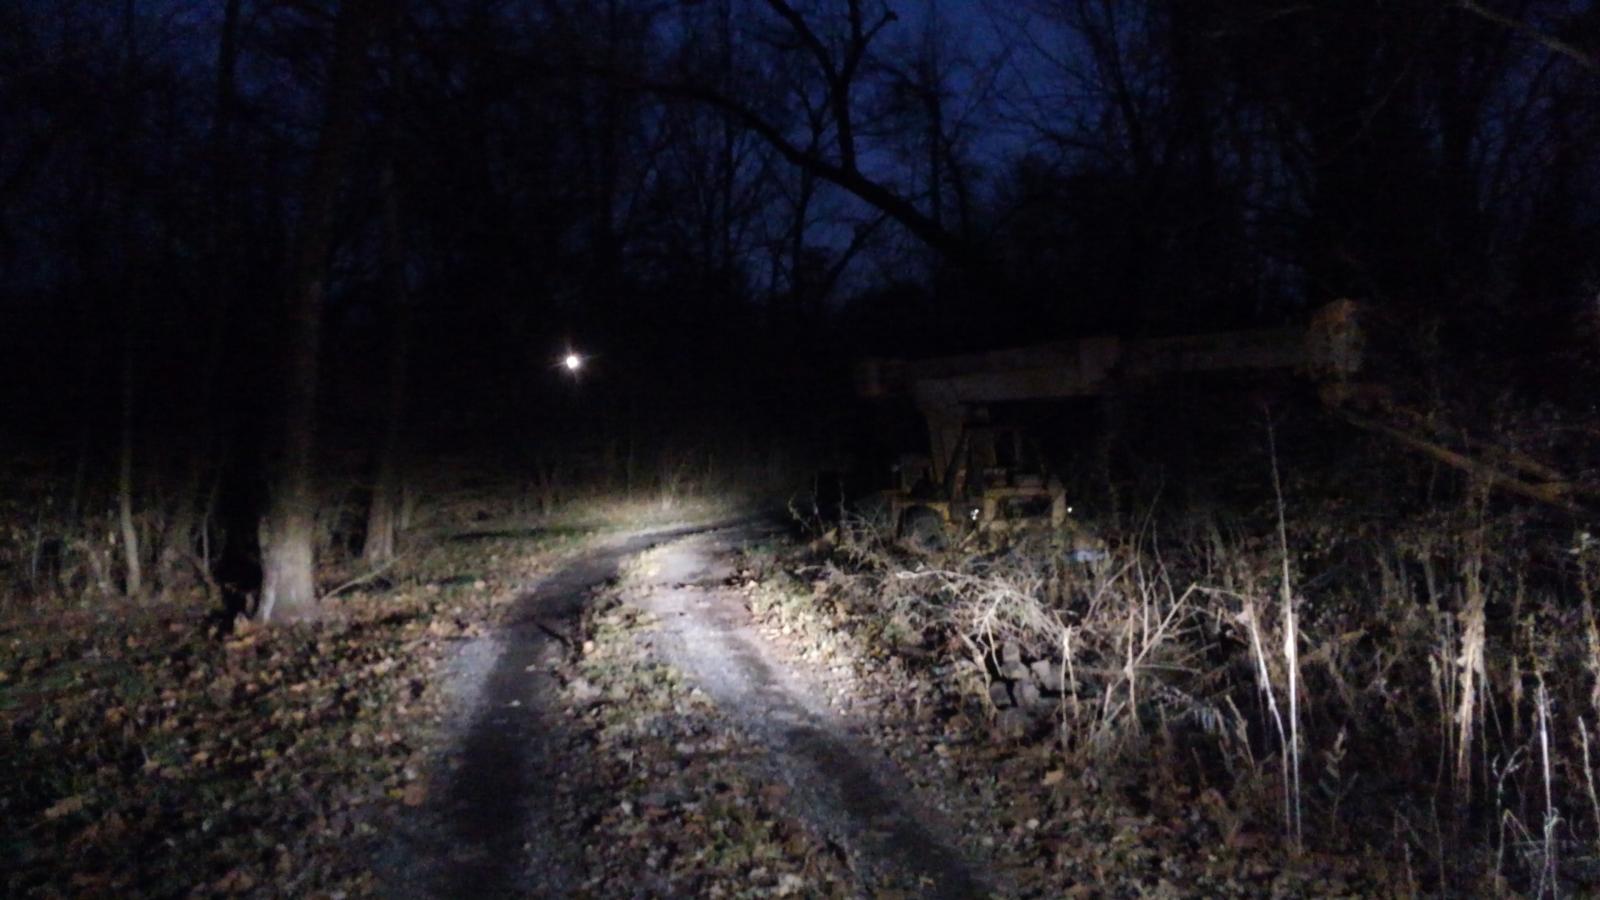
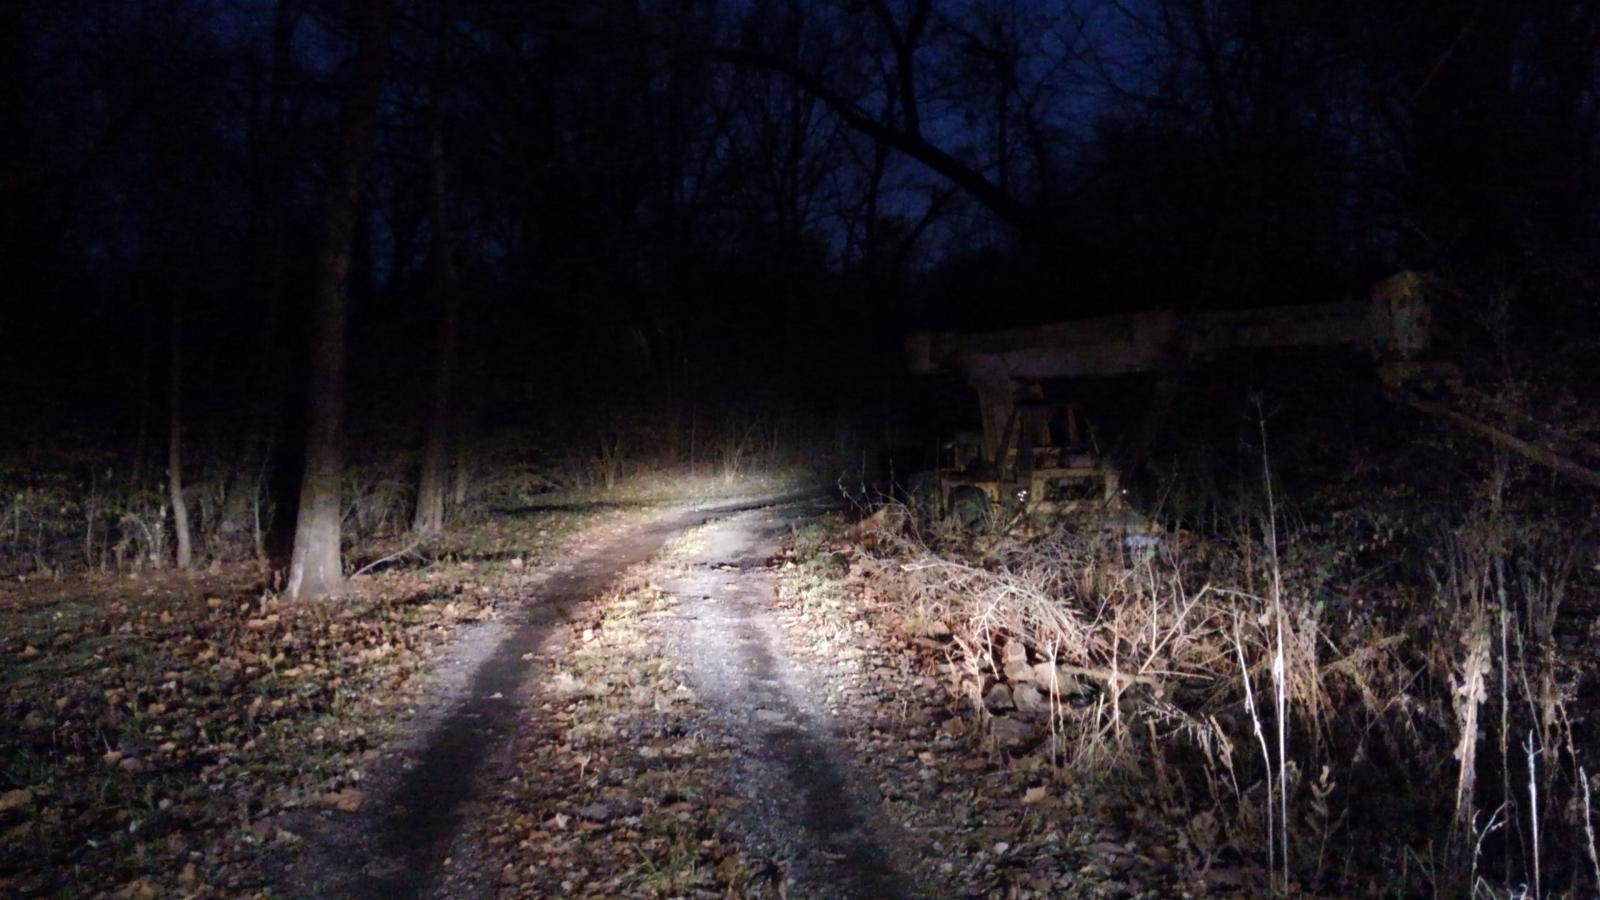
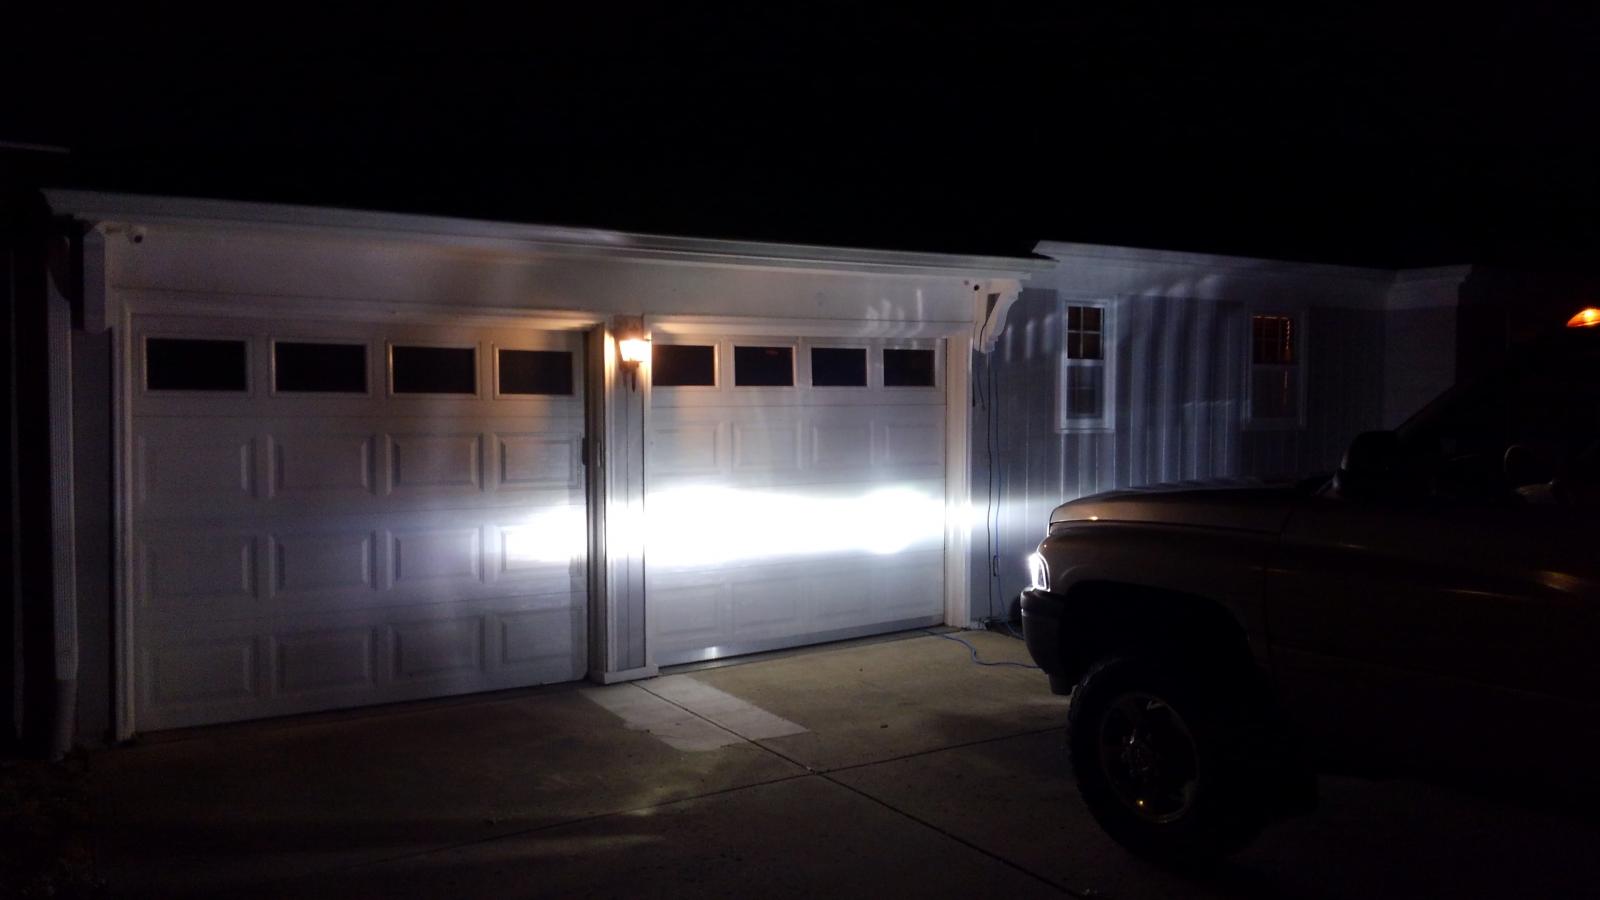
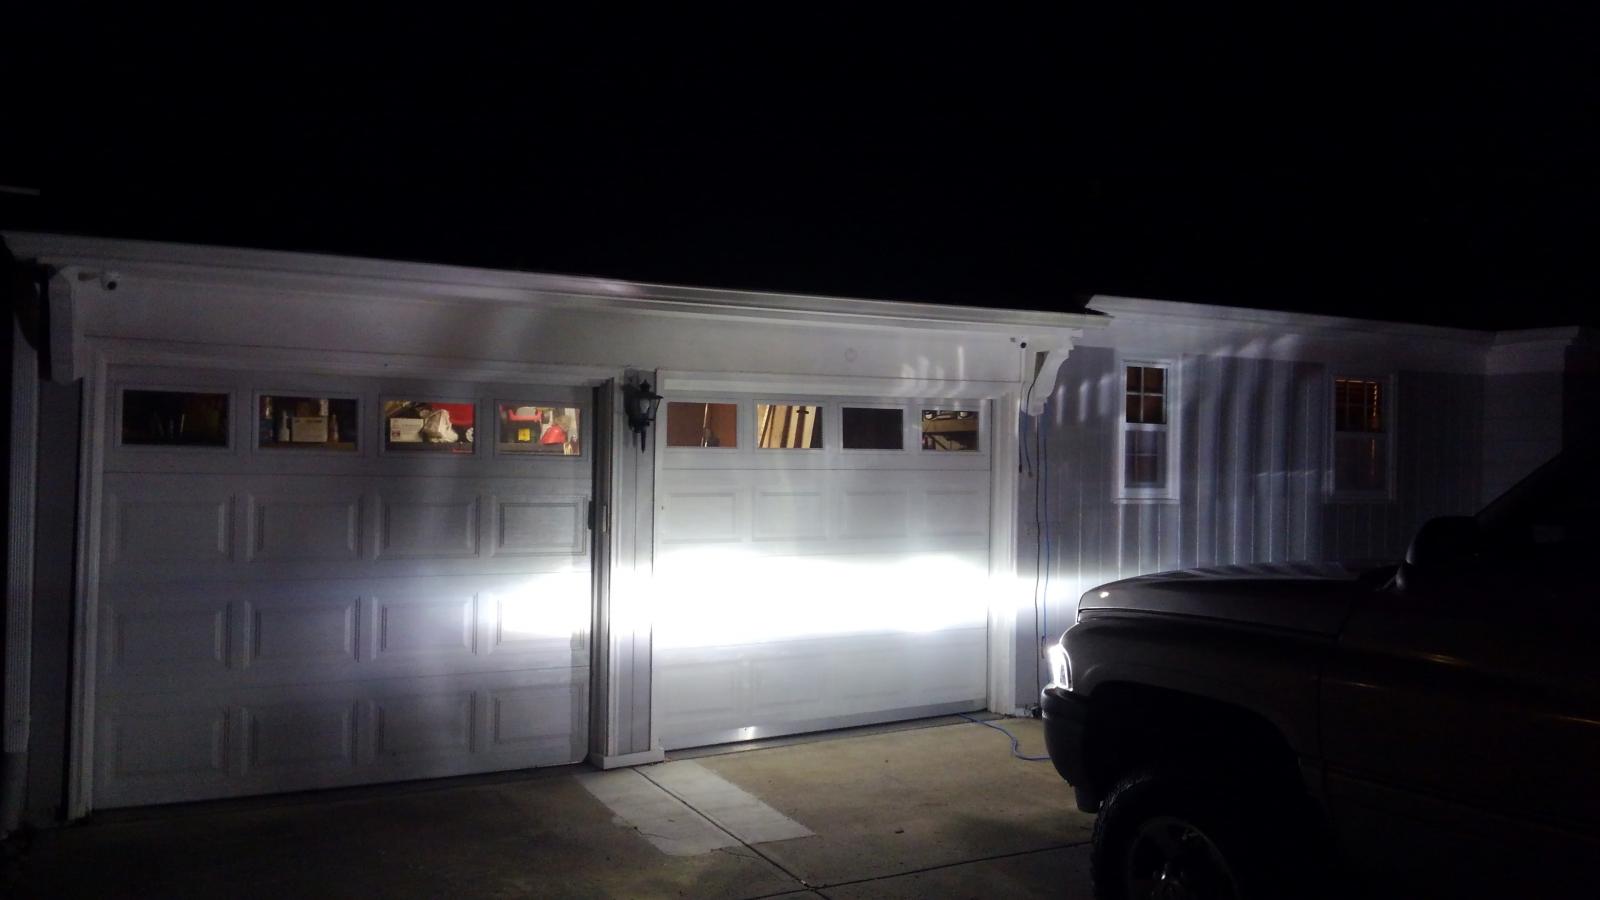
Some more pics. Today I installed the driver's side HID light in a clear housing. Much less light scattering, still not perfect. As we all know, the halogens scattered some light, too, it was just ward to see because they were about 1 literal candlepower compared to the new setup. True projectors may soon be on order. Still need to aim the lights.
-
I have a set that showed up Christmas Eve, I just need to install them. ANZO 111067 https://smile.amazon.com/gp/product/B0038AXQJ6/ref=ppx_yo_dt_b_asin_title_o01_s00?ie=UTF8&psc=1 If they work out well with the Morimoto Elite 9007/9004 setup, I'll have HIDs for $302.03, and if they don't work well then I'll reinstall the old housings while I try my hand at installing projectors. I hope if I go that route that the electrical components are all compatible! Ignitors, ballasts, etc.
-
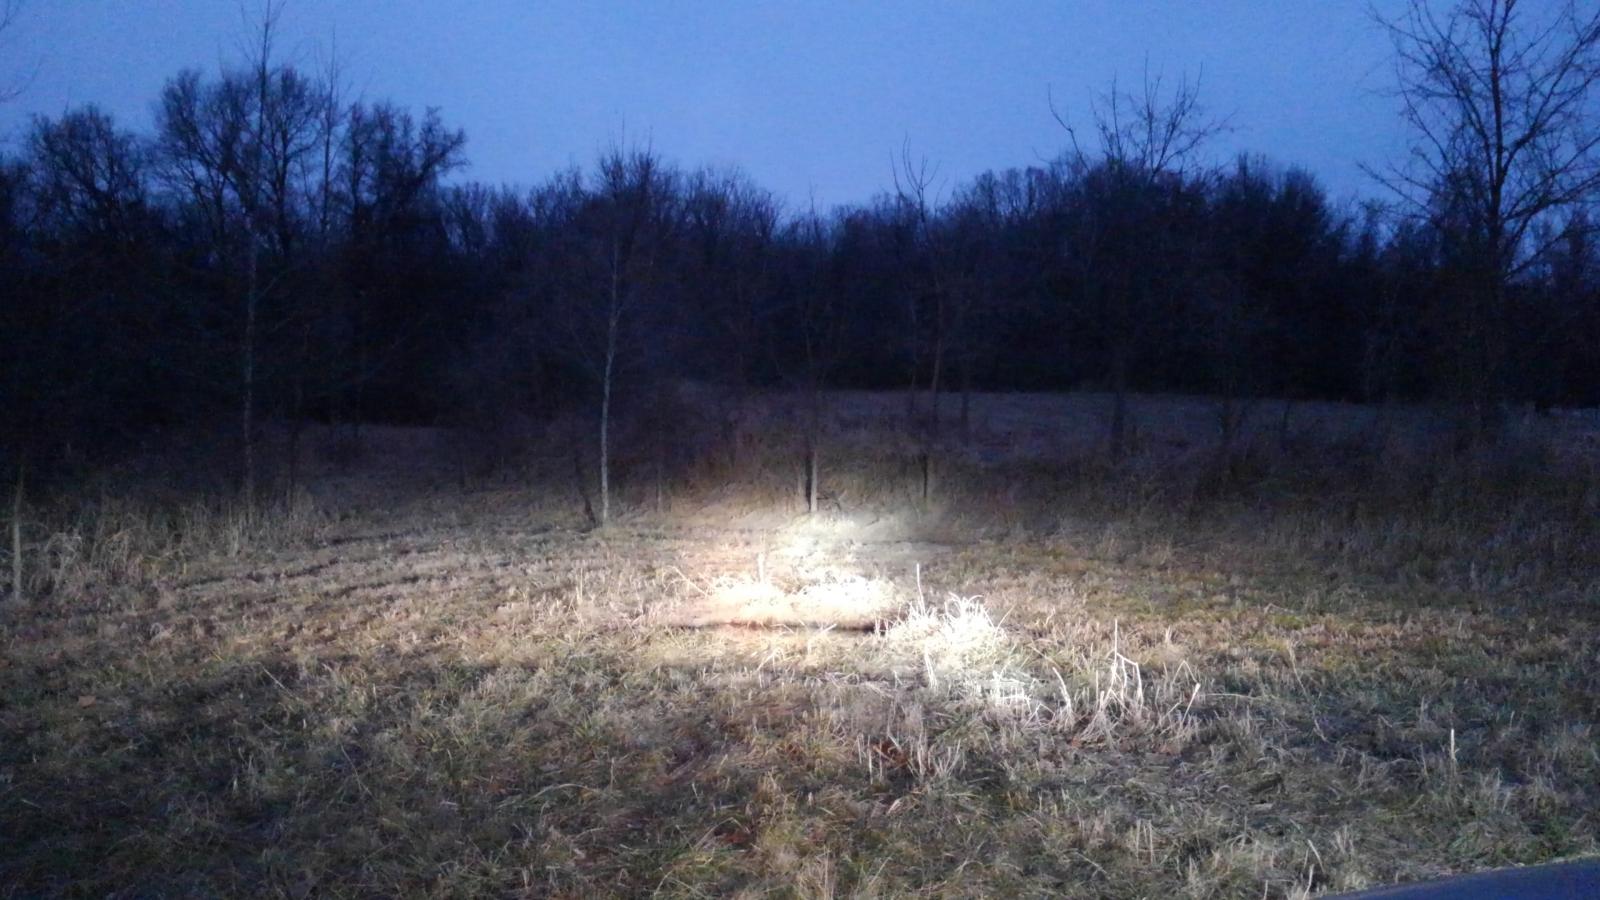
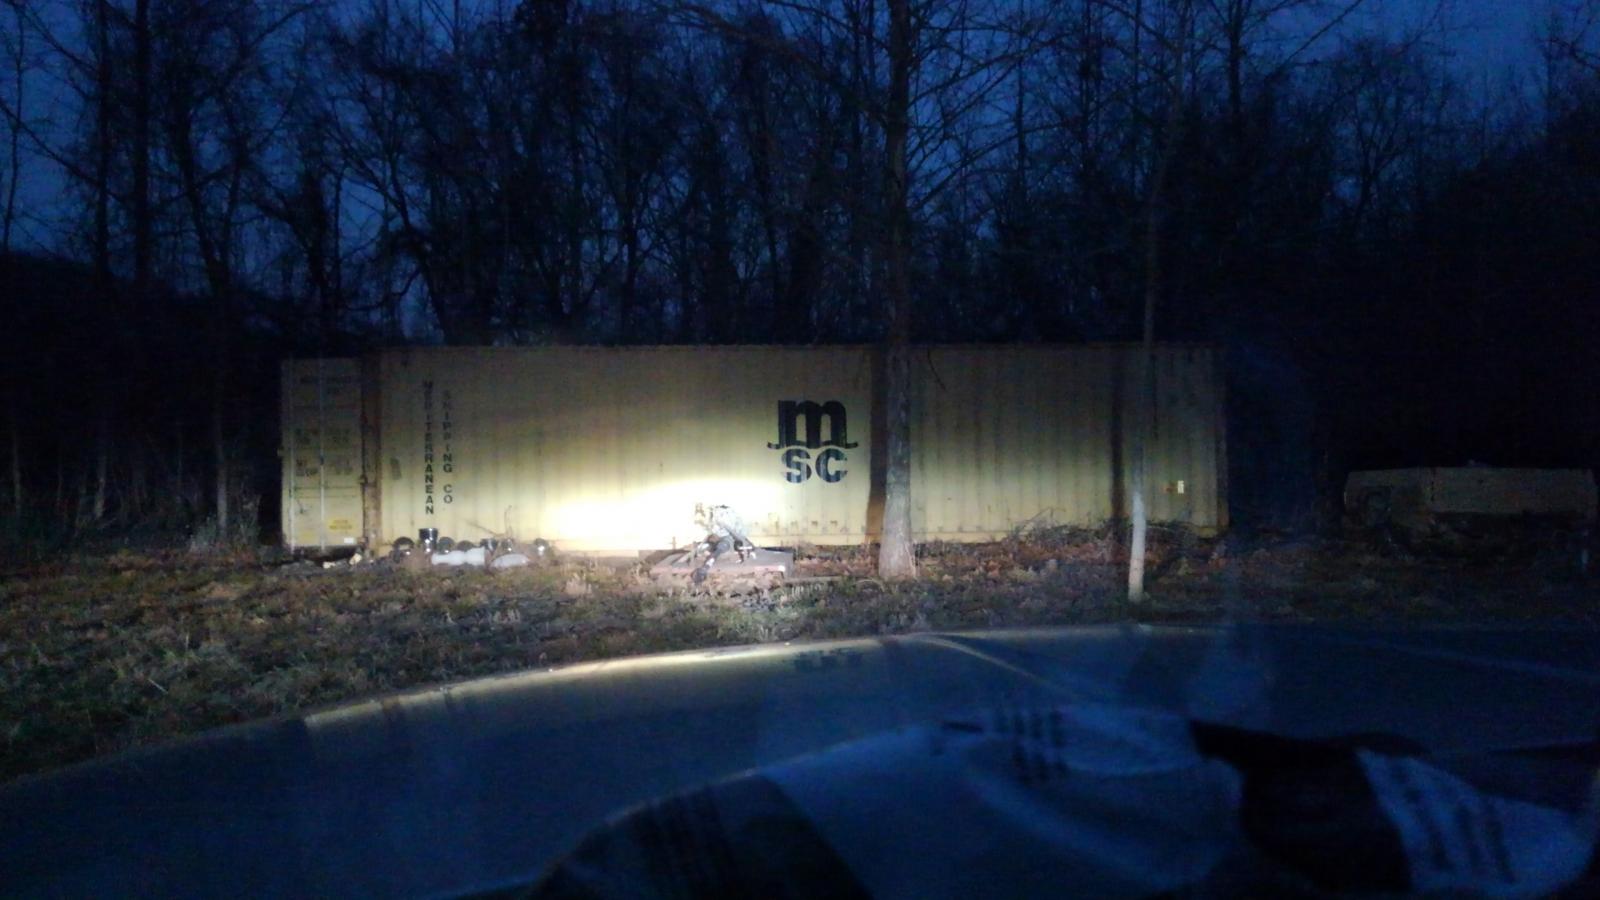
Okay, not sure why the 1st pic below is on top, it should be second from bottom and I selected the files in order! No tall buildings around, so don't need to worry about people driving up there. The top photo is with me standing in front of the HID light. The last photo at the bottom is with me standing between the bulbs, and the second from bottom is with me standing in front of the halogen. Not much difference. The difference between the halogen and HID amazingly obvious in person, but not as amazing as is indicated in the photos! Need the wife's SLR on manual mode to have a prayer at capturing reality. On the 30 mile (mostly interstate) drive home any car I followed was lit up less than if a new car with halogens was behind it at around the same distance. One of those new cars was a gray haired guy in a GMC Acadia or similar. No doubt the $700 projectors are better, but this setup is WAY better than what I had, in my current testing and observation is not (much?) more dangerous or annoying that the average new vehicle, and I still have $540 in my pocket.