Mopar1973Man
Owner
-
Joined
-
Last visited
Everything posted by Mopar1973Man
-
Not bad ISX you got that right on the money... setting high idle from cold you only need the IAt fooler... After the high idle starts then flip it off... Now if going for high idle on a warm engine you must use the ECT fooler too to trigger it... But remember the high idle setting you use will remain till the engine is shut off... So if you set 3 cyl high on a cod morning and head to town and try setting 6 cyl high idle it will fall back to the 3cyl because it was last set mode. The way to reset this is to turn the engine off for a extend period of time (15 Mintues or so)
-
Yeah it got to be on the line to the #1 in that pic... The return line is not going to see pressure unless you pumping excessive amounts like about 20 on the supply side... So switch it around...
-
Dang... I wish I lived near you I'd be more than willing to plow your yard and roads out... But i'm a long ways from you Russ... Come on gang there is got to be someone near Russ that can help out??
-
I got one for you... My trip to town my pyrometer was floating about 400*F and about 2 PSI of boost at 55-60 MPH. By the time I hit town SGII was showing my Today MPG at 38.9 MPG after traveling 15 miles. I did my business and had for home back the same 15 miles. Cruise set for 55 MPH and my boost was varying about 7-10 PSI with pyrometer floating 800-1000*F still average out at 21.2 MPG... Funny what a tail wind to town and then a nasty head wind home will do with 30 miles... I've gotten so good I can pinch good number even with bad weather...
-
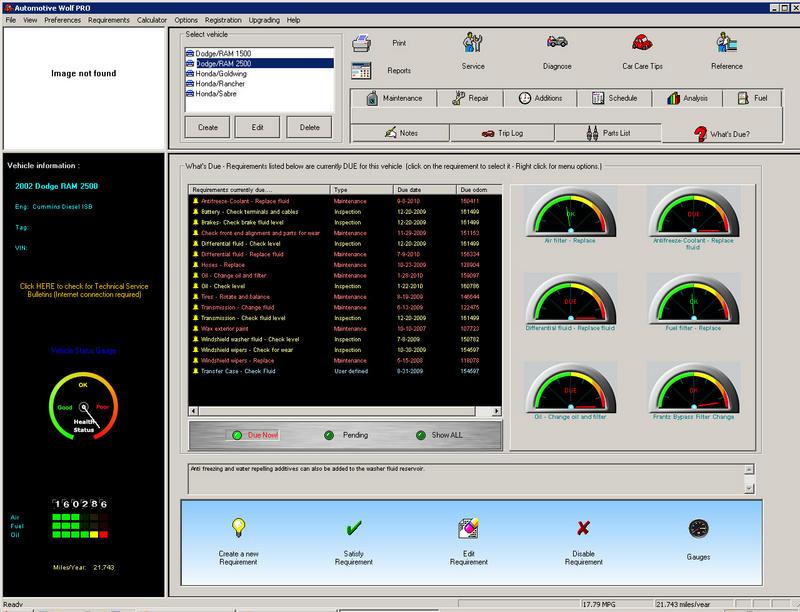
Hey gang... I figured I would share what software I use for tracking my maintenance for my truck. I'm using Automotive Wolf it a very simple software to use that reminds you of the maintenance you need to do on your vehicles... so here is a screen shot of my current work load... Yeap I need to get out to the shop and take care of the beast... But here is where you can buy it at... http://www.lonewolf-software.com/automotivewolf.htm
-
I tapped the illumination lead on the stereo adapter for my Kenwood stereo. The lead is un-used so why not... Thinking of maintenance I need to check my logs... :rolleyes2:
-
Well as for the fuel issue the VP44 can draw its own fuel but hates like hell to do it. So since there is little to no fuel pressure there isn't anything to advance the timing cam plate so it stays in full retard mode... Hence the lack of power... I would hook up a realy just for safety sake. The ECM is what powers the lift pump directly. So if the current load gets to much then the ECM might fry... Well you did the right thing then... But I doubt you'll have a problem with a FASS pump... But I would take the time next and get a 0-30 PSI fuel pressure gauge and hook it up if you don't already have one...
-
I've had my tank out 2 times now and can do a fuel sender change in under 1 hour... That includes pumping the tank dry, pulling the carrier bearing, filler hose, unscrew the sender nut and then drop the 2 fuel tank straps... Bam! it on the floor... I got smart thuogh... I bought the beer and invited a friend over to help me... He said here hold my beer and check this out... Funny part was it went in really easy I held the beer, the video camera, and watched...

-
Holy Moly... Geez what are you doing with that truck ISX???
-
That's rather cool looking without any fastener on the face... But I wonder how long the carpet tape is going to hold up to rain and wind... I guess time will tell... You could take in my idea of the bolt and fender washer... http://forum.mopar1973man.com/attachment.php?attachmentid=437 http://forum.mopar1973man.com/attachment.php?attachmentid=436
-
Here is a short video I did last summer with my ScanGauge II and the how I pull good numbers... http://www.youtube.com/watch?v=AiQFadYL6co
-
Yes sir... The little plastic disc is a temp sensor for the battery... http://mopar.mopar1973man.com/cummins/2ndgen24v/wiring/24V-wiring-1.jpg
-
Sorry for the lag... But my issue was the bolts on the transfer case had come loose... So the front shaft was rattling on the bolts... Easy fix for me... :thumbsup:
-
It located under the driver side battery. It senses the battery temp and regulates the voltage to prevent gassing of the battery which in turns dries them out. The old school regulators use to sense the under hood temp and under charge the batteries which caused them to fail early. Now with the new technology the battery life is extended greatly because it always gets a full charge (if driven long enough) and done in such a manner to keep the electrolyte from boiling out and drying out a cell. Side Note... My house is totally battery powered... The inverter has the same battery temp sensor mounted on a battery to control the charge rate and keep the batteries from getting gassy on normal charge. Give you a clue the 8 6 Volt batteries are 15 years old and still holding awesome charge and the light NEVER go out at my place! :thumbsup:
-
Well the APPS sensor might need to be replace or reset. I would try reseting first then if the dead pedal and the code returns then the APPS is done and needs replacement. The P0236 code is a MAP sensor problemmost likely and the sensor had failed... The low voltage codes is most likely a wiring fault, alternator issue, or blown alternator fuse... But I wonder why the engine was replaced? The engines will travel up to 1 million miles without being rebuilt. Talk to CajFlynn he's going on 760K+ miles on a 2001 Dodge...
-
From what i'm hearing that AVG is pre-programmed into the SG II at the factory for people but its really easy to change, add or replace...
-
Lots of fresh water quick! Then even more fresh water... But I would replace both batteries and double check the charging system and the cables for problems. Check for error codes because maybe the battery temp sensor is bad... Guessin'
-
Yeah you busted me... My Bad...
-
Now there is a bumper that could push anything...
-
Thanks Edcasey... That is a great way of putting the P1693 error code. Little more insite on the key trick it went back to as early as OBD I computers and function as flash codes. This includes the 1st Gen trucks. But the key trick was omitted in the 98.5 and 99 I figure because of the rush to retrofit the Dodge with computers (Cummins and Dodge) so by 2000 they figure out how to enable it but didn't quite get it right all the time. I've found several trucks here in Idaho that function fine for the key trick (2000-2001 models) So not all truck had this issue...
-
I think so... The pic is rather small but if you watch the routing of the fuel lines to the center line should go to the VP44 and the outter line back towards the lift pump... ISX is the wizard at this! I've got the newer filter with the connection on the bottom...
-
Give it time and calibrate it a few times... Short story... I bought mine orignally for my Mom's truck to diagnose a error code problem but I desided to hook it up and us the MPG display too... OMG! The number were WAY off... Showing about 53-70 MPG as a tank total... After doing a calibration 2 or 3 times and getting the offset right now it just about dead nuts prefect. But you want to know what the offset was??? 233% OFFSET... Yes... It took awhile of check hand math, GPS the speedometer and odometer fo correct numbers, and verifying the numbers from the SGII... But tell you the truth I trust the SGII more so that the fuel gauge in her truck now... When I pull up to the pump and the price it shows it usually right on the money if the price per gallon has changed... as for the offset on my truck its 9.6%... I know it time to verify mine again too...
-
Here to help out... http://www.dodgeram.org/tech/dsl/Facts/98ISBspecs.html http://www.dodgeram.org/tech/dsl/Facts/01ISBspecs.html
-
I purchased a tapped banjo bolt from Geno's Garage for the fuel pressure gauge... (Staock system) Since you got the older style filter housing you can use the port on top. (Inner most port sohuld be to VP44). Then yes you need a needle valve so you going right ans the braided line to the gauge is fine for under dash but A-pillar it going to be a really PITA. If all the fittings are 1/8" NPT then yes...
-
I love it so far... Worth it...