Jump to content

Welcome To Mopar1973Man.Com LLC

We are privately owned, with access to a professional Diesel Mechanic, who can provide additional support for Dodge Ram Cummins Diesel vehicles. Many detailed information is FREE and available to read. However, in order to interact directly with our Diesel Mechanic, Michael, by phone, via zoom, or as the web-based option, Subscription Plans are offered that will enable these and other features.  Go to the Subscription Page and Select a desired plan. At any time you wish to cancel the Subscription, click Subscription Page, select the 'Cancel' button, and it will be canceled. For your convenience, all subscriptions are on auto-renewal.

Posted

I have spent the past 2 days of my weekend replacing my severly cracked dash and a leaky heater core. In the process I also replaced my ac evap core. My heat had gotten to the point of the only way to regulate it was thru the windows. By that I mean the heat on full blast and opening a window when it got to warm, which was not to often since hy heater was not putting out alot anyway. I installed a new core and the Heater Treater part I heard so much about. The oe part for the blend door was broken and I am glad I had it on hand.I bought a replacement dash from LMC. The color match was spot on. The fit was very good. It was a fairly straight forward replacement. 90% of the screws were not to difficult to install, but the other 10% were a challenge. I used Mike's article for the HVAC rebuild for most of the work, but got a little inventive on doing both the HVAC work and the dash installl. I have pictures and will try and write it up in the near future as to what I experianced while doing both. I will say that the time frame posted for these were exceded by quite abit and if you attempt either one allow some extra time. Since this was my first time taking a dash apart of any kind, the unknown mutiplied the time frame that I needed.I would also like to add that I would never had even attempted something like this had it not been for this forum. The members here give so much confidence and info I feel notthing is impossible. Thanks guys.

  • Replies 18
  • Views 8k
  • Created
  • Last Reply

Top Posters In This Topic

Most Popular Posts

  • I went the buildi g supply and picked up the closest thing I can find to the remnants that were left in there. There is more than one kind in it.  Matched it the best I could. Did not have to mess wit

Posted Images

Featured Replies

Looking forward to seeing the write-up and pics! :thumbup2:

I have spent the past 2 days of my weekend replacing my severly cracked dash and a leaky heater core. In the process I also replaced my ac evap core. My heat had gotten to the point of the only way to regulate it was thru the windows. By that I mean the heat on full blast and opening a window when it got to warm, which was not to often since hy heater was not putting out alot anyway. I installed a new core and the Heater Treater part I heard so much about. The oe part for the blend door was broken and I am glad I had it on hand. I bought a replacement dash from LMC. The color match was spot on. The fit was very good. It was a fairly straight forward replacement. 90% of the screws were not to difficult to install, but the other 10% were a challenge. I used Mike's article for the HVAC rebuild for most of the work, but got a little inventive on doing both the HVAC work and the dash installl. I have pictures and will try and write it up in the near future as to what I experianced while doing both. I will say that the time frame posted for these were exceded by quite abit and if you attempt either one allow some extra time. Since this was my first time taking a dash apart of any kind, the unknown mutiplied the time frame that I needed. I would also like to add that I would never had even attempted something like this had it not been for this forum. The members here give so much confidence and info I feel notthing is impossible. Thanks guys.

The saying goes something like this: "We the unwilling, lead by the unknowing, have done so much for soooo long with so little that we are now qualified to do anything with nothing." :woot:

Congrats dripley!! I have dismantled most of my dash for a dash replacement as well and look forward to your write-up! Glad all went well and agree on the extra time :lol:...I was just talking with a friend about how it always takes me muuuuuchhhh longer than others haha.

  • Author
  • Popular Post

I have not forgotten this. Working and driving to to many places the past week. coming soon though.

- - - Updated - - -

Let me give this a shot, its pretty quite a work right now. This not meant to be an entire how too on the HVAC box rebuild. I used Mikes article:thumbup2: here for that. So I will start at the point of having the dash un done and pulled out from the body.[ATTACH=CONFIG]4697[/ATTACH]I used a cam strap from the uh oh handle like Mike showed and a ratchet strap tied to the upper rear door latch. They really worked good together.

Next I pulled the hvac box. There were 4 bolts on the firewall and 2 inside the cab. All but one of the bolts are horizotal. The one at the far passanger side is verical. I made the mistake of thinking I would have to pull the box both down and out. The braket the one vertical bolt is in is made in such a way that was not necessary. It is slotted to allow the box to be pulled straight out.[ATTACH=CONFIG]4698[/ATTACH] During removal I managed to break 2 of the bolts off of the back of the HVAC box. I used epoxy to reattach them and they seemed to hold up just fine. I stressed them both and they did not give.:pray: One other thing I forgot to do was disconnect the vacumm line from the fire wall:doh:. A coupling fixed that issue and all works well. If I had it to do again I would have replaced the line completly.

Now I have the HVAC box out and crack it open, again using Mike's instructions. I had been geting a wiff of anti freeze every so often and the AC was loosing its charge. I expected to see evidence of both leaking.

[ATTACH=CONFIG]4699[/ATTACH][ATTACH=CONFIG]4700[/ATTACH][ATTACH=CONFIG]4701[/ATTACH]

The only thing I saw on the evaporator was clogging. It was completely dry. I was also experiencing poor air flow and the clogging would explain alot of that. The wetness seen in the photos is an oily/greasy mess. It was green in the bottom of the depression for the heater core and a burnt orange color on the other side of the blend door. The heater core had both green and burnt orange mess on it.[ATTACH=CONFIG]4705[/ATTACH][ATTACH=CONFIG]4704[/ATTACH][ATTACH=CONFIG]4703[/ATTACH][ATTACH=CONFIG]4702[/ATTACH][ATTACH=CONFIG]4706[/ATTACH]

My AC system had the green flourescent dye in it from the last time I had some one check for leaks and charge the system. Either that or the green anti freeze I use could be the source. The AC evaporator had nothing on it. The burnt orange colored grease looking stuff,post-10340-138698194438_thumb.jpg I dont have a clue of where it came from. Maybe someone can enlighten me.

So I cleaned all of the mess up, replaced the foam gaskets inside and out(most of it was in bad shape). I installed new foam around the evaporator and installed it. I then reassembled the box and installed the heater core.

post-10340-138698194462_thumb.jpgYou can see on the back of the box the 2 bolts I broke off and epoxied on. If you look closely you can see the coupling i had to installl on the vacumm line I broke. Installation is the reverse and it all went back together quite easily. Just before install I used the Heater Treater kit for the blend door, the connector was broken and this also was affecting my heat. It is quite easy to install while the box is in your hand. I thought it was a little pricey at $25 + almost $10 for shipping, but what do you do. It is al installed now and every thing works great. Good air flow, the temp contol now works as it should and I dont have to regulate the temp with an open window. i have not had the ac checked and recharged yet, soon I hope. Or at least before summer arrives.

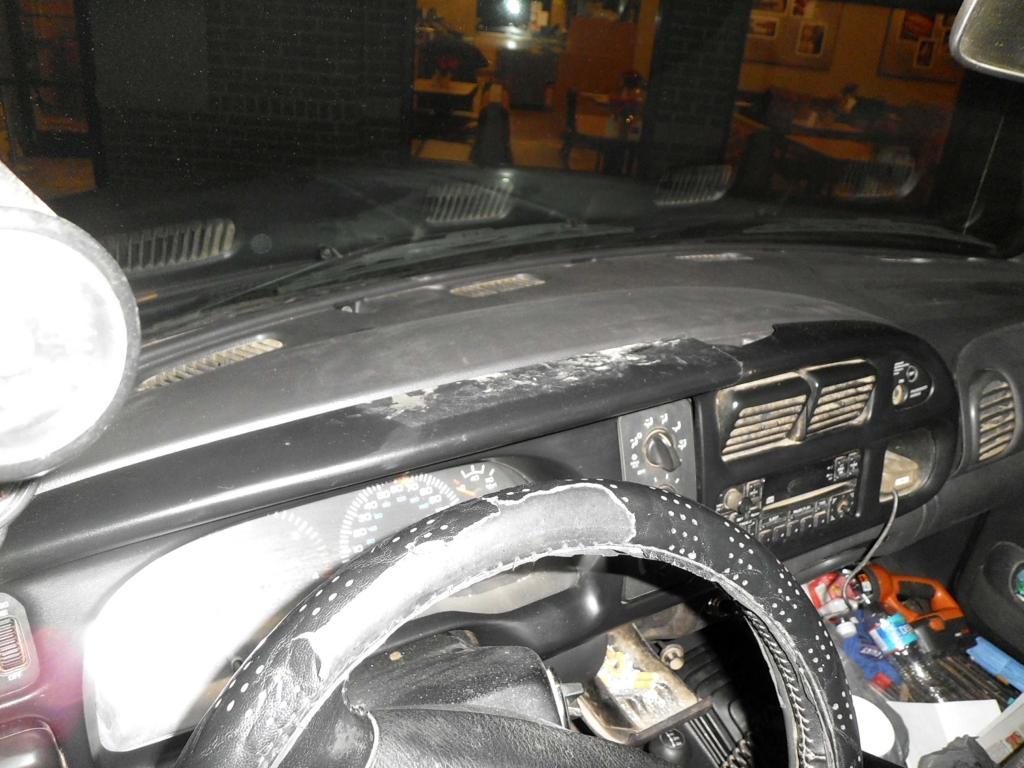
Now for the other item, a new dash pad. I chose to install mine while I had it out and did it with just one side of the dash out instead of pulling it completely. Removal was easy and if your dash looks like mine did, your will be too.

post-10340-138698194474_thumb.jpgIt was all still in place but I was afraid to clean figuring it would cave in.

I used a dash from LMC. It was right at $300 with shipping + oversize charge and the extra washers for the screws that go into the body at the windsheild. The washers just felt like cheap insurance after what every thing else cost.

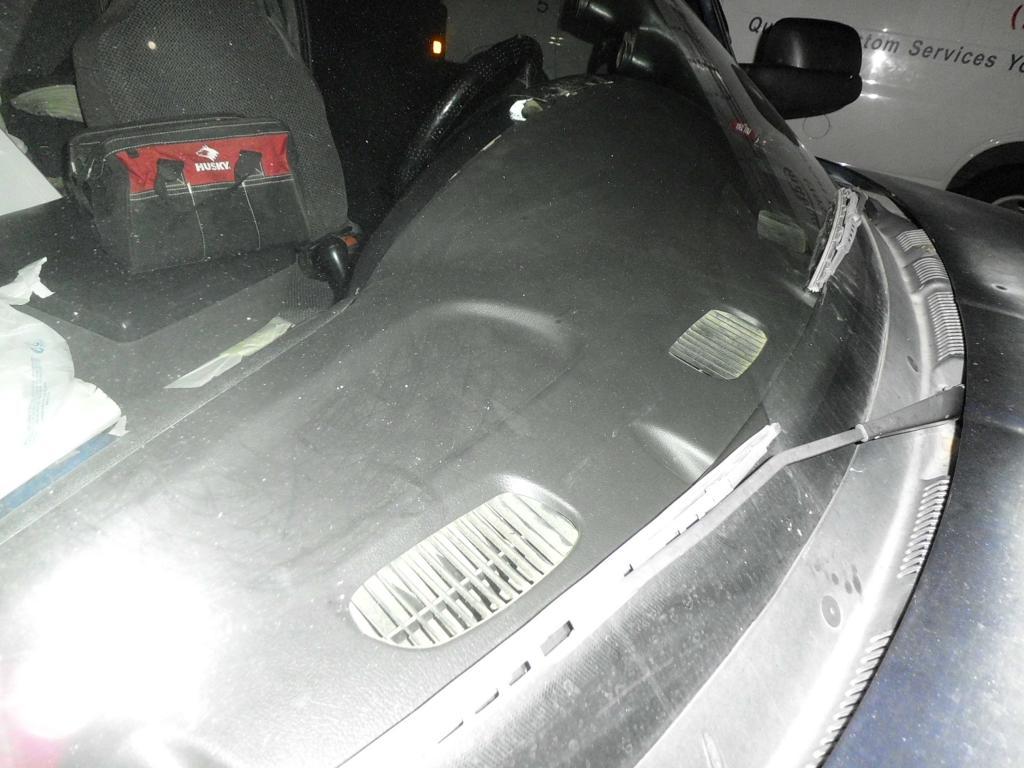
Install was pretty easy also. My thinner than me son graciously accepted doing the work behind the dash. As I remember ther were 12 or 14 screw that need to be installed from underneath the dash. 2 each at the 4 defrost vents, 1 each at the 2 side vents for the front windows and i beleive 4 more across the width of the dash, all installed from underneath. We started on the passanger side and worked our way across. The closer we got to the drivers side the harder it got, but the only ones we had alot of difficulty with were one screw on the driver side of the last vent and there was another beside it. There is no way you can see it and install it. It took both of us, one using his fingers and the other there eyes to get them started. Once started we used a 1/4" ratchet with a #2phillips bit to tighten them. The one screw holding the side vent was accesed by taking out the headlight switch.

post-10340-138698194486_thumb.jpg I could not seem to get any good photos from thru the winsheild, but it is pretty self explanatory when you see the new dash. One other problem we had as we installed it was when we got to the driverside. The last screw did not line up with the mounting bracket. I put a screw driver thru the dash pad and the braket and pried it over with no ill effects, but I sure sweated doing that. There just di not seem to be another way. I could not get my hands on the bracket to move it. If you have the dash un hung on both ends you could have. When we rehung the dash and tipped it forward all off the holes lined up prefectly. It all just bolted right up with no problem. every thing else went in fine. The fit was as close to perfect as you can get.

post-10340-138698194496_thumb.jpg

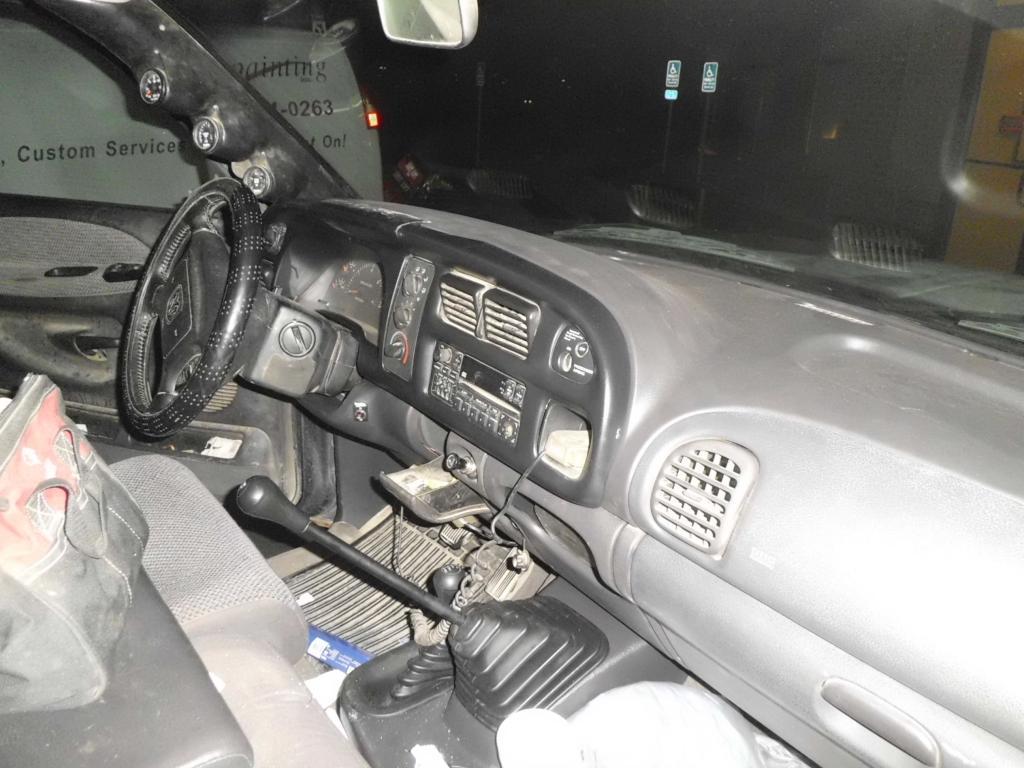
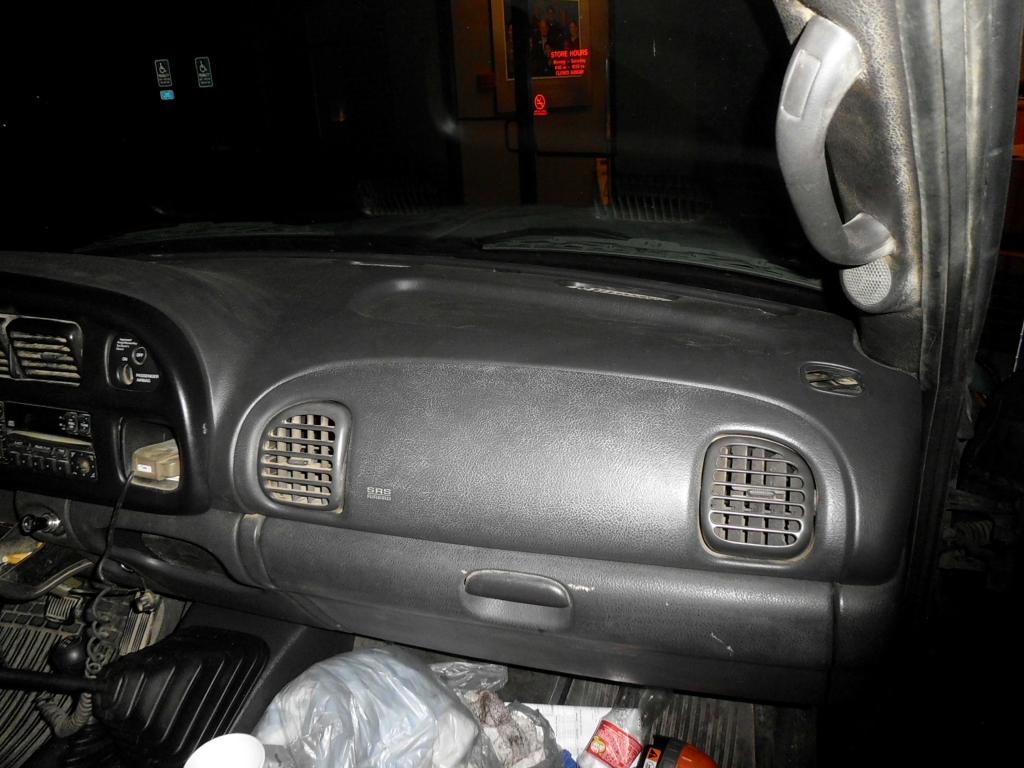
This was not a hard install. If you are just installing the dash pad and take the dash loose on both ends it would make it easier. I just dont know how much more you need to remove to get it off. Steering wheel maybe and some of the wiring would have to be disconnected. The only thing that we put any stress on was the hood release cable. It was pretty tight, we did not realize that until under the hood for something. Here is what it looks like now.

post-10340-138698194538_thumb.jpg

On a side note from the heater core install. As some of you might remember I have been having an overcooling problem with my truck for some time now. I was hoping the heater core had something to do with that. I did not help at all. When I refilled everything with coolant I filled the heater core before connecting it back up. I refilled the engine thru the t stat hole and topped it all off thru the radiator. I can only manage to get 170* to 175*. This is with the winter fronts on and the ambient temp around 55*. That is on the interstate making 75mph. I am sitll scratching my head on that one. The only t stat I have not tried is one from the dealer. Even one of the ones i bought that did not work in mine works in Mike's truck.:shrug:

Anyway, I hope this helps some of you out. It is not difficult, but the first time is always a little tricky. I just took my time and tried to do it right and almost suceeded.:whistle:

post-10340-138698194452_thumb.jpg

post-10340-138698194506_thumb.jpg

post-10340-138698194516_thumb.jpg

post-10340-138698194527_thumb.jpg

post-10340-138698194549_thumb.jpg

  • 2 weeks later...

So basically just to change the dash pad do i need to drop the dash down or can it be done while still installed?

Dripley,Looks great!! Nice work and write up!!On the temperature, have you ever verified that the dash gauge is actually reading without an offset? You might need to use another method of temperature measurement. This gauge is fed from the PCM. Have you had a scan tool connected to see what the PCM actually "thinks" it sees as a temperature input? If the PCM is "actually" seeing this temperature, you might need to pop the coolant temp sender out, and check its resistance to known temperatures. Also, according to my wiring diagram, the power for the sensor is "shared" with the power for the WIF sensor. If for some reason that is drawing too much voltage, the scaling of the coolant sensor will be offset.Hope you figure it out!!Hag

  • 3 months later...
  • Author

Dripley, Looks great!! Nice work and write up!! On the temperature, have you ever verified that the dash gauge is actually reading without an offset? You might need to use another method of temperature measurement. This gauge is fed from the PCM. Have you had a scan tool connected to see what the PCM actually "thinks" it sees as a temperature input? If the PCM is "actually" seeing this temperature, you might need to pop the coolant temp sender out, and check its resistance to known temperatures. Also, according to my wiring diagram, the power for the sensor is "shared" with the power for the WIF sensor. If for some reason that is drawing too much voltage, the scaling of the coolant sensor will be offset. Hope you figure it out!! Hag

I checke the voltage a couple years ago and as I remember it was fine. I have also replaced the sender twice with no differance. I recently bought a cheaper laser temp gun and have shot the tstat housing just after parking the truck with the engine runnig and seems to be close to the gauge. Though it varies alot aroung that area of the block.

How hard for the dash out of 10 ?Thinking of doing mine .. ..

How hard for the dash out of 10 ? Thinking of doing mine .. ..

about a 3 or 4.
  • Author

How hard for the dash out of 10 ? Thinking of doing mine .. ..

I would have to say a 4 or 5 if it is your first time. Getting the dash loose and hanging for install was a lot easier than I thought it would be. The dash screws that are under the dash are the hard ones. I did not know they were there until I removed the old one. It was easy to remove since it was in so many pieces. I also had the hvac box removed at the time which made the install easier. Now that I have done, I would agree with Rogan's rating. Even if it had ben a 7 to 8 it would be worth seeing and feeling a solid, uncraked dash. That thing bothered me more than any damage on my rig. It is well worth doing.

Do you have the link to mikes mod for the hvac blend door?

  • Author

I don't have the link, just google Heater Treater and that should get you what you are looking for. I used it on mine.

you like the LMC fit and quality ?How much did you pay shipped ?

  • Author

The dash fit and looks great, I hope it holds up for a very long time. The dash was $240 + about $30 for shipping and a $20 oversize part charge. It came in a rather large box wrapped in foam and packed in Styrofoam peanuts. I also ordered the reinforcement kit for $25 extra. It was a little pricey for no more than what was, but seemed to be cheap insurance. So it was about $315 for everything. Here is where I got it, http://www.lmctruck.com/icatalog/de/full.aspx?Page=93 It just fit right in no trimming or filing was necessary.

  • 6 years later...

Doing heat core, evaporator, blower motor and resistor, and new actuators all around right now. When i took everything apart all of my foam gaskets and most of my firewall disintegrated. I was wondering which foam you use for your gaskets? And i can no longer get the firewall pad so i guess i make my own. Thanks in advance.

  • Author
4 minutes ago, billhulbert said:

Doing heat core, evaporator, blower motor and resistor, and new actuators all around right now. When i took everything apart all of my foam gaskets and most of my firewall disintegrated. I was wondering which foam you use for your gaskets? And i can no longer get the firewall pad so i guess i make my own. Thanks in advance.

I went the buildi g supply and picked up the closest thing I can find to the remnants that were left in there. There is more than one kind in it.  Matched it the best I could. Did not have to mess with the fire wall. You will also need some sealing foam on the evaporator and the heater core as I remeber. Bought that at the building supply also.


There is a fitting on the outside of the box that goes thru the fire wall for the condesate drain. It will get knocked when you remove the box. If you dont put it back on all the condesation will leak into the floor board. If you loose it dont worry you can replace it with anything that will fit on there from the same building supply. I have a piece of clear vynil tube on mIne. 

11 hours ago, dripley said:

You will also need some sealing foam on the evaporator and the heater core as I remeber. Bought that at the building supply also.

I just used black silicone, it's somewhat easy to peel off of things if you ever need to. Got a couple of tubes of it at Menards for few bucks a tube. Used some of it to go around the headlights to close up the gap between the fender, as the new cheap housings don't fit quiet the same and live a bigger gap.

Did This Forum Post Help You?

Show the author some love by liking their post!

Welcome To Mopar1973Man.Com LLC

We are privately owned, with access to a professional Diesel Mechanic, who can provide additional support for Dodge Ram Cummins Diesel vehicles. Many detailed information is FREE and available to read. However, in order to interact directly with our Diesel Mechanic, Michael, by phone, via zoom, or as the web-based option, Subscription Plans are offered that will enable these and other features.  Go to the Subscription Page and Select a desired plan. At any time you wish to cancel the Subscription, click Subscription Page, select the 'Cancel' button, and it will be canceled. For your convenience, all subscriptions are on auto-renewal.