

Leaderboard
-
dieselautopower
Vendor4Points481Posts -
dripley
Retired Staff1Points11,788Posts -
2000Ram2500
Monthly Subscription1Points240Posts


Popular Content
Showing content with the highest reputation on 09/25/2018 in all areas
-
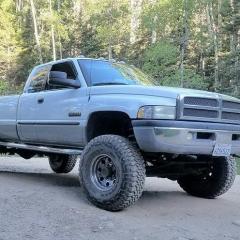
5 points(With a Mad Scientist voice) It's alive! It runs once again! I'm quite amazed. I got it started and left it idle while I picked up a few things then kicked it out the door to warm up more as I clean up a bit more stuff. Then I took off down the road riding easy on it till it warmed up and the thermostat opened and cycled once. I knew it needed to burp once. After that, I gave it a few good stabs at the throttle and it pulls like a scalded ape. Nothing long but something to create EGT's a bit. After about 5 miles I stopped and check for leaks or any issues. None to be found. Continued down canyon for another 5 miles. Pulled off again checking for any leaks or any issues. Still nothing. Cruise on back home and sun is just going down and with my flashlight, I caught a glance at my breather pipe the blow by is greatly reduced. The vapor comes out the end of the pipe like steam off a hot cup of coffee in the morning. I'm leaving the beast outside to chill tonight so I can see the start up and what the smoke if any.5 points
-
4 pointsno need to do anything with the injectors. 309 is the pop off pressure. You will like the extra power!4 points
-
I will ALWAYS pre-fill an oil filter if possible. Been doing this for decades and will continue to do so too. The whole "you can pour something into the filter by accident and it will get into the oil system" is so implausible that it would be the last thing on my mind. If I'm that slight of mind of whats coming out the new oil bottle then I'd be pouring the same crap into the valve cover fill hole... Why I do this? Well because I prefer not to shove 70 psi of cold oil through a dry filter element. Thats simply asking for the media to tear... Would you know if the media is torn, basically turning the filter into a bypass? Probably not. And because I prefer not to hear 5 seconds of dry valve train while the oil system is filling the filter before maximum pressure is achieved. Especially on engines that are preset to ramp the throttle up upon startup. Sounds painful. The only times I dont pre-fill is if the filter is mounted sideways or is a cartridge type, but I'll make sure to warm the engine a bit before changing in hopes that the oil will pass through a warm block before reaching the pan, and the oil system is basically charged with lube which will offset that first blast of dry RPM's. Nonetheless, it seems we all have our own ways of wrenching.2 points
-
2 pointsRight from ARP's website... https://arp-bolts.com/p/FAQ.php2 points
-
2 points
-
I take it you’ve never seen a virgin oil report on particulate size? Oil out of the bottle has more larger contaminates than oil at the end of its life. Oil manufacturers are counting on the oil filter to clean their oil. Any oil that goes thru the block without filtering is doing more damage than good. When you pour oil into the valve cover it drains jnto the pan. The oil added will never go thru anything with a tight tolerance without being filtered. The same cannot be said for oil added to the center of a filter. Pressure is a measure of resistance, and a dry or wet filter will have the same resistance based on what’s after the filter. A filter rated for 20+ GPM is not going to have an issue with a “dry start”. If it did it would have shown up on my UOA’s by now. If a filter cannot handle the initial low flow of oil at idle how can it be expected to withstand the psid of normal use and high rpms/flow? Or the resistance created by oil that’s only a few degrees above its pour point? If you’re getting 5 seconds of dry valve train sound you need a new oil! Even with a dry filter and a change I’ve never heard 5 seconds of dry valve train. My motor is noisier after 6 weeks of sitting than it ever is after an oil change with a dry filter and even then it’s not more than 1-2 seconds.1 point
-
Its sure interesting reading about these different ways. Lots of things I never thought of.1 point
-
1 point
-
1 pointThe tach needle bouncing is very common at idle. Mine always has for the most part. But smooth there after. The ground wire mod should help. It decreased mine by 65%.1 point
-
I won't do it. Anything poured in the center hole debris wise is straight to the bearings and oil jets. You would have to hold your thumb over the center hole and fill from the outer.1 point
-
1 pointI just did this a couple weeks ago and I too was wondering what to do with the pdc end of the wire. I actually disconnected it all originally but because of my super custom battery wiring I ran out of room on my drivers side battery stud and had to re-purpose a side post adapter (I have optimas with a top and side post). So I used my side post adapter to attach my new ground to the drivers side battery and then ran my grid heaters to one side of the 140A fuse and connected the other side to the battery as it was before coming from the alternator. Hasn't blown yet and I know those heaters draw quite a bit of power. I guess we'll really see when it starts to get colder here in a month or so. I also experienced a huge improvement in overall driveability. Shifting is alot smoother. From a stop the shift from 1st to 2nd is extremely smooth and comes on alot sooner. I used to have to feather the throttle around 25 mph to get it to come out of first but now its already changing by 20mph. Overall i feel like it just drives alot better after this mod. I have my edge monitoring the APPS percentage and it holds steady (I was just trying to fix up a P1689). I do still need to get a reading on my alternator AC but for now its doing great. Gotta say thanks to @W-T for sharing this and @Mopar1973Man for getting better pictures and simplifying it I should also point out that at least my local Napa carries a couple styles of premade lengths of 4ga battery cable. You can get it with a standard battery terminal one one end and eyelet on the other or 2 eyelets. I used a side to top post adapter with a 20 or 24" piece of battery cable for the alternator. I would suggest not going that route as i had to go to great lengths to get the eyelet to fit inside the alternator connector and a better route would definitely be the way that mopar man did it. But for the ground on the drivers side these napa cables work perfectly.1 point
-
1 pointCheck for exhaust leaks. Missing manifold bolts, cracked manifold, or cracked turbine housing. Any leak will cause an abnormal sound and lag.1 point
-
1 pointWelcome to the family. Ask all the questions you need I'm sure someone can help.1 point
-
1 point
-
20mpg based on odo miles with a 5% error is 19mpg actual. Having ran several different sizes of tires on my truck none have had more than a 2-3% change in economy. That from stock to 285’s to my 125 lb 19.5’s. Each tire size has its benefits. The OEM tires pulled better in OD at 65, but the current ones do better at 60 in 5th. Personally I wouldn’t run something as small as a 245 if you ever see back roads and/or snow. The pumpkin drags enough as it is on my truck with 255/80R17’s coming it at 33”. It’s not as bad in the summer, but even with the stock 265’s I would find more sticks, rocks, etc bumping the undercarriage than I do with 33’s. On my dads 17 he has some winter tires that are 265/65R18 vs 265/70R18 for his summer tires. He gets better economy on the bigger tires, even after accounting for the speedo error. The 6.7 is a different beast thou, and prefers lower rpms than the 5.9’s.1 point
-
1 pointSmoky... XZT is designed around stock injectors. Not boost to fuel control nor timing control. Bigger the injectors the more timing is required. Again it's about a balance of fuel and timing. XZT is not going to do that. Need a good amount timing retard as the turbo starts to light then flip over to advancing and heavy fuel. That period of time is based on timing and fuel/boost control. Ummm... Stock ECM timing is about 12* above 20% engine load. So if you want timing you have to have a live data display and keep the engine load below 20%. This is normal smog control tuning. If you really want to see retarded look at CR software it so retard stock that the main event actual fires ATDC not BTDC. The only thing I could think of is an exhaust leak or boost leak. But that wind tunnel sound is typically the BHAF that seems to amplify the sound like the turbo attempting to suck the glovebox through the firewall. If the compressor is not making contact and the shaft can't be pulled in or out the bearings are good. Long as there isn't any oil in the mouth of the compressor the seals are good.1 point
-
1 pointYou found Valvoline CI-4 last year? I haven't seen it in a decade. Never mind, the photo didn't load earlier and now I see it's CJ-4 vs CK-4. CK is a good spec, from what I can tell What I saw was wear metals that increased much quicker, and higher, with the HDD. My theory was that since the high temp/high shear viscosity of the HDD was 3.5 cP and the minimum is 3.5 cP for a -30 oil, from Cummins, that it was increasing the wear. The Viscosity also reacted to the soot much quicker, and the soot seemed to climb a little quicker too. A lot of the soot was my stock motor, since the rebuild doesn't produce hardly any soot. Piston design is likely a big part of it. In the end, I just didn't see the need to run a 5w-30 when there was a 15w-40 that would provide better protection at increased power and loads. I don't need the protection below -36° that it offers.1 point
-
1 point
-
1 pointYes, FASS and AD work the same and wire up the same using that relay. And yes, the ECM rapidly cycles voltage to reduce fuel pressure but for some reason this can still result in too much initial fuel pressure for some VP's. Tighter tolerances, heat, voltages, resistance, combination of all?.....not sure, but its more a problem for anyone using a fuel pump like the FASS or AD or Raptor. Either way, its been found that by adding another relay to cut all power to the fuel pump during engine cranking removes all head pressure to the VP. The result is immediate starting of the engine. As long as the fuel line prime is retained then this seems to be the best method too.1 point
-
1 pointENGINE CONTROL MODULE (ECM) Removal & Installation 1. Turn ignition off and disconnect negative battery cables. ECM is located on left side of engine block above engine oil pressure sensor and behind fuel filter. See Fig. 3 and Fig. 4 . 2. Loosen 5/32" (4 mm) Allen head bolt securing 50-pin connector at ECM. Carefully pull ECM connector outward while removing connector bolt. Remove 3 mounting bolts securing ECM to engine block and remove ECM. 3. Ensure back of ECM is clean for good ground connection to engine block. Do not paint back of ECM. To install, reverse removal procedure. Tighten ECM bolts to specification. See TORQUE SPECIFICATIONS . 4. To calibrate ECM to Accelerator Pedal Position Sensor (APPS), turn ignition on. Without starting engine, slowly press throttle pedal to floor and then slowly release. This procedure can only be performed one time. If this procedure is not performed, DTCs may set.1 point


This leaderboard is set to Boise/GMT-06:00