dripley
Retired Staff
-
Joined
-
Last visited
Everything posted by dripley
-
I would have to say a 4 or 5 if it is your first time. Getting the dash loose and hanging for install was a lot easier than I thought it would be. The dash screws that are under the dash are the hard ones. I did not know they were there until I removed the old one. It was easy to remove since it was in so many pieces. I also had the hvac box removed at the time which made the install easier. Now that I have done, I would agree with Rogan's rating. Even if it had ben a 7 to 8 it would be worth seeing and feeling a solid, uncraked dash. That thing bothered me more than any damage on my rig. It is well worth doing.
-
I like the bracket. A nice addition. This is the first time I ever heard of a bungee cord being and up grade. I needed to replace my BHAF and was shot of time. I purchased a 6637 from NAPA and was surprised to see it was the same filter as the BHAF except for the size. Both of them DuraLite. Does any one know if size is the only difference? The 6637 only cost $33 versus the BHAf at near $85 from Vulcan.
-
If you have a small air leak some where, bleeding the system will not eliminate it. recheck everything you changed out and be sure they are all tight. some leaks are so small they will let air in but no fuel out. By that I mean you might have a leak that wont show any fuel at said leak, but can let air in the system.
-
I don't think so. I have a spare speedo and installed it when my ecm went out and it acted no different. - - - Updated - - - I don't think so. I have a spare speedo and installed it when my ecm went out and it acted no different. - - - Updated - - - By they way I see the avatar has grown up a little. Correct me if I am wrong, but I believe the flow thru the heater core is constant. When I replace my core I saw nothing to restrict the flow. It appeared to me the flow is constant and the temp in the vehicle is controlled other means. I know some older vehicles I have owned had a vlave that controlled the amount of flow from the engine. could be wrong on that though. As far as leaks, I am loosing no coolant and the tstat housing is the stock one. - - - Updated - - - This seems interesting. I will have to try this tomorrow. I have no scan gauge, but if I immerse the sensor in 190* water the temp gauge should be near the same. - - - Updated - - - While I don't think it is the gauge on the dash, I have thought that it might be the signal thru the wiring. I have 3 senders and they all do the same thing. I also have a spare speedo which registers the same as my original. - - - Updated - - - Negative. When my fan comes on it sounds like a Turbo prop engine is running with me. - - - Updated - - - I remember that thread and thought about getting one myself, but did not. My temps a varying so much more than yours it is ridiculous. Still might try one though. No high idle box on mine. - - - Updated - - - I have thought of doing that, but think it is more a signal problem thru the wiring. I am on my 3rd sender with the same results. I have even changed the cluster out with the same results. I have good heat. and all seems normal tempwise under the hood. That is more from feel than any scientitfic results though. I very much appreciate the offer on the gauge, but I am going to play with it all some more for now. - - - Updated - - - Thanks for the info here. I will use when is get some time.
-
I checke the voltage a couple years ago and as I remember it was fine. I have also replaced the sender twice with no differance. I recently bought a cheaper laser temp gun and have shot the tstat housing just after parking the truck with the engine runnig and seems to be close to the gauge. Though it varies alot aroung that area of the block.
-
I have assume the the young man in the avatar has grown up a little. I like the time lapse photo.
-
As some of you here know I have had a over cooling condition in my truck for quite a while. It seems to be getting worse. No matter what tstat i am using now the temp is hard pressed to get over 175 and will drop to 155 but seems to stay just below 170 most of the time. This is in 70 weather, in town or high way and with 2 of my winter fronts in place. I am on my 7th tstat with the same results. I even sent one of them to Mike and it runs fine for him. After 6 190* tstats and one cummins 180* tstat with almost the same results with them all I am at my wits end. I have also replaced the temp sender twice and no differance. I am wondering has anyone else here had this problem. Not long ago I replaced the heater core and refilled the engine thru the tstat hole and even put water in thru the heater supply and return. I cant beleieve there is any air in the block. The gauge will move between 155 and 175 but I cant get it any higher unles I am pulling the rv. But even then about 180 is the best I can seem to get.. I have noticed of late it the temp drops below 165 i get some EGT fluctuations and a little boost gauge fluctuations. If any body has had this problem I am very interested in hearing about them and any solutions you might have found.
-
My 02 showed 245's as stock and the 265's were an option. The sticker in my door shows 245's, the sticker in the window showed the 265's. Mine is 4X4.
-
How did this work out for you? It sounds like an air leak. Very possibly the return line on the back of the head or the return tee at the back of the engine. Both of these are near the #6 injector . I had the samemproblem and new orings and a sealing washer took care of it.
-
Hello to all. I have been MIA for quite a while and thought I would try and let you know what was going on. The first week in last December we had a major up heavel in the family. This consumed all of us and is still ongoing at this time. I must keep the nature of this to myself for now. My job was taking me to Alabama back on december 15th. I was out getting the rv ready for the trip and had to jump up in the door way with out the steps deployed. I have done this many times. This time when i jumped I felt something give in my leg and i fell back out on the ground. It felt like some hit me with a sledge hammer and was continuing to beat me while I was laying there. It turned out to be my achilles tendon seperating. You could feel the fibers of it coming apart when I jumped up. I was finnalyy able to get up and make into the house. Only 60 feet seperated me from the RV to my chair and it took me 40 minutes to get ther, 12 day to get to the doctor and 1 week to get ot the specialist, and another week to get a boot to strap on and imobilze my foot for it to heel. I was very fortunate that it did not seperate completely of surgery would have been needed. I have been 10 weeks in recovery and dont want to know how long it would have taken if surgery was involved. Any way I am back to work, but must take it easy on the leg for a couple more months. The boot I was wearing had wedges in it to keep the toe pointed down and all the stress off the tendon. When I did stand on it, my left leg was 5" longer than the right and quite difficult to walk on. Its like wearing one 5" high heel shoe and one flat shoe. You just dont walk around much. So for 4 weeks I mostly sat in a chair and ate alot of pain pills and stool softners. They seem to go hand in hand quite well. Somewhere thru this my computer crapped out and I had to get a new one. I just got that a week and a half ago and fronm the looks of things, Ihave alot of catching up to do. Just form a brief look around the site and my messages I owe some responses and many thanks to all for the TOTM nominations. Thanks alot. This site still amazes me as to the calber of folks that are members here. I will try a catch up with all and not be a stranger any more.Thanks to all,Dave
-
Hello. It was my Achilles tendon. I tore almost in half. I have a new computer now and very little time. I appreciate all of the concern and will explain a little more this evening. ThanksDave
-
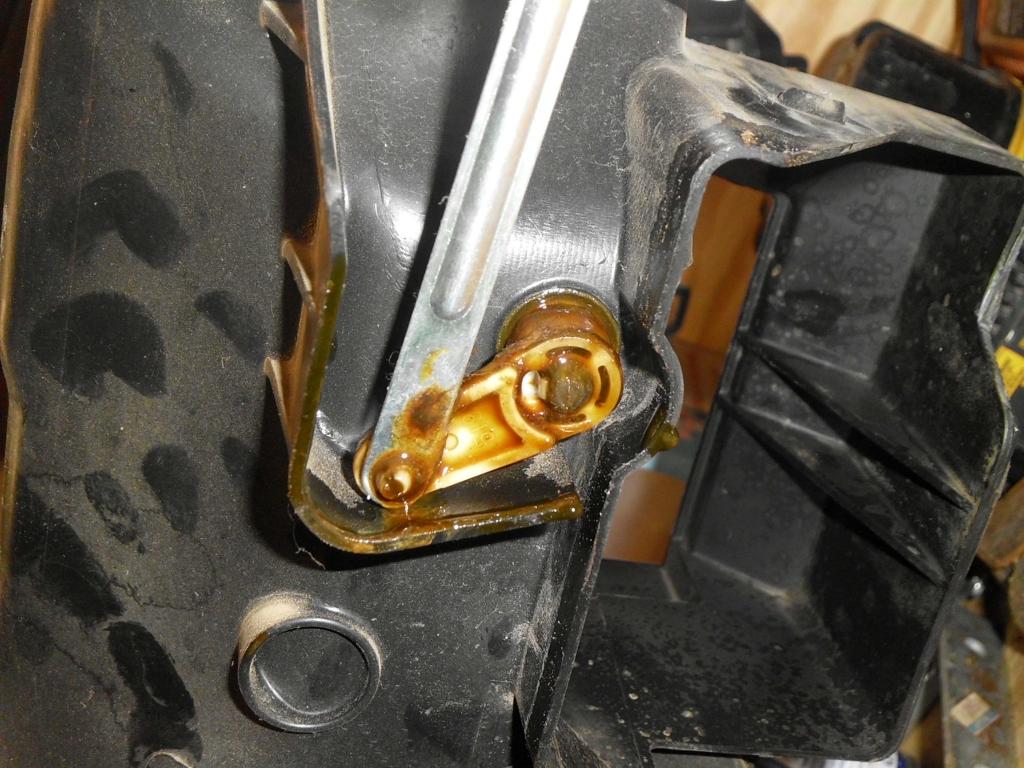
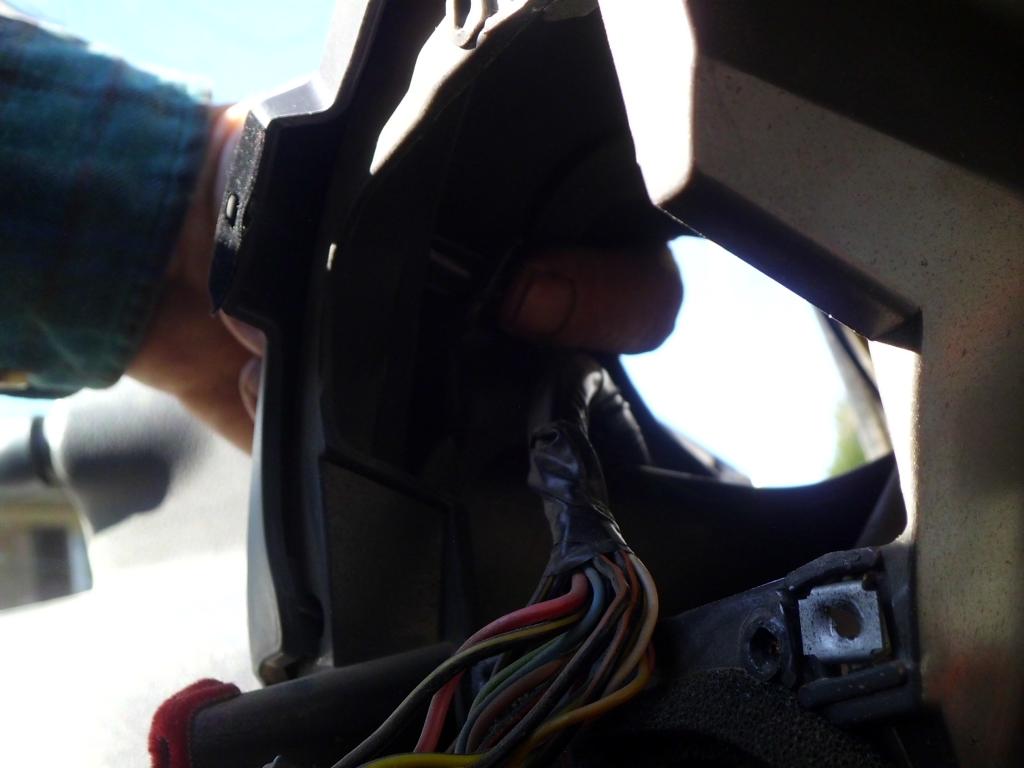
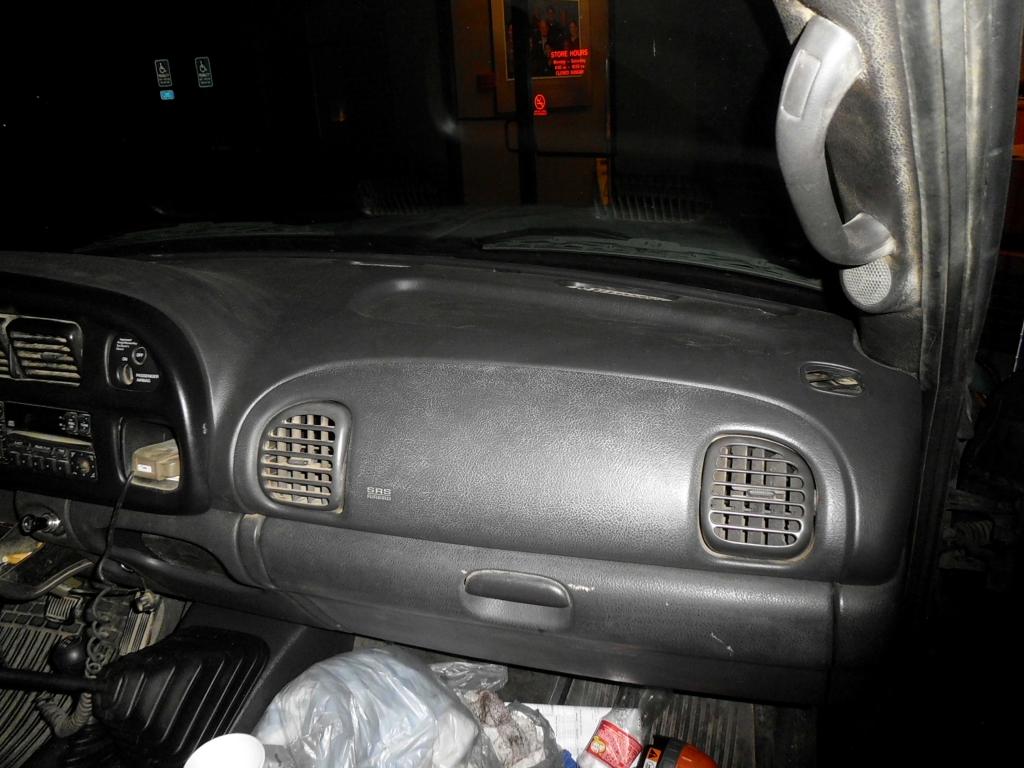
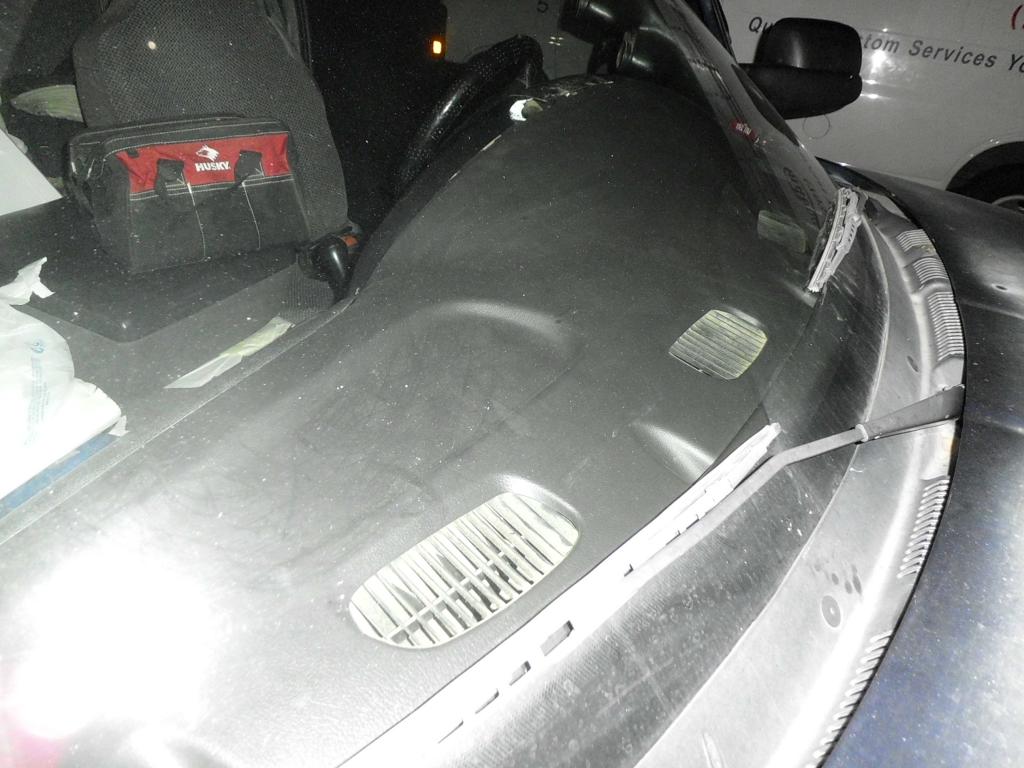
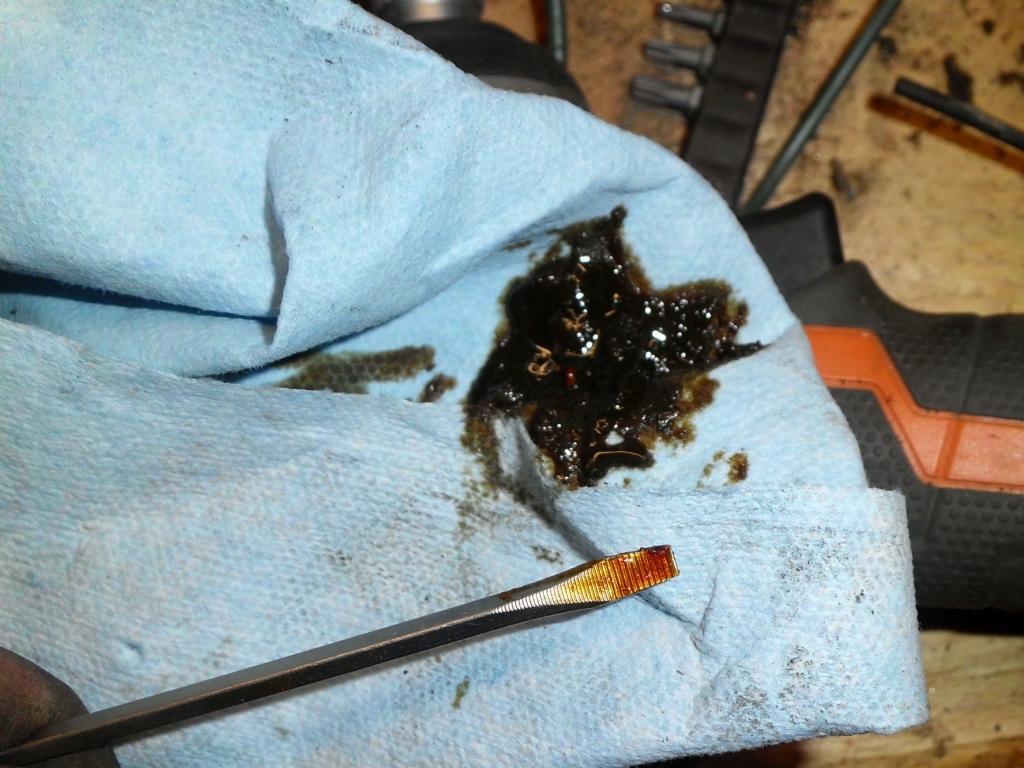
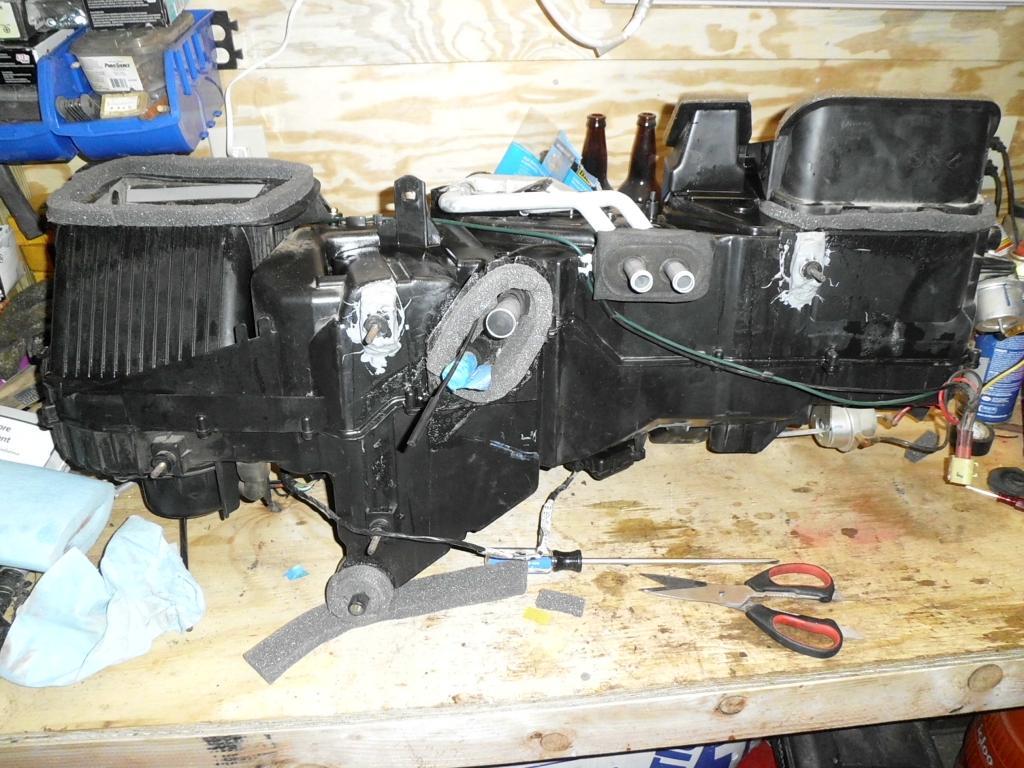
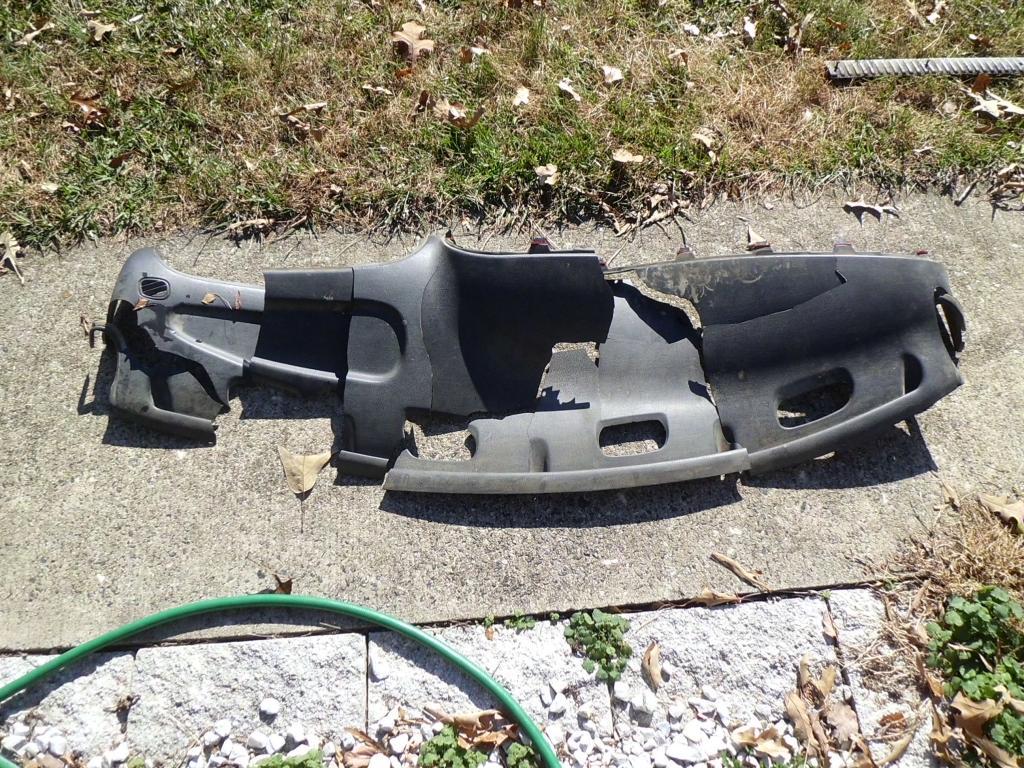
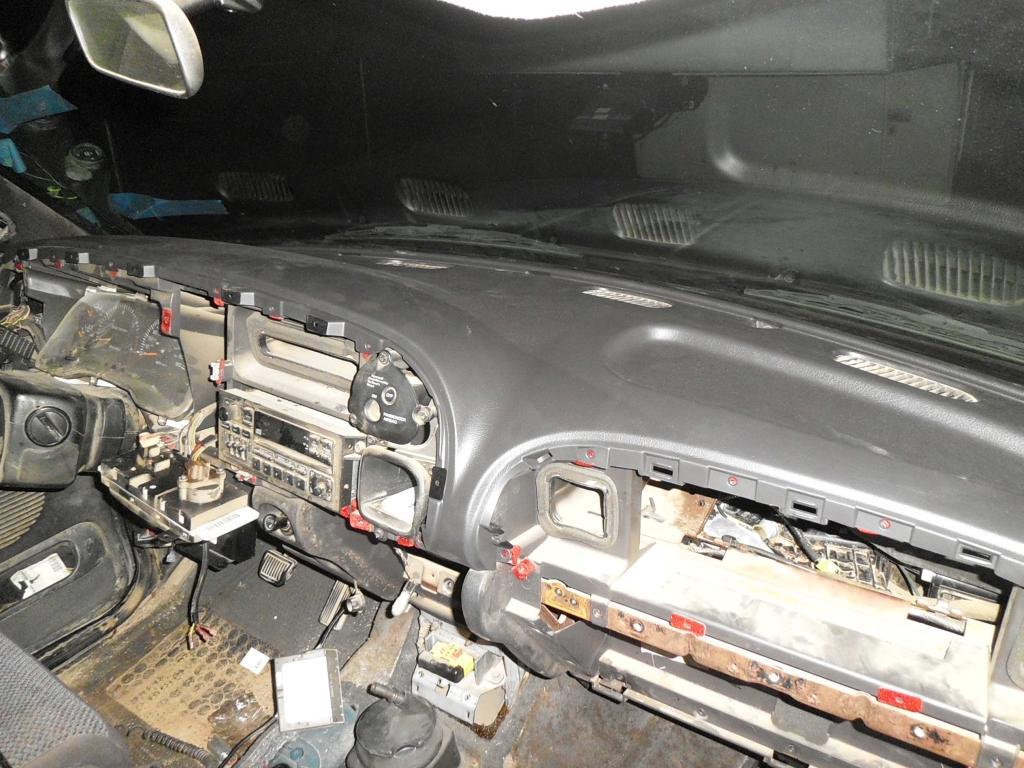
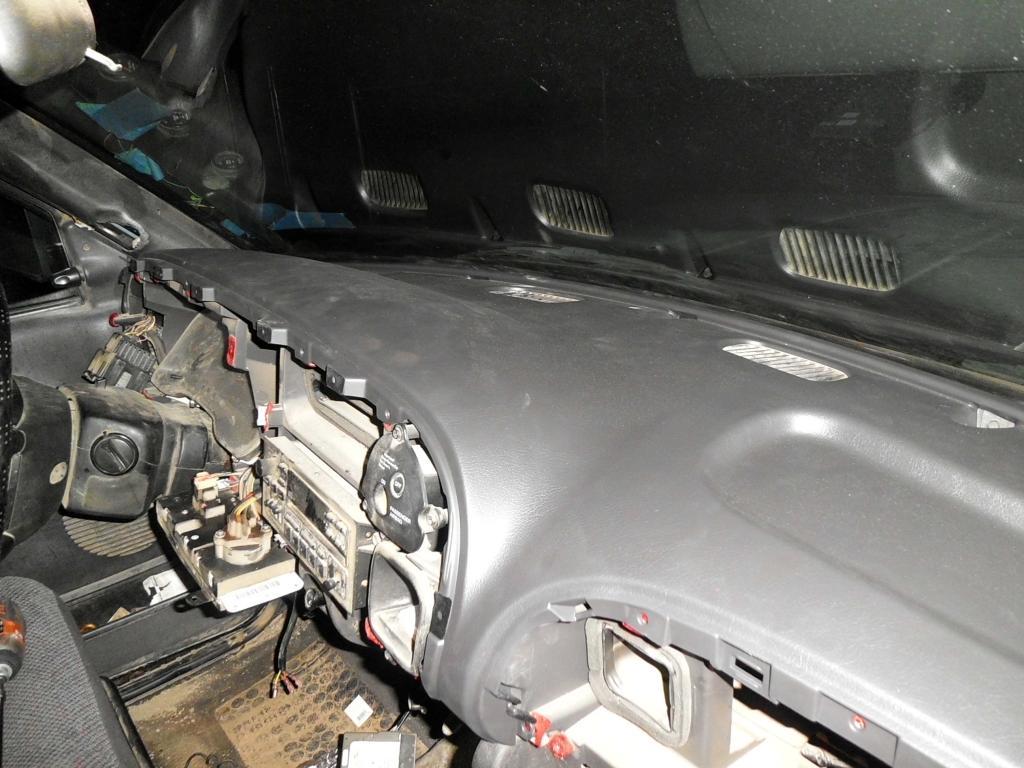
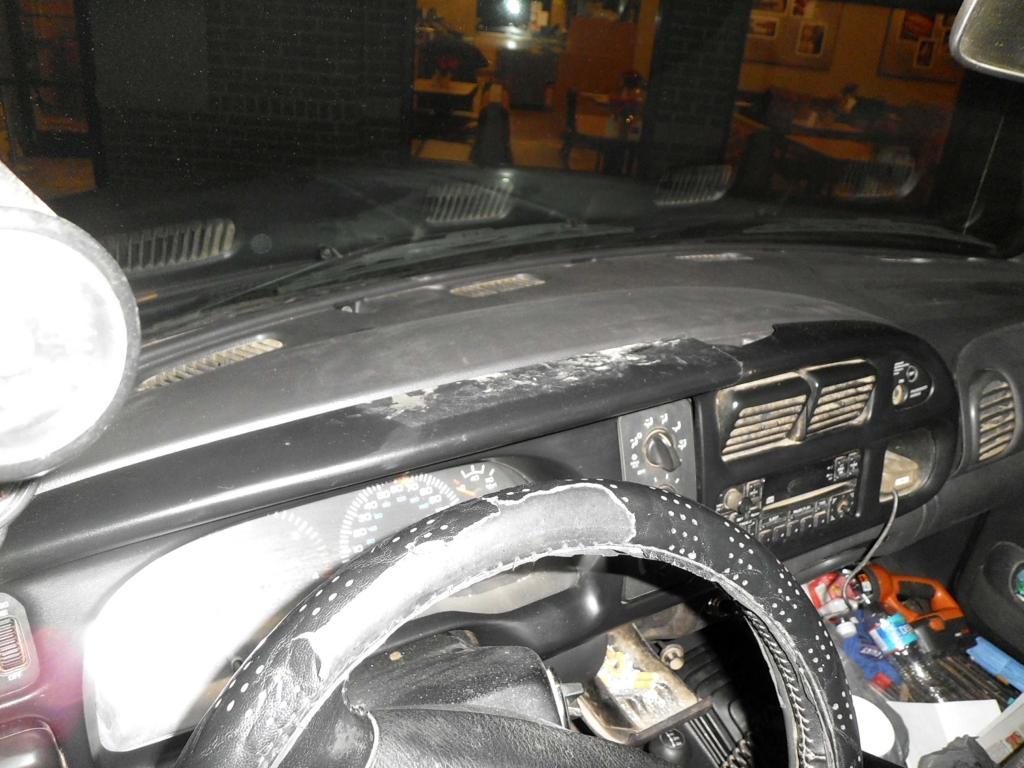
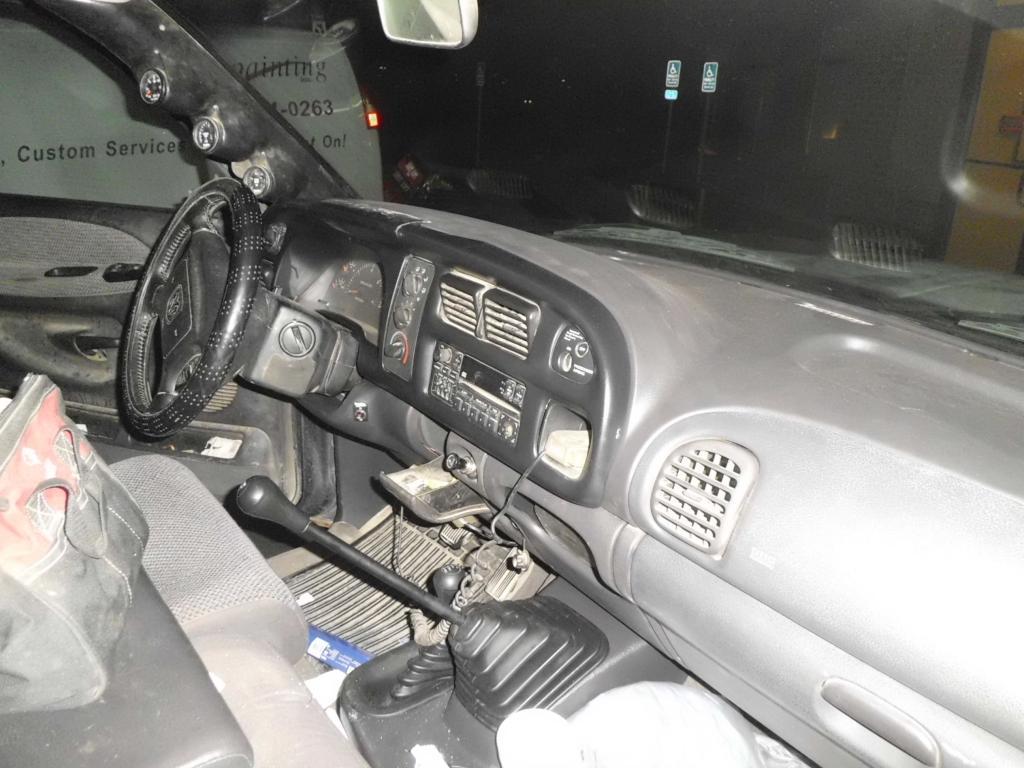
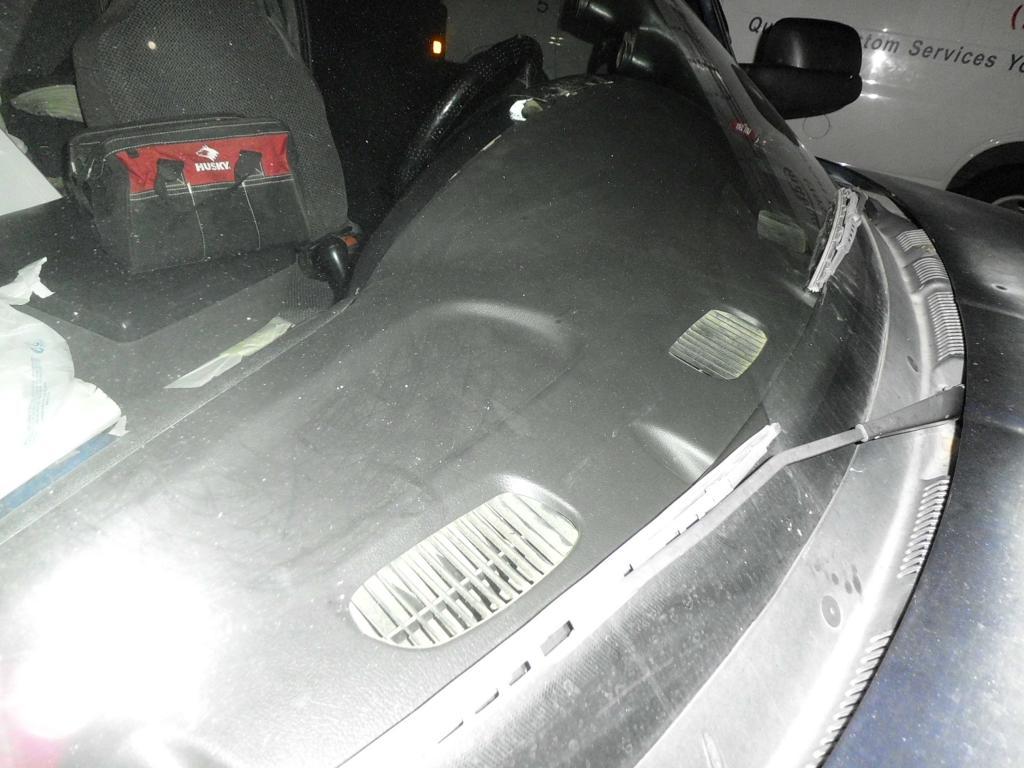
I have not forgotten this. Working and driving to to many places the past week. coming soon though. - - - Updated - - - Let me give this a shot, its pretty quite a work right now. This not meant to be an entire how too on the HVAC box rebuild. I used Mikes article:thumbup2: here for that. So I will start at the point of having the dash un done and pulled out from the body.[ATTACH=CONFIG]4697[/ATTACH]I used a cam strap from the uh oh handle like Mike showed and a ratchet strap tied to the upper rear door latch. They really worked good together. Next I pulled the hvac box. There were 4 bolts on the firewall and 2 inside the cab. All but one of the bolts are horizotal. The one at the far passanger side is verical. I made the mistake of thinking I would have to pull the box both down and out. The braket the one vertical bolt is in is made in such a way that was not necessary. It is slotted to allow the box to be pulled straight out.[ATTACH=CONFIG]4698[/ATTACH] During removal I managed to break 2 of the bolts off of the back of the HVAC box. I used epoxy to reattach them and they seemed to hold up just fine. I stressed them both and they did not give. One other thing I forgot to do was disconnect the vacumm line from the fire wall:doh:. A coupling fixed that issue and all works well. If I had it to do again I would have replaced the line completly. Now I have the HVAC box out and crack it open, again using Mike's instructions. I had been geting a wiff of anti freeze every so often and the AC was loosing its charge. I expected to see evidence of both leaking. [ATTACH=CONFIG]4699[/ATTACH][ATTACH=CONFIG]4700[/ATTACH][ATTACH=CONFIG]4701[/ATTACH] The only thing I saw on the evaporator was clogging. It was completely dry. I was also experiencing poor air flow and the clogging would explain alot of that. The wetness seen in the photos is an oily/greasy mess. It was green in the bottom of the depression for the heater core and a burnt orange color on the other side of the blend door. The heater core had both green and burnt orange mess on it.[ATTACH=CONFIG]4705[/ATTACH][ATTACH=CONFIG]4704[/ATTACH][ATTACH=CONFIG]4703[/ATTACH][ATTACH=CONFIG]4702[/ATTACH][ATTACH=CONFIG]4706[/ATTACH] My AC system had the green flourescent dye in it from the last time I had some one check for leaks and charge the system. Either that or the green anti freeze I use could be the source. The AC evaporator had nothing on it. The burnt orange colored grease looking stuff, I dont have a clue of where it came from. Maybe someone can enlighten me. So I cleaned all of the mess up, replaced the foam gaskets inside and out(most of it was in bad shape). I installed new foam around the evaporator and installed it. I then reassembled the box and installed the heater core. You can see on the back of the box the 2 bolts I broke off and epoxied on. If you look closely you can see the coupling i had to installl on the vacumm line I broke. Installation is the reverse and it all went back together quite easily. Just before install I used the Heater Treater kit for the blend door, the connector was broken and this also was affecting my heat. It is quite easy to install while the box is in your hand. I thought it was a little pricey at $25 + almost $10 for shipping, but what do you do. It is al installed now and every thing works great. Good air flow, the temp contol now works as it should and I dont have to regulate the temp with an open window. i have not had the ac checked and recharged yet, soon I hope. Or at least before summer arrives. Now for the other item, a new dash pad. I chose to install mine while I had it out and did it with just one side of the dash out instead of pulling it completely. Removal was easy and if your dash looks like mine did, your will be too. It was all still in place but I was afraid to clean figuring it would cave in. I used a dash from LMC. It was right at $300 with shipping + oversize charge and the extra washers for the screws that go into the body at the windsheild. The washers just felt like cheap insurance after what every thing else cost. Install was pretty easy also. My thinner than me son graciously accepted doing the work behind the dash. As I remember ther were 12 or 14 screw that need to be installed from underneath the dash. 2 each at the 4 defrost vents, 1 each at the 2 side vents for the front windows and i beleive 4 more across the width of the dash, all installed from underneath. We started on the passanger side and worked our way across. The closer we got to the drivers side the harder it got, but the only ones we had alot of difficulty with were one screw on the driver side of the last vent and there was another beside it. There is no way you can see it and install it. It took both of us, one using his fingers and the other there eyes to get them started. Once started we used a 1/4" ratchet with a #2phillips bit to tighten them. The one screw holding the side vent was accesed by taking out the headlight switch. I could not seem to get any good photos from thru the winsheild, but it is pretty self explanatory when you see the new dash. One other problem we had as we installed it was when we got to the driverside. The last screw did not line up with the mounting bracket. I put a screw driver thru the dash pad and the braket and pried it over with no ill effects, but I sure sweated doing that. There just di not seem to be another way. I could not get my hands on the bracket to move it. If you have the dash un hung on both ends you could have. When we rehung the dash and tipped it forward all off the holes lined up prefectly. It all just bolted right up with no problem. every thing else went in fine. The fit was as close to perfect as you can get. This was not a hard install. If you are just installing the dash pad and take the dash loose on both ends it would make it easier. I just dont know how much more you need to remove to get it off. Steering wheel maybe and some of the wiring would have to be disconnected. The only thing that we put any stress on was the hood release cable. It was pretty tight, we did not realize that until under the hood for something. Here is what it looks like now. On a side note from the heater core install. As some of you might remember I have been having an overcooling problem with my truck for some time now. I was hoping the heater core had something to do with that. I did not help at all. When I refilled everything with coolant I filled the heater core before connecting it back up. I refilled the engine thru the t stat hole and topped it all off thru the radiator. I can only manage to get 170* to 175*. This is with the winter fronts on and the ambient temp around 55*. That is on the interstate making 75mph. I am sitll scratching my head on that one. The only t stat I have not tried is one from the dealer. Even one of the ones i bought that did not work in mine works in Mike's truck. Anyway, I hope this helps some of you out. It is not difficult, but the first time is always a little tricky. I just took my time and tried to do it right and almost suceeded.


-
The last time I towed my 5'r Iweighed in at 22.7k.(4400# front alxe, 6000 rear axle and 12,300 on the 2 7000# rear axles)The truck pulls and handles just fine. Alot of wind will change that however. Neither the truck axles or the trailer axles are over loaded, but I am exceeding the GCWR. Stopping is the biggest issue I see. I always allow extra room for brakeing. The E brake helps, but in an emergency the service brakes must be counted on, truck and trailer. My trailer brakes are in need of an adjustment. I am not advocating overloading your vehicle, it is a decision you would have to make for your self.
-
Missed the big tires.
-
If you are turning neat 2k rpm at 70mph you should have 3.55. That is in OD. I cant imagine the gear ratio in od is much differant in an auto than a manual.
-
If you check your owner manual it will give you all the info you need to answer your question. Mine tells me that with my configuration I am ok with at a 20k puond gross. Axle weights are shown there also. These weights are losded weights and not the manufactures dry weights of the trailer. You have to figure that kind of stuff in when coming up with what the actuall weignt of your load is.
-
Swapping te orings is not that difficult. If it is going to be a while before you get to change the injectors, then swap the o rings, it is not hard to do.
-
I have spent the past 2 days of my weekend replacing my severly cracked dash and a leaky heater core. In the process I also replaced my ac evap core. My heat had gotten to the point of the only way to regulate it was thru the windows. By that I mean the heat on full blast and opening a window when it got to warm, which was not to often since hy heater was not putting out alot anyway. I installed a new core and the Heater Treater part I heard so much about. The oe part for the blend door was broken and I am glad I had it on hand.I bought a replacement dash from LMC. The color match was spot on. The fit was very good. It was a fairly straight forward replacement. 90% of the screws were not to difficult to install, but the other 10% were a challenge. I used Mike's article for the HVAC rebuild for most of the work, but got a little inventive on doing both the HVAC work and the dash installl. I have pictures and will try and write it up in the near future as to what I experianced while doing both. I will say that the time frame posted for these were exceded by quite abit and if you attempt either one allow some extra time. Since this was my first time taking a dash apart of any kind, the unknown mutiplied the time frame that I needed.I would also like to add that I would never had even attempted something like this had it not been for this forum. The members here give so much confidence and info I feel notthing is impossible. Thanks guys.
-
I have cleaned both of mine before and as I remember they were both equally black from soot. No oil was present however. I also have an e brake and have heard that will soot them up pretty quick.
-
I believe with the 5th gear nut issue you loose 5th all together. My old 5600 started slipping out of 6th while coasting. Then later on it stated doing it in 1st and reverse, but always coasting not under any engine load. Then one happy day I lost 4th altogether.
-
Well I will have to lok for one. I have to change my tappet cover gasket on of these days and just might swap it out. Good info. Thanks.
-
Happy Thanksgiving and thanks to all. Started replacing my craked dash and leaky heater core and evaporater today. Would not have tried it my self with out all the info from yall I gathered here. Thanks again. Proud to be even a small part of this site.
-
I take the 12v tappet cover works just as good for venting without the oily mess of the puke bottle?
-
I used the alt for a power source, but it still goes thru a relay triggered by the wiring harness for the oe lift pump.
-
Same here. 47 bucks is pretty cheap. Mine was undrivable and I did not want to pay a wrecker to drive my rig around.