Jump to content
  • Welcome To Mopar1973Man.Com LLC

    We are a privately owned support forum for the Dodge Ram Cummins Diesels. All information is free to read for everyone. To interact or ask questions you must have a subscription plan to enable all other features beyond reading. Please go over to the Subscription Page and pick out a plan that fits you best. At any time you wish to cancel the subscription please go back over to the Subscription Page and hit the Cancel button and your subscription will be stopped. All subscriptions are auto-renewing. 

Recommended Posts

Which way is the nut threaded, righty tighty lefty loosey or the reverse? About to take mine off and dont want to drive myself crazy, I know its on there good. I have plenty access.

engine front.jpg

Edited by dripley
Link to comment
Share on other sites

  • Staff

The direction the engine turns is threaded to always tighten up so it's going to go loose if you could turn the engine the wrong way.:think: IF this helps at all it's a mystery


More I think about it.... you loosen it the same direction the engine runs.

Edited by JAG1
Link to comment
Share on other sites

  • Staff

I think you loosen it clockwise Boss. It's an inch and 7/16ths will work.


So if the engine spins clockwise standing at the front it's always tightening when engine running. So to loosen you spin the nut clockwise also to get it off.


You need another tool to hold the pulley from spinning too, right?

Edited by JAG1
Link to comment
Share on other sites

I cheated. Quicker than buying a new tool.

fan.jpg

51 minutes ago, JAG1 said:

I think you loosen it clockwise Boss. It's an inch and 7/16ths will work.


So if the engine spins clockwise standing at the front it's always tightening when engine running. So to loosen you spin the nut clockwise also to get it off.


You need another tool to hold the pulley from spinning too, right?

That is how I saw it.


43 minutes ago, Mopar1973Man said:

Left hand threads for the fan clutch. So it reverse.

That is what I figured.


38 minutes ago, JAG1 said:

So are you pulling the gear cover while at it?

Yes. Since I had the bumper off I figured I would go all the way in and replace the main seal and the timing cover is leaking a little too. I just hope the timing case it self is not leaking, I think it is at least weeping. Cleaning it up real good and going to caulk it from the outside as best I can.

Also am going to replace the harmonic dampener. Picked up a vibration at idle a little while back and have one at 70 to 76 mph. Not sure they are related. Got the old on off and cant find the tick mark on the inner ring to see it it slipped, but the rubber on the back looks a little funky.

HD01.jpg

HD02.jpg

Link to comment
Share on other sites

  • Staff

Can we have pics? especially if you have a KDP pin? That's a good job your doing.... make truck good for many more miles.:thumb1:


Ready to drive to meet and greet at the Eclipse camp trip :burnout:

Link to comment
Share on other sites

1 hour ago, JAG1 said:

Can we have pics? especially if you have a KDP pin? That's a good job your doing.... make truck good for many more miles.:thumb1:


Ready to drive to meet and greet at the Eclipse camp trip :burnout:

 X2 and maybe any special tools you needed.  Are you going with stock or big dollar harmonic dampener.  Big price difference and wonder if worth the extra money.


Link to comment
Share on other sites

1 hour ago, JAG1 said:

Can we have pics? especially if you have a KDP pin? That's a good job your doing.... make truck good for many more miles.:thumb1:


Ready to drive to meet and greet at the Eclipse camp trip :burnout:

Check out the KDP thread. I posted it there for @notlimah. Can post here to if need be.


45 minutes ago, 015point9 said:

 X2 and maybe any special tools you needed.  Are you going with stock or big dollar harmonic dampener.  Big price difference and wonder if worth the extra money.


No special tools so far. I did cheat on the on the fan and just unbolted the assembly from the engine block. It was quite easy. I am going back with the stock part. Found the oem one on Ebay for $75 to the door. Dont think I have a need for a fancy one.


40 minutes ago, notlimah said:

In for updates :thumb1:

A little photo montage for you.

beginning 01.jpg

beginning 02.jpg

beginning 03.jpg

Now for the crank seal. While the crank is polished from the old seal I cannot feel it with my fingers at all. This is where the seal has be sitting. At the front of the crank you can see a little gray line. Now I can feel something there but it is almost like the crank has a slight indentation just forward of the line. Not like a groove worn into just a lightly indented. The forward part of the seal does sit there though. Is that a secondary seal? To sleeve or not to sleeve?

front crank 01.jpg

front crank 02.jpg

Link to comment
Share on other sites

3 hours ago, 01cummins4ever said:

If it's questionable I would speedi sleeve, just to be sure your not doing it again.

I did the speedi sleeve about 5 years and 100 k miles ago and holding up well.  


What did you use to seal the sleeve to the crank? I cant seem to remember or find  what is recommended. I know it is anaerobic as I remember, sets up in the absence of oxygen. Think I have that right.  

Link to comment
Share on other sites

It's been a while but I don't remember using any kind of sealant on the crankshaft, or seal Just cleaned real good with emery cloth. The sleeve is such a tight fit you need to press it on, I remember using a block of wood and hammer to get it started and then used the crankshaft bolt and washer to drive it the rest of the way. Of course I did it with radiator in so tapping it in all the way with  a hammer and wood would have been difficult. 


I got the speedi sleeve kit through Cummins and it came with sleeve and seal to match along with some handy tools to help ease install, Thier is some write ups and old archived threads here that might help too. 

Link to comment
Share on other sites

1 hour ago, BBHD said:

I remember someone talking about using a speedi sleeve a while back on the front cover and a loctite sealer for the sleeve but can't find it. 


Thanks for link


Am I the only one that the pic's don't show up on above link?

Link to comment
Share on other sites

  • Owner

front crank 02.jpg


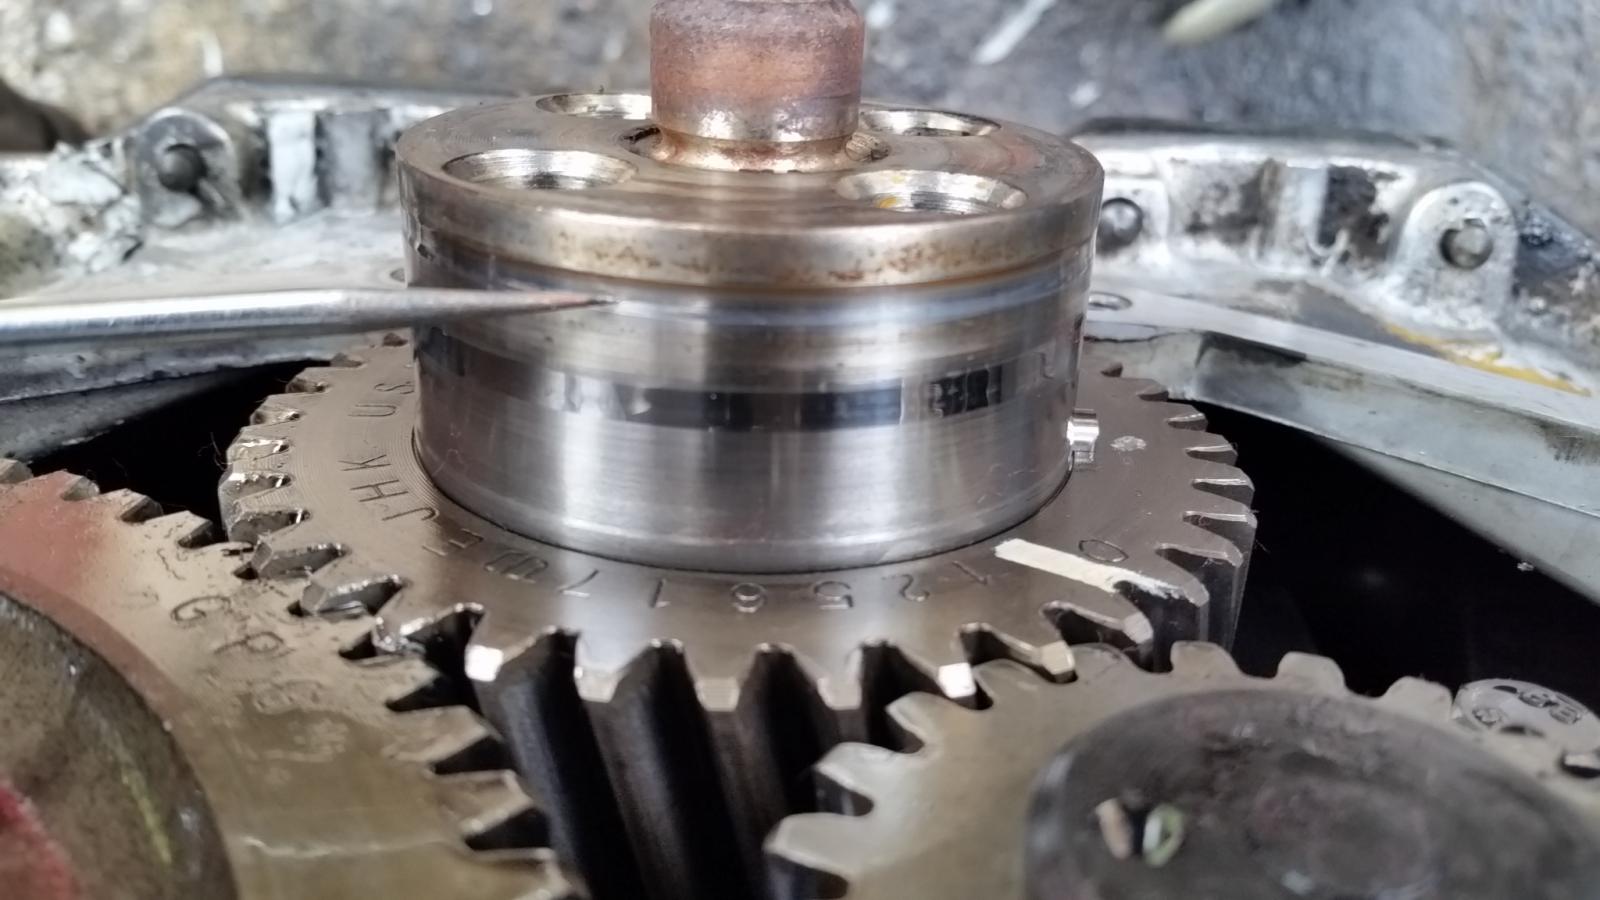
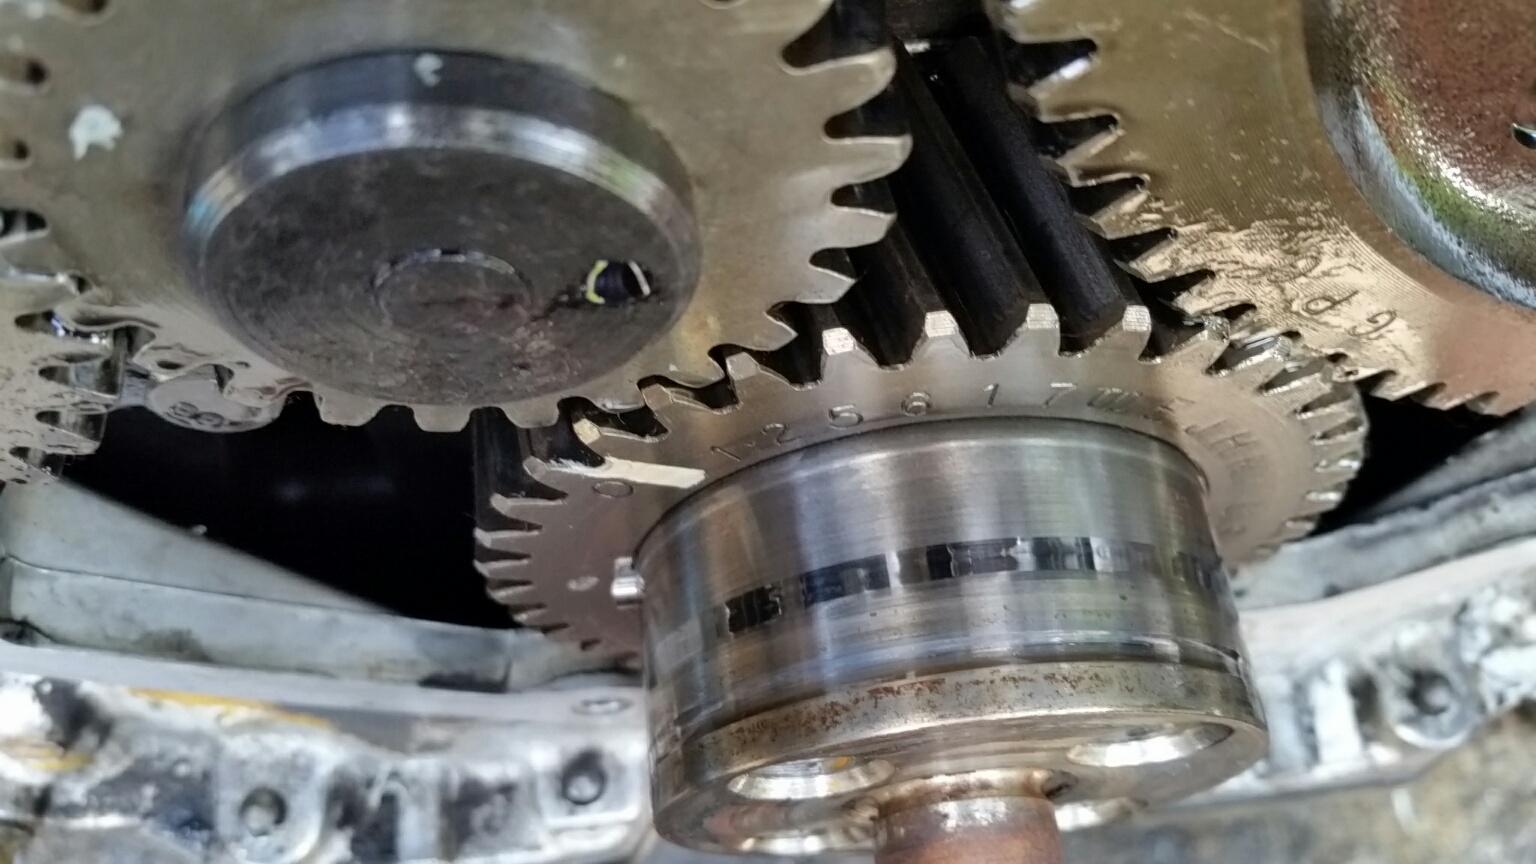
@dripley just keep in mind the front seal is a dust lip and tends to cut into the crank. Now the polished ring behind is the actual oil seal riding area. So that groove your pointing at is caused from all the dust piling up at the front dust lip. Even mine had a groove too. I just installed another seal and moved on.

  • Like 2
Link to comment
Share on other sites

×
×
  • Create New...