Jump to content
  • Welcome To Mopar1973Man.Com LLC

    We are a privately owned support forum for the Dodge Ram Cummins Diesels. All information is free to read for everyone. To interact or ask questions you must have a subscription plan to enable all other features beyond reading. Please go over to the Subscription Page and pick out a plan that fits you best. At any time you wish to cancel the subscription please go back over to the Subscription Page and hit the Cancel button and your subscription will be stopped. All subscriptions are auto-renewing. 
Teardown and Rebuild


Recommended Posts

Leave the mirrors on and cover the chrome with some of that bed liner.

They cost too much to do that to them! Thinking about the front bumper plastic though....


So I started out the night by pulling a bunch of the injection lines to get number three pulled out. I never got it all the way out (I wasn't willing to take the intake horn off) but I got it pointing straight upward and was able to clean it up. About 45 min with 400 grit sand paper got all of the pitting removed. Then I used a scotchbrite pad to make it smooth. I then cleaned it out with starting fluid and blew it out. It's good and sealed up now!


Took the truck for another drive tonight. About 60 miles. This thing keeps running better and better! I opened it up a bit and wow that cam makes a HUGE difference on the top end. 34-35psi of boost on stock tuning and it pulls HARD (again for being stock.)

Tomorrow I'll drive it to work and do the re-torque, change oil, and adjust the valves. 


Thanks everyone for the compliments! I'll continue to update this as the engine breaks in. 

  • Like 2
Link to comment
Share on other sites

  • Staff

Why 3 bottles of ZDDP on the next change?

Is there a reason you are waiting so long on the retorques? Or is it just out of convinenance?

A good cam is fun! i am surprised you gained so much boost but maybe that's the turbo? I dropped boost with my cam but increased airflow. Heck I don't hit 34-35 psi now on a 400rwhp tune.

Link to comment
Share on other sites

Why 3 bottles of ZDDP on the next change?

Is there a reason you are waiting so long on the retorques? Or is it just out of convinenance?

A good cam is fun! i am surprised you gained so much boost but maybe that's the turbo? I dropped boost with my cam but increased airflow. Heck I don't hit 34-35 psi now on a 400rwhp tune.

It says for 4-5 quarts of oil... We have 12, so extra is ok with me until it breaks in. I'll drop down to 2 for the rest of the trucks life after the second oil change. 

I have torqued the head 3 times so far... This will just be the hot torque, and hopefully the last one for a while.


Maybe.... I don't know I can just tell it pulls way harder on the top end. Like all the way to 3100 (That's where I let off) pulling hard no drop off. 

Link to comment
Share on other sites

They cost too much to do that to them! Thinking about the front bumper plastic though....

I was just yanking your chain.  I don't think the chrome accent on the mirrors looks bad at all.  I wouldn't change them, or should I say, the wife wouldn't let me buy a new set :shrug: .

  • Like 1
Link to comment
Share on other sites

  • Staff

It says for 4-5 quarts of oil... We have 12, so extra is ok with me until it breaks in. I'll drop down to 2 for the rest of the trucks life after the second oil change.

I have torqued the head 3 times so far... This will just be the hot torque, and hopefully the last one for a while.

Maybe.... I don't know I can just tell it pulls way harder on the top end. Like all the way to 3100 (That's where I let off) pulling hard no drop off.

Gotcha. I was just thinking the ppm increase since diesel oil has a fair amount of ZDDP in it anyhow.. CJ is lower than CI but still more than the gas oils on the market by a lot.

Ever figure out why your builder doesn't want synthetic? That is still 100% opposite of any explanation Inhave ever heard, and synthetic would open you up to CI oils that don't need ZDDP additive. All high performance OEM builds require synthetic.

Did I Miss you o-ring or fire ringing the head? Or are you just torquing it for the sake of torquing it? I haven't ever heard of a need for more than a cold and a hot on studs with a standard head gasket, and even the hot it just preference by some.

Just curious is all.

Yes the higher rpm pulling is great. Even my cam pulls much harder thru 3000 and it is labeled as a idle-2500 rpm cam.

Link to comment
Share on other sites

On most of the old mopars I find that the rust never comes from the outside.  Bed lining the outside won't do much other than keep the rock chips down and keep the dirt in the cracks and crevices in the rhino lined rocker panels.  


Rust comes from inherent design flaws and manufacturing methods used in the car.  


One, leaves and debris in spaces between body panels like down the vents behind the engine or between the cab and inner fenders.  This is notorious in old cars and why I see most eastern and southern cars need patch panels on the firewall and lower front fenders.  I get irritated when I find old leaves in cars... Shows that folks didn't wash their cars properly. 


Two, is from salt and galvanic reactions on exposed metal and spot welds.  Not much you can do here other than spray and pray. Doing a serious undercoating job on the truck, religiously washing & waxing the truck, and in extreme salt states spraying out parts of the body with some sort of oil will help.  

You are so right on this, being from the South we have some good preserved vehicles, but while working up North, rust was a battle even for cars and trucks only 10 years old. You would think it would be a standard practice from the factory to prevent rust especially is hard to reach areas.

Link to comment
Share on other sites

I'd love to buy or build a bumper as well.  I wouldn't be satisfied at how it would come out if I were to build one and I can't afford to buy one...so I guess I'll just keep dreaming.

The detailed steps you took on this build and the results show what a genius engineer is all about, so draw us up some detailed plans on what you would like to fabricate if you were designing your own, No I'm not  :cookoo: I bet it would be a one of a kind or several of a kind once we see it  :hyper: 

  • Like 1
Link to comment
Share on other sites

Was the process for applying the liner coating very difficult?  Was it a spray on application?  Something I would like to do in the future.  I am impressed with how good that looks.

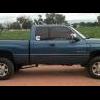
It was actually really easy. Sand the big stuff, tape off the lines, sand to the lines, wrap the truck, use self-etching primer on bare metal spots, pour the catalyst in, shake it and shoot it on. Wait around an hour and shoot on a second coat.

(80 grit sandpaper on everything)

Gotcha. I was just thinking the ppm increase since diesel oil has a fair amount of ZDDP in it anyhow.. CJ is lower than CI but still more than the gas oils on the market by a lot.

Ever figure out why your builder doesn't want synthetic? That is still 100% opposite of any explanation Inhave ever heard, and synthetic would open you up to CI oils that don't need ZDDP additive. All high performance OEM builds require synthetic.

Did I Miss you o-ring or fire ringing the head? Or are you just torquing it for the sake of torquing it? I haven't ever heard of a need for more than a cold and a hot on studs with a standard head gasket, and even the hot it just preference by some.

Just curious is all.

Yes the higher rpm pulling is great. Even my cam pulls much harder thru 3000 and it is labeled as a idle-2500 rpm cam.

I need to call him and have another talk.... MAYBE he said only for the breakin but I could have sworn he said at all times.

The head is O ringed. I think I posted pics earlier.... Either way the 3 torques were done when the engine was out to get the "stretch" out of the studs. I did it following the GDP instructions because of everyone complaining about popped head gaskets after stud installs.


You are so right on this, being from the South we have some good preserved vehicles, but while working up North, rust was a battle even for cars and trucks only 10 years old. You would think it would be a standard practice from the factory to prevent rust especially is hard to reach areas.

If they made vehicles las they wouldn't be able to sell the new ones!

  • Like 1
Link to comment
Share on other sites

The detailed steps you took on this build and the results show what a genius engineer is all about, so draw us up some detailed plans on what you would like to fabricate if you were designing your own, No I'm not  :cookoo: I bet it would be a one of a kind or several of a kind once we see it  :hyper:

http://forum.mopar1973man.com/index.php?/topic/9120-miss-at-all-rpms/page-2 Look here......

  • Like 1
Link to comment
Share on other sites

Looks good! Here's an option to save a little $ on a bumper if you're handy with a welder.

https://www.movebumpers.com

What a great site, a lot of options and designs. Tyler, I only have 42 years of welding experience, I know you are looking for more quantified in the profession but I will do you a good job as long as I can take frequent breaks and a bucket, well a good chair now, to sit on in the shade and a helper to get me set up every morning. I should be ready to work by 10:00 am on the money at least 2 times a week, let me know if I should get packed or not. Yes I will be riding around with you in Your Truck to make sure you driving it correctly and staying well within the speed limit, don't thank me now, wait till later please. :woot: :woot:

  • Like 2
Link to comment
Share on other sites

You should forget school for a while with all the "Tear down and Rebuild" orders coming in. Right now you own the market, down the road you'll be selling shares of you company on the exchange. Probably the only sure thing on the stock market.


I hate to see it come to a close, this is a great story for a short book on how to add 750 hp and do a body off restoration at the same time on a Dodge 24 Valve. All kidding aside Tyler, you and your older brother have had all out attention for many weeks now and I have enjoyed every post and picture listed. I wish you would buy a 12 valve and do the same tear down and rebuild all over again. You don't run into young people in their early 20's that have the discipline and responsibility to do what you did, with exception to our young men and women serving in the armed forces, God Bless them all. I wish I had the words to describe more than saying a good job because it was more than good to all of us.  

  • Like 3
Link to comment
Share on other sites

  • Staff

I need to call him and have another talk.... MAYBE he said only for the breakin but I could have sworn he said at all times.

The head is O ringed. I think I posted pics earlier.... Either way the 3 torques were done when the engine was out to get the "stretch" out of the studs. I did it following the GDP instructions because of everyone complaining about popped head gaskets after stud installs.


I would guess it was just during breakin, but???


The o-ringing makes sense and I must have missed that. The o-rings need multiple torque sequences to crush the ring and not to stretch the stud, AFIK.


The GDP instructions are great. Are you calling that the 3 torquings? Or have you broken the torque and re-torqued 3 times after running it? Standard head gaskets just need the 3 stage (different than 3 times) torquing, whereas o-rings need to be completely re-torqued multiple times to ensure the o-ring is crushed/seated. Even the 4 times GDP has you break and torque on the initial install is 1 torquing, IMHO. O-rings need torqued and allowed to sit, then broken and re-torqued, and time to sit... etc.


Yes head-gaskets can be compromised when doing the one stud at a time method if you do it wrong. The one stud at a time method is the basis for the GDP instructions and a new head is different but staged torquing is still used you can just start with a lower value since the HG isn't clamped down yet. When the engines are assembled at Cummins they have a machine that does all the head bolts at the same time with the same torque which is pretty cool. 

Link to comment
Share on other sites

Thanks Greenlee! I've considered some thing for when I'm out of school. Whether that ever facilitates into anything I'm not sure.

I hope this thread has been fun for everyone to follow. I've really enjoyed this project!

How much did the bed liner cost to do?  I might have to do that as it would fix %80 of my body issues haha.  


Wanna do it again?

I think online you can get the kit for 120 then add in the gun 20 or so... then paper, tape, sandpaper ect. I would bet around 200 was the total cost. Sure as heck beats the 750 bucks LineX wanted to do the same thing. You can see it tomorrow and let me know if you like the texture. 


I wouldn't mind doing it.... we'll talk buddy!


I would guess it was just during breakin, but???


The o-ringing makes sense and I must have missed that. The o-rings need multiple torque sequences to crush the ring and not to stretch the stud, AFIK.


The GDP instructions are great. Are you calling that the 3 torquings? Or have you broken the torque and re-torqued 3 times after running it? Standard head gaskets just need the 3 stage (different than 3 times) torquing, whereas o-rings need to be completely re-torqued multiple times to ensure the o-ring is crushed/seated. Even the 4 times GDP has you break and torque on the initial install is 1 torquing, IMHO. O-rings need torqued and allowed to sit, then broken and re-torqued, and time to sit... etc.


Yes head-gaskets can be compromised when doing the one stud at a time method if you do it wrong. The one stud at a time method is the basis for the GDP instructions and a new head is different but staged torquing is still used you can just start with a lower value since the HG isn't clamped down yet. When the engines are assembled at Cummins they have a machine that does all the head bolts at the same time with the same torque which is pretty cool. 

I'll give him a call tomorrow. 

You are correct about the ring needing to crush the gasket's fire ring.

I did GDP's instructions for putting the head on, so "1" torque in your book haha.


So tonight I changed the oil & filter, re-torqued all of the studs (One at a time broke one loose, took the nut off, applied ARP lube, and put it back on) and set the valve lash when the engine cooled down to 100*. 

I can say the studs were LOOSE! Just for giggles I torqued a couple before doing the process correct and got 1/2 to 3/4 of a turn on each one. They might have been around 100 ft-lbs. I feel a lot better about getting after it now.

I cut the filter open and it looked spotless inside! Good news, the motor isn't eating itself. Hopefully I don't have to to the torquing many more times.... 190* motors hurt. 


Clean filter. Quite a shame to throw away 3 gallons of oil that wasn't even black yet....

IMG_20150723_204728_780_zpskyee0oyt.jpg

Link to comment
Share on other sites

IMG_20150723_204728_780_zpskyee0oyt.jpg


Man, you have more contamination on your fingers Tyler, I'm going to send you a box of rubber gloves to start wearing, after all the patient (24 Valve) deserves the best care. I wouldn't leave a finger print on it. Have you had good success using NAPA filters? I told my brother to use Fleetguard, I wish I could remember what Michael shared with me on that. I'll go back and read the post again.    

Link to comment
Share on other sites

Can't. The ash levels are too high now and will leave nasty deposits on the pistons and injectors. This is why 2 cycle oil theory started because 2 cycle oil is ashless.

Learning something new about 2 cycle oil, ashless!!!!

Link to comment
Share on other sites

×
×
  • Create New...