

Leaderboard


Popular Content
Showing content with the highest reputation on 07/08/2016 in all areas
-
Just throwing rocks in the biggest fresh water lake on earth.
 3 points
 -
2 points******************************************************************************************************************** !!PROBLEMS FIXED!! ******************************************************************************************************************** Well guys, it turns out it was indeed the 3 grommets that are at the fuel T causing my issue. I changed those out 3 days ago and parked it nose up hill in my driveway like I'd done in the past and what caused the hard start and let it sit for 15+ hours each time and every time she fired up almost instantly! Really happy to finally have this over with and I really hope this thread can save some people the headache of figuring out what's wrong with their trucks if they have similar issues in the future. Some interesting things of note though... If you remember earlier in this thread I was talking about not hearing the lift pump (FASS 150) do it's typical *brrrppp* once you turn the key and are waiting for the WTS light to go out. Normally that was with me parked nose down hill, but I thought maybe it was just because I still had my fuel leak. Well after replacing the grommets I was parking nose up hill again to test if my fuel leak was gone and the first 2 mornings, the truck would fire right up, but every time I'd turn the key on and expect the lift pump *brrrppp* It wouldn't happen. No fuel pressure bump either. So I started recalling back what was different before and realized that I was just above a 1/4 tank of fuel. Well after 2 days of starting up just fine while pointed up hill but with no fuel pressure bump I filled up my tank. Sure enough, go to start, turn key on, lift pump *brrrppp* see a fuel pressure bump and fires right up! Next day pointed nose up hill, same thing! Maybe this is just something my truck does but it seems to not want to do that when my fuel is below a certain level. Anyways, thanks to everyone who's helped me trouble shoot this issue! Really glad it's over with!2 points
-
Yea loose connections in regards to batteries can cause all sorts of weird things. Just last week a guy I work with has an old ford gasser and he said it was driving and shifting really weird on the way into work and the radio would randomly come on, all sorts of things! Well come to find out it was just a really loose battery terminal. Once he tightened it down it ran like a top! That's another reason I upgraded all of my battery cables and connectors to the military style so I knew the cables were in good condition and the connectors would stay super tight.2 points
-
1 point
-
1 point
-
1 point
-
1 point
-
1 point
-
1 pointGood to hear that you got it fixed and even more glad to hear that it wasn't anything more extensive.1 point
-
1 pointIf anyone is interested, below is the spec sheet for the OEM 5600 fluid. And in regards to High Gear Transmissions stance on Mobil, I have to wonder if they'd say the same about Valvoline or Redline or any other brand if they just so happened to invite other oil brand besides an Exxon Mobile representative to determine the best oil for the NV5600. And why Mobil? Thats not to discredit their professional opinion either but just pointing out that their marketing statements leave room for questions. Tex_5600_fluid.pdf1 point
-
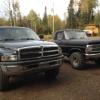
1 pointAny "part time" 4wd truck I've had or been around, the front driveshaft would spin somewhat like in that video. Even an old NP205 which are completely gear driven transfer cases.1 point
-
1 pointwe tend to more DIY stuff to articles once the path has been laid out.1 point
-
If you have the old style 2.02 heads (camel back) make sure they have the holes drilled in front to accept brackets, many of the old styles like from the sixties did not. the only accessory they ran was an alternator, and they used the exaust manifold for mounting the alternator bracket. the rest like a/c and power steering was not really an option on some of the old muscle cars. A 700 R4 would be a good option if you are looking for overdrive, its also a popular trans because of the lower first gear compared to the 350. it will just cost a little more, and probably have to have the driveline shortened.1 point
-
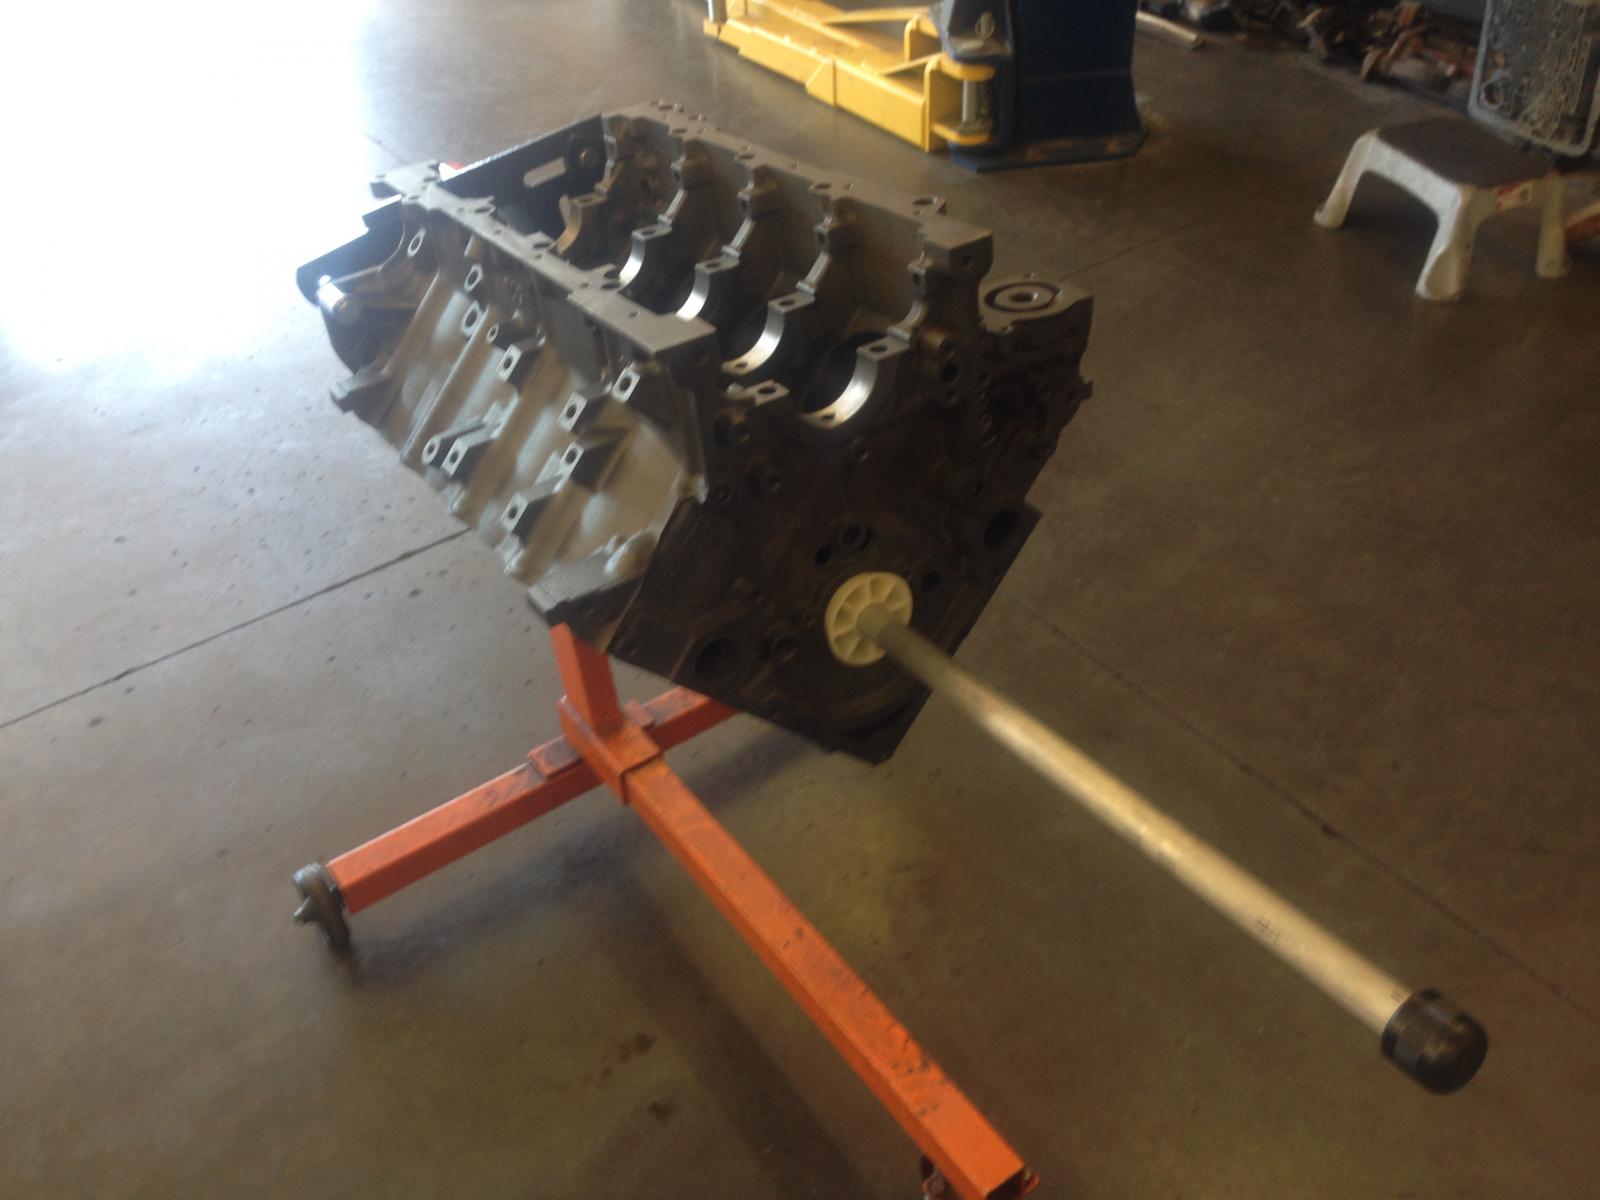
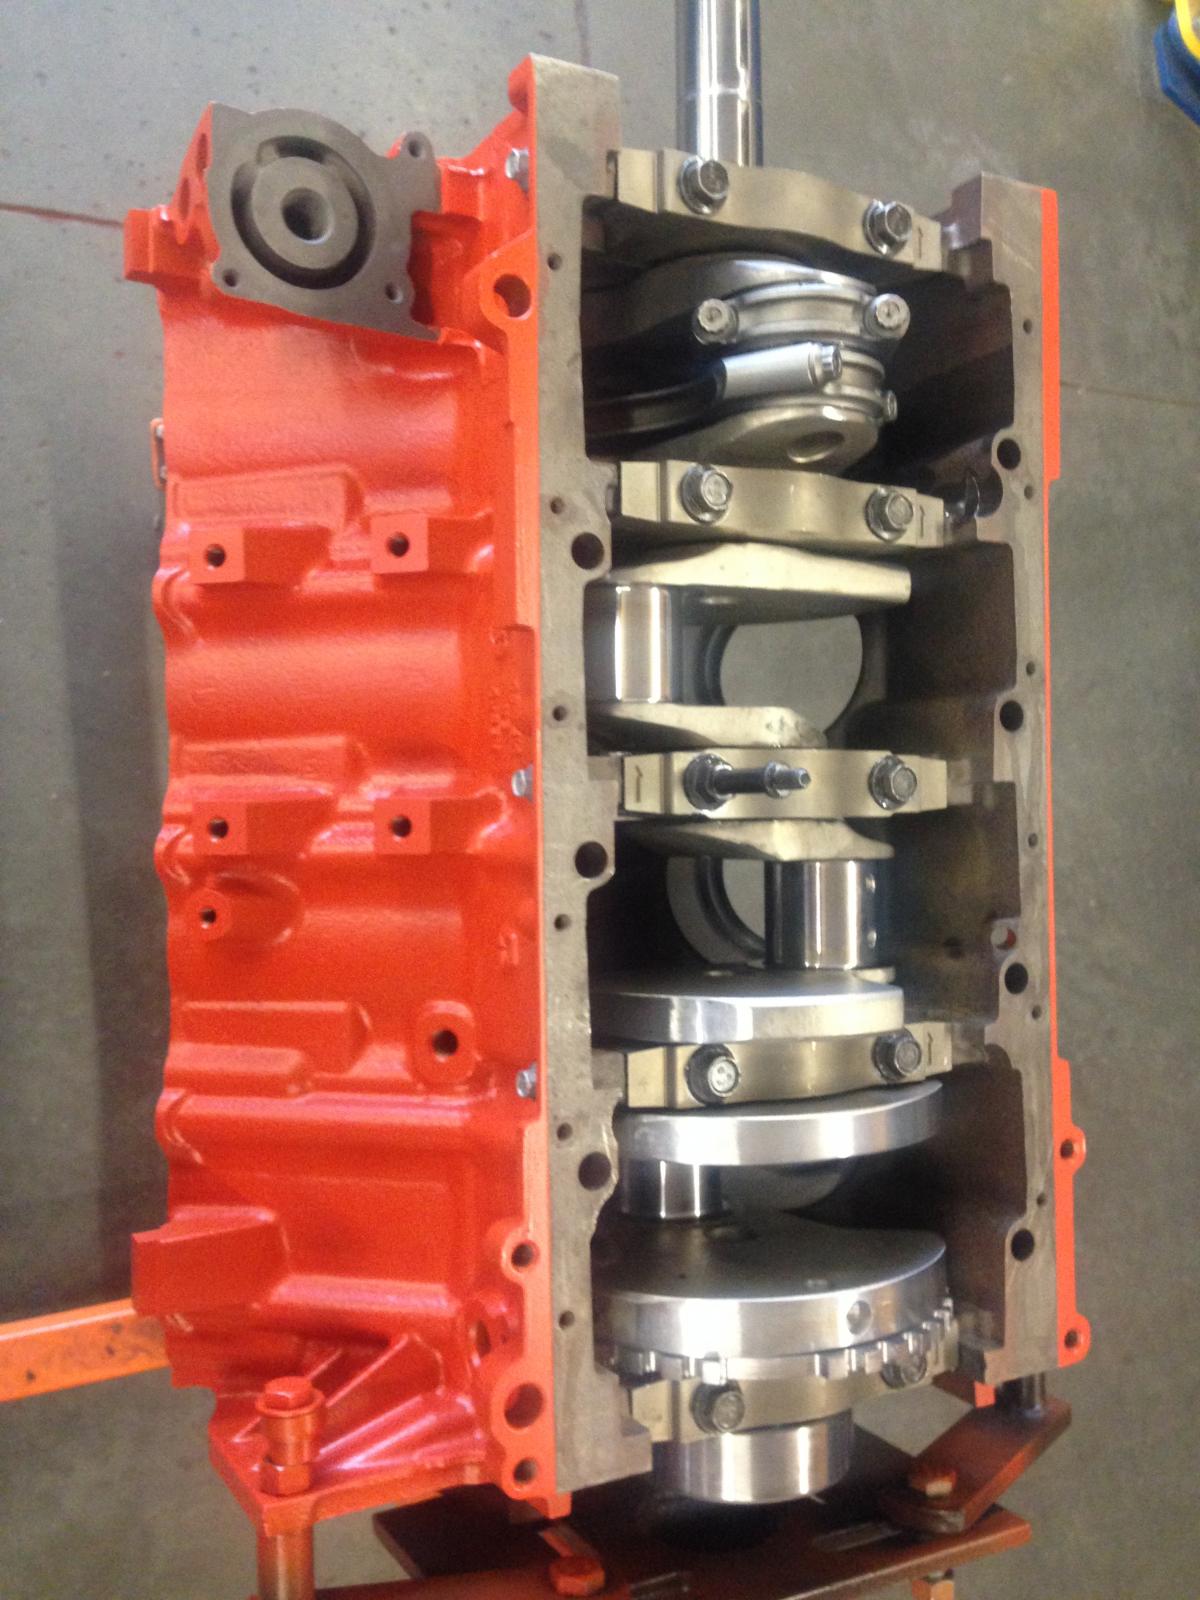
1 pointFinally making some progress on the Hem build. All of the machine work is finally finished, and I can start going together with it. After a thorough cleaning of the block, and scrubbing the bores with hot soapy water to remove all of the honing abrasive, the next step was to install the cam bearings. After filing all of the rings for the proper end gap, the pistons were hung on the rods for final assembly. Filing ring gaps is a tedious, iterative process, but one of the more important steps. Most ring sets anymore come "oversize" so that the ring gaps can be set where the builder wants them. I set mine at .018" for the top ring, and .020" for the second ring (for those scoring at home...). Here are some of the pistons, hung on the rods, ready to install... After a few coats of Chrysler Hemi Orange paint, the crankshaft went in for the final time, as well as the front two pistons and rods (#1 and #2) in order to degree the camshaft. I like to degree the camshaft with as few pistons installed as possible because the less drag there is, the easier it is to be ultra-precise in the degreeing process. You obviously need #1 to establish TDC on the degree wheel, but I always like to install the other piston/rod that rides on the same crank journal to keep the rod from floating around side-to-side. It's a minor thing, but it's just my way... Here's the block with the crank and front two pistons/rods final installed... Degreeing the camshaft is also one of the more important steps in any engine build. The cam was spec'd out and ground to be in a specific relationship to the crankshaft. The process of degreeing the cam ensures that when it is installed, this relationship is, in fact, correct. I had this camshaft custom ground with 115 degree lobe centers (the number of degrees between the center of lift of the exhaust lobe, and the center of lift of the intake lobe). I wanted to run this camshaft with the intake centerline aligned at 112 degrees ATDC (after top dead center) of crank rotation on the intake stroke. That is the center of intake lift (intake valve all the way open) occurs at 112 degrees ATDC. This is all done with a degree wheel and a dial indicator riding on the #1 intake lobe of the camshaft. Here is that setup... Now, on to installing all of the other pistons, and assembling and installing the heads. (I had to order custom thickness head gaskets in order to get my quench set where I wanted it. Long story... I'm still waiting on those.)
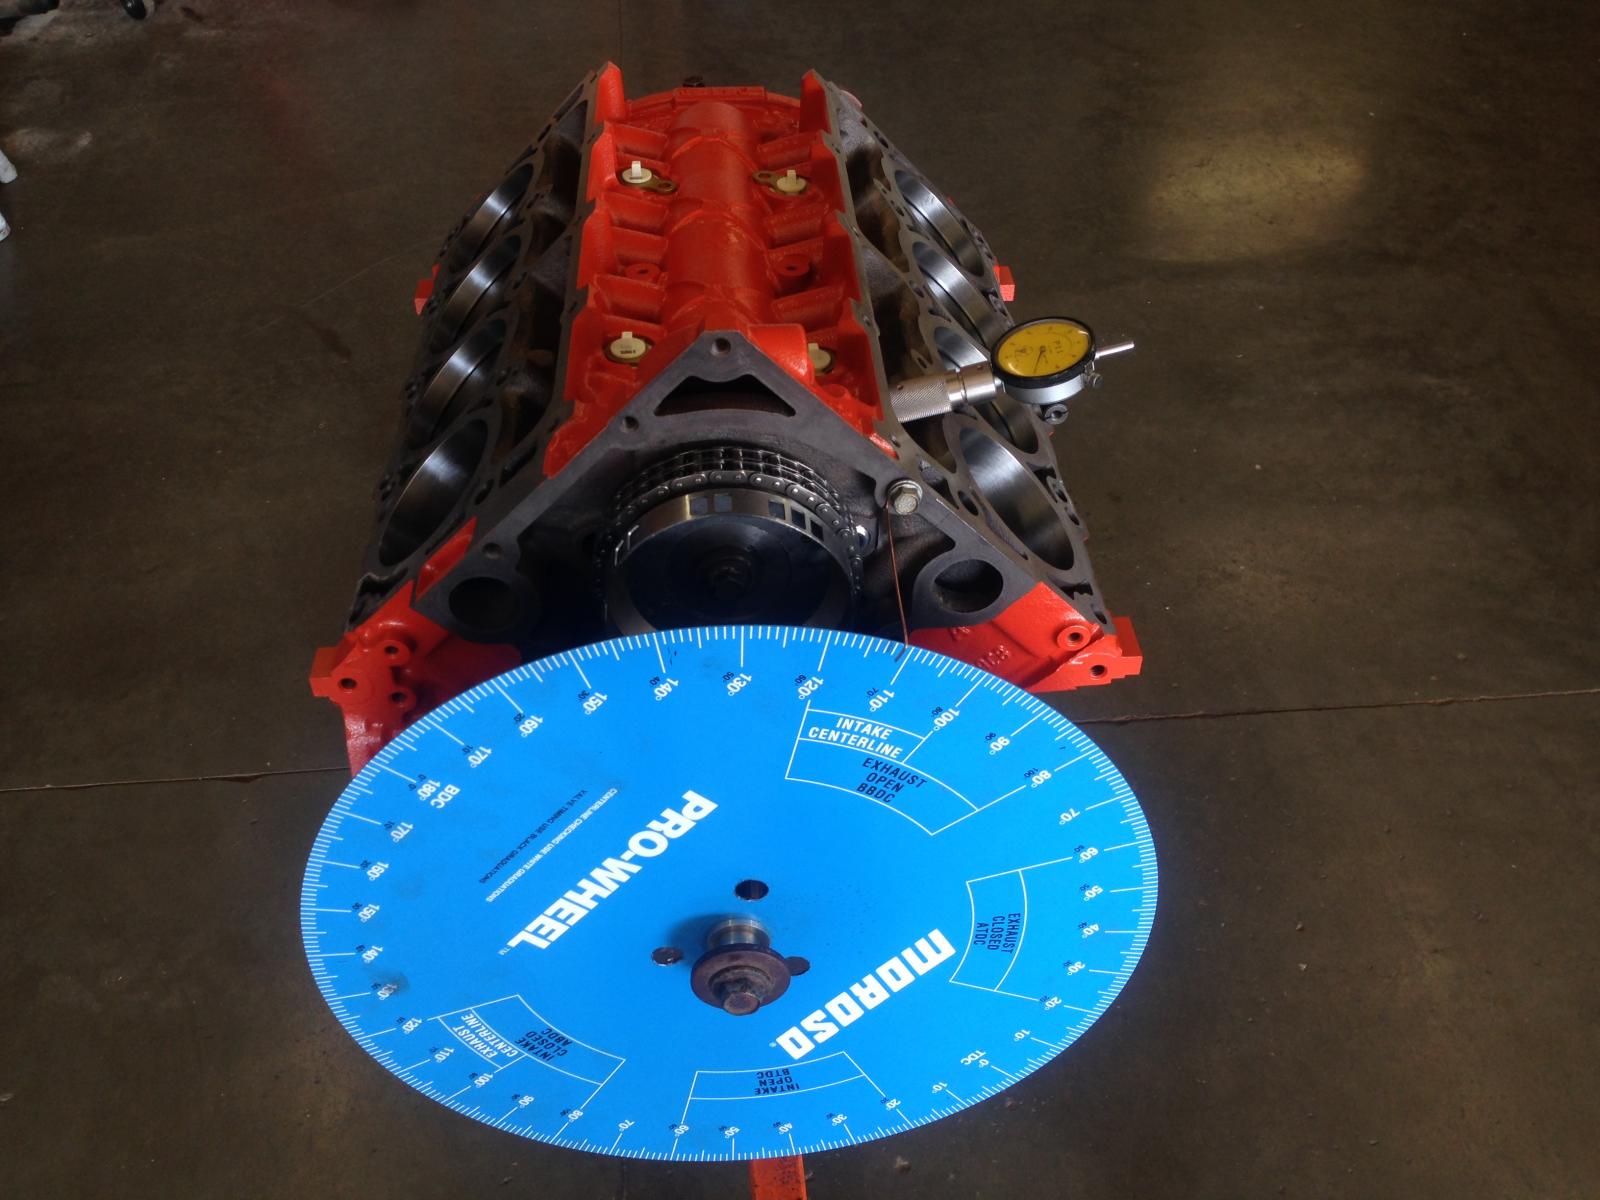
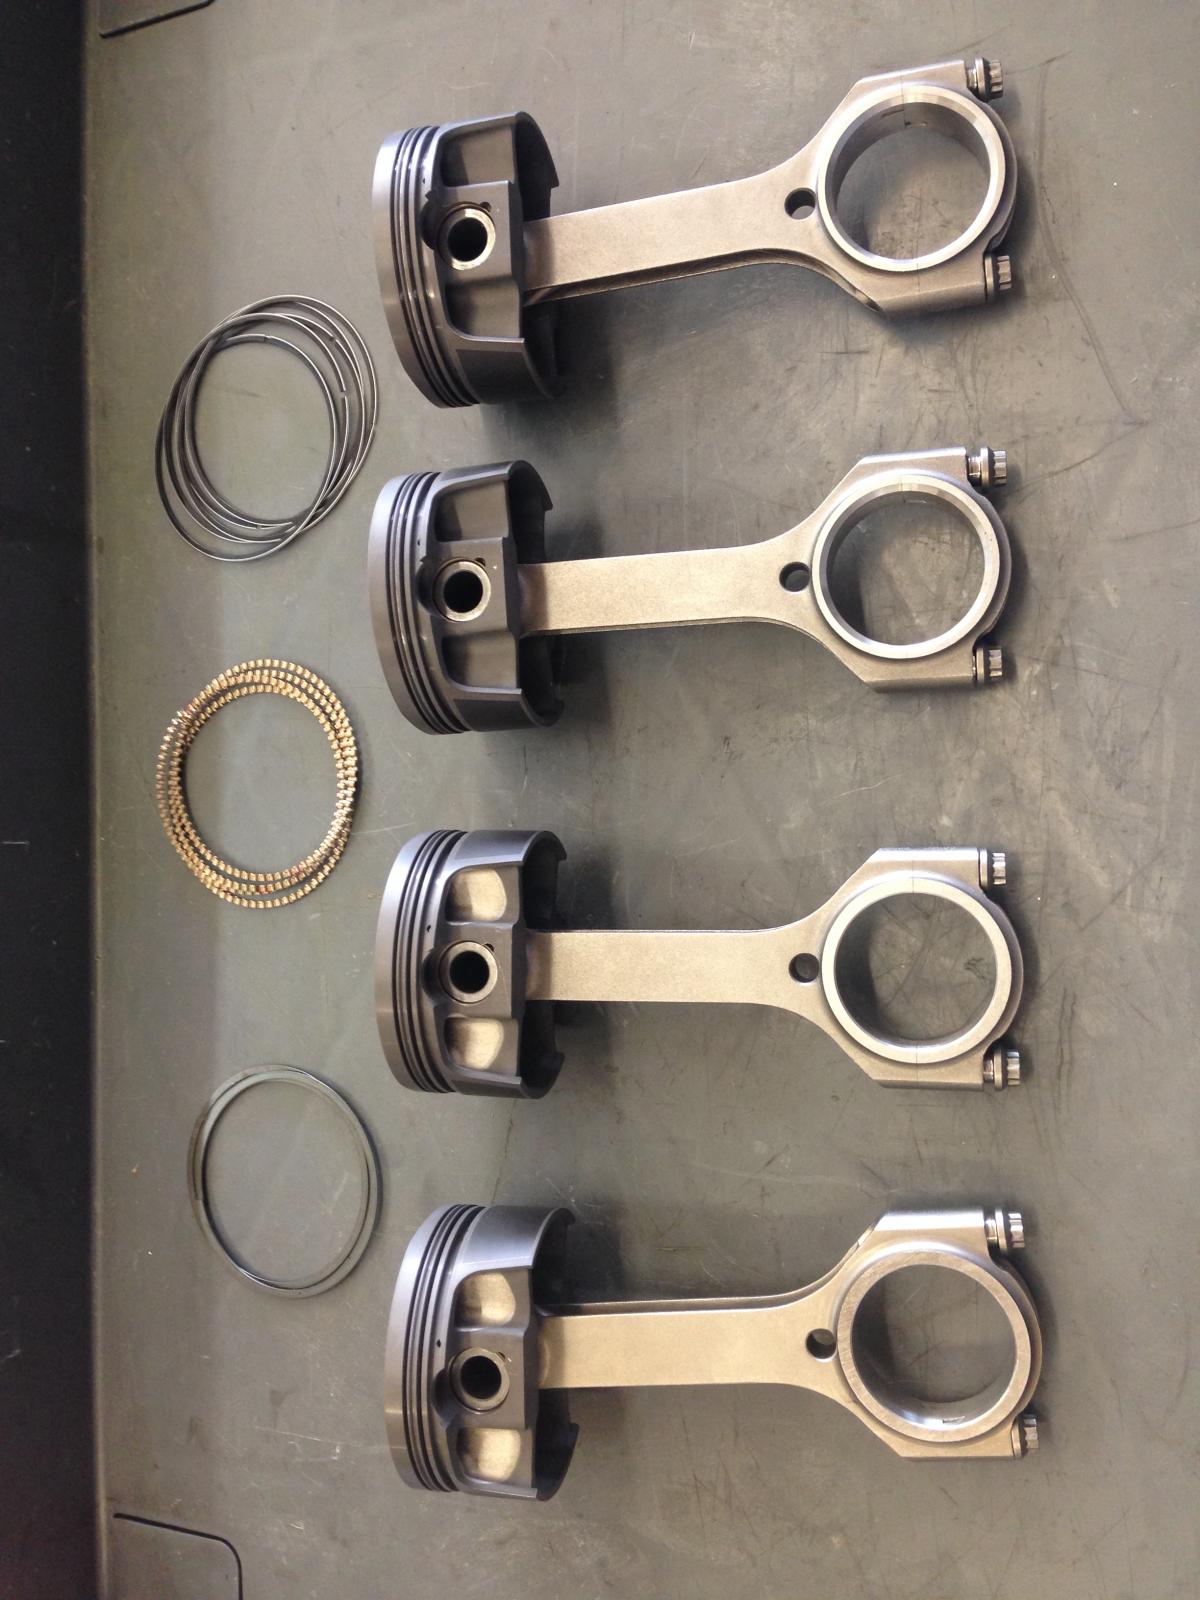 1 point


This leaderboard is set to Boise/GMT-06:00