


Mopar1973Man
Owner
-
Joined
-
Last visited
Everything posted by Mopar1973Man
-
How about I pull the wire tap and run only timing from the Edge Comp? Would that fit the bill?As for the temp sensor in the VP44 its phyiscally attached to the electronics and is part of the speed sensor module... As you can see there is no way your going to modify that sensor with a ribbon cable inside the VP44...
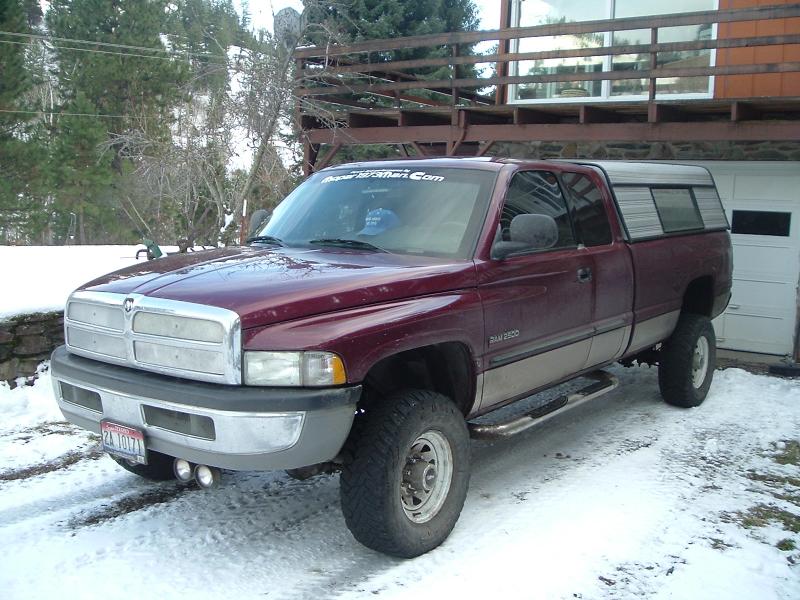
 Ok here is todays trip... @ISX yes I've got my heavy Cooper STT's 265/75 R16 on... With the 2.7K ohm resistor for the trip to McCall ID for shopping... Not bad... I was hoping to smack 20 MPG... Low record for the trip but on average it was about 19*F Now you got to remember I live at 2,800 feet and McCall, Id tops out at 5,200 feet... So I got climbing, winding roads, reduced speed from snow covered roads, etc...

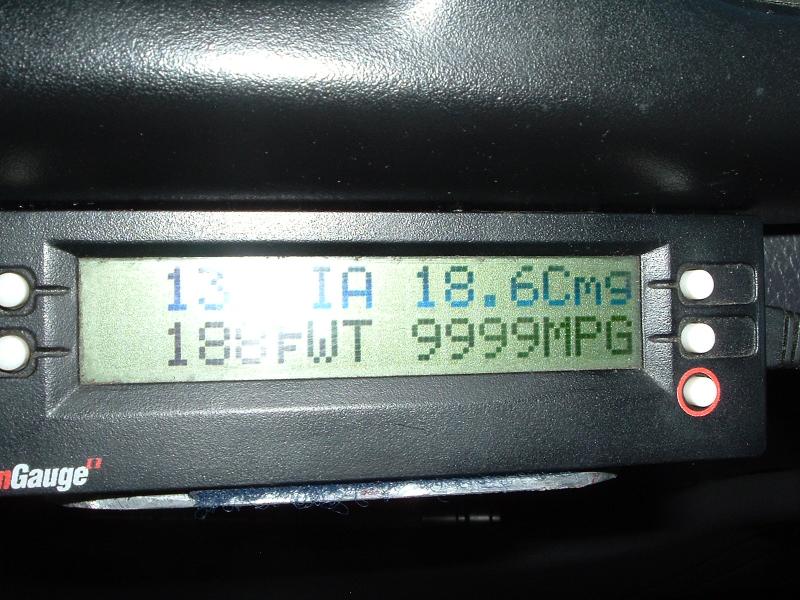
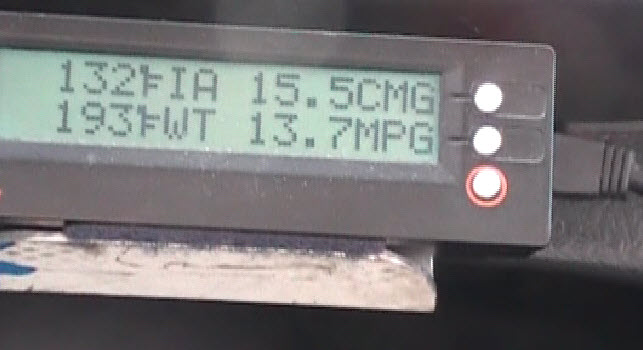
 Here is the wiring for the ECM and VP44... There is only 1 power supply relay located in the PDC... But if this relay fails it will throw a P1689 code... If the ECM fails it typically throws a P0606 code.... If you can find a Cummins Shop that has a cheater box that plugs into the VP44 it will isolate the VP44 by itself and allow you to start the truck and select idle or high idle mods. So that a way of testing the VP44 without a ECM present... As for testing a ECM the only way I know is to replace it...Hmmm... If the Timbo's APPS is installed and working properly then it going to most like be a Injection pump problem... But I hate point a finger at something without a for sure bet... If there was a injection pump error code I would run with it... But so far nothing...Maybe we should get smart and grab JL Welding and have him create these bracket for us... I'm sure he's got the right stuff to do it...The current ones on got now are loud and can be heard by the human ear... The cover all freqencies from low to high and ultrasonic so its truely distrubing for most animals... Deer stay quiet a distance from the two cars parked under the trees. Also mice wise it not bad I still might find a droping or two but they are not building nest in the vehicles nor are they storing seeds and feed in the vehicles like in the past without the box... I was truely hoping to find another like these but... No longer made... They really do work...As for hook up I'm just unhooking the IAT wire and plugging in a 2.7K ohm resistor in the plug. I'm going to pick up another DPDT toggle switch and hook up the resistor on a toggle off my high idle fooler so can command the fooler for the testing phase... As for cold start you it will most likely die on it face with your automatic trans being as tight as it is... When I had the resistor in for my cold start up it just like ISX it stumbles a few revs and then with slight pressure on the throttle for a second or so it will hold up after it gets a few secs of heat built.The only down side I seen was start up it acted like a old 12V engine... As for completely warmed engine it actually performed quite well. I'm going for loner term testing now... I got plans to head to McCall, ID to go shopping and take care of a few other things so I'll put the resistor back in and do some more long term testing...Actual Outside Temp = 32*F Fooled IAT 13*F = 31-32 PSI Boost Fooled IAT 132*F = 35 PSI Boost IAT Sensor (81*F) = 33 PSI Boost (Note: Winter front is present) Just got to keep pushing the envelope...Becareful the FOOLED 132*F is what produced the high boost numbers over the FOOLED 13*F...ADDON INFO: Doing a little math for the to test runs... (2 miles out 2 miles back) 55 MPH / 14.7 MPG = 3.74 GPH 55 MPH / 15.5 MPG = 3.54 GPH So this goes to prove so far that cold air intake and such don't do anything for MPG number they will do something for HP/TQ numbers. Another tidbit that I found interesting while playing around was the truck was capable of building a full head of boost at 35 PSI with the 132*F IAT than with the 13*F IAT it only pulled 31 barely 32 PSI...Well some basic testing done... Now as for the grid heater its based on both the ECT and IAT temps for a trigger so if I use my ECT fooler from the high idle and the 2.7K ohm resistor in the IAT sensor fooling to 132*F the grid heater are not present at all... As such the truck starts and run similar to a 12V the idle is a bit low and rough for a second or two. Then it will idle normally... (Interresting! ) Ok... Now as for the test run I left the house with the 2.7K ohm resistor in place and could see a instant change in the behavor of the truck. The MPGs was notably high just during the warm up period. So I drove till the engine coolant was at full temp of 195*F before I started testing... The first batch of test I threw out because it was to short of a distance to measure and had a slight down slope which skewed the numbers. So I found another spot that was a bit flater and desided to run both directions and test it out. This gave me roughly 4 miles round trip going point A -> point B -> point A again. So what I used was the ScanGauge II reset the current MPG number to ZERO each test and tried to drive the same way both times using cruise control both ways set at 55 MPH. Here is some of the data pulled for 2 miles out and 2 miles back to start point... FIA = Intake Air Temperature.FWT = Coolant Temperature.CMG = Current MPG for this Test.MPG = Instant MPG of the moment. Resistor fixed 13*F (14.7 MPG's) Resistor Fixed 132*F (15.5 MPG's) Now this isn't actual MPG numbers. These are short based number that reset each time so the SGII never has a real chance to average out to a full MPG number but I'm going to start doing some long term testing now and see who it performs...
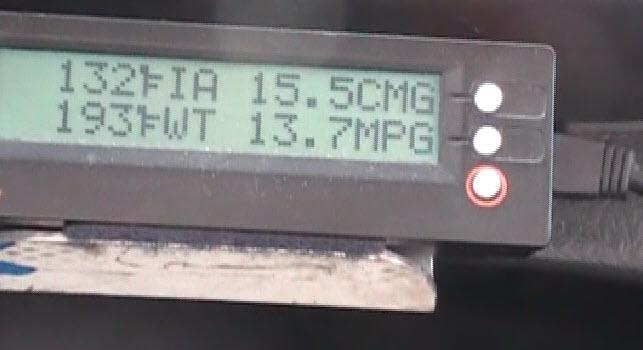
 I got a friend that asked me about a power steering pump problem on the 04 Dodge Dakota's. I guess the pump has a screen built in and there is issues with the pump plugging up and wiping out the pump itself. Has anyone seen or heard anything about it?Actually like today the temps are starting at 30*F now... So in theory the IAT temp for today will be ~70*F IAT which is short from my crossing point of 100*F IAT. Remember its a rough +40*F offset. So I got my resistors picked out to fool to 116*F, 132*F, and 148*F... Make the engine think its summer... Actually its based on the simple principal that if the air is colder it more dense so to keep the air fuel balanced it need more fuel. So in reverse respects if the air temp is warmer and less dense then less fuel is required to keep balance. But since the older mechancial VE and P7100 pump could careless of the air temp then why not fool it to a good temp for MPG numbers?Yeah I remember that but never heard much about it...Thanks Bugman... But that sucks to see a good bracket like this no longer produced...Hmmm... That might not be a bad idea... I think I'm going to push it a bit harder... I'm thinking it might be a killer idea of fooling the ECT at a higher temp say 205*F and lock it down and see if that changes the factors of MPG's ... Also see if that effect the grid heaters at startup... Oh... All the neat stuff I can fool the ECM into doing... (Evil laughter)Well there is 3 temperature sensors on these trucks... [*]ECT (Engine Coolant Temperature) Sensor [*]IAT (Intake Air Temperature) Sensor [*]Battery Temperature Sensor (Under the driver side battery) I wonder if the ECM uses input from all 3 or combination of the above to figure out the grid heaters... But at any rate I'm going to see if I can fool the ECM to thinking its a summer day and get the MPG's to rise I hope... Lets see in the morning...That's what its all about is having the patience to show/explain to the members how things are done... More than welcome...Well gang... I've been playing with theories and ideas for long enough now its time to put them into a design and see if it actually works. We all know the 24V's seem to take a good tumble in MPG's as the winter sets in well ISX proved that with the 12V engines with static timing that MPG's don't change. Well if you look at it the only thing that could be tossing this out the window is the IAT sensor on the 24V is changing the VP44 performance. Most know that colder air produces better HP/TQ because colder air is denser and requires more fuel to keep balanced. Well if you reverse this and warm the air (in theory) the VP44 should retune and burn according to the manifold temp. So what I've done tonight is fished through my resistor pile and found 3 I'm going to use for test candidates. Orange - White - Red - Gold = 3.9K Ohm = 116*F IATRed - Violet - Red - Gold = 2.7K ohm = 132*F IATRed - Black - Red - Gold = 2.0K ohm = 148*F IAT So now tomorrow I'm going to pull 3 test runs on the same piece of highway... Seeing if the highier the IAT temp increases the MPG or not... I'll can give you something to think about... Grid heaters are NOT controlled directly by the IAT... With the 2.7K Ohm resistor in place before even starting the grid heater still where hitting as normal. So there is more to the grid heater that the IAT temps... ... On the cutting edge again...


Account
Navigation
Search
Configure browser push notifications
Chrome (Android)
- Tap the lock icon next to the address bar.
- Tap Permissions → Notifications.
- Adjust your preference.
Chrome (Desktop)
- Click the padlock icon in the address bar.
- Select Site settings.
- Find Notifications and adjust your preference.
Safari (iOS 16.4+)
- Ensure the site is installed via Add to Home Screen.
- Open Settings App → Notifications.
- Find your app name and adjust your preference.
Safari (macOS)
- Go to Safari → Preferences.
- Click the Websites tab.
- Select Notifications in the sidebar.
- Find this website and adjust your preference.
Edge (Android)
- Tap the lock icon next to the address bar.
- Tap Permissions.
- Find Notifications and adjust your preference.
Edge (Desktop)
- Click the padlock icon in the address bar.
- Click Permissions for this site.
- Find Notifications and adjust your preference.
Firefox (Android)
- Go to Settings → Site permissions.
- Tap Notifications.
- Find this site in the list and adjust your preference.
Firefox (Desktop)
- Open Firefox Settings.
- Search for Notifications.
- Find this site in the list and adjust your preference.