

Leaderboard
-
Hawkez
Yearly Subscription3Points785Posts -
dripley
Retired Staff1Points11,788Posts -
Justin Spring
Yearly Subscription1Points10Posts

Popular Content
Showing content with the highest reputation on 02/09/2016 in all areas
-
Alright, We got word that we should be seeing the harness's for the Mopar1973Man High Idle Switches by the end of next week.2 points
-
I liked the old 80 cushions, but she didn't like them so we compromised..... I would let her do the cushions if she leaves the blinds the same color, she asked if she could sew on new backing and I said ok. I think we are going to head up to 11 mile this weekend and do some camping and ice fishing. Can't wait to be able to come in off the lake, start the heater and relay / play some cards / drink coffee without having to try and start a fire and manage it. Don't get me wrong, I am still going to start a fire and manage it, but I don't NEED to hahahaha.2 points
-
I have a couple of Mr Heaters that I use in my ice tent. Once in a while they will shut off and will not light again until I open up the tent and air it out really well. When the O2 levels get out of whack they will shut off, but a CO2 alarm is a great idea. I bet that will keep that camper pretty warm.2 points
-
2 pointsNo effect at all. I'm changing both the AirDog and Stock fuel filters at 60k miles now. I've got roughly 47k miles on my current filters and fuel pressure is still strong. Here is my last change at 30k miles.2 points
-
2 points
-
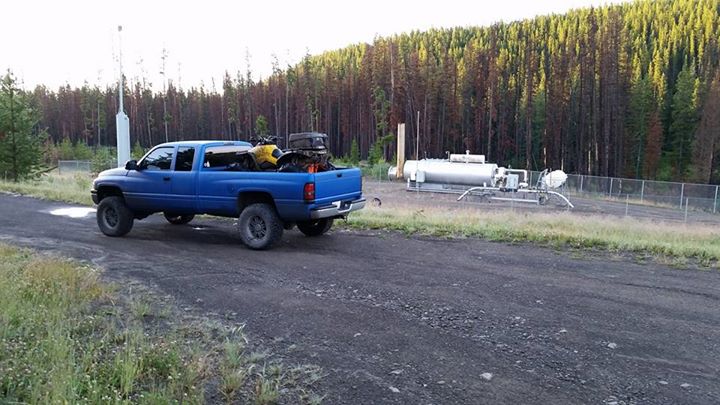
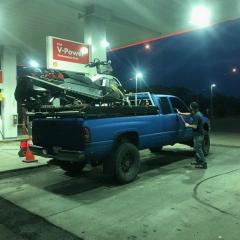
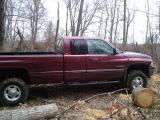
1 pointWell new to me at least! Some of you helped me out in my other thread when looking for one. Well I finally pulled the trigger and picked one up! It's a 2002 4x4 QC LB auto. Single owner, garage kept majority of its life, never had a goose neck or 5th wheel (which is harder to find than you'd think up here). Came with a 2in leveling kit and 35's and a hypertech 'tuner' to fix the speedo. Other then that, she's all stock. I crawled under to check for any signs of a 53 and couldn't find anything, so I might have a mexican block, but I'm going to keep checking. I couldn't be happier! I originally wanted a manual, but the wife said, if I'm getting a new truck then she better at least be able to drive it. So rather then argue, I just said 'ok' and got lookin! Anyways, wanted to start a thread here because, since it is stock and I'm planning on keeping this truck for the long haul, I wanted to do some mini write ups of the mods and what not I get done to her. As of now, here's the order I want to go in: 1. FUEL! and lots of it! 2. Gauges 3. Steering 4. Transmission 5. More power! 3 and 4 may get swapped around depending on what's needed more and my budget but that's the general order. So to start, fuel... The stock injection pump was replaced by the dealer 50-60k miles ago so it should have some decent life left, and it looks like they moved the stock lift pump. I didn't track it down exactly, just looking fairly quickly, and couldn't find it mounted on the frame, did they do in tank LP's for 02's? I'd like to fatten up my fuel lines to 3/8s everywhere possible, also looking to go with the Fuel Boss, but not sure how that works if my LP is mounted in the back in tank if that's even a thing. Any ideas or experience with this? As of now I'm looking at getting the following for step 1. FUEL BOSS ----- BIG LINE KIT ----- MOD FUEL MODULE As far as fuel lines, the obvious is the big line kit from Vulcan but I figured I'd talk with Eric about getting lines replace as much stock line as possible. I also threw on the modified fuel module. I saw that as I was browsing their site and hadn't seen it before. Is that necessary at all? Keep in mind I'm just looking to have fuel flow as easily as possible through the truck. When more power rolls around I don't plan on going EXTREME, but would like lack of fuel to never be thought of again after this. I'll leave at this for now but really looking forward to wrenching on this truck and getting her setup for the long haul!
 1 point
 -
Injector Disassembly, Cleaning & Inspection Cleanliness is very important, any dirt or debris that get inside the injector will wear on the tight tolerance parts. Injector Diagram: Torque Specs 15mm Nozzle Retaining Nut - 22 ftlb's 10mm Injector Bleed-off bolt - 6 ftlb's 24mm Injector Retaining Nut - 44 ftlb's Things we'll need. 19MM Open end wrench (For Pop Tester). 15MM Open end/box end wrench (For Injector Disassembly and Pop Tester). Torque Wrench with 15mm Deep Socket. Vice, Preferably Smooth Jaw. Lubrication Oil (I use 50% Diesel, 50% engine oil). Pen Magnet for Shim Removal. Small pick (I like a 5/64 hex key, it fits tight into the shim for easy removal). Adjustment Shims (For Adjusting Pop Pressure). Caliper (For measuring Shim packs for easier pressure adjustment). Pop Tester (For checking Pop Pressure) Fluid for Pop Tester (I use 95% Diesel, 5% 2-Stroke Oil) Clean the injectors thoroughly before disassembly. I Highly recommend you only work on one injector at a time to prevent mixing parts between them. Clamp Injector in the Vice. Do not Clamp onto the Injector Return Outlet Port. Use 15MM Wrench to loosen Nozzle Clamping Nut until Hand Tight. Remove the injector from the vise, put the injector close to your work bench before finish removal of the Nozzle Retaining Nut. This will prevent small parts from falling and disappearing. Disassemble the injector further, note the orientation of everything, it should come apart like this. Clean All Parts Thoroughly. Use Brake Cleaner/Carb Cleaner and Compressed Air to blow backwards through the Feed Passage in the Injector Body to clean the Edge Filter. Carefully remove the Needle from the Nozzle, if necessary use some pliers and carefully pull the needle out, make sure not to scratch the nozzle mating surface. If the needle still won't come out (very unlikely for a used nozzle in good shape) then reassemble the injector and install it into the injector Pop tester and use it to pop the needle loose. And then once again disassemble the injector and continue cleaning. Use Brake Cleaner/Carb Cleaner and Compressed air to clean out the nozzle, blowing into the needle hole, and the feed passage. Inspect the injector needle for wear or pitting at the tip. Here is a video showing a good and bad needle. If the injector needle is damaged, both it and the nozzle must be replaced. If this is the case, it is highly recommended that you replace the whole set. Once clean, use your lubricating oil and put a couple drops on the injector needle before inserting it into the nozzle. Make sure to lube both the needle tip, and the largest diameter portion of the needle. Well used nozzles aren't picky about the type of oil, you could even get away with straight engine oil. However new nozzle have much tighter clearances so are very picky about oil thickness, Use a maximum of 50% oil and 50% diesel. To thick will warrant inaccurate readings with the Pop Tester. If the injector isn't working correctly on the Pop Tester, Disassemble the injector, clean the nozzle thoroughly, and make sure you're using a thin enough lubricating oil. Once done, insert the Needle back into the Nozzle. Back to the injector body. Install all the shims back into the hole, if you are installing extra shims to raise the Pop Pressure, install them under the main thick shim. As a general rule, .01mm of shim will raise the pop pressure 1.5-2 Bar. Once the shims are in place, insert the spring, if the spring does not sit approximately flush with the injector body, the shims are not seated correctly. Carefully use the spring as a ram-rod to seat the springs. Here is the shims and spring inserted correctly. Then install the spring seat, note the orientation. Now install the Valve Stop Plate. Once again, note the orientation, the conical side should face the injector body. When installing, make sure to line up the Feed passages. Once installed Dribble a little Lubricating Oil onto the Valve Stop Plate, This will lube many key things, most importantly the injector body threads. Also dribble some oil into the Injector Nozzle Nut, this will again lube the threads, as well as where it seats against the nozzle. Once done, install the nozzle, again make sure to line up the Feed Passage. Install the nozzle, then the nut. Tighten the nut until you start to feel spring tension, then back it off a turn or two. Grab the nozzle tip with your fingers and pull up and down on it, there should be play, if not, loosen the Nozzle retaining nut further until there is some play. Then try and spin the nozzle tip, while pulling in and out. The nozzle should not spin. If it does then you do not have the aligning dowels in incorrectly. Disassemble and re-check your work. if the nozzle does not spin, everything is good to go and you can tighten the Nozzle retaining nut down to 22 ftlb's. If you are changing the pop pressure, or installing new nozzles, it is highly recommended that you Pop test the injectors once down. This will let you know if you should shim the injectors, or if some nozzles aren't spraying correctly. I highly recommend you do your pop testing outdoors, or in a very well ventilated area (Due to the fact that it was raining, I had to take these pictures indoors). Good spray pattern: 5x.010 VCO @ 280 Bar 7x.0105 SAC @ 320 Bar 7x.0105 SAC @ 260 Bar 5x.013 SAC @ 260 Bar 7x.0105 SAC With Bad Spray pattern, it may look like it's just injecting less fuel, but it's actually the same amount.1 point
-
1 point
-
I would rather have it single digits than anything above 90.1 point
-
1 pointJust ordered my VP through Jacob at DAP. 2 gigantic thumbs up for that guy. spend bout half hr on the phone with him. Be definitely ordering parts from him again in the future.1 point
-
I called the cable manufacture I had him break it into 2 batch so we can get them sooner.1 point
-
1 pointThe blend door motor has a little coupler that is made out of plastic and it tends to crack or break. Here is what I used on mine.http://www.heatertreater.net/. It is a bit a pain with the hvac box in place but easier than removing the dash.1 point
-
1 pointI'd say the first thing to do is check the coolant level and temperature of the heater core hoses located on the passenger side firewall. They should be about the same temp with the blower motor off and the engine running. Not real likely the heater core plugged over night but possible. It also could be a blend door issue. Turn the temp knob from cold to hot a few times, you should hear/feel if the door moves. I think there's an article on blend door repairs.1 point
-
1 pointNo foolin'. I'll end up getting a loan from a guy named Vinny who has an office in a shady restaurant.1 point
-
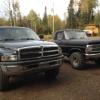
1 pointHawkez, you need to start a new thread 'Need a new vehicle". We can all chime in and tell you what to buy and how to fix it. You'll need something like this.1 point
-
1 point
-
1 point
-
1 pointI concur entirely. That is why I posted this so other could share there favorite articles/videos/pictures. And then I can assemble that into an article. I used to be of the mind that just about anything is accessible via google. However I have realized the art of googling was not bestowed upon everyone. Anytime I watch a friend google I question humanity its self. lol1 point
-
Don't have to buy the expensive hydros either NAPA hydros are just as good just you have to bleed the system before installing. I still suggest bleeding even sealed systems because you never know how it's been handled before it got to you.1 point
-
I am figuring that the camper is drafty enough to overcome that issue. I was in it for over an hour yesterday with the heater on all windows / doors closed and I didn't notice any smell. Again I don't know how much we will actually use the heater, doubt we will have it on when we sleep. Maybe just morning and evening for relaxing.1 point
-
UL...whats that? hahahah Honestly it might be. The converter is all contained and mounted, wire is all big enough gauge, wire nuts are up to spec for the amp. I still have a breaker in place and fuses on everything. Some more work tonight, Heater came in and I am happy to say it fits where I was thinking it wouldn't Ran the heater for over a hour on high and the outside faces other than the front are cool to the touch. all surrounding areas are also cool so I am happy about that. Heats the camper up nice. Had to relocate the speaker and switch for the water pump, oh well. Installed USB charging ports and cig lighter with a volt meter. Again all wired into the new converter. Still waiting on the water pump, the kill switch for the battery, and a couple other small things like LED lights. Other than that I am say I am happy enough to take it out. Curious to see how much power I will end up using per night.1 point
-
1 point3rd lockup? Every time you take your foot off the gas pedal the torque converter unlocks. Then you get into the pedal again and 3rd locks up. 1st, 2nd, 3rd, 3rd lock up and 4th(locked). Lock up shouldn't "clunk" but you can hear and feel it.1 point
-
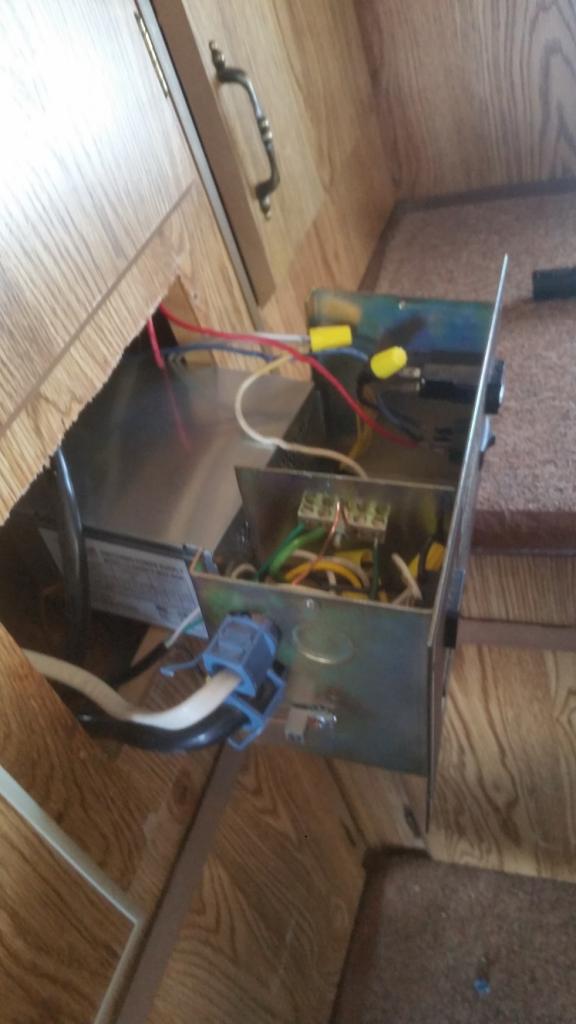
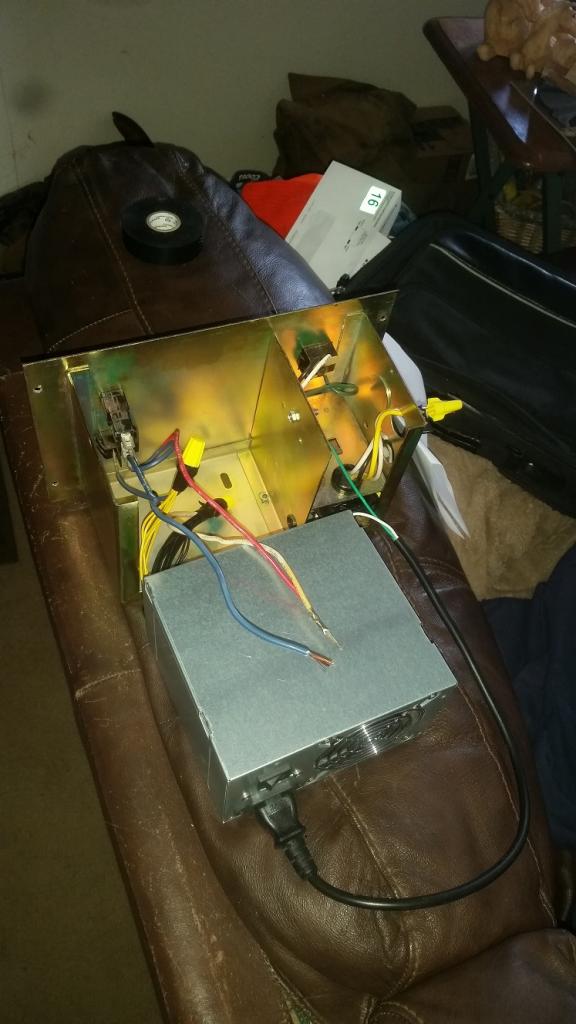
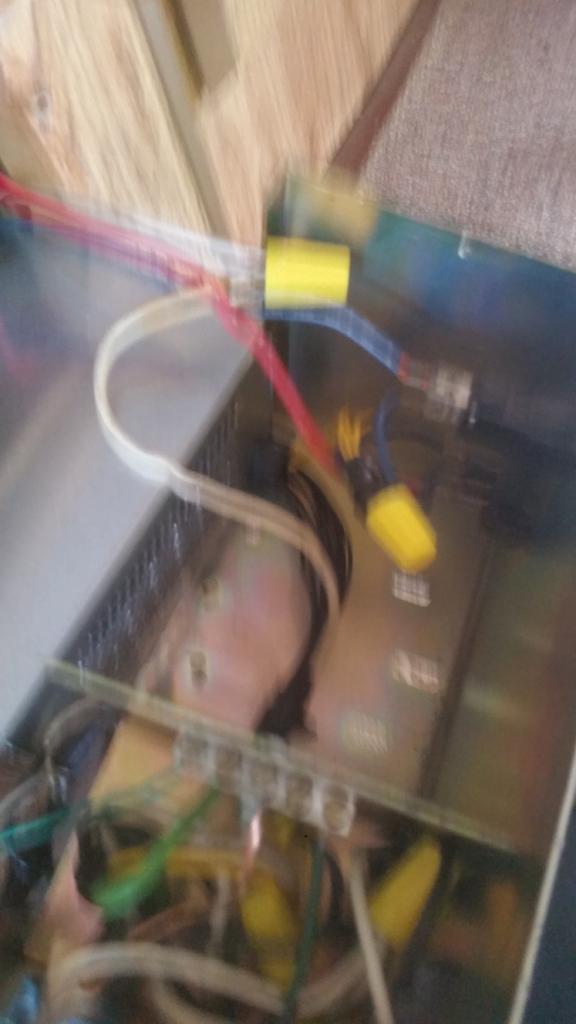
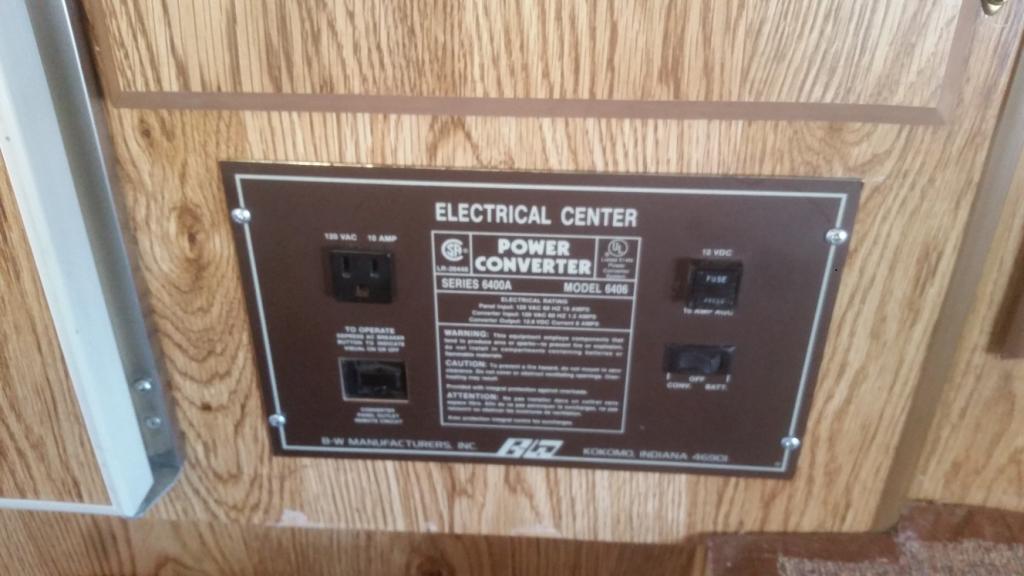
Well I am happy to report that I have successfully converted the old 6 AMP 120v-->12v dc to a 26 amp 120v-->12v dc using a server power supply that I had at the office. ( images are of the desktop PSU that I tested with prior) Very simple to do, wire up the PSU to turn on when power is applied, use a switch to ground the green wire on the PSU. then figure out what colors are 12v on your PSU. Cut all the leads and cap them to ensure no shorts. then run the 12v output from the PSU into the switch system of the old controller. Do the same with the ground from the PSU. And thats it. You now have a VERY cheap, yet reliable,stable power converter for your RV. Typical desktop PSU's range from 10amp to 25 amp and more depending on price. Converter removed. Simple 2 wire input (neutral and hot) u I have steady 12v rather than the 15-17v I had before. Operation is still the same from the panel and everything looks OEM from the outside. Still have the separation between the battery and 120v system so the battery will not be charged while plugged into 120v, but that is not really an issue for me. I can now runt he radio full bore and not have the lights dim. It's the little things I also wired in the 12v Fridge to the converter side also. It used to be setup where it would only get power if you where connected through the battery as the fridge takes 10amps to run on 12v, and the old converter would only do 6 amp. Since I now have the extra amps I ran some heavy gauge wire to the fridge from the converter with a fuse. I doubt I will ever use the 120v -->12v ---> fridge setup, but it is good to know I can. I effective turned a 2 way fridge ( LP / 12v) into a semi 3 way fridge. Should also point out jen has recovered all of the cushions

 1 point
 -
1 pointMy truck 2 years ago had a slight leak at the back of the oil pan and it looked very similar to your condition. I loosened all of the oil pan bolts during one of my oil changes and then re-torqued all of the pan bolts back to (18ft/lb) per the factory sequence. I then drove the truck for a couple hundred miles and upon inspection there was no visible leak at the pan. However to be on the safe side I re-torqued all of the pan bolts per sequence again at (18.5ft/lb) to ensure a good seal. It has been 15k since re-torque of the pan bolts and so far the leak has not returned.1 point
-
Great article Hammer. Your explanations were easy to follow. It's sad to see crooks in business stealing from folks that don't know better. I'm not one to cause issues but I don't run from them either, can't run that fast, In the old days before there was a lawyer on every corner you could have pulled this guy in the back or out to the rock pile and whip him like his father should have. Not taking away from anything you pointing out, where did you find a book or reference on the 47re and the pressures, understanding the hydraulic system and the flow and so on.?? I'm trying to learn as much as I can about the transmission too, if it wasn't for all the great members of this forum that take the time to read and answer back with suggestions I wouldn't be learning anything about my truck and how to maintain it. Great report Hammer, God bless all of you.1 point


.jpg.6faf1b82511481ed49eb74810b772c80.thumb.jpg.375710f140d09e5d6efe01c939c78654.jpg)

This leaderboard is set to Boise/GMT-06:00