Leaderboard
-
in Posts
- All areas
- Events
- Event Comments
- Files
- File Comments
- File Reviews
- Images
- Image Comments
- Image Reviews
- Albums
- Album Comments
- Album Reviews
- Blog Entries
- Blog Comments
- Cummins Articles
- Cummins Article Comments
- Cummins Article Reviews
- Vendors
- Vendor Comments
- Vendor Reviews
- Ads
- Ad Comments
- Ad Reviews
- Policies
- Policy Comments
- Topics
- Posts
-
Year
-
All time
December 14 2009 - October 8 2025
-
Year
October 8 2024 - October 8 2025
-
Month
September 8 2025 - October 8 2025
-
Week
October 1 2025 - October 8 2025
-
Today
October 8 2025
- Custom Date
-
All time
-
Tractorman
Yearly Subscription79Points1,474Posts -
Mace
Monthly Subscription41Points56Posts -
PilotHouse2500
Yearly Subscription38Points428Posts -
Sycostang67
Monthly Subscription32Points607Posts
Popular Content
Showing content with the highest reputation since 10/08/2024 in Posts
-
Subscription
6 pointsWelp, just ponied up for another year, and I've got to say that this one of the better expenses that I have. The amount of technical knowledge, experience, and willingness to share is outstanding and needs to be supported. For those of you who use this site for information and advise (as I do) remember, it costs money to keep it up and running. Mike and his Mods aren't trying to make money, they're just trying to cover costs. For less than $10 bucks a month we can maintain this site, and continue to have access to one of, if not the best sites for our trucks. Remember, information not shared, is information lost. Mark6 points
-
ECM failure
4 pointsBig thanks to you for getting those computers back to me. Also, I messaged Mike on here this morning and he was a phone call away in no time helping me source this issue! That’s a community This is why I really enjoy this forum. In the beginning we had Dave Fritz/Dodgeram.org, now we have TDR (to some extent). Finally we have this place where all the mysteries have been solved. Don’t forget Mike as we discussed: You may perish of cancer but the forum lives forever, so you live forever!4 points
-
Subscription
4 pointsThank you for the wonderful comment. Truth yes it's still paying to keep the server alive and keep paying the bills. Remember Mopar1973Man.Com is the LAST PRIVATELY OWNED WEBSITE left. I'm not owned by a corporate clearing house like Cummins Forum which is owned by VerticalScope Inc. Or DieselBombers which is owned by Internet Brands. All these other websites are corporate owned groups.4 points
-
Driving with 5th gear removed
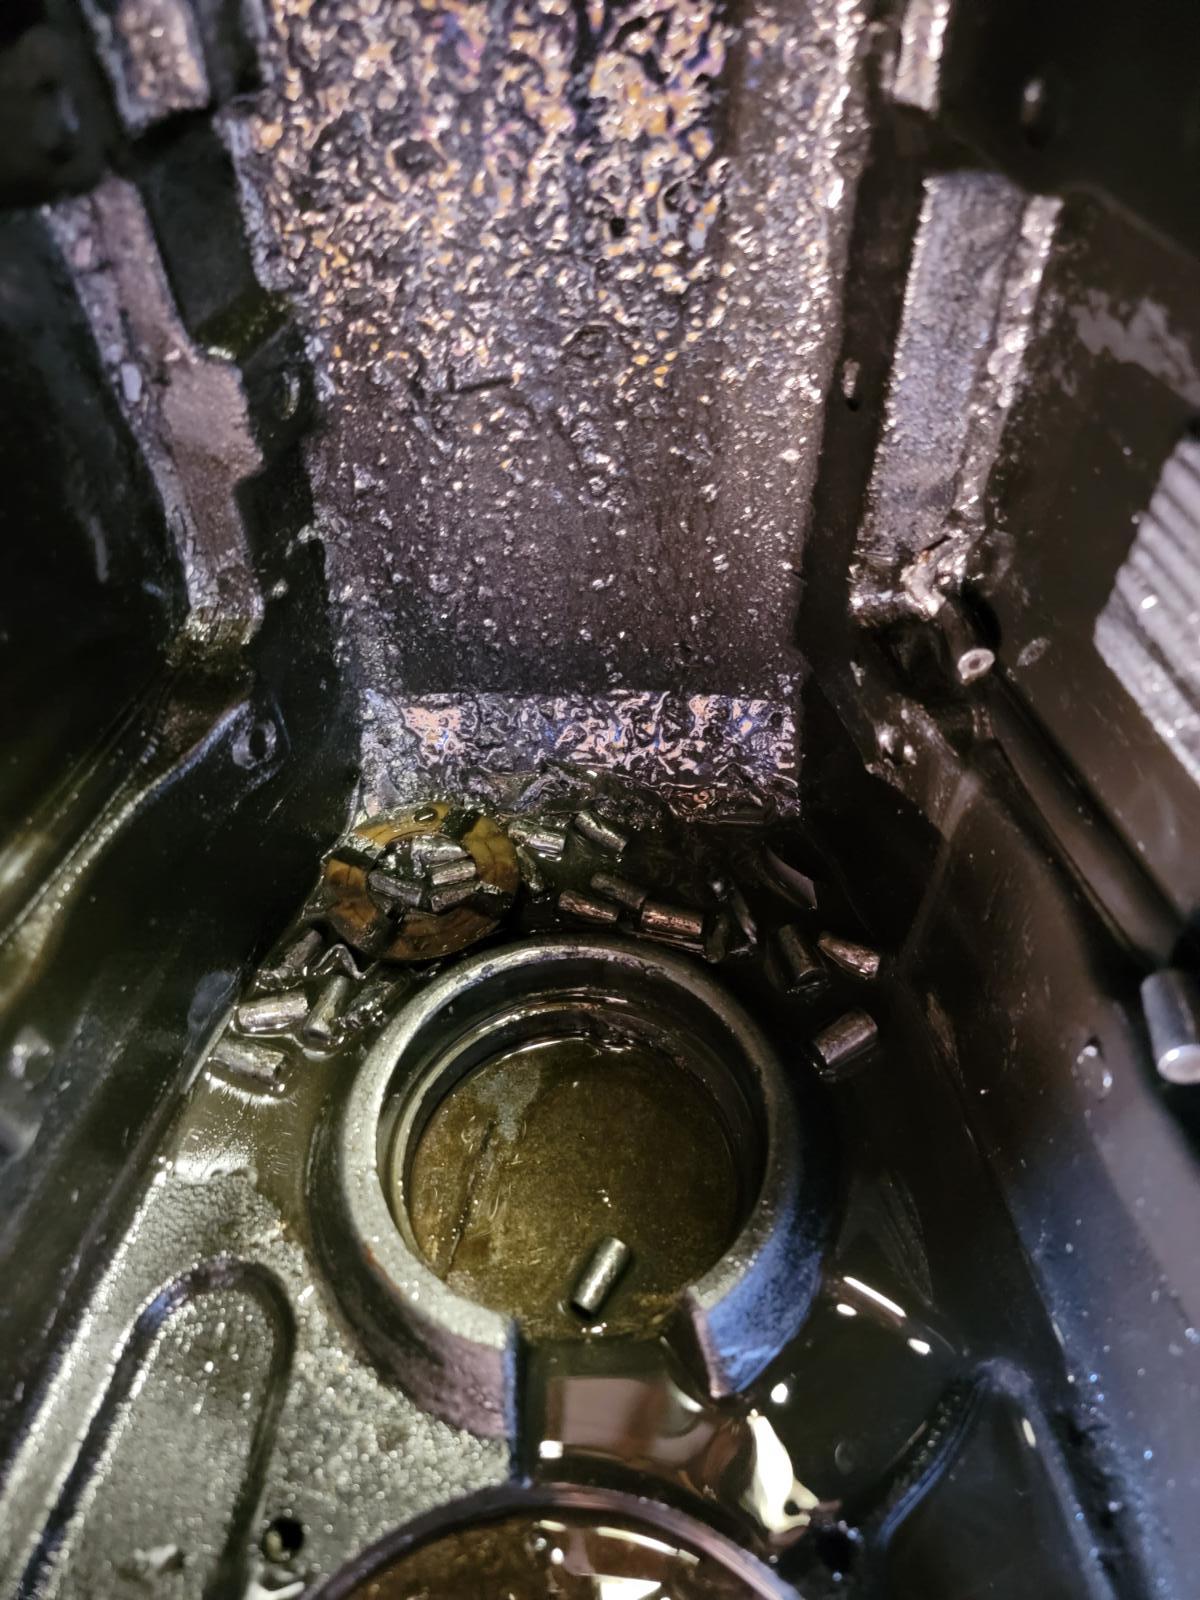
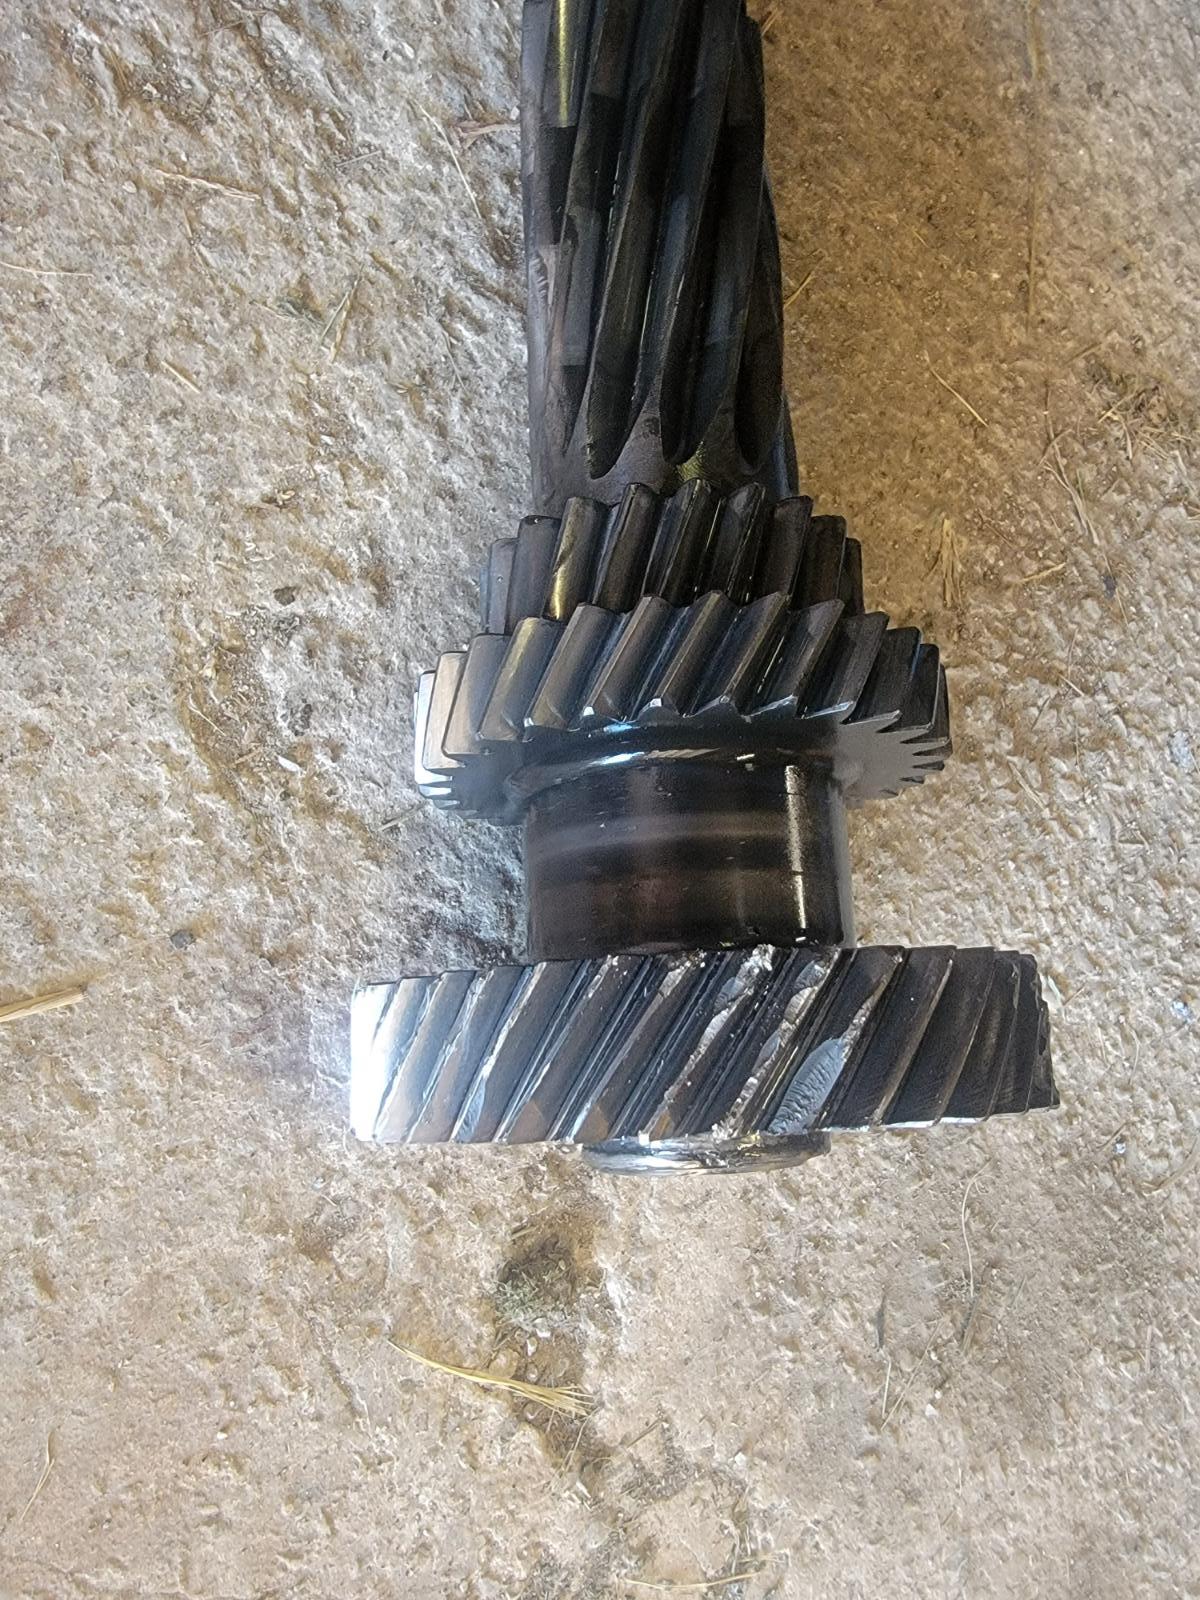
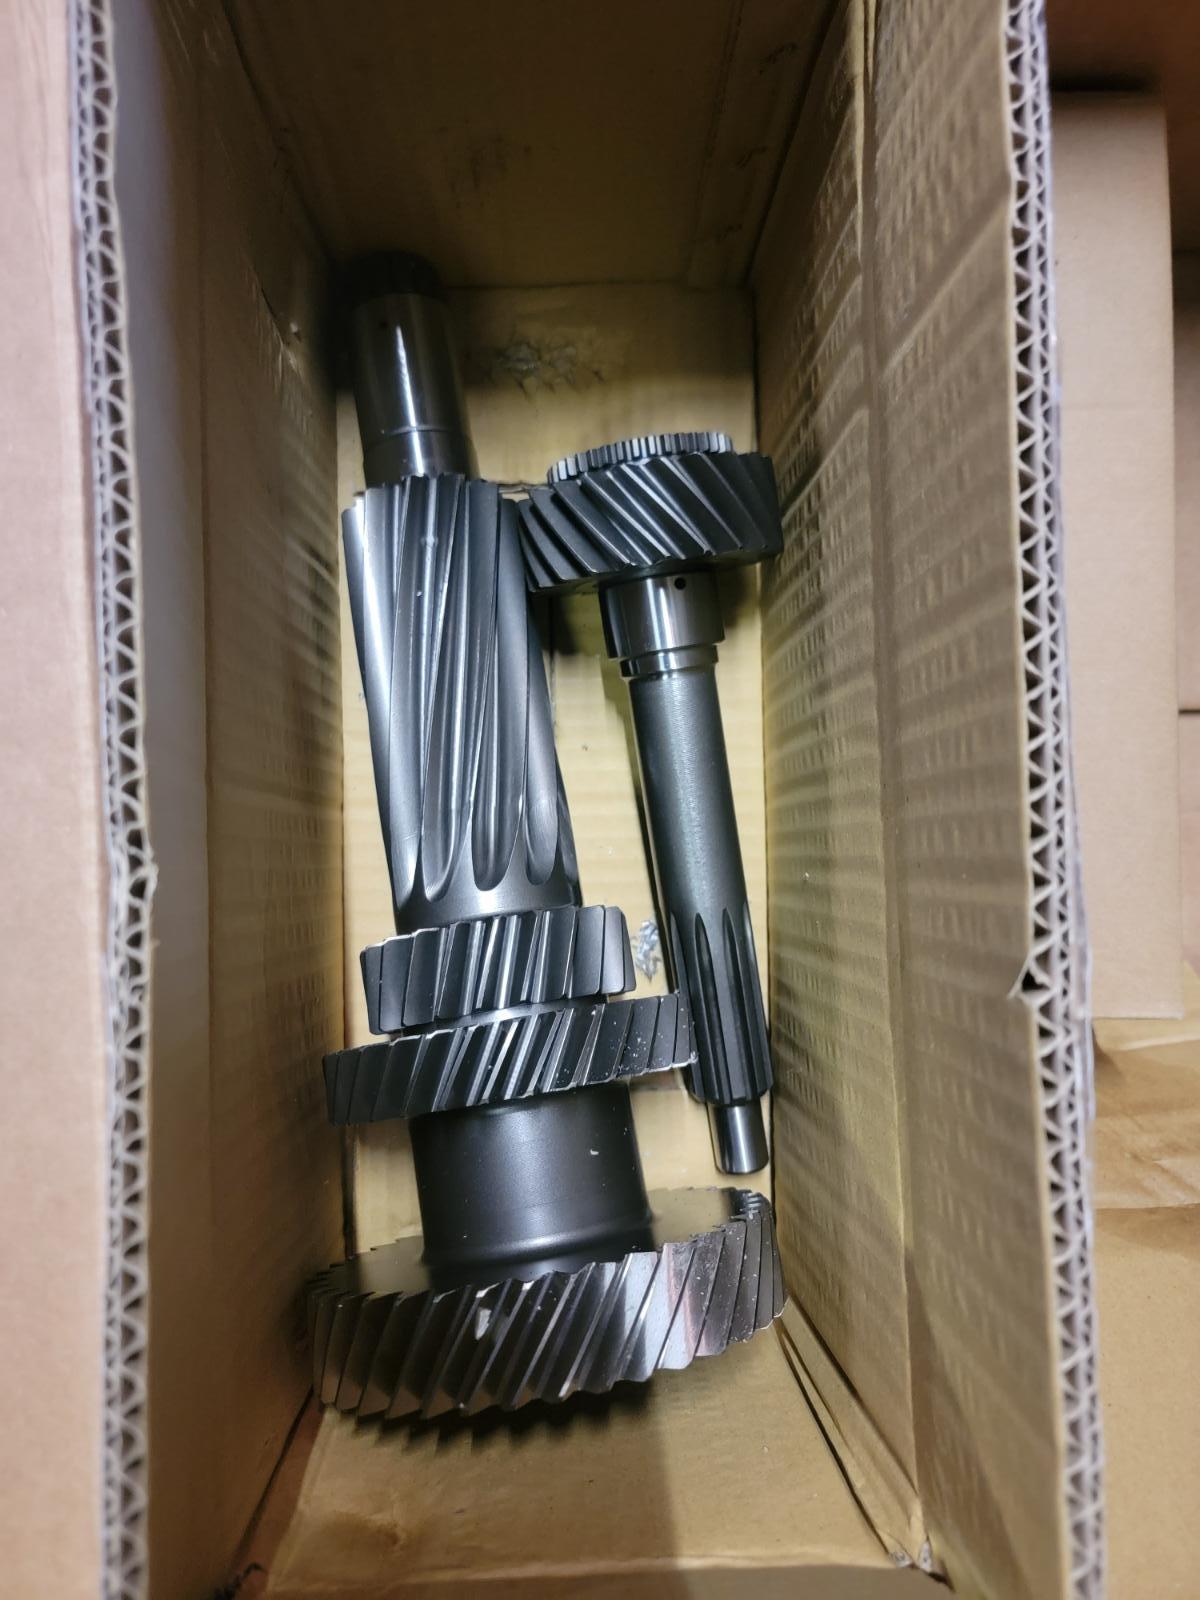
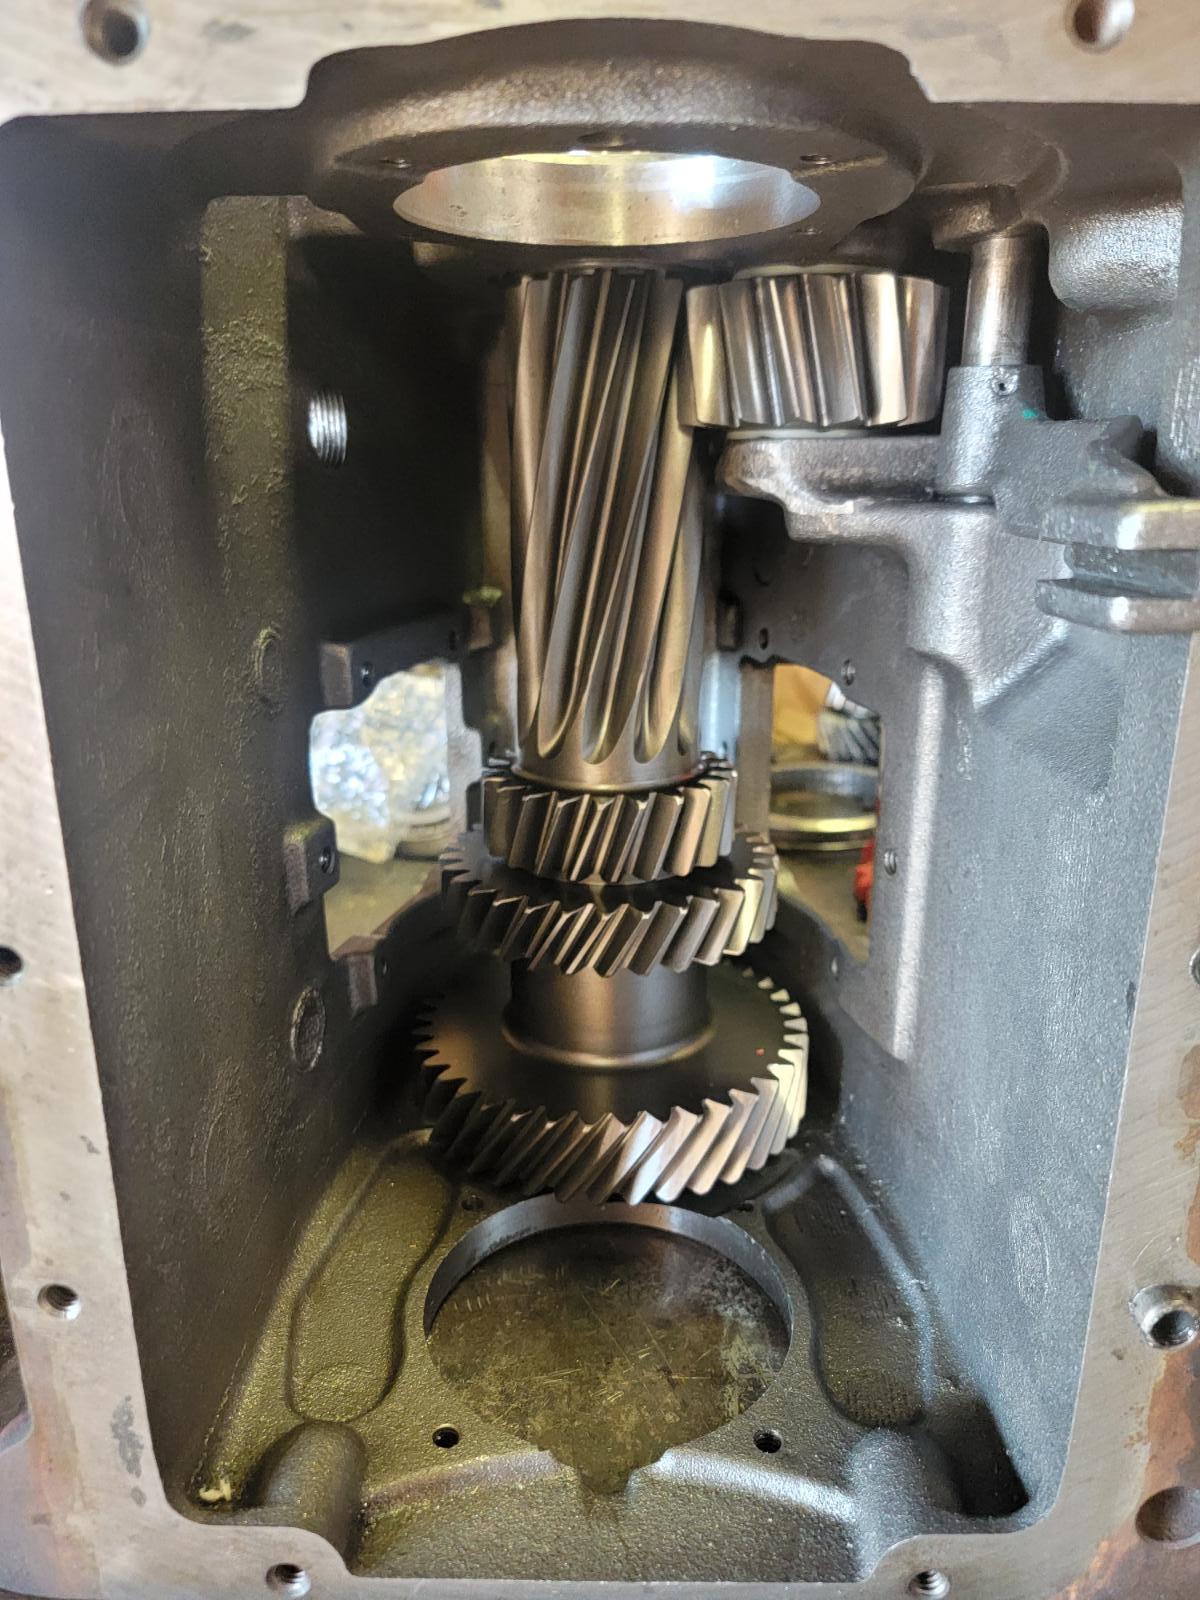
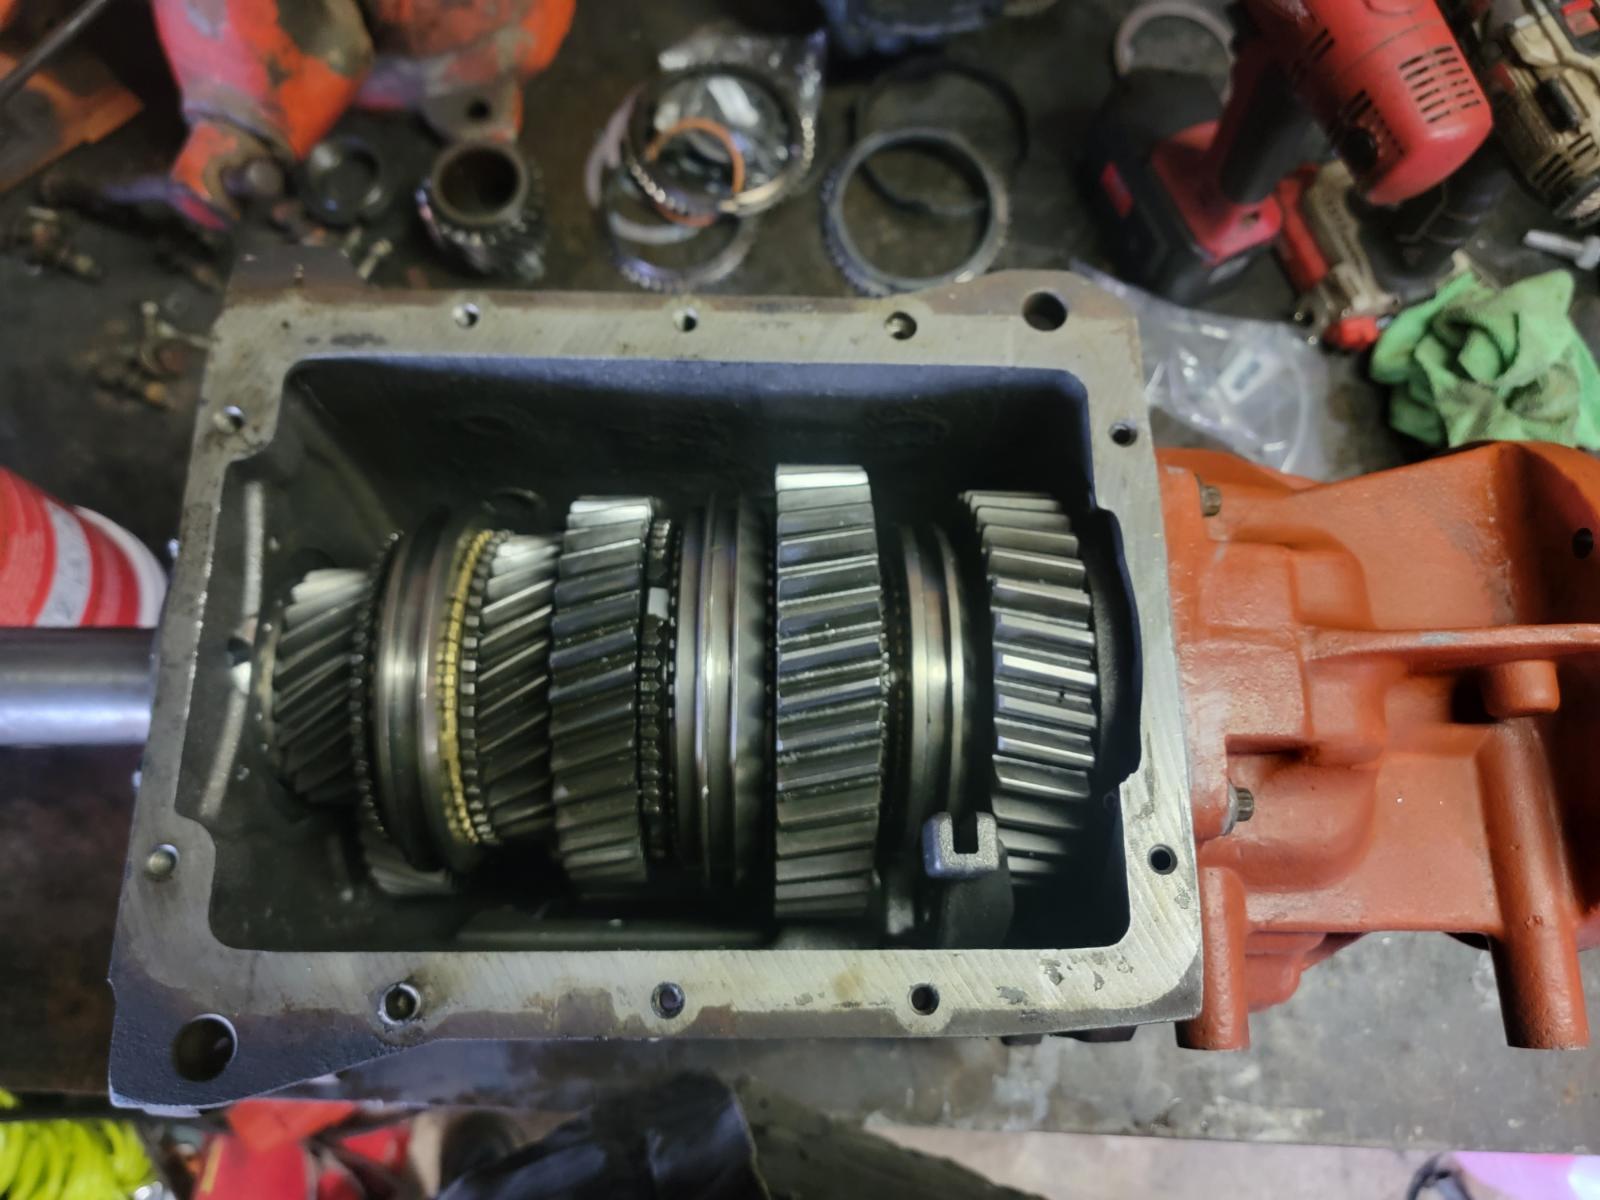
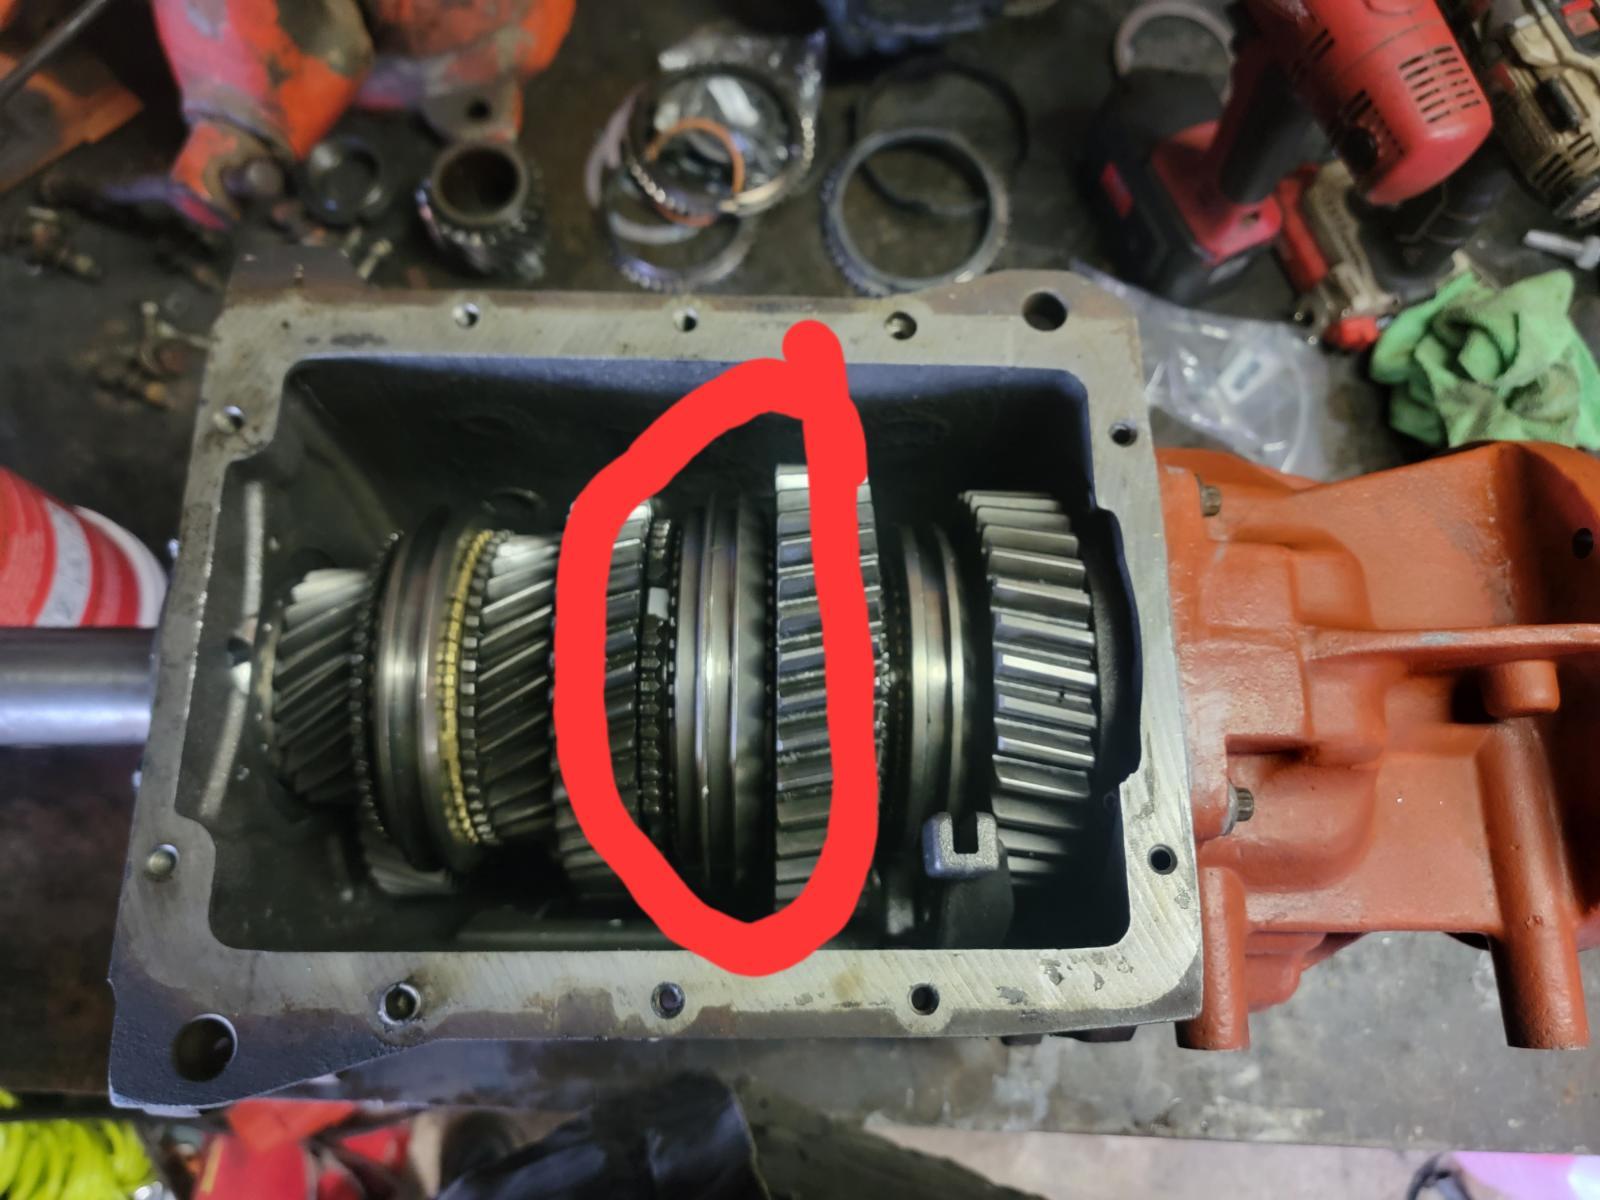
4 points@Mopar1973Man It looks like he has the updated main shaft already. I purchased several of my transmission parts from Allstate Gear online. The 5th gear nut I used was their "super nut" kit that cane in the master rebuild kit that I bought. I has to replace all 3 shafts, input shaft, counter shaft and the kit came with the full spline updated main shaft as well. My trans was trashed. The main shaft bearing in the front took a massive dump and trashed everything. Also, get a big torque wrench! As Mike mentioned, the 5th gear nut needs to be torqued to 300ft/lbs. DO NOT use a chisel and hammer and think it's good. It isnt. I post some pics of mine below. The carnage More carnage New input shaft and counter shaft New counter shaft in place, reused the small reverse idler. Case has been cleaned here also New main shaft installed, also replaced the tail housing with a cast iron piece. OEM was aluminum and had the mount holes hogged out of round. Now, the shift ring or collar that I have circled in this pic are important! I installed the ring backwards. If you look closely the ring is flat on one side and has a tapper on the other. The flat side has to go toward the large gear to the right as shown in the pic. Due to installing that ring backwards I do not have the use of 1st gear. I don't need it unless towing and I will pill it and make it right, just haven't yet. Hope all this helps!4 points
-
New Life and New Body with issues...
4 pointsWell I'm coming back. I'll admit I'm not able to do a lot of jobs. Anything in the heavy lift is over. Currently have Thor stuffed in the house garage and getting ready to go back over the injectors again. Now Thor my 2006 Common rail is my pet project. Like a Phoenix rising from the ashes the new version of me will be going public. Sadly no more wrench time for me. I'll still play with my own rigs. My problem is I've got to consider my stoma and kidneys. So I'll continue my education of the Cummins line. As for my medical issues I'm clean of cancer nearly 6 months. Check up coming. I'm stuck with Stage 3 Cronic Kidney disease this is due to my kidneys being choked by the cancer. The website I'm going to upgrade software and there is a lot of new features coming. Stay tuned in. There is a feature to have live chats again and when the chat ends it will convert the chat unto a forum thread auto-magically. One of many.4 points
-
New Life and New Body with issues...
4 pointsI'm still here. I'm still waking up every morning ready to battle each day. Even though my body is not quite ready for the world of work but I'm trying to figure out how to work with my new body. I'm thankful I've got a few good friends that advocate for me and helped out. I need to call out Mark Hall thank you for being a close friend and helping out get my firewood for the winter. Then Dan Catherman for bringing his Datsun pickup with his fishing pole setup that loaded all the logs on my trailer. Then Einer for helping up in going out and doing the heavy work getting the firewood loaded. I'm even making attempts to see how much I can do. I had the driver's wheel joint fail last spring. I managed to change it out but took two days getting it done and still not quite right. The wheel joint is fine but my slide pins on the calipers need replacing and the kits were missing the rubber boots. Now to add a bit of good news. I had to endure hell to get to heaven. What do I mean by this. My hell was handling my mother's dialysis, my mother's death @MoparMom, 3 bad relationships. Then hit with bladder cancer both times on 2018 and 2023 Christmas. Then deal with 4 months of chemo. Then a 7-hour surgery to modify my body to no longer have a prostate or bladder which are gone! Now on my trip to Portico West medical building, I ran into Suzanna Lopez and had a few words and got called into my appointment. Now during my appointment, I rescheduled for 2 weeks not the 4 weeks that the doctor wanted. This lined me up to see Suzanna a second time and she came off the elevator and said "I remember you from the last time!" yes this was true. I was decked out in my Black and blue hair and makeup. She got in and sat down and the first thing she asked was for my phone number. Crazy fact Suzanna is the first woman to walk up to me in 53 years to ask me for my phone number. I asked why she was impressed with my makeup and appearance as well as some of my story about my cancer and taking care of my mother. Suzanna has more or less just stayed with me. She is attempting even right now to sort through all the Social Security documents and getting information dealt with. She has been there for all my medical appointments too. We have already been together already 2 months and have a difficult time when we are separated for a length of time. Suzanna issues are that she was injured in an accident that broke her left ankle and then had issues for most of her life. Now she had her ankle fused and now we are healing together attempting to support each other to work out and get back into shape. So there you go gang a tidbit of good news. I'm trying to get over the Social Security hurdles and she is being a huge help.4 points
-
Seat belts not as snappy?
4 pointsIf your seatbelts are stiff or slow to retract, I found this little trick online that really helped mine out. I was constantly having to force feed my seatbelts back into the retractors and it was driving me nuts. I got some clamps, pulled my belts all the way out and used the clamps to hold them out. I filled two medium sized bowls with hot water and dawn dish soap and let the belts soak overnight. The next day I changed the water and used a brush to scrub them a bit and then did my best to dry them with a towel. I left the widows down and let the belts finish air drying for the day. When I removed the clamps the belts were slow to retract from having the springs compressed for so long but they bounced back after a few uses. Now my seatbelts work like new, no more force feeding them in.4 points
-
Recent upgrade
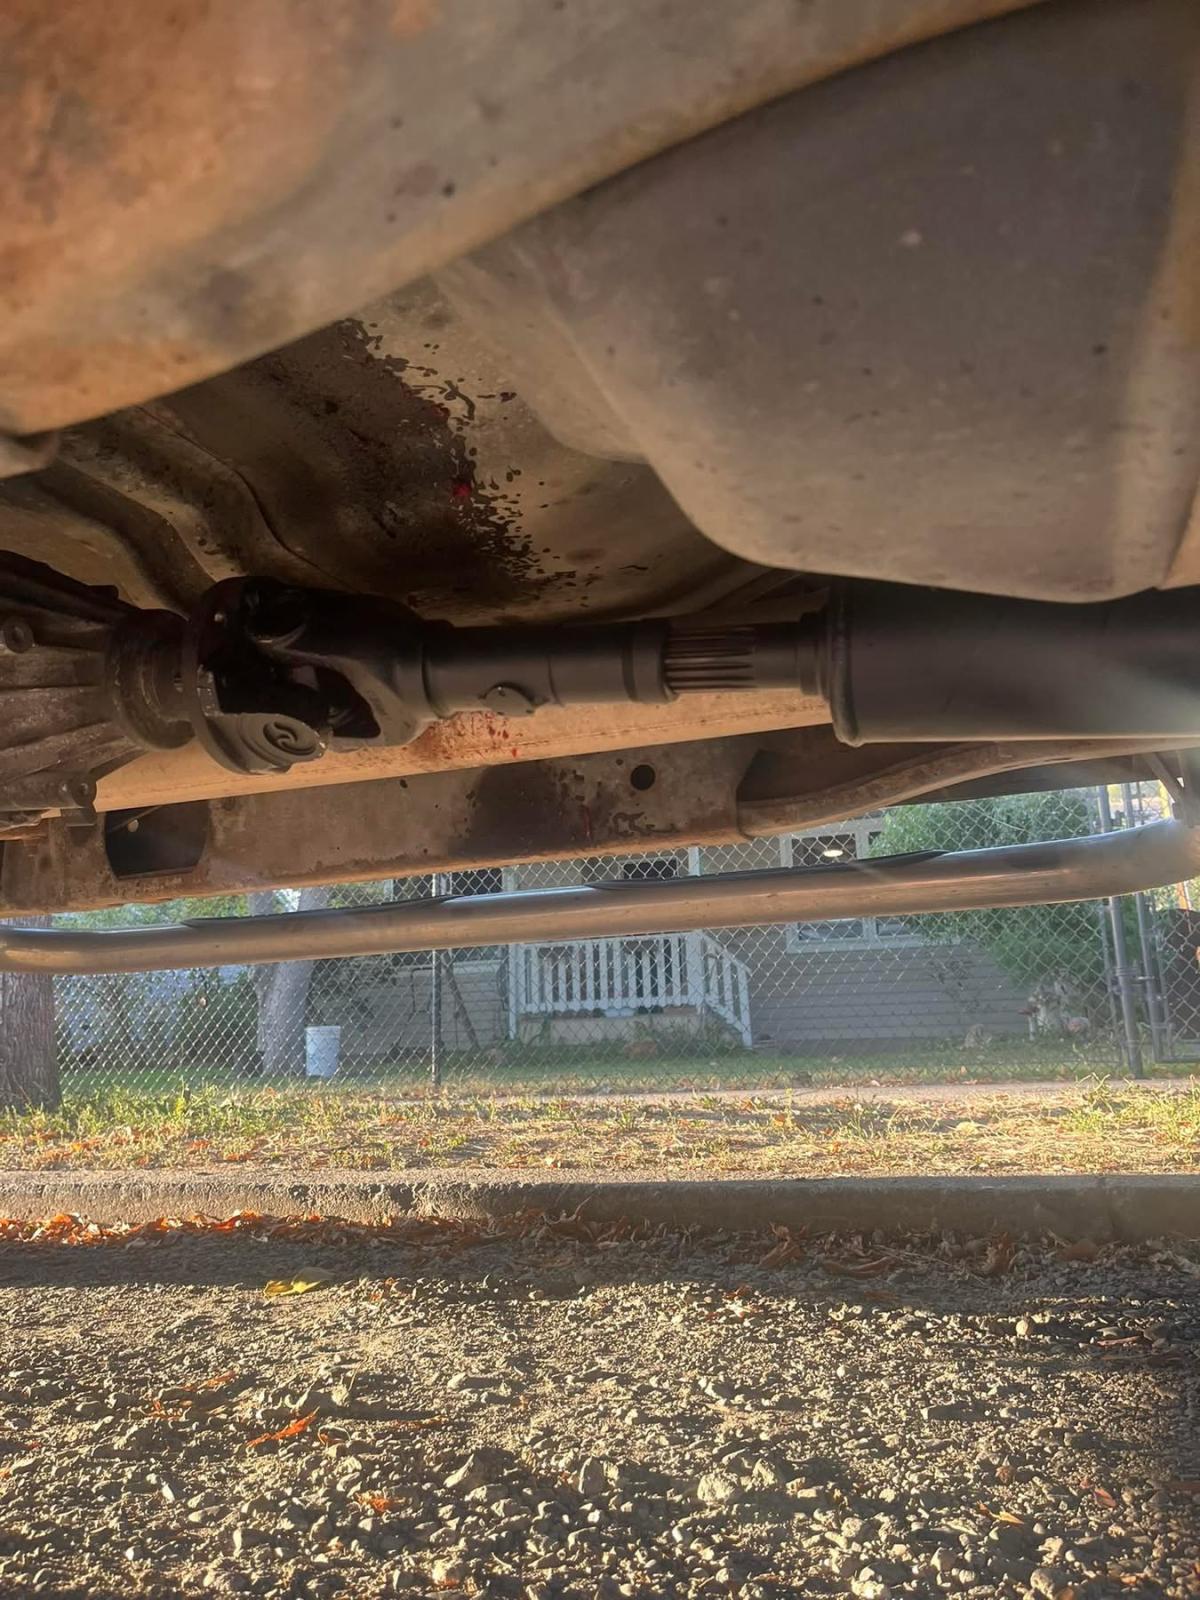
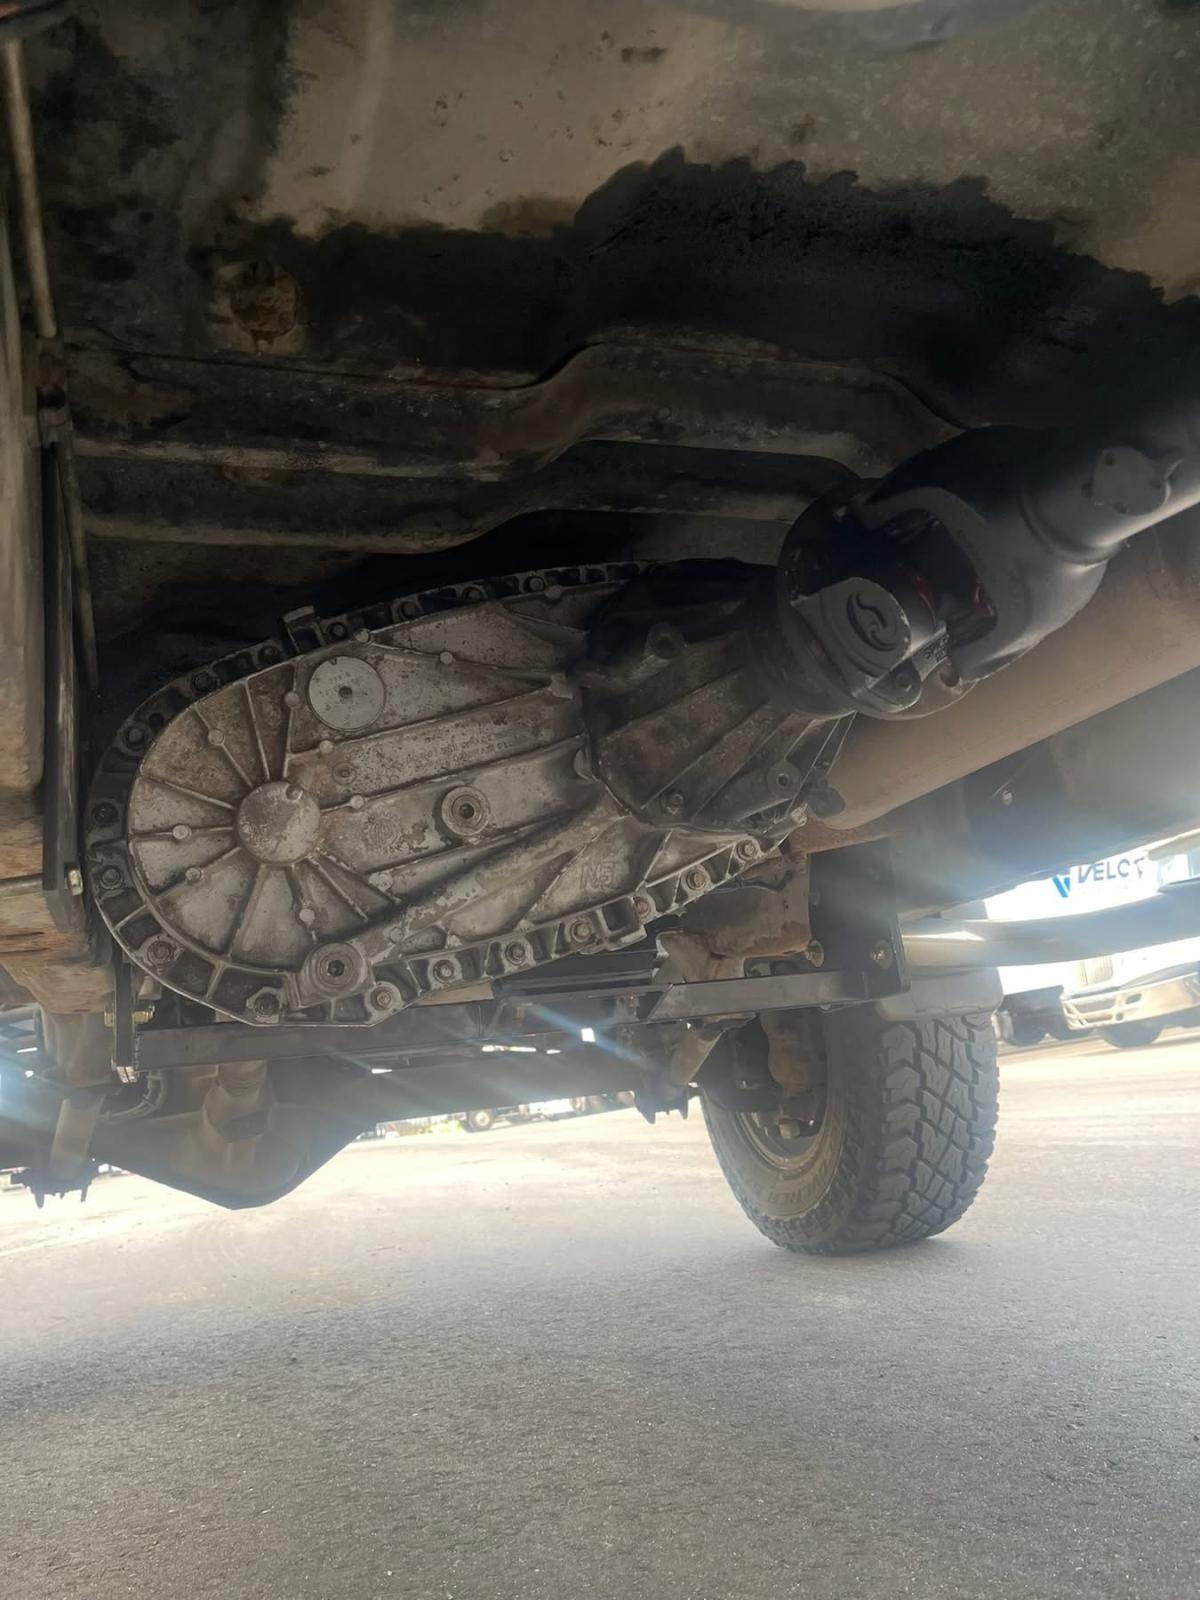
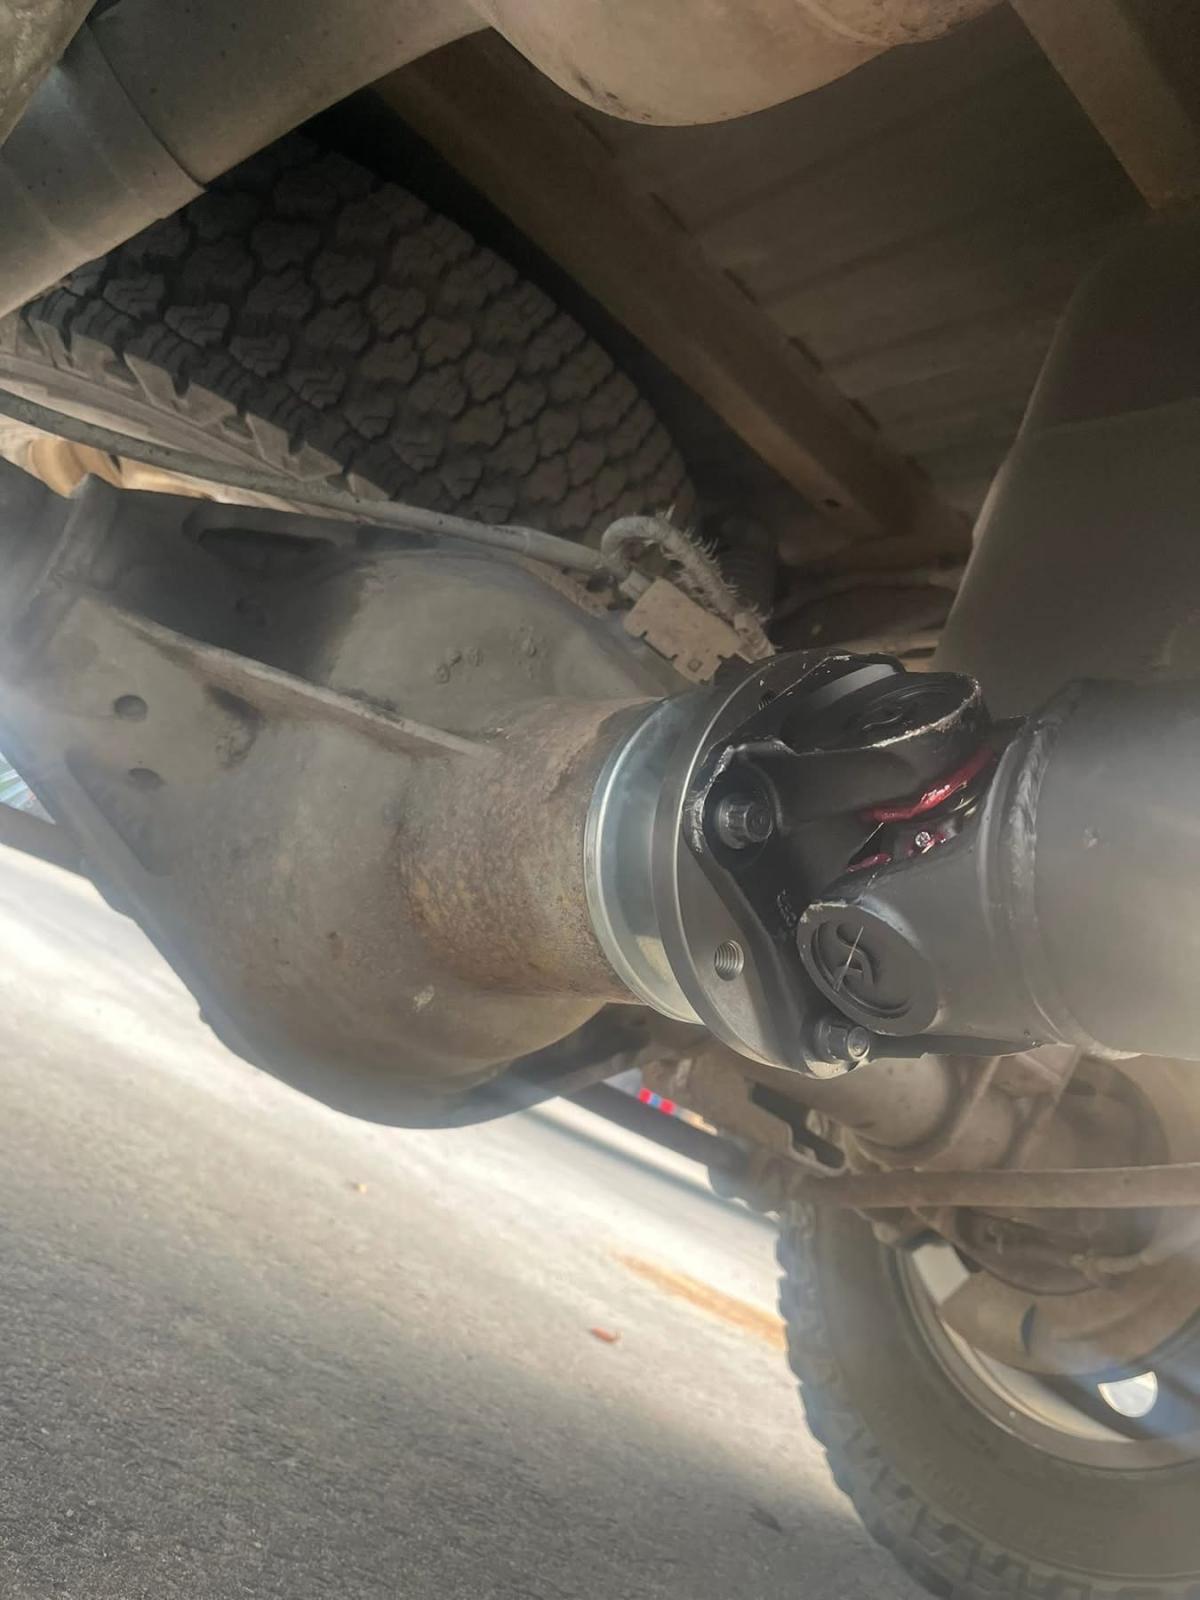
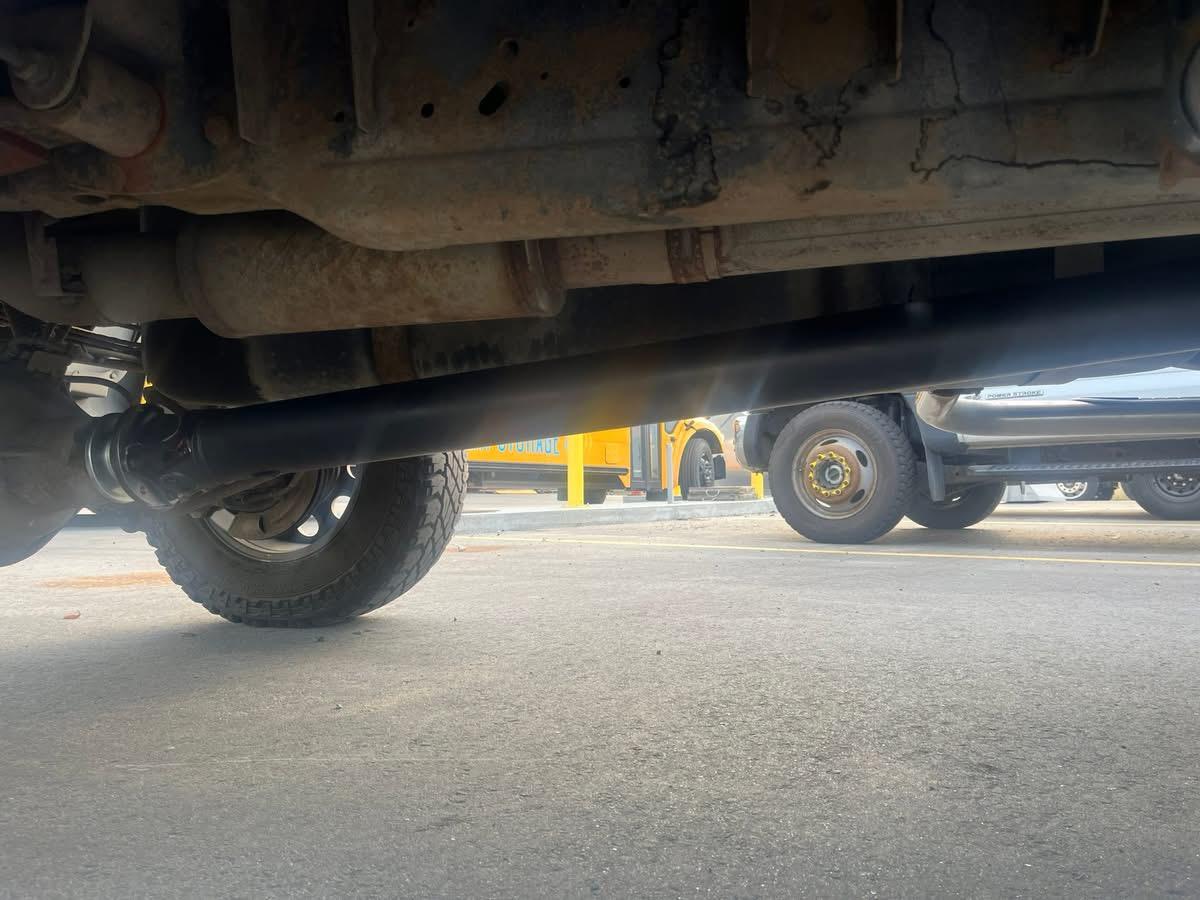
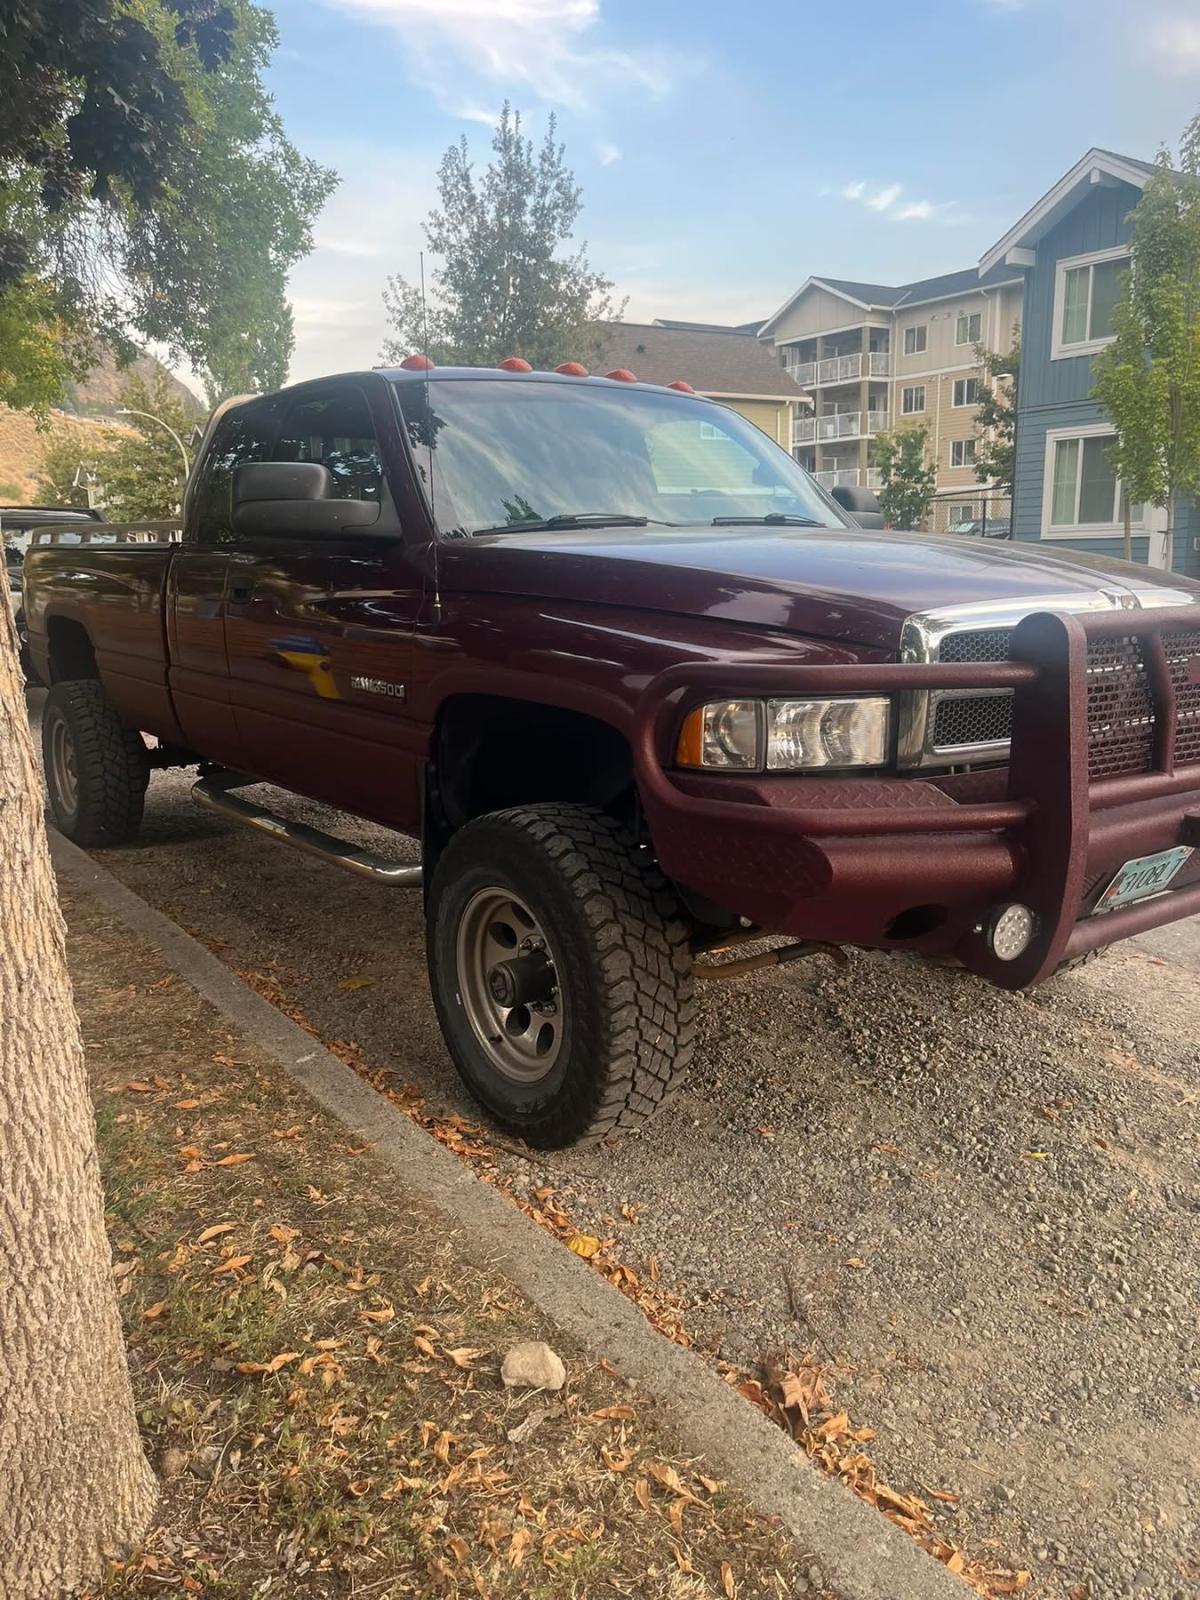
3 pointsI thought I’d share my recent drivetrain upgrade I put in my 01’ 3500 (SRW converted) 6 spd. On transfer case side of things swapping a NP271D in is pretty common for a 2nd gen. I wanted to take it one step farther. It took some trial & error finding what parts will work and what doesn’t. It’s pretty much a modified Ford design. I found a used 08’ NP271D and rebuilt/modified it. Eliminated the leaky Dodge slip yoke tail housing and utilized the rear fixed flange yoke setup from a 06’ NP273F. I bought the rebuild kit, some updated parts & specific seal installers from TorqueKing4x4. I also installed the Ford style companion flange on my Dana 80 along with a new washer, nut & seal. ***Snap-On # M3586 is the correct thin walled 1-7/8” socket if you ever need it.*** Initially had a 5” aluminum driveshaft but the Sonax slip yoke kit is quite expensive so I had a 4” steel one locally made and upsized it to 1480 greasable ujoints (OEM are 1410). T/case fits perfectly. There’s 1/8” of clearance at the frame and no contact at bottom of cab. The 2nd Gen linkage rod (11”) is a tad short so even set at max travel the shifter will be off just a touch. So I replaced it with the 3rd Gen 16” one and now it’s perfect. I don’t have the cad Dana 60 so the momentary ball switch from the old NP241D-HD just swaps over to make the 4wd light come on. I have the LRG trans crossmember so I didn’t have any interference with the front driveshaft. APPS delete ✅ Midrange power steering ✅ Electric vacuum pump ✅ Next project: Dynatrac high pinion 35 spline Dana 60 3.73 gears with an electric locker… Enjoy!3 points
-
Flashing WTS light
3 pointsMike if you lived closer I would kiss you. I had to remove the t-case boot to replace some wires and left it in neutral. 🤦♂️3 points
-
Flashing WTS light
3 points
-
Flashing WTS light
3 pointsWell the news isn’t good, after talking with the folks at GoECM they have confirmed the processor is bad in my ECM and is not repairable. Thankfully they are applying my repair cost towards the purchase of a new(reman) unit. I would assume this may be why the ACS repair didn’t work. I don’t know enough about these things to know if they would have been able to test this in depth. Their cost was much cheaper than GoECM so I’m not going to say anything negative about them. According to the info ACS sent me it sounds like they tested and repaired the parts I knew weren’t working. I’ll update again when I receive the new ECM and get it installed.3 points
-
Flashing WTS light
3 pointsI hope they find what the problem is. Please let us know how it works out with this ECM repair shop so we can update the article "List of Verified and Reliable PCM/ECM Rebuilders" in the 24 Valve 2ed generation engine section.3 points
-
Adding inline power steering filter with system flush update
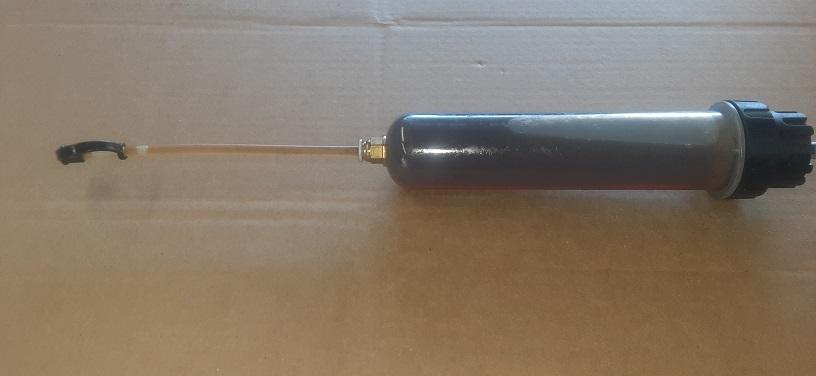
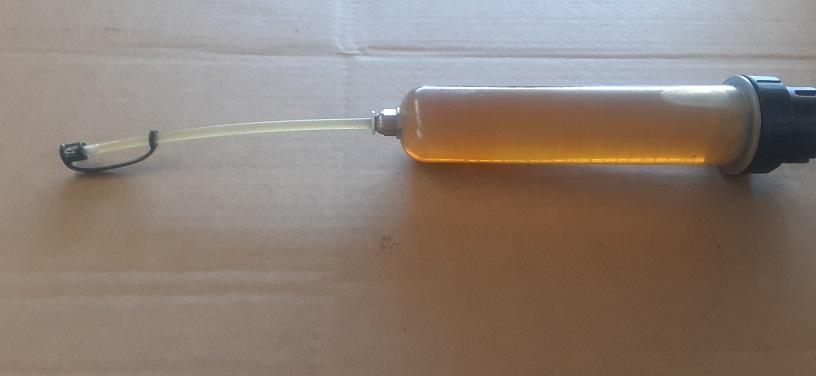
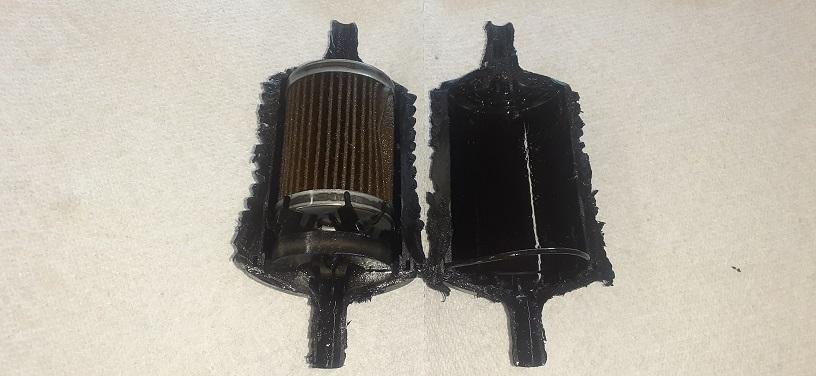
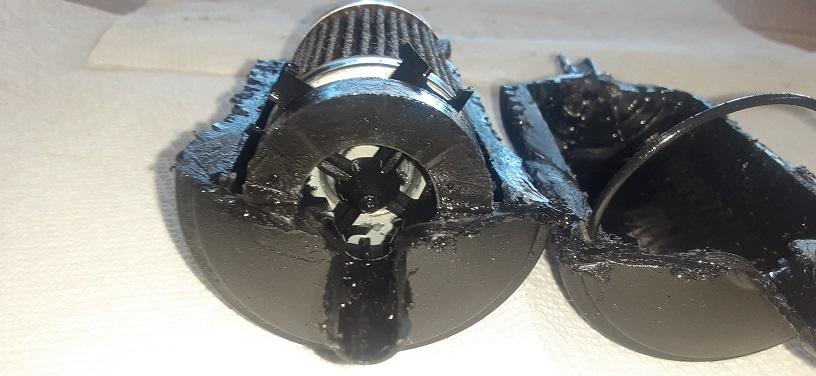
On September 6, 2016, I wrote the article "Adding inline power steering filter with system flush" and posted it in 24 valve 2ed generation/Axles, Suspension & Brakes. This is the follow up to that article. Update...7/25/2025 It has been 8years 9months and 44,888 miles since I installed the Magnefine filter and flushed the power steering system, so it was time to flush the power steering fluid and replace the filter again. I used an oil syringe fluid evacuator pump this time to remove and refill the fluid at the power steering pump. The picture below shows the first time the fluid was removed from the system It took 5 remove, refill, and run engine for 4secounds to get the fluid to this clear color, about 2qts. Here is the filter cut open. It looks like the filter could last 60,000+ miles before changing. There was just a fine film on the magnet.3 points
-
A little Dodge horse tradin'
3 pointsMy buddy traded me a first gen 6bt to do some body work for him on his truck. So several patch panels later I got a "free" engine.3 points
-
ECM failure
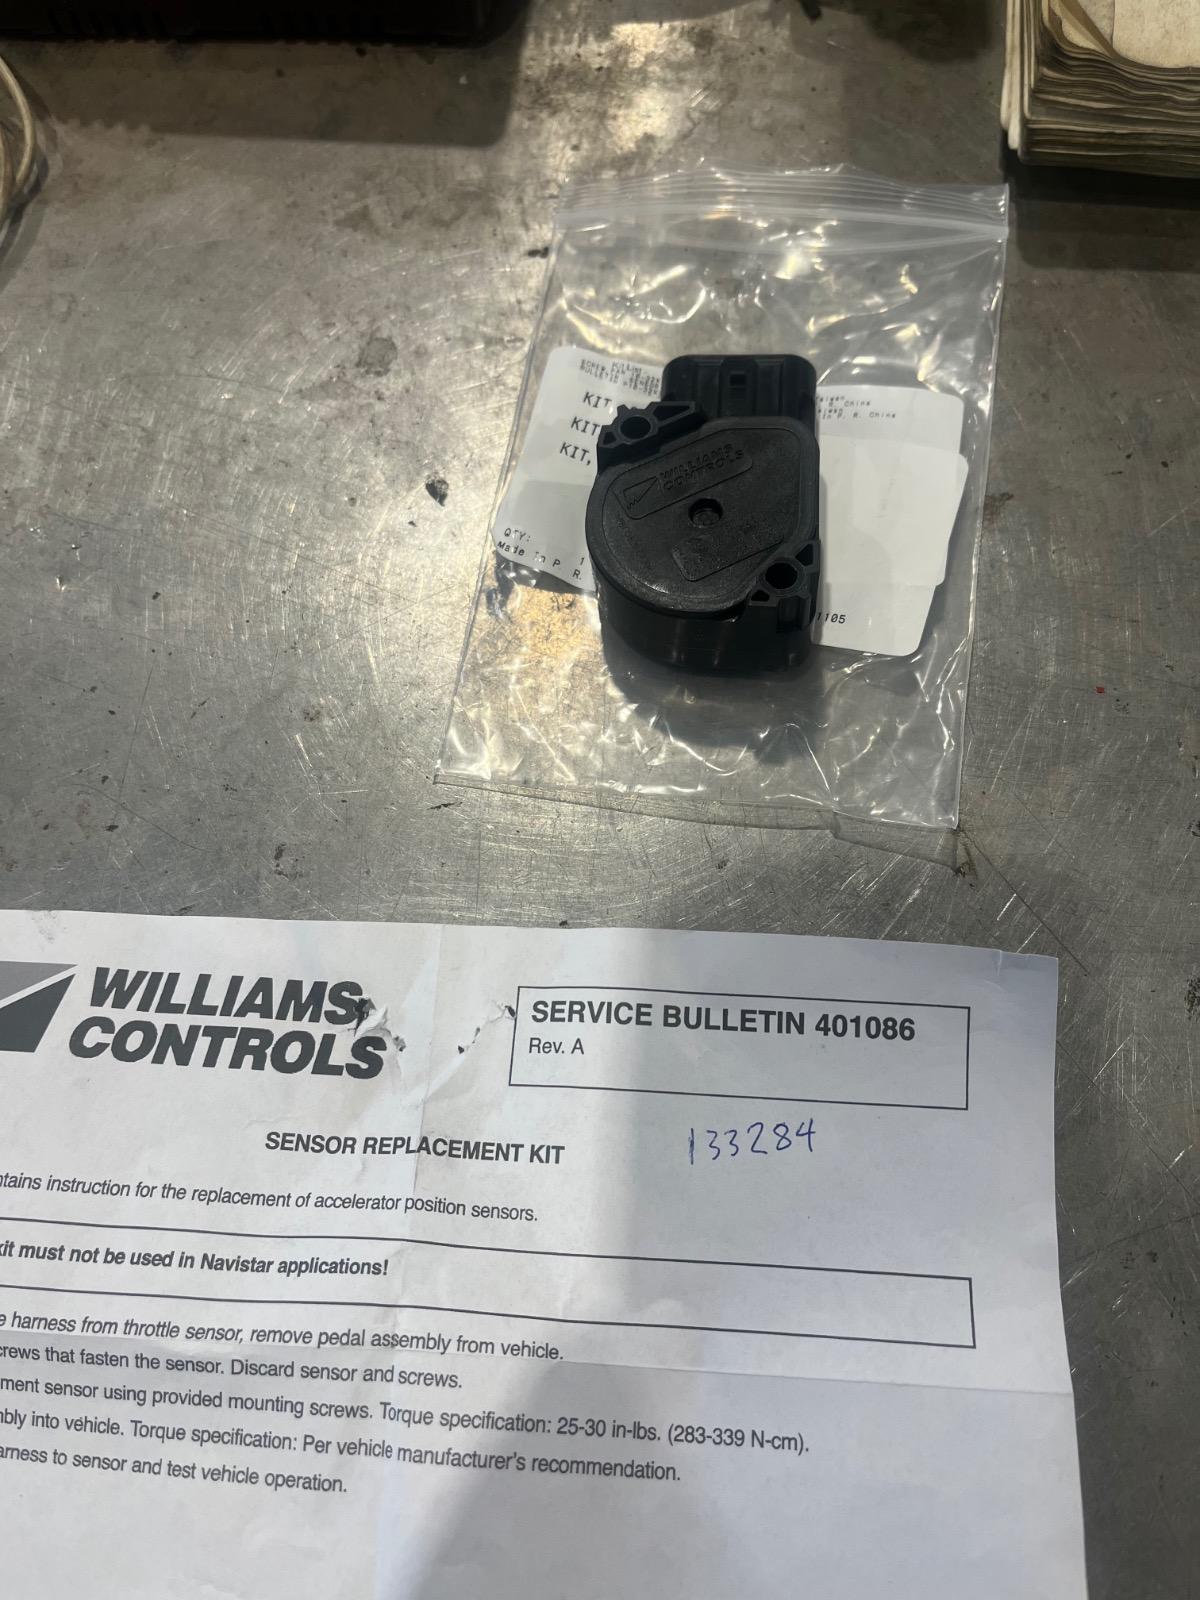
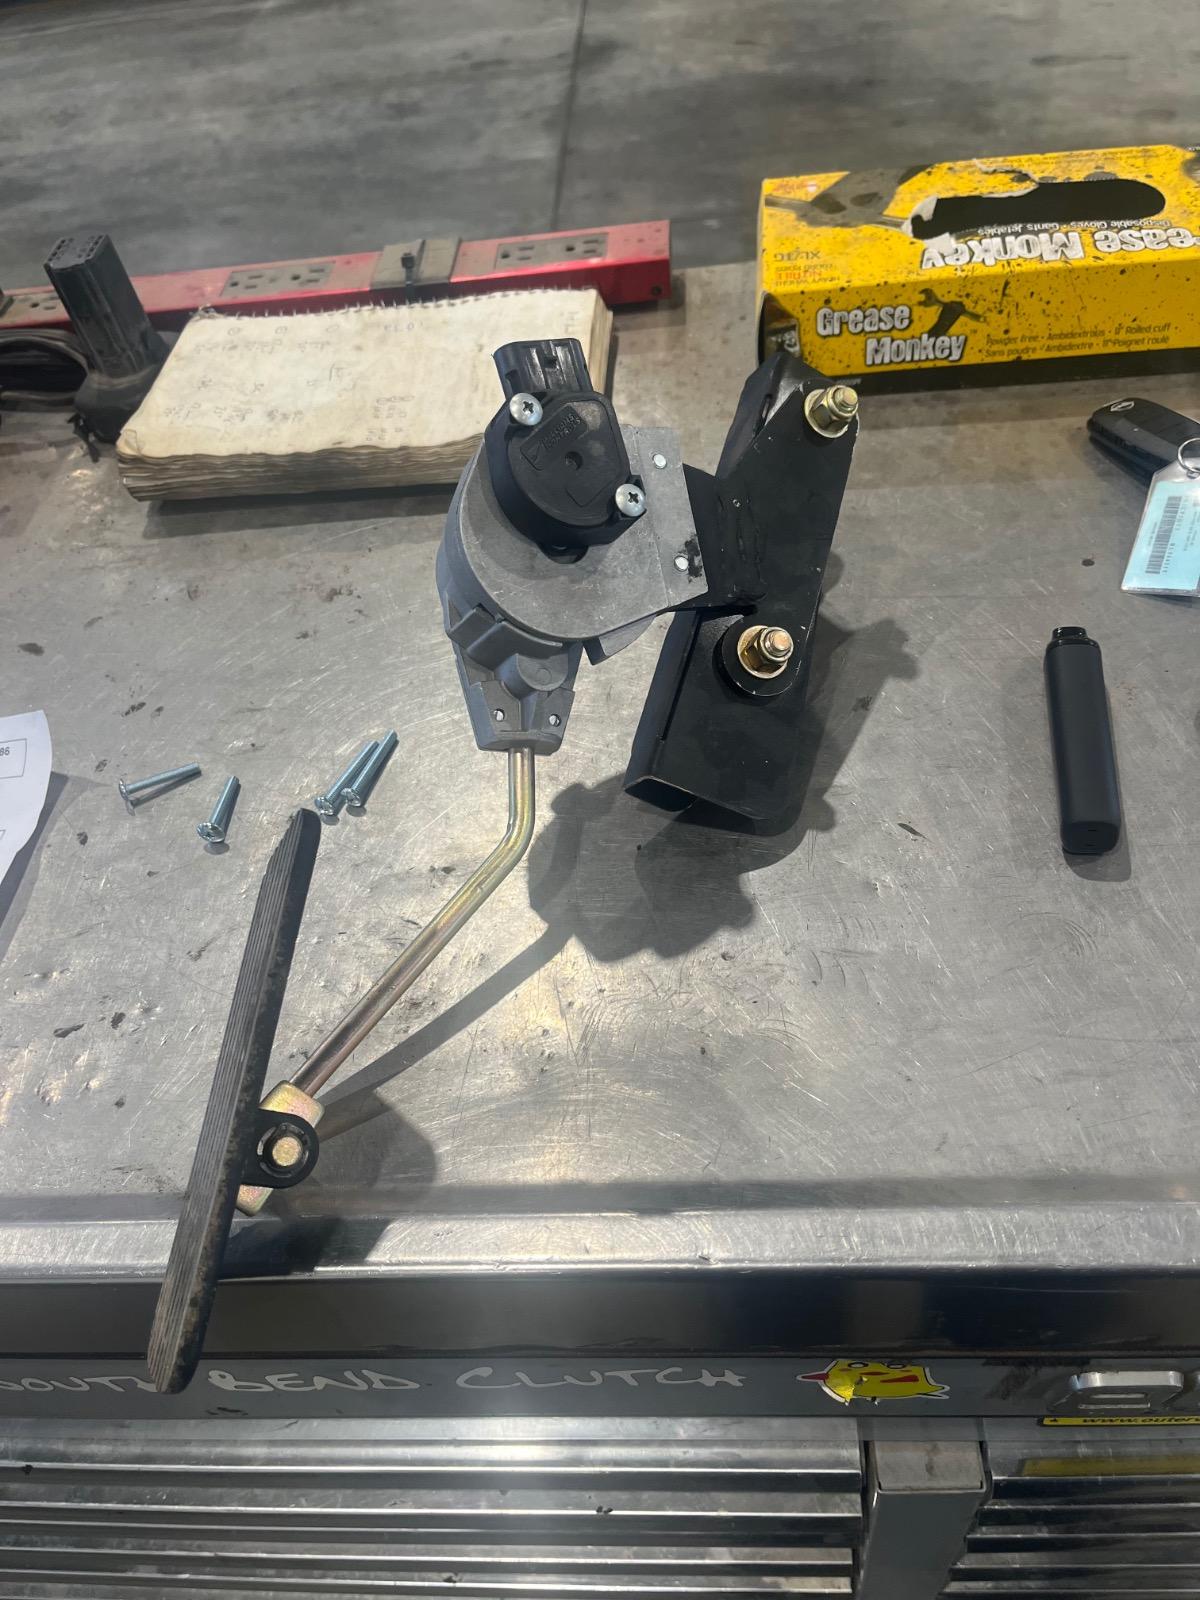
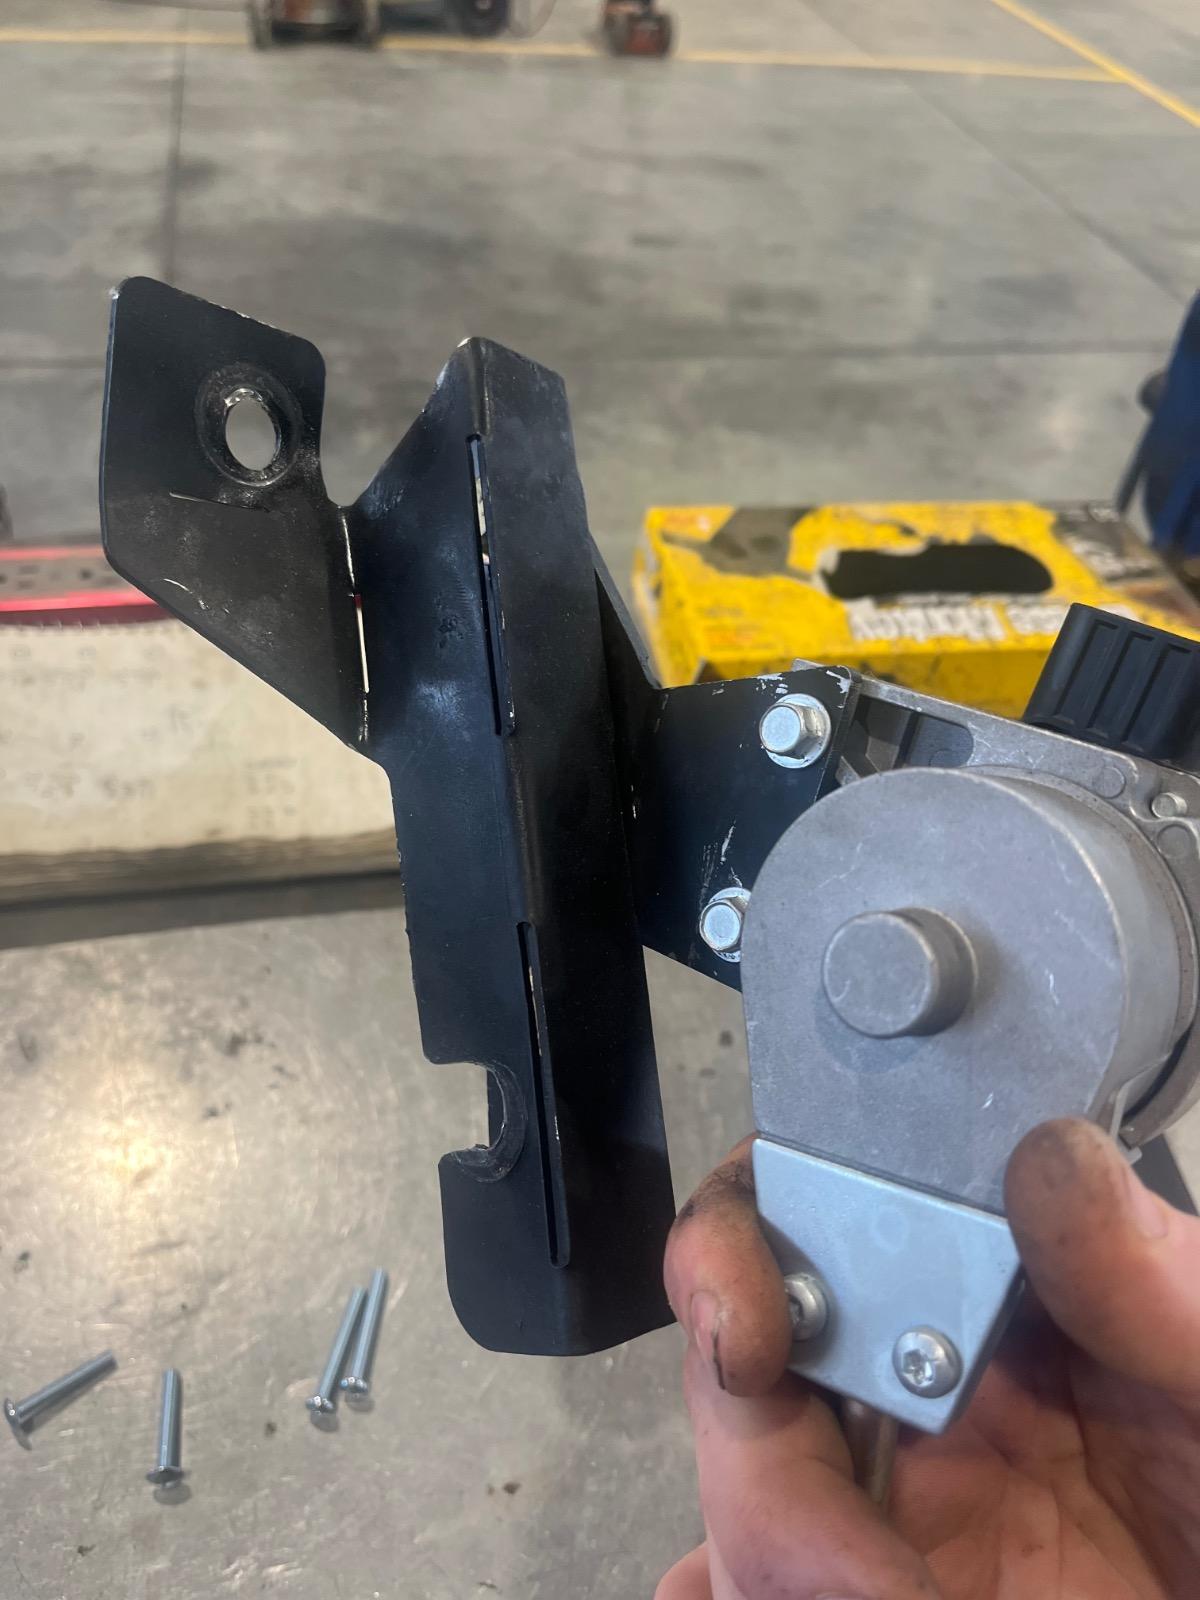
3 pointsWanted to show something here. Here’s the new APPS, number on it is 133284, same as the Timbo. Even though I ordered a 131973 this is what comes now. You can buy these at any truck dealership. Here’s a pic of my relocation bracket.3 points
-
Hello Everyone!
3 pointsI would like to introduce myself to all of you. I met Michael last July in Meridian, Idaho at a medical facility. He had a follow up appointment for his urostomy/ileostomy, while I was getting wound care treatment for my ankle. We briefly met at this place once before but had not been able to chat. On this particular July day, we had a few minutes to chat. As I learned more about Michael's life, I realized that he is an amazingly unique person with a kind heart and good old fashioned values. Upon listening to how he sacrificed on behalf of his mother's need for dialysis in the midst of dealing with his bladder cancer, I began to highly respect and admire this wonderful man. He genuinely cares for people. I knew he was amazingly unique...and I did NOT want to lose track of him. So...I asked for his phone number immediately after he was called in for his appointment. I wanted to know more about him. The crazy thing is that I was adamantly resolved to never get involved with another man at that time! However, we have NOT been apart for more than a few consecutive days since the time we met up at his house shortly after our encounter in Meridian! My interest grew even more when I learned he's a Diesel Mechanic. I was already familiar in auto mechanics, as my dad was an auto mechanic himself doing it as a hobby. I come with a small background in basic auto mechanics...my dad graciously taught me how to do a few maintenance repairs on my own car. To further expand my knowledge base, I have recently joined the Mopar1973man website as Michael's partner, another site administrator and his "soon to be" wife! Our plan is to get married this Spring! We have discussed a few exciting ideas that we would like to implement in the future. We are also working on improving this website for all of you. Be safe out there on those roads!! And...stay tuned!!3 points
-
47RE kicking out of O/D
3 pointsWT mod should be done in full first. I don’t have much troubleshooting experience with autos as I have the 6 spd but from what I understand a lot of issues are solved when the mod is done. At least you can rule that out.3 points
-
Help with Quadzilla 3 cylinder/6 cylinder box
We were right, the harness itself was wired incorrectly. IAT and ECT plugs reversed. New harness arrived and problem solved! 3 and 6 both work with correct values displayed.3 points
-
Power Steering Pump / Vacuum pump Conversion
@mace, I have performed the power steering pump and vacuum pump conversion that you brought to this site. I hope you are still perusing the site and will see this. The time and effort spent on this project (and the APPS relocate) has been very worthwhile. Much engine space has been freed up and the power steering reservoir is right where it should be for easy fluid check / fill. The reservoir is like the brake master cylinder reservoir – you can see the fluid level through the reservoir. An unexpected benefit is that this direct mount power steering pump outperforms any previous power steering pump that has been on this truck. There is no more stopping of the steering wheel when the power steering is under high demand, such as when maneuvering in tight spaces, steering from stop to stop with little forward or backward movement of the truck. I started the project by finding a location for the new power steering reservoir, which was going to be right where the APPS assembly used to be. Then I built a mounting bracket for the reservoir (shown below). The first part of the bracket assembly is designed to let the weight of the oil and reservoir rest in the V slot. In the above photo, note the welded nut where the tab on the top of the reservoir is screwed into the bracket. In the photos below, more brackets are added to fasten the unit to the engine. Below is the new location for the reservoir in the engine compartment - lots of space available for mounting with the removal of the APPS and APPS mounting assembly. I don't have any photos of the actual pump mount, but the mounting is straight forward, especially with the addition of studs instead of bolts. Much easier installation the old vacuum pump / power steering pump combination was. I didn't use a gasket - just the grey Permatex RTV gasket maker. The one thing that Mace did that I should have done (which he clearly mentioned) is to have the pump suction fitting turned down on a lathe from 22 mm to 19 mm to match the 19 mm connection on the reservoir. Because I didn't do that, I have not-so-neat connections from the pump suction to the reservoir (another reason to not take a photo down there). @Mace, thank you again for making this possible. That’s all, folks! John3 points
-
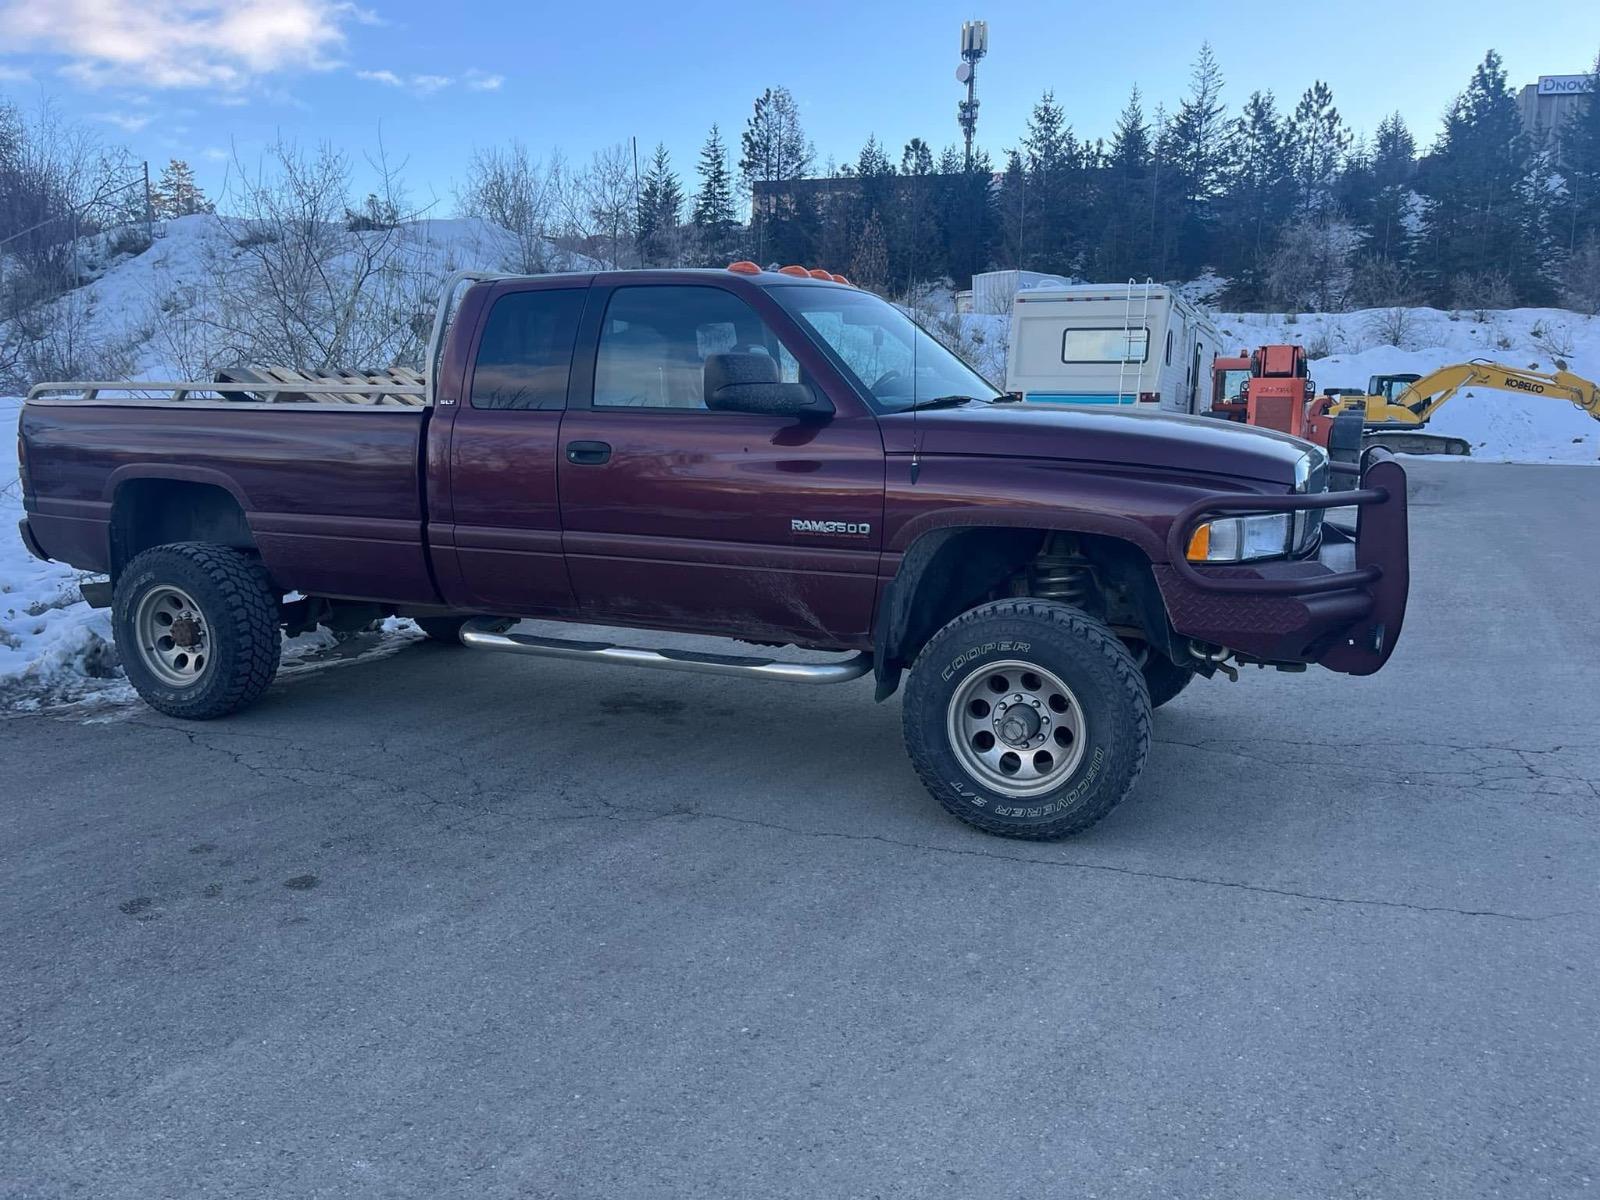
Pilothouse/RAM3500 build
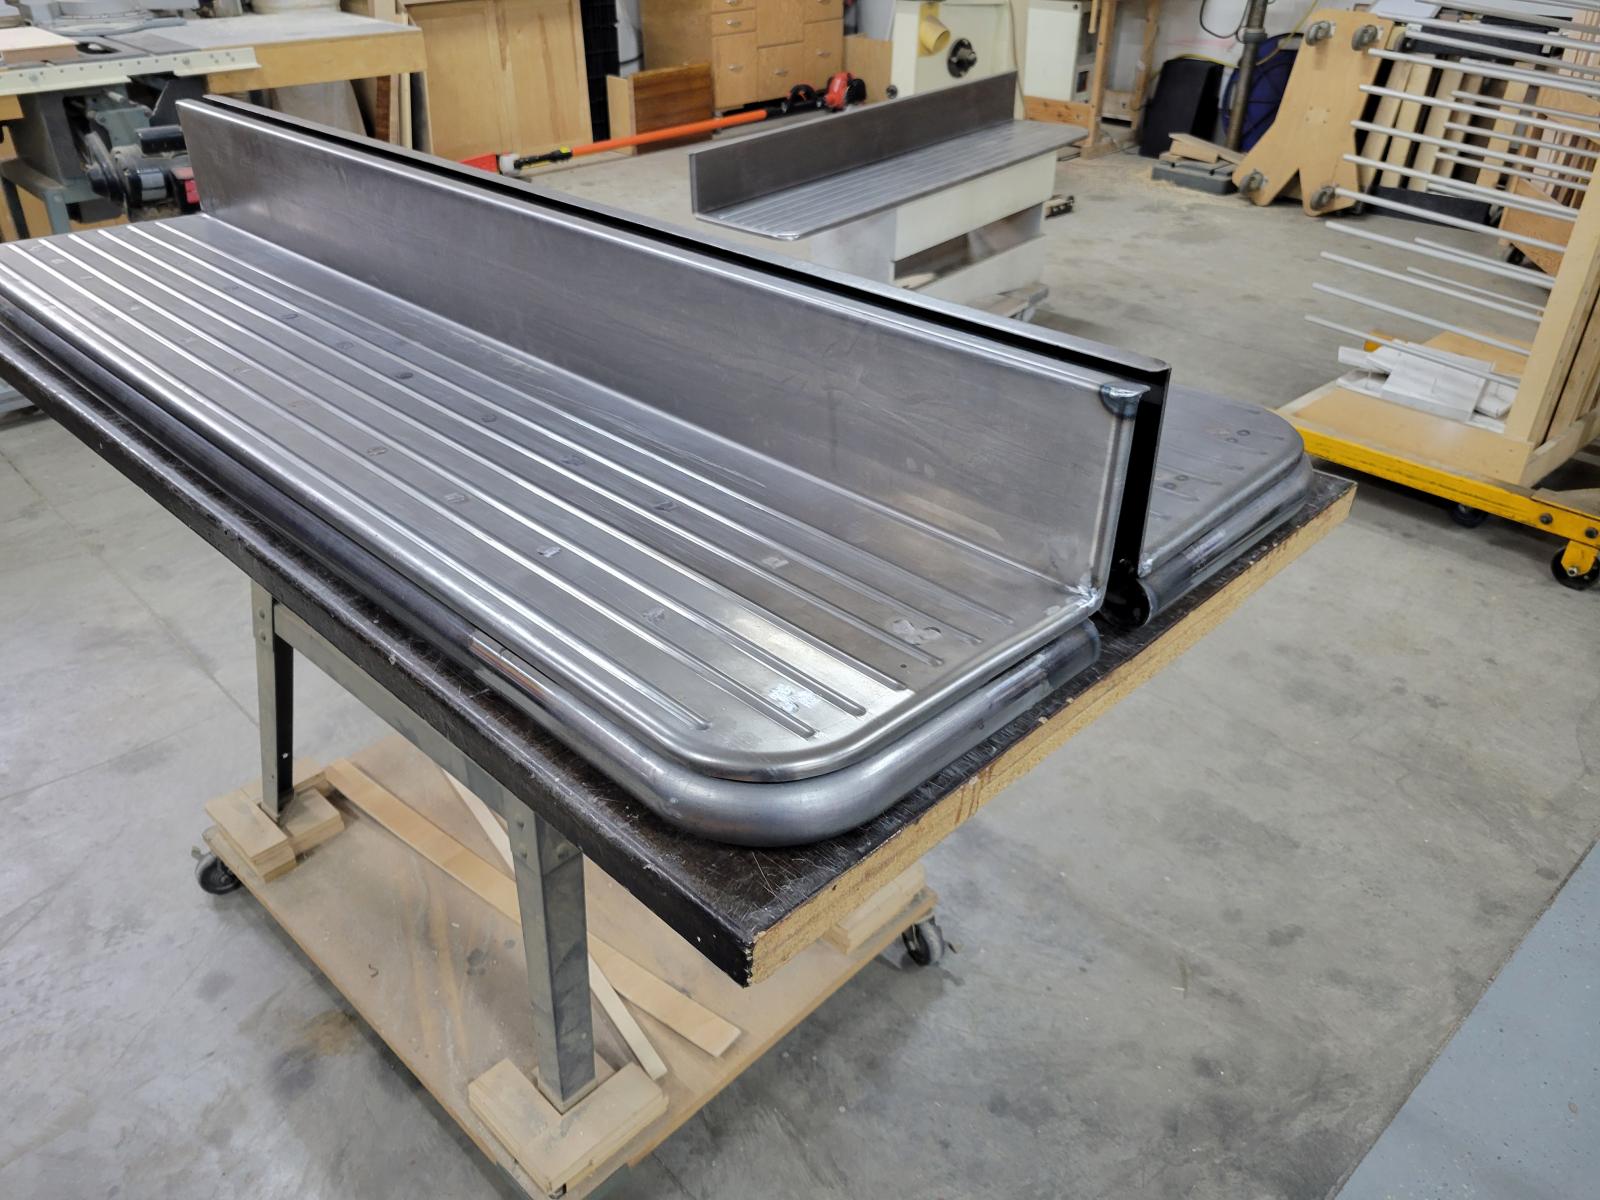
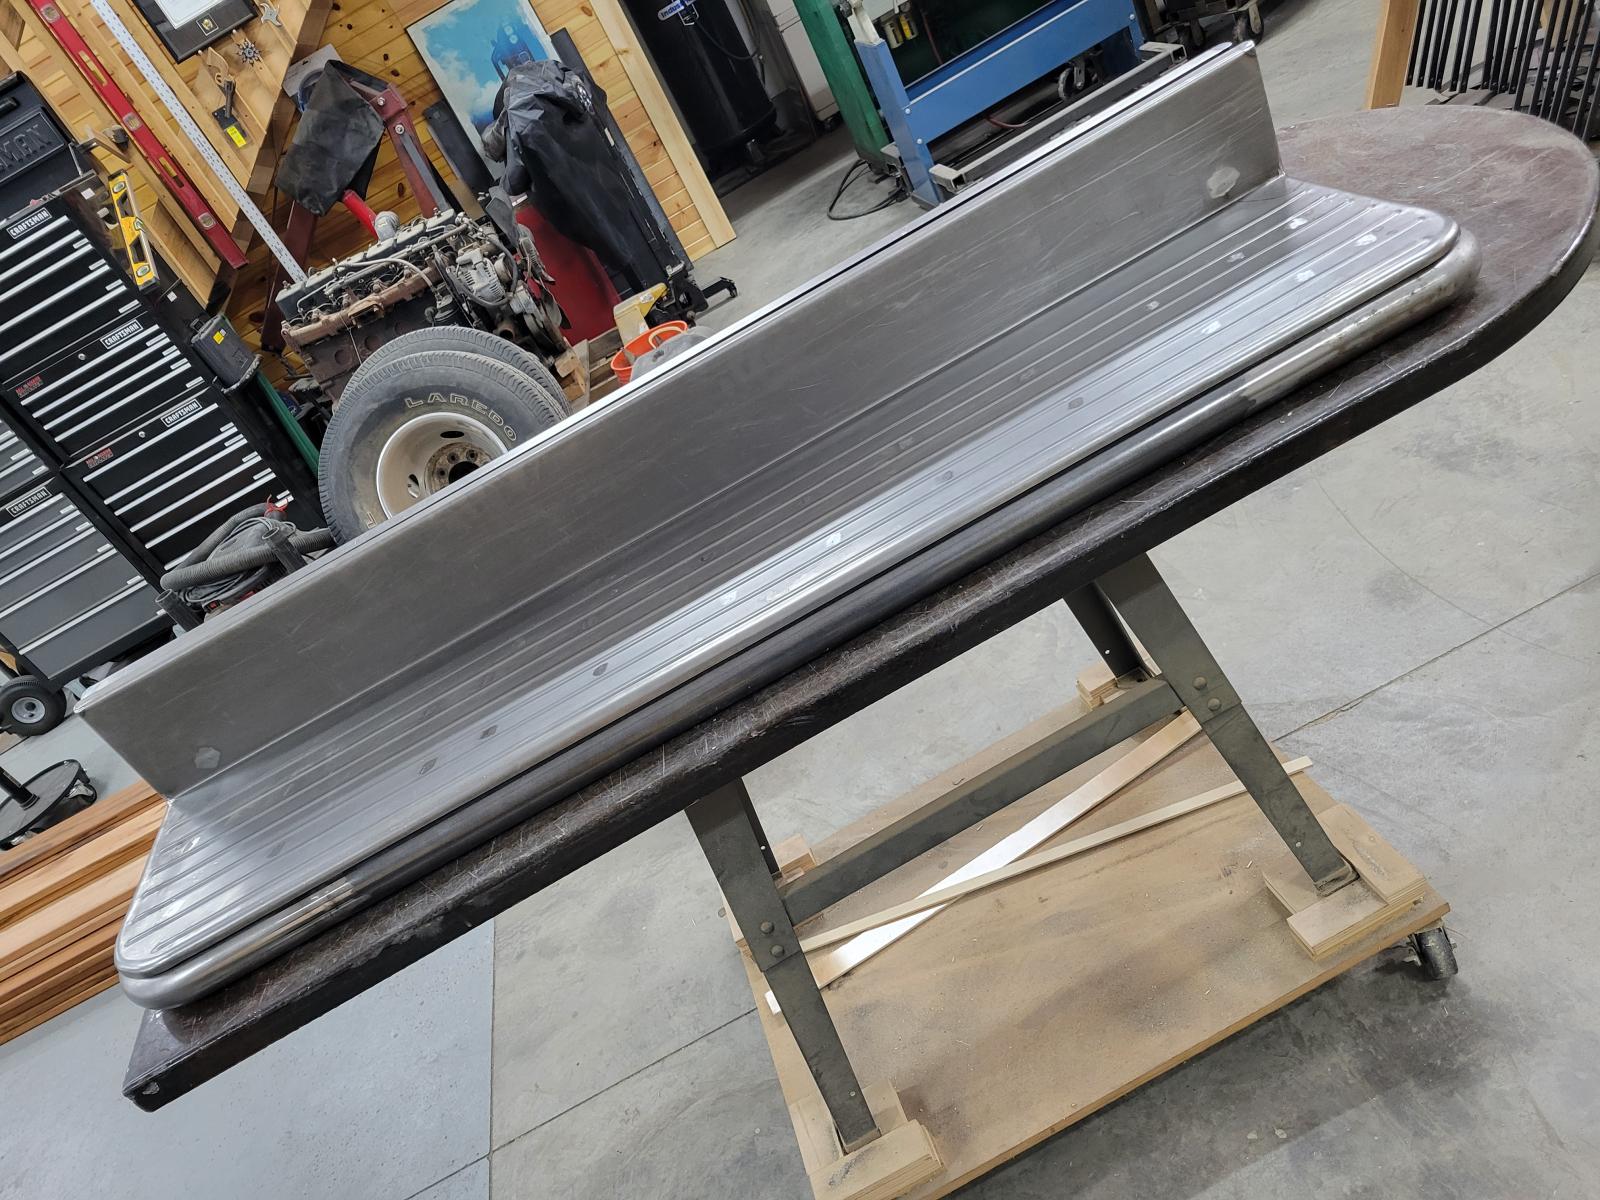
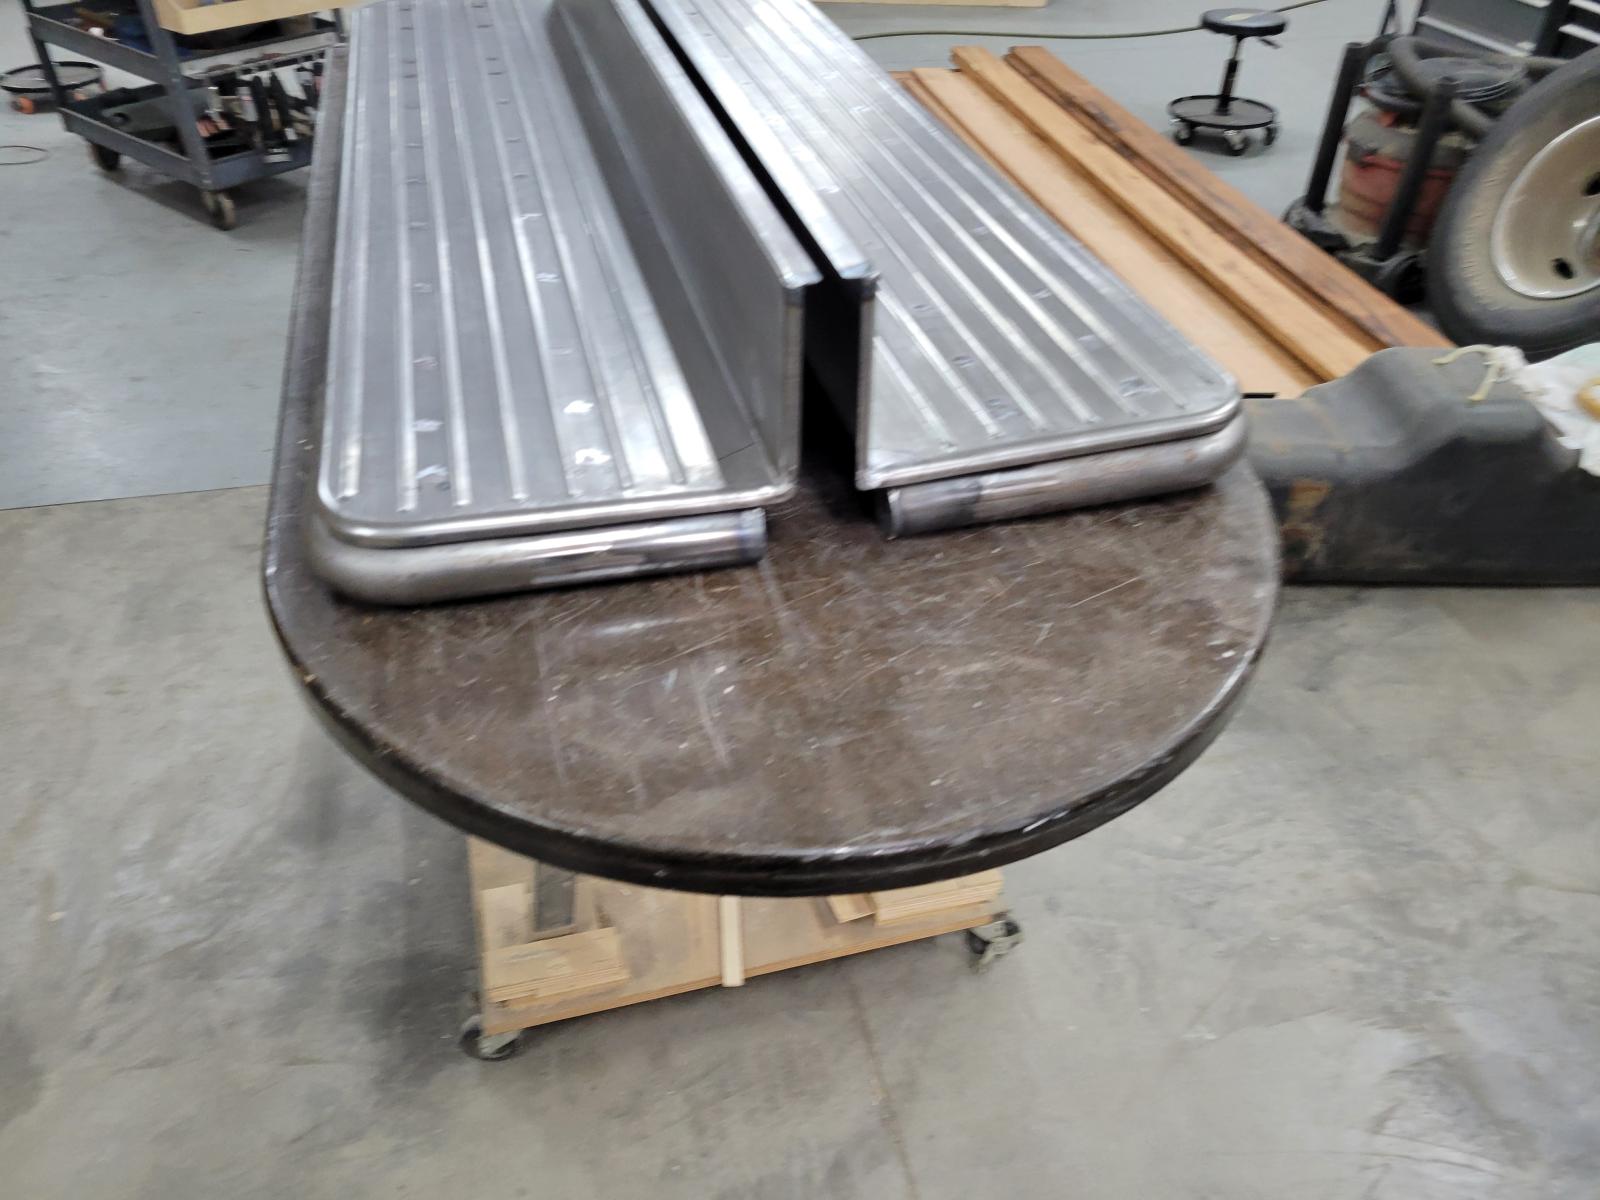
3 points
-
VP 44 home made brains part 2 getting real now
This is an entirely new method of not just relocating the controller but making one from scratch. It's independent of an ECU. I made a github project with all the details https://github.com/Greatwrk/VP44-EXPLORER3 points
-
New Life and New Body with issues...
3 pointsAnother update. Medically I'm healing slowly. Finally made it past my first cancer check and still going. No medical appts except for PT which I need to help ditch my spare tire. I need more core strength to prevent having hernia anytime soon. Still a risk with any heavy lifting. Tidbit that is funny that my makeup and Goth look now has nurses betting with money what I'm going to be wearing. Yeah it true I just was down getting resized from 1 inch stoma to 7/8 inch stoma and change the Rx. The nurse was overjoyed when I was there with my black and purple hair and makeup.3 points
-
VP44 operation, electrical and alternative controller.
I decided to open source my stand alone VP44 electronics project. I started a github repository. It's far from a bolt on replacement. It's just a prototype but it has been running reliably for a couple of years now. Unfortunately, it's not a project for beginners and requires good soldering experience and there is one surface mount part on the board. The circuits have some high energy parts and requires some testing before operating. The software is not simple and has time critical routines. An in depth understanding of the MCU internal peripherals (timers, PWM) is also required. Any mistakes in assembly or coding can cause permanent damage to the fuel solenoid or speed sensor. My project explores the electrical operation of the mysterious VP44. I included some diagrams and tutorial. The mechanical operation is described on various websites so I skipped it. It may help to review some of those sites. https://github.com/Greatwrk/VP44-EXPLORER3 points
-
Pilothouse/RAM3500 build
3 points
-
Flashing WTS light
2 pointsGlade to hear it. This means that GoECM fixed what ACS could not. A big plus for GoECM.2 points
-
Tracing disappearing oil
2 pointsObserving soot at the end of the tailpipe is normal for this era of truck, especially if you have larger than stock injectors. Disconnect the compressor discharge plumbing from the turbo and inspect for an oily mess. Then, disconnect the exhaust band on the exhaust side and inspect for the same. It is possible. The hone pattern intentionally put into the cylinder walls is used as a mild abrasive to condition the outer wear surface of the piston rings for the first 1,000 miles or so of driving. During this period of time, the best mating of the rings to the cylinder wall will occur, resulting in the least oil consumption and least engine blow-by. Using a slippery synthetic oil during break-in reduces the effectiveness of the abrasive characteristics of honing the cylinder walls - it will have a more likely effect of polishing the piston rings and the cylinder walls, resulting in more oil consumption and more engine blow-by. Try performing the oil cap rattle test for the poor man's method of checking engine blow-by. John2 points
-
Flashing WTS light
2 pointsThey listed a ton of possible causes for failure to check. Basically every sensor on the truck, damage to the harness, TSB’s, faulty grounds, etc. The truck ran perfectly and has for the last ten years when I pulled into the garage so I had no clue what to even look at. I did check some of the harness and found one tiny hole in a wire possibly from a probe, it wasn’t close to touching anything but I wrapped it up anyway. If I have time this weekend I plan to go through the whole thing and check all the grounds and fuses.2 points
-
Mysterious Knock on VP44 Truck – Need Help! No one can figure this out!
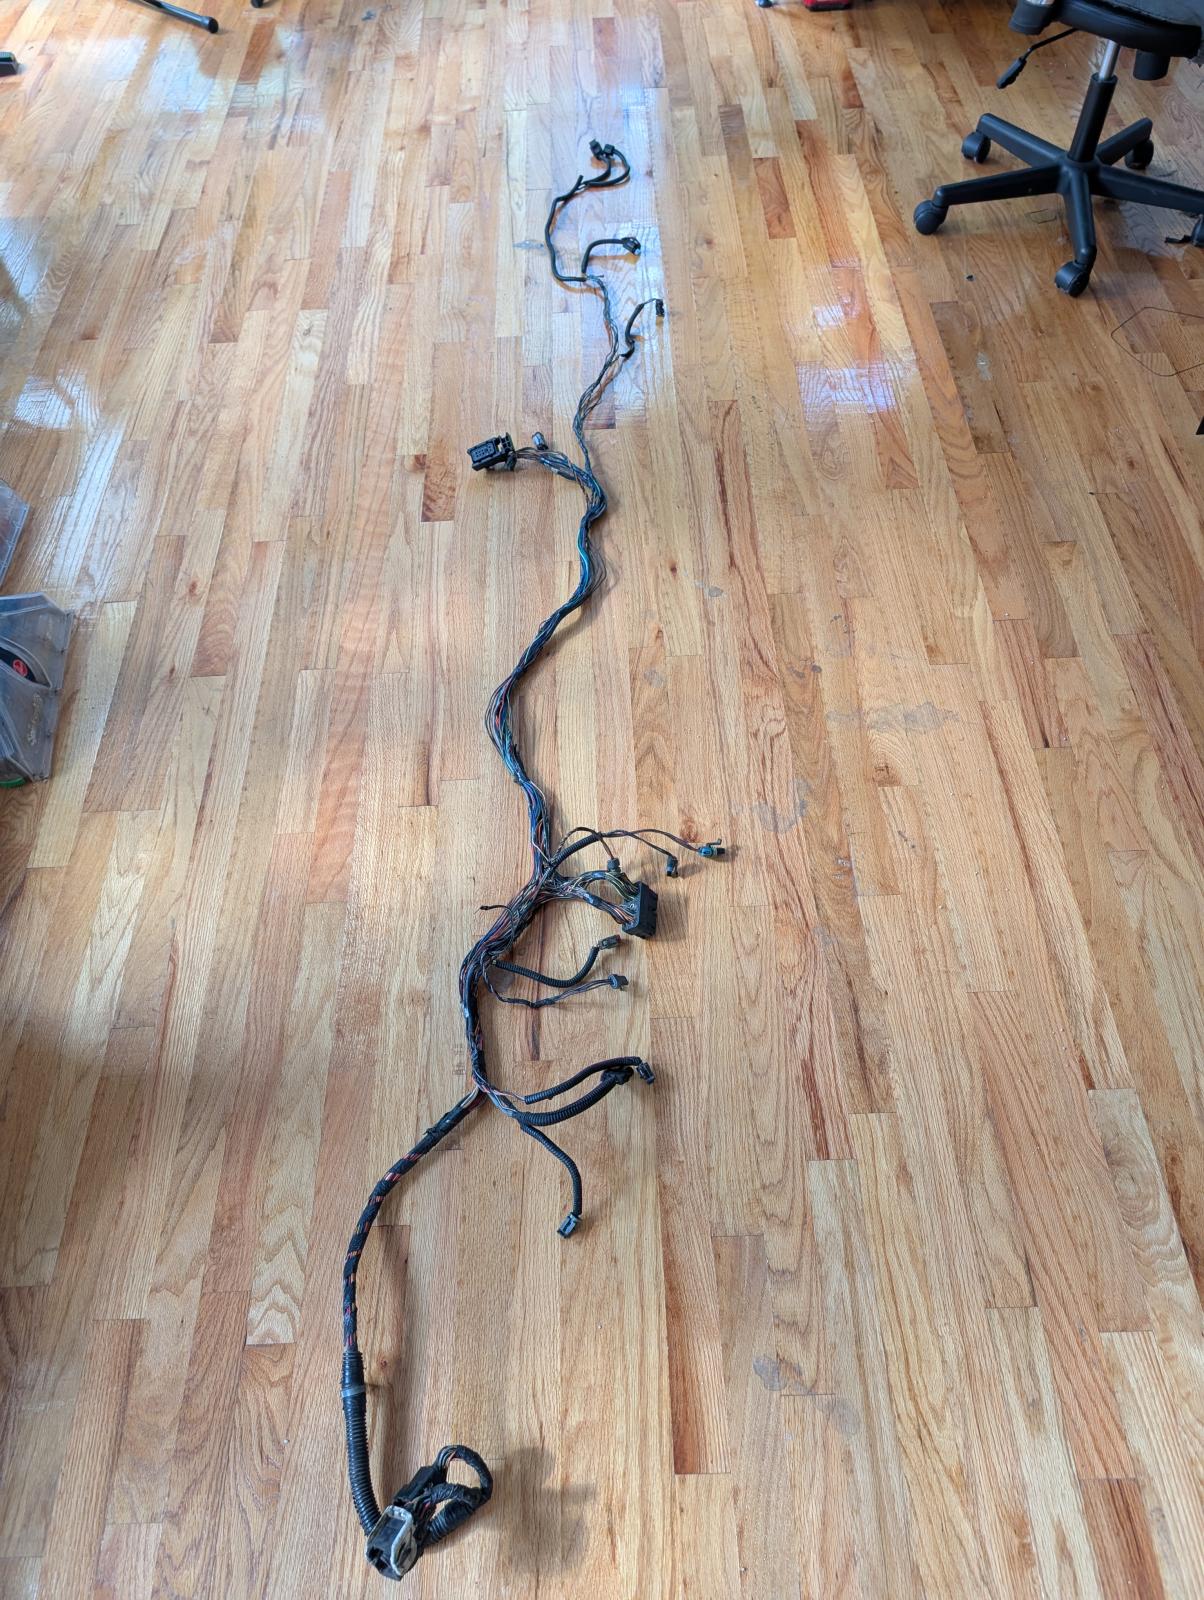
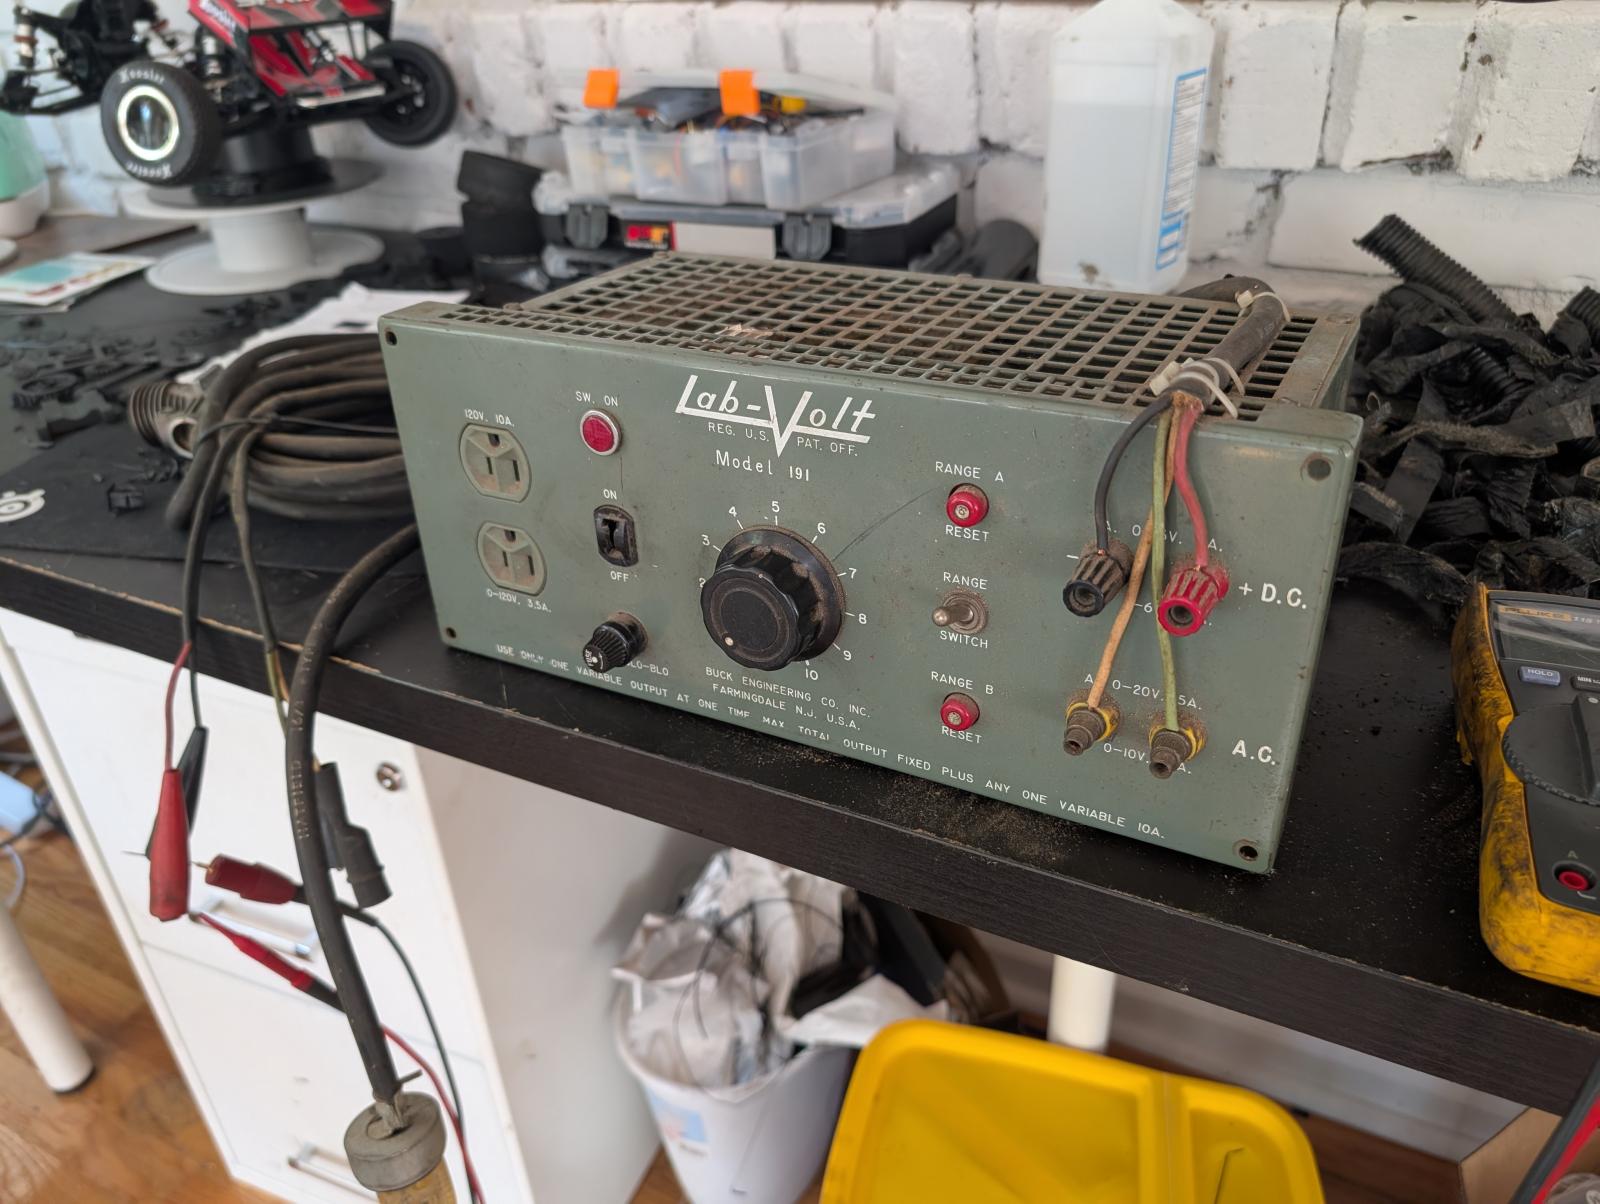
So far I have found nothing! It's not difficult, just time consuming. I have this old power supply that I'm using to help load test the wires! Good to know! Im a cheap *** and prefer to struggle my way through this LOL.2 points
-
Mysterious Knock on VP44 Truck – Need Help! No one can figure this out!
I appreciate the phone call as well. Good to chat with someone that actually knows what they're talking about! I hope to update this next week with a solution! This has been an ongoing thing for years now!2 points
-
Problem with idle cut off
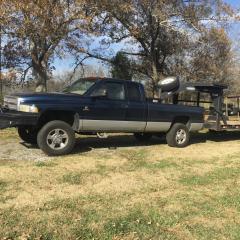
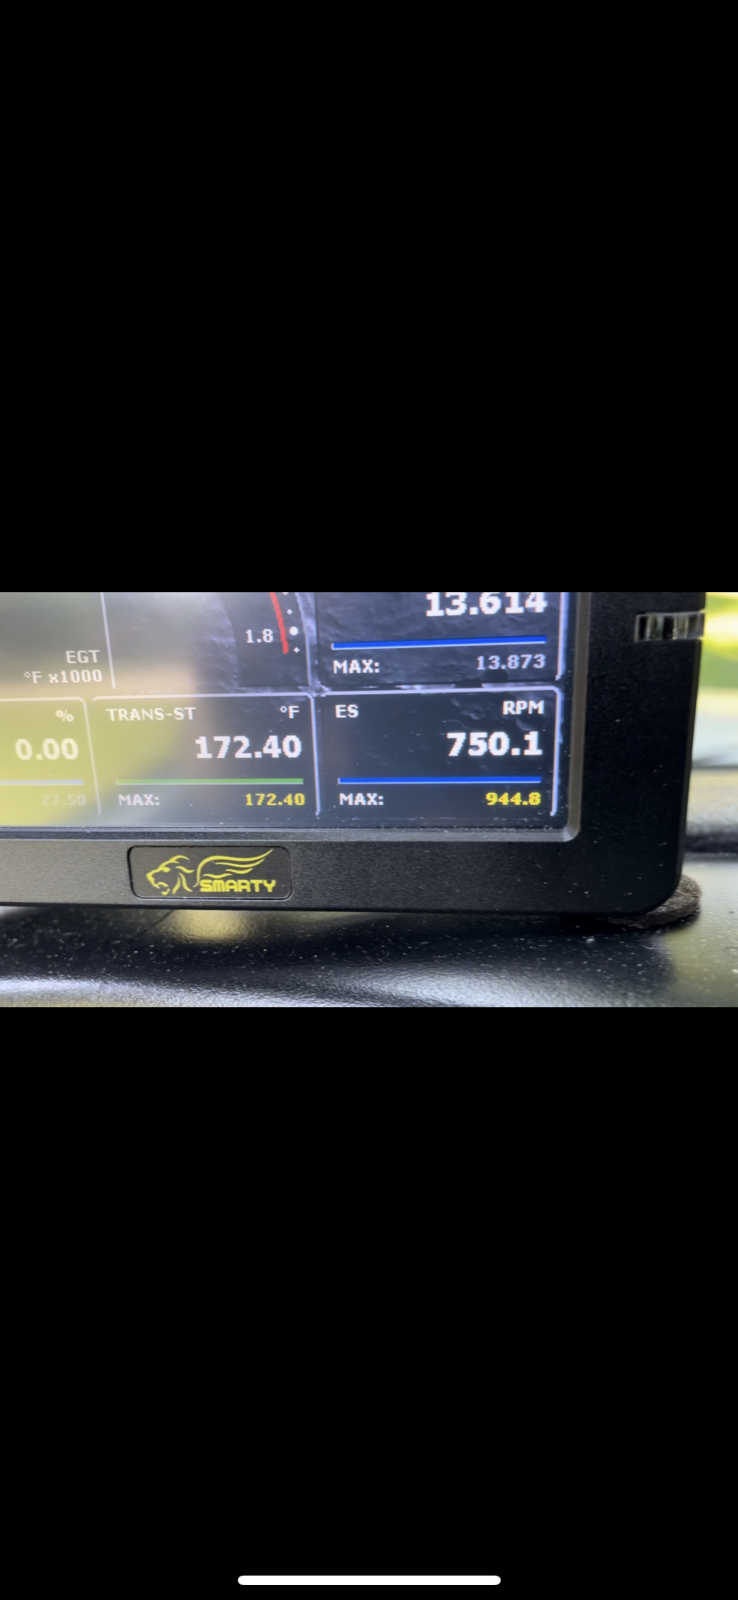
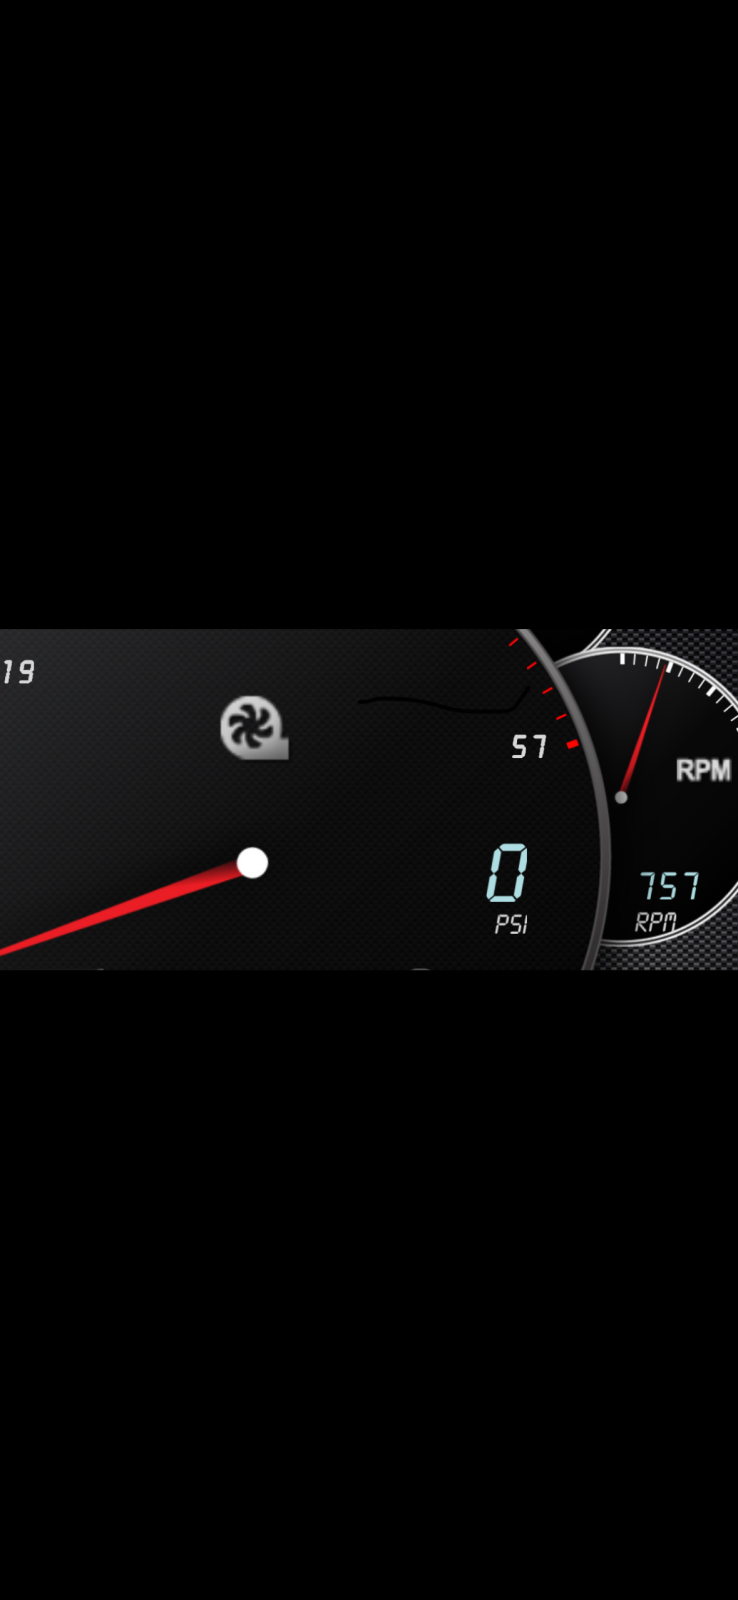
2 pointsLooking back on the thread, Mike mentioned this a few days ago “Remember Bosch stock injectors are NOT made as a set. You could have low end of 293 bar you the high end of 327 bar. This can affect idle performance. Ihigh suggest AGAINST using stock injectors. Buy+50 HP from any good injector shop and they are balanced as a set within 2% of flow rate” I still think it’s very likely both sets of your injectors have been mismatched. I learned this the hard way over the past year or so. Had your same stall issue after I ordered and installed a matched set from the same outfit that did Mikes injectors. Pulled them out, had 2 shops pop test them and they ranged from 290 to 330 bar (both shops showed same numbers on each injector). Pulled them back out, send them back and told them specifically what I wanted (310 bar-I believe they set them up at like 308 normally) they sent them back and I had them independently tested again and they were still off-not as much but by then I was mad. Keep in mind this was a “premium” set, not their normal budget injectors. I tossed those and went with the Mach 1 from Flux bc the owners are still directly involved with building their injectors and they’re perfect. For whatever reason my 2000 model is very sensitive to matched/balanced injectors and it sounds like yours is too. This shows my truck stalling after shifted intro reverse. On a slight hill, if the initial fuel input didn’t create enough force to back it up it would just drop and stall. The pics below show the idle RPMS from 2 different tuners. Roughly 750.IMG_6135.mov IMG_6162.mov2 points
-
2006 Dodge Ram 3500 - Thor Project
2 pointsHey Gang, I've managed to get Thor running for the first time in 2 years. I opted for a stock fuel pump for right now since I'm missing parts yet for the AirDog 150 fuel system I've got I'm looking for a bracket for the pump. I have good positive pressure for the CP3 injection pump. I need to find out what the misfire and studdering are about. Cold start it's a bit long cranking not bad. Once it starts it runs rough and smokes white. I've got a set of @dieselautopower +50 HP injectors installed and had them sent back to DAP and found one injector had an issue and was repaired and sent back. Then I ordered a set of o-rings and replaced all o-rings on injectors and cross-over tubes. Once warmed up all roughness is gone. It runs good and strong for what it is. I can even do the oil cap test and the cap does not even move. I'm trying to figure out the cold idle roughness and warm up smoke them once warm it drives and runs great. Even yesterday I drove to town and got 50 dollars of fresh diesel fuel to make sure its got enough cetane and pour point depressants. Currently 39*F here. Last problem in this category is the grid heater light came on yesterday and dinged 10 times signaling its high flow rates of the CP3. It idles at about 7,9xx PSI of fuel rail. At 1,500 RPM its pumping up to 11,8xx roughly and appears the fuel rail is building good pressure. With Thor being my project I plan on writing articles as I get things figured out. So anyone give me a hand on this? Monday I'm going to put insurance and registration on Thor and he's going to become my daily runner. Why? Beast finally needs shop time and the rear main seal is leaking. Thor becomes the primary rig for now while I gather supplies for Beast and get my help here to remove the transmission and transfer case so we can access the rear main seal. Thor is also going to lose the heavy flat bed and front bumper soon. I'm going back to the lighter factory box and tailgate then factory bumpers and ditch close to a full ton of steel. Thor is fat at 9,300 pounds even empty.2 points
-
Pilothouse/RAM3500 build
2 points2 points
-
Ford 6.7L issues
2 pointsYou guys!...., that piston is not in backwards - that cylinder is only supposed to be used when backing up! - John2 points
-
Hello Everyone!
2 pointsYup it is true. Strange enough I was in full makeup when we met both times. She enjoys my artistry of my makeup and wigs which she continues to encourage me to learn more about the art. Yeah after I did give Suzanna my number it seemed like there was so many questions and so much to talk about most of our phone calls went till 2am most nights. Strange some night we still just talk till early hours. Yes it's true we plan on getting married in the spring of the year. Suzanna was amazed by what I've created with Beast. She enjoys good Cummins power. Now we both want to build into 3rd and 4th Gen lines hence why the active work on Thor to attempt to give me time to repair Beast which is nearly 500k miles now. There is a lot going on with software changes, server changes, and even things on the site. Suzanna and I are going to fix the website up and bring more newer generations to the article database. Right now I'm just cleaning up after moving servers to cut operational costs.2 points
-
2006 Dodge Ram 3500 - Thor Project
2 pointsIt is possible. I have worked on a few common rail Dodge Cummins engines. What I have found is that it can be very difficult to troubleshoot this fuel system, even with the use of the right diagnostic equipment. You may be fairly certain that a high fuel return rate is occurring, but that could be caused by a leaking PRV, a CP3 pump, one or more injectors, crossover tube / tubes not seating, etc, or even a combination of the these. It is for the above reasons that I would want to prove (which can easily be done) that there are no issues with fuel supply, first - then move on to other diagnostics if the fuel supply is good. One thing for sure..., if there is a problem with the fuel supply, then the high pressure part of the injection system cannot run right. - John2 points
-
Help with Quadzilla 3 cylinder/6 cylinder box
Not a problem and your welcome always here to support the Cummins family.2 points
-
Headlights, tail lights, and turn signals blink
Give Module masters a call in Moscow Idaho. https://mopar1973man.com/vendor.htm/vendor/module-master-r8/2 points
-
Hi everyone
2 pointsI'm alive and cancer free yet. I go in on Jan 28 for testing make sure my cancer doesn't return.2 points
-
1999 Dodge Grand Caravan - Minnie - Electrical weirdness
Armature shaft binding when cold. See if tapping on the housing frees it up.2 points
-
Driving with 5th gear removed
2 pointsIf your going to pull the 5th out why not just put a new one in while you have it apart? At least it should get you home, then to a proper rebuild. I rebuilt mine (4x4), they're not extremely hard to do, many good videos online to take you step by step.2 points
-
200℉ Cummins Thermostat
2 pointsThe winter covers definitely work. I bought mine from Genos 2 years ago. What a difference in the winter. Warm up times are much shorter and she holds heat a little better also.2 points
-
Fuel Article - Remove and Replace Injectors
Remove and Replace Fuel Injectors First step you need to have all your tools ready and clean place to layout parts in the assembly order. Make things a bit easier take a moment and disconnect the 2 plugs going to the valve cover. Grab a 10mm wrench or a short socket on a ratchet. There are 6 bolts holding the valve cover in place. You don't need to pull the bolts out of the cover just loosen and leave till you lift the valve cover off. Now you should see this below. You are going to grab a 8mm short socket and ratchet and remove all 12 wires from all 6 injectors. Don't worry about tagging there is no wrong way for those wires. Then just lift the gasket off carefully and watch for snagged nuts. Now you have the spacer to remove. There is 10mm bolts holding the space in place. Be aware there is one bolt at each end right near the gasket. There is 7 bolts in total. The rear most is difficult to see bu the next photo should help. Showing the bolts for the spacer. Now your ready to pull the exhaust rockers of using a 10mm socket and just loosen and lift of each rocker and lay in order on your clean area. Make sure to grab the valve bridges as you go they have to stay paired up with its valve set. If you don't you will have to do a valve lash adjustment afterwards. It should look the same as this with all 6 exhaust rockers removed. Now you have the external stuff to handle. 10mm socket and 11mm socket and remove the single 10mm bolt holding the dipstick to the air horn. Then loosen the 11mm nut on the hose clamp and slip the air tube off the air horn. Then the last 10mm should be 4 holding the air horn to the grid heater and intake. Now grab a 19mm open-end wrench and start loosening all the high-pressure lines from the fuel rail and the crossover tubes. There will be 10mm bolts holding the lines to the manifold. Be aware cylinder 6 you have two 15mm bolts in the hoist ring. The right bolt is a 13mm nut holding the injector line. Use an 8mm wrench and loosen the clamp. Remove the 13mm nut and flip the holder off the stud then you can remove the 15mm bolts to gain access to cylinder 6 line way in the back. Now using a 24mm open end wrench or socket you can remove all 6 crossover tube nuts in the driverside of the head. As for removing the crossover tubes, there is cap tools that aid in the removal of the tube from the heads. I wrap a rag around and gently grab with channel locks in a rocking motion and pulling it will come out without much effort. Just for the backyard mechanic. Now use an 8mm socket and remove all 12 bolts holding the 6 injectors in place. Using a flat-blade screwdriver insert it below the collar and twist the screwdriver to lift the injector out of the bore of the head. Cylinders 1, 2, and 3 Cylinders 4, 5, and 6 Injectors and crossover tubes. INSTALLATION Now I'm going to show you how to install new injectors in your common rail Cummins. Lay out all your injectors. Remove protective caps. Look and see if the copper washer are installed on the nozzle. If not use a small dab of axle grease to hold the washer in place on the injector. Now place the injector in the cylinder head. Please take notice to the crossover tube hole and its location on the injector and make sure it faces the driver's side. You will also notice the one side of the collar is square and the end towards the exhaust valve side is rounded. Install the two 8mm bolts and torque to 44 inch/pounds. After this loosen both bolts. This is only to seat the injector completely in the bore. Now install the crossover tube with the BBs facing up. Then install the collar nut. Then torque to 11 foot/pounds. Now complete the torquing of the injector hold down to 89 inch/pounds. Make sure to do both bolts evenly. Then you can finalize the crossover tube torque to 37 foot/pounds. Install the valve cover spacer and tighten the 10mm bolts. Don't forget the one bolt in back. Install the valve cover gasket and electrical. Torque the electrical nuts to the injectors at 11 inch/pounds. Install the exhaust rockers. Remember these must be in correct order to the cylinder in which it came from. Don't swap rockers to another cylinder you will be forced to do a valve lash adjustment if you do. The torque on the 10mm rocker arm bolt which is 35 foot/pounds. Install the fuel rails to each injector. Torque the line nuts to 37 foot/pounds. This should get all the injectors installed but you'll need to install remaining things like the grid heater and air horn. View full Cummins article2 points
-
Fuel Article - Remove and Replace Injectors
This should help others to install common rail injectors properly. More to come!2 points
-
2004.5 engine stopped running while driving
Finally had time under the hood & I found that when the transmission company installed the power supply for the transmission temp sensor the battery terminal nut was put on finger tight..... pretty sure that was the primary issue. I also checked & cleaned all grounding connections. Batteries are brand new. I did change the fuel filter & found some debris in the bottom of the filter housing but nothing crazy. Drained the fuel from the filter housing & did not find any water. Just got back from vacation towing a toy hauler 300 miles & it did not miss a beat. Thank you @Tractorman & @Mopar1973Man2 points
-
Help with Quadzilla 3 cylinder/6 cylinder box
Yes sir you can. Just key on and click the switch through the different modes and report back the values seen.2 points
-
93 fuel pump leak
2 pointsWe have pumps on the shelf. We also have seals. If that is a an option/ you can determine the part # you need. There is an exploded view picture and part #s here http://www.sparesbosch.ru/results_bosch.php?article=04604261142 points
-
93 fuel pump leak
2 pointsSadly. I would remove the injection pump and see about getting a rebuild kit and replace all the seals including the front seal too so the diesel fuel doesn't leak in the crankcase. Reman pumps are available from @dieselautopower . I would consider that being the governor spring and other internal parts do wear out. So before performing any repairs I would highly suggest removing the pump from the truck. That cover should have 4 Allen bolts holding it on. Be careful the Governor Spring is attached to the cover and could be replaced but be careful not to stretch the spring. Serioyusly I would just consider a reman'd pump at least then the pump is in good shape to keep running.2 points
-
Throttle Assembly Re-location Mod
2 pointsI truly believe that the amount of apps sensor failures are because of the vibration they absorb being engine mounted. Ram eventually went to a pedal apps setup in the later 3rd gens. Well done, looks good!2 points
-
Greeeting! :)
2 pointsApps relocation mod is simple. Just need some fab skills. Your not changing anything, just moving the apps from the noisey, dirty, vibraty engine to inside. Once the bell crank & cable is removed you’ll need to remove the pedal assembly from the floor. Not the aluminum mount just the pedal. You need a pedal assembly as suggested. You’ll have to make a custom bracket to mount the pedal to that’ll mount to the old aluminum pedal mount. Throw away the no name apps that comes with the new pedal and install yours or a Williams Control (WC) one so you know it’ll function correctly. Make a jumper harness from engine harness connector to the pedal, just have to pin the connectors the same way front to back so it matches the engine side connector. I’d suggest using the same hole in firewall the old cable went through with a grommet. THEN pin and connect the harness wires to the connector base vs drilling a big hole 7/8” in the firewall. Secure the harness to various points to make it clean and trouble free. I can’t tell you how to make the bracket I can only show you what I did in pics for ideas. I don’t want to give incorrect info and then you getting mad at me. It’s not difficult but it took me a couple times before I got it spot on. The bottom bolts through the pivot pin in the old pedal (vide grips will remove it - just turn it out). The top side mounts to an existing in the upper part of the aluminum bracket so it stays rigid. This mod isn’t too expensive (under $400 for me at the time). It’s time consuming but worth it! Parts: 699-5101 pedal (Rockauto) 1x 6 pin male/female Duetsch connector(s) 6-8 feet of 6 wire harness 131973 apps (Williams Control) Here’s the vacuum pump mod: Since I still need vacuum I added the Super Duty setup. My truck only needs vacuum for hvac and the exhaust brake. I have a non cad Dana 60 so all those lines are not there at the diff & transfer case. My cruise is ecm controlled. Parts: CON166 - pump connector (Rockauto) VCP112 - vacuum pump (Rockauto) Vacuum hose Mini fuse tap connector 4 pin relay & base connector I mounted the pump to the fuse box cover. I attached a 4 pin relay to the pump bracket. Pin 30 is right from pdc positive cable, pin 87 goes to the spliced in pump connector. The pump ground and pin 86 are spliced together and ground to fender stud. Pin 85 is triggered from 10a fuse tap for radio in dash fuse panel, then run a wire out to the relay. Pump only comes on with key is in ignition/start stage. It’s turns off when vacuum is achieved by an internal governor. The pump only uses 2 pins but the connector comes with 4. I depinned the connector to get rid of the 2 wires not needed. You can run the vacuum line out to your firewall vacuum line and connect it but mine runs 8” or so to a bracket that the exhaust brake solenoid is mounted to. I have a tee in the inlet that I use to run to the firewall oem vacuum line. If & when the pump dies it’s 5 minutes to replace it. You won’t hear the pump until key on and you don’t hear it at all with the engine running. No more vacuum pump oil leaks was the selling point for me So here’s how I did the power steering mod & vacuum pump: Parts for PS: 4002056 plug - Cummins RES0161 reservoir - Rockauto 4988390 pump kit - Cummins performance.com M20x1.5 to 6 jic fitting I mounted the reservoir to the driver battery hold down rod using some p clamps. It’s rigid and clean and removable if need be. The ports on the reservoir are 3/4” and 3/8”. I ran both the steering box & hydroboost returns to the reservoir and lucky for me they’re 3/8” as well. I removed the fitting out of the block and put a proper plug in it, be aware it’s not npt or orb but a metric size. Or I guess you could just put a #4 jic cap on the original fitting. Once the oem vacuum pump assembly is removed. You’ll need to install the studs with some red loc-tite, don’t bottom the studs out in the timing case or you won’t have enough for the nut to grab onto. This is key. The low pressure supply fitting is 7/8”. You’ll need to remove it and have a machine shop turn it down to 3/4” for proper fitment. Also the fitting won’t come off with the pump mounted :/ ask me how I know. The pressure side needs a straight fitting (see above in parts list). It’s crucial to find the pressure fitting in steel as it’s rated for better pressure than an aluminum one say from Amazon (aluminum equivalent is rated for 1500 psi). Once that’s dealt with run a hose from reservoir around the intake pipe the pump supply port and secure it you deem fit. For the pressure hose simply remove the old hose from the hydroboost and cut the old pump side fitting end off and crimp on a 90* 6 jic fitting (3/8”). It’ll reach perfectly once it’s reinstalled. Refill system with ATF and bleed system by locking wheels left & right in the air. ***The pump is from China. The part number doesn’t cross over to anything genuine Cummins. But it’s rated for 1450 psi/3.4 gpm and puts the oem Saginaw pump to shame*** I had a problem with not able to turn wheels at a stop in my truck, soon as I started to go the assist would kick in and I could turn. Now I can power lock left & right at idle/stop with no effort.2 points
-
Pilothouse/RAM3500 build
2 points
This leaderboard is set to Boise/GMT-06:00