Mopar1973Man
Owner
-
Joined
-
Last visited
Everything posted by Mopar1973Man
-
Beautiful dogs... Sure tell they are spoiled...
-
http://mopar.mopar1973man.com/cummins/2ndgen12v/fuel-pressure/p-fuel-pressure.htm
-
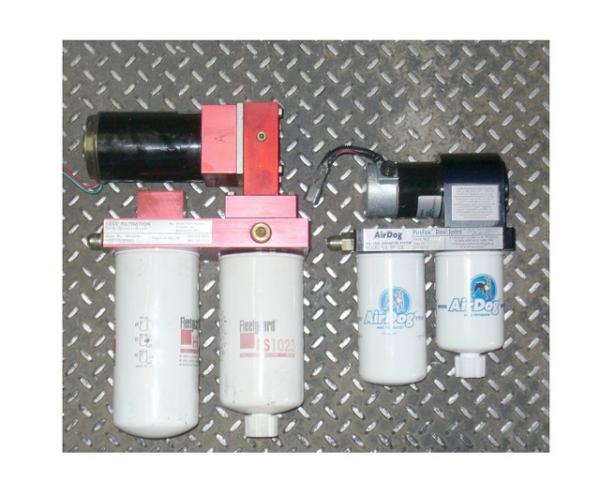
I'll toss the 2 cents into the pot... Be aware that AirDog and FASS are the same design for the most part but the FASS is phyiscally larger and difficult to hide under a truck. As for the platinum series I'm not sure... As for a AirDog it hides behind the transfer case quite well... So consider the phyiscal size of the pump, filters, and your mounting location.

-
Mine got to come out because the lift ring has my crankcase vent zip tied to it... As for 5 and 6 still kind of hard because of the simple fact my wrench length is what is getting me I can turn maybe 15* and then flip the wrench 180* and turn again the flip again... Now if I went out and got a set of stubby wrenches... (Pretty! ) Now you'd be able to get back under the cowling and really turn lines...
-
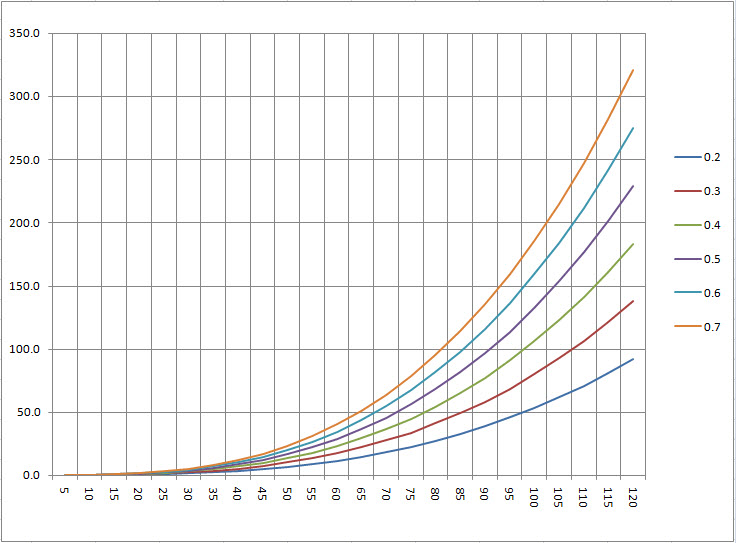
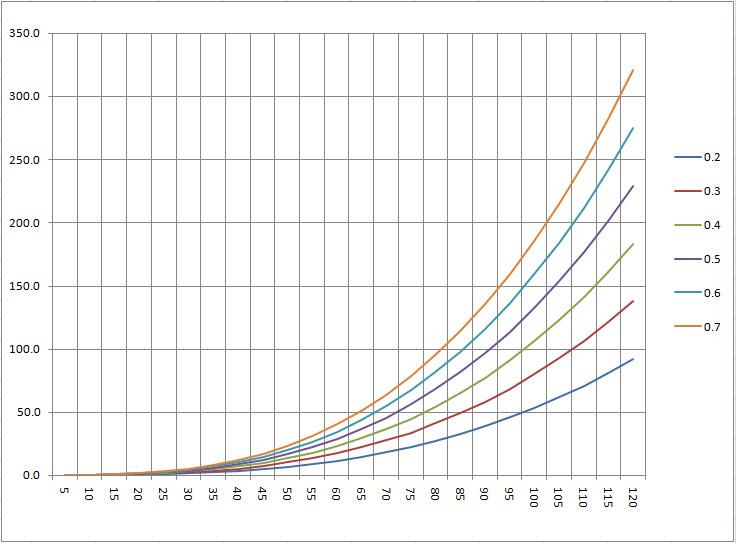
Just going from 55 MPH to 65 MPH your wind drag will nearly double but going from 55 MPH to 75 MPH the wind drage will nearly be 4 times... Speed is not your friend... This is just a truck alone... Tyipcal drag co. is about .46 to .48 but now the graph doesn't include trailer of larger frontal area but you can imagine the curve gets more aggressive with a larger frontal profile and more speed.
-
No... My first OEM orignal failed closed and started to get to hot. Kind of hard when its got a spring pushing the valve closed. Unless the spring fails. Normal. If your reaching this temp your fine. Take the truck out for a ride. Return home and carefully open the care with a rag. Remember this is under pressure and could contain hot water. But once you got the cap open look and see if the coolant is moving. Also is the upper hose the same time as the thermostat housing? The lower hose or the cap side will always be considerably cooler. Another suggestion is to replace your thermostat every time you flush the system this just makes sure there is no future problems.
-
Both... I've got my Excel sheet, notebook, and then the good ol' ScanGauge II...
-
Here you go... A quick video of going towards New Meadows, ID where its colder... Brrrr... Now if I drove all the way to to McCall, ID 35 miles and went shopping like typical and drove the same way 45-55 MPH the whole way I might tip the MPG at 15-16 MPG's for the trip... But now same thing in the summer time and 80-90*F weather I can pull nearly 21-22 MPG's... The only thing different between the two trip would be the tires (235/85 R16) and the winter front.
-
MoparMom says "Happy Birthday" as well... I totally forgot its going to be your first legal beer or drink...
-
Stay in the green...
-
Like on my truck the more I watch the IAT temps the colder the tem pgets to about 60*F then it seem to stop. Like right now my best MPG for going to the store and a fire meeting is like 14-15 MPG... Driving easy because of snow and icy roads 40-55 MPH tops. Then the added load of using my 265/75 R16 Cooper STTs which are a extra 20 pounds per tire. Then cold air is denser so more drag on the vehicle. It just goes on and on... Let me get the vid camera out and do a short run with you guys...
-
I've been using 15w-40 all the way down to -20*F no issues here... I just allow it to warm up to 100*F worth of coolant before driving...
-
Wow made 21! I remember those day long ago... But Happy Birthday to ya... And many more!
-
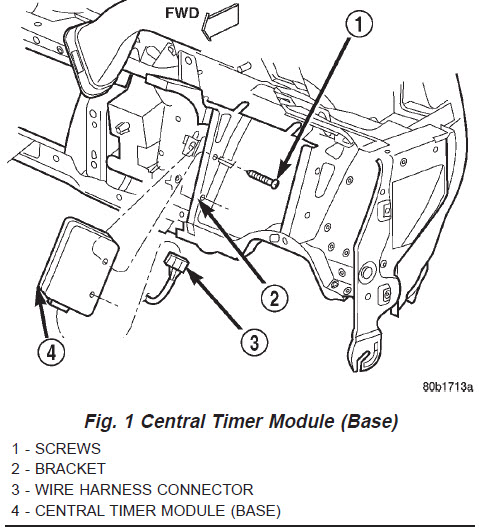
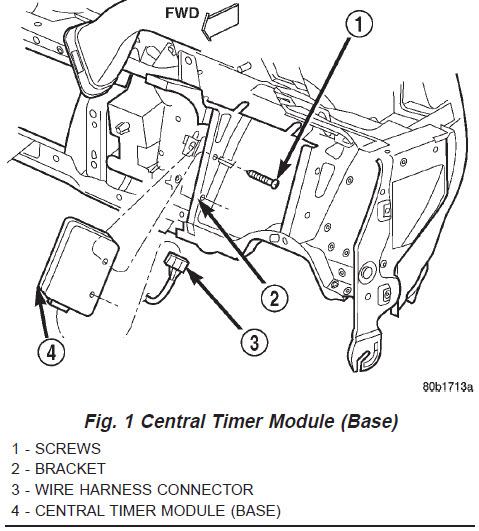
Central Timer under the dash runs the wiper delay... There is a relay or something inside that module... At least on my Mom's 96 I here it click every time.
-
Yeap...

-
Sorry there is a few people that disagree with this topic so I'm closing this thread...
-
Just another fruit loop...
-
http://mopar.mopar1973man.com/personal/2002/vulcan/vulcan.htm
-
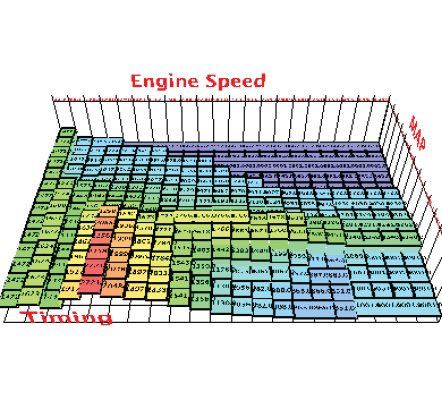
Umm... learn curve for Edge Comp boxes... The quick answer is 1x1 is going to give you the least boost of MPG over 5x5 will give you the most... You main level is how much timing curve you going to get with the maximum amount of fuel. So for the most timing you need the main level set to 5. So 1 being the least amount of timing and 5 being the most. Now as for sub level... Sublevel is how fast you get to full fuel and timing in relationship to boost. 1. 33% of stock fuel and timing till 20 PSI 2. 50% of stock fuel and timing till 15 PSI 3. 67% of stock fuel and timing till 10 PSI 4. Some extra fuel and timing at 0 PSI 5. Full fuel and timing at 0 PSI So if you looking for the most amount of timing keep it on 5x5 and use a light foot... Another tip is as the boost rises above 5 PSI the timing starts to retard. This princepal is from the autoignition temperature. http://en.wikipedia.org/wiki/Autoignition_temperature The autoignition temperature or kindling point of a substance is the lowest temperature at which it will spontaneously ignite in a normal atmosphere without an external source of ignition, such as a flame or spark. This temperature is required to supply the activation energy needed for combustion. The temperature at which a chemical will ignite decreases as the pressure increases (Boost pressure) or oxygen concentration increases. It is usually applied to a combustible fuel mixture. So to keep timing correct the VP44 is going to retard slighly to keep from over advancing the timing... Take notice the timing it more advanced at low boost pressures compared to high boost. So running the Edge Comp on 5x5 with a light foot and low boost pressures you can increase that stock table higher...
-
Yeap... Phyiscal damage has a way of doing that...
-
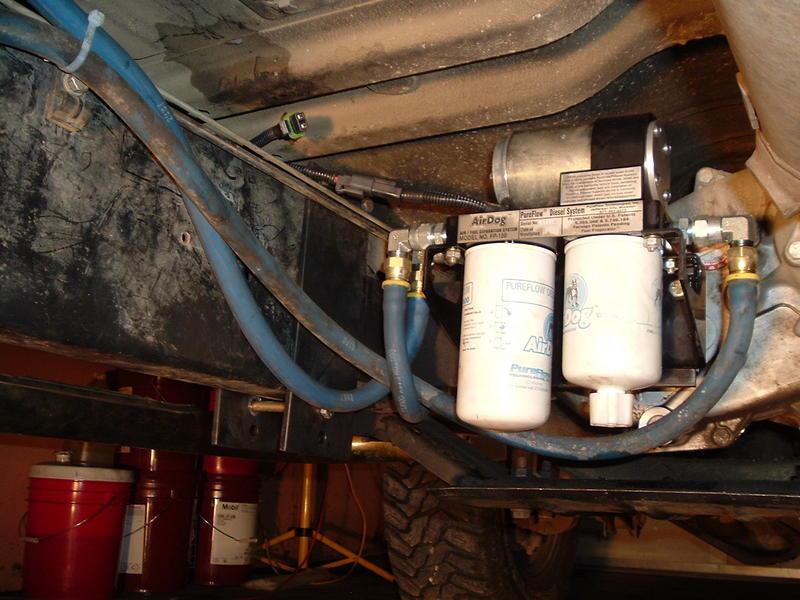
The source of the water hammer is coming from the the VP44 so closer you get to the VP44 the stronger the pulses get. If I could get the time and extra fund I want to move back to the stock filter can instead of middle of the line...
-
Stock manifold is find for most everything... But if you out drag racing and looking to gain that extra few tenths then I might suggest a 3 piece manifold.
-
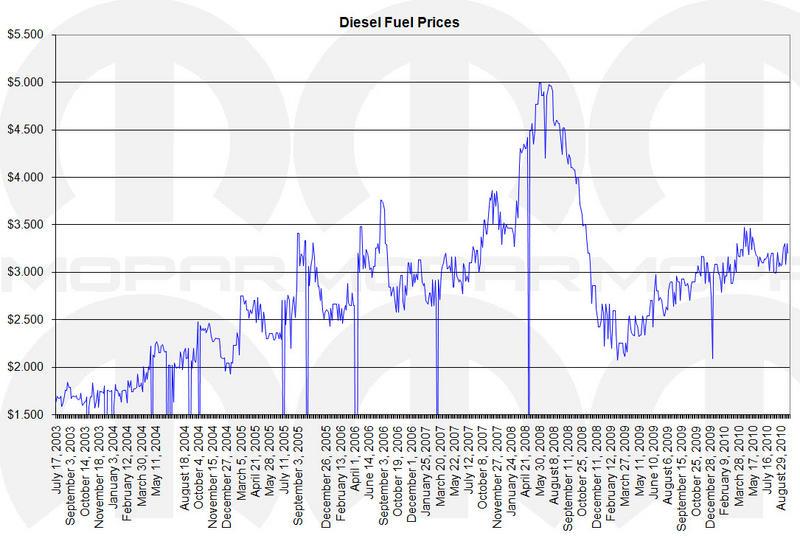
I know I'm a bit behind on doing my fuel logs but here is the price history here in Idaho...
-
I've come across several bad caps missing the spring on the vacuum valve of the cap. As you would hold the cap in normally mounted position the valve would hang down and not close causing the radiator not to hold pressure. I've seen where upper rubber seals in the cap start to get little crakcs in them causing air to leak in. Worse yet seen radiator cap missing them out right.. Damaged radiator necks it possible cracked, deformed, or just damaged it will not seal correctly and draw from the bottle. How is the hose to the bottle is the hose damaged? Is the bottle damaged on the draw tube if its it will spit coolant into the bottle be never draw it back up... See this one too...
-
From the above link Hmmm... Maybe you should correct the noise issues than trying to cover it. Being the alternator noise is caused from bad diode(s) and APPS sensor noise cause from bad grounds... I still say most trucks ran for over 8-10 years without a filter and now all of a sudden need one... something is broken and you covering it up...