Mopar1973Man
Owner
-
Joined
-
Last visited
Everything posted by Mopar1973Man
-
You not going to like it much. I owned mine for about 3 month and sold them. No improvement in light at all. The secondary light are narrow thin bands of light more of a vertical column than spread on the highway. The main light are the only thing cast on the highway. Pattern is scattered and poor. I even did the relay mod to get both bulbs to burn. Still no help from the secondary bulb because of the pattern it gives. Next step after this is HID...
-
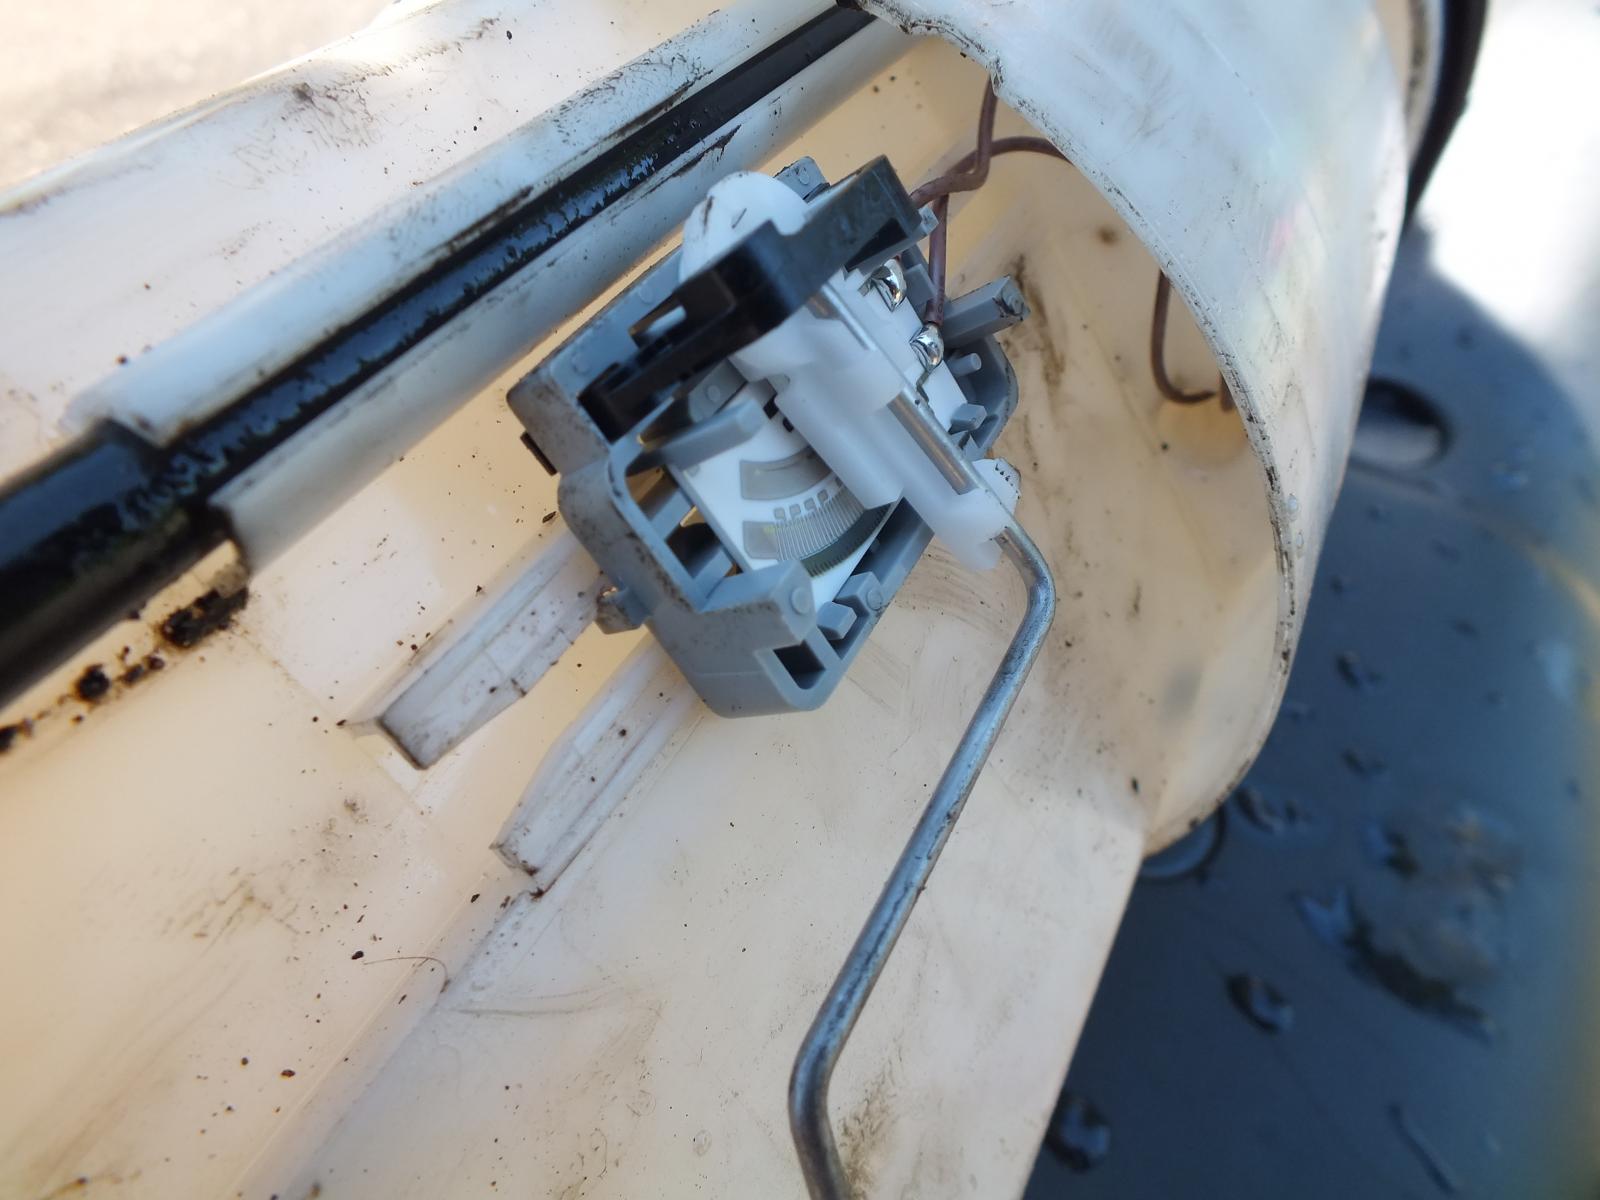
Most likely the rheostat on the sender is wore through my first one failed that way... My 1996 Dodge is got a bad spot between 3/4 to 7/8 of a tank drops to EMPTY. Below that shows correctly too.
-
All the error code and definitions are here... https://mopar1973man.com/cummins/articles.html/24-valve-2nd-generation_50/51_engine/obdii-error-codes_94/
-
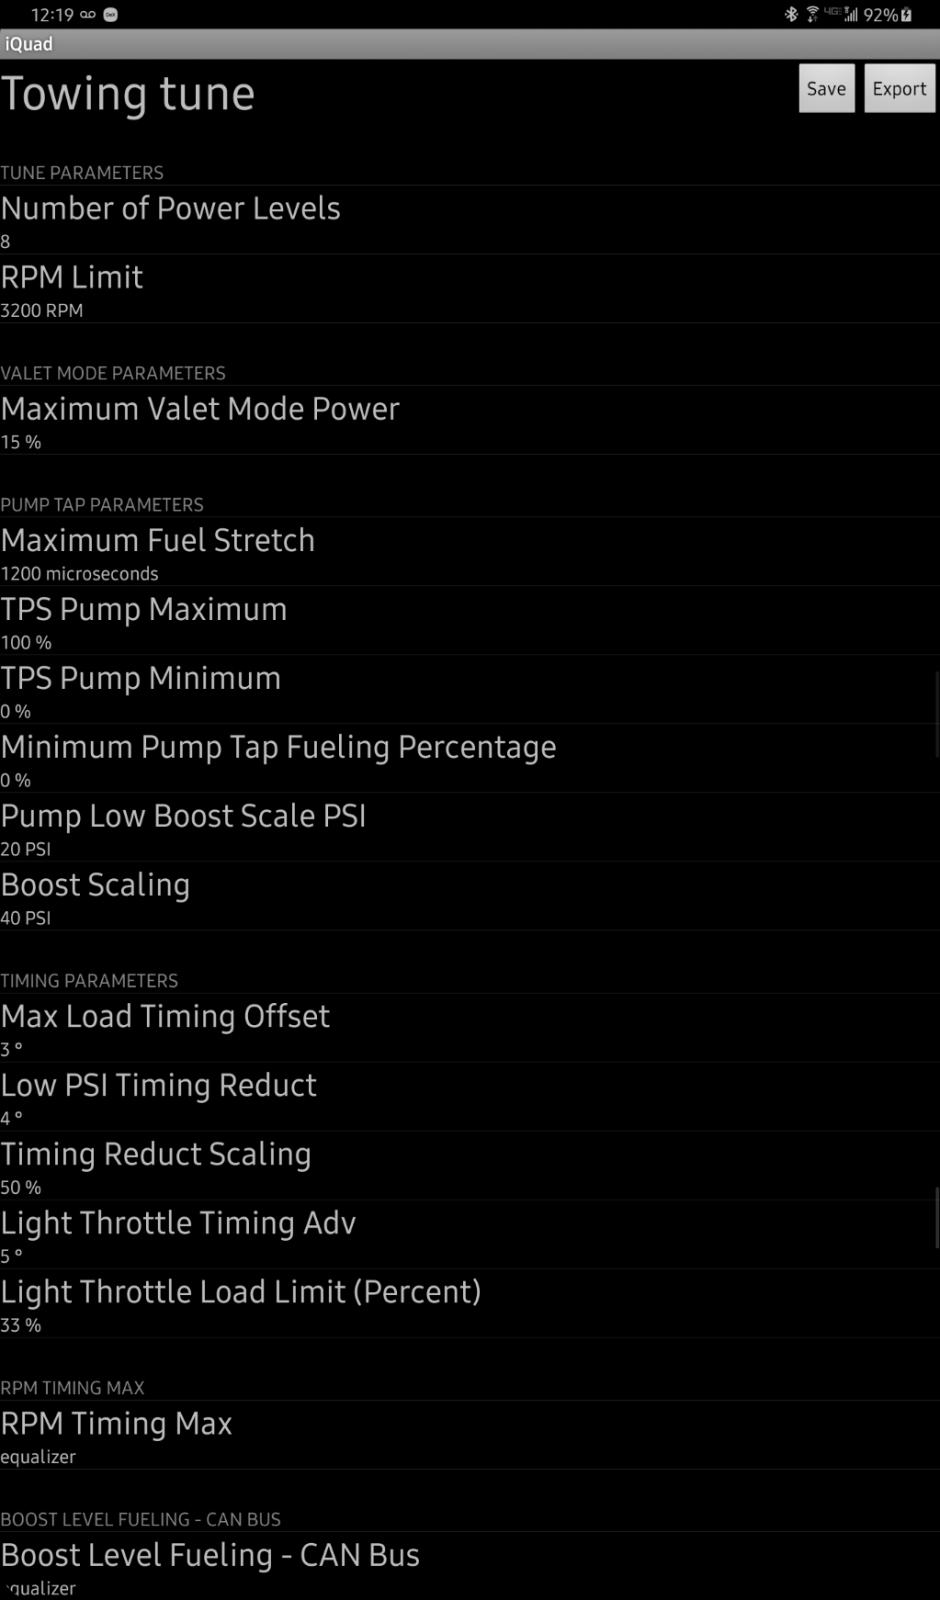
I can give classes on this its super easy to build tunes on Quadzilla. Think this is hard look at a EFILive or Smarty Touch no that is complex and confusing as hell. Pump Tap Parameters is all the setting for wire tap. How much time to add wire tap in microseconds. When does the wiretap max out vs TPS signal. When does wire tap start based on TPS signal. How much wiretap signal to start off with in percent. When to start wiretap based on boost. How far to go with wiretap based on boost pressure. Timing Parameters is all the setting for timing. Load based timing after load increased past cruise state. How far to retard timing based on heavy throttle. Second parameter for timing reduct. Cruise timing to add on top. Cruise timing range from 0% to ... RPM Timing Max is all the setting for max timing limits. Boost Level Fueling is all your CANBus fueling based on boost pressure.
-
I see a injection pump in your future. CCD Bus commincation error. Boost error code.
-
Sorry to hear about the loss.
-
Just got word that since there is no new rock movement they plan on blasting the massive rocks and the remaining hillside that is hanging.
-
I've already got the tank hung in the bands just getting frustrated with the drawstraw JIC connection. There is just enough hose but can't quite line up the threads and get it started. Only enough room for one hand. Already hot outside and 90*F here. Taking a break and going to try again later on that.
-
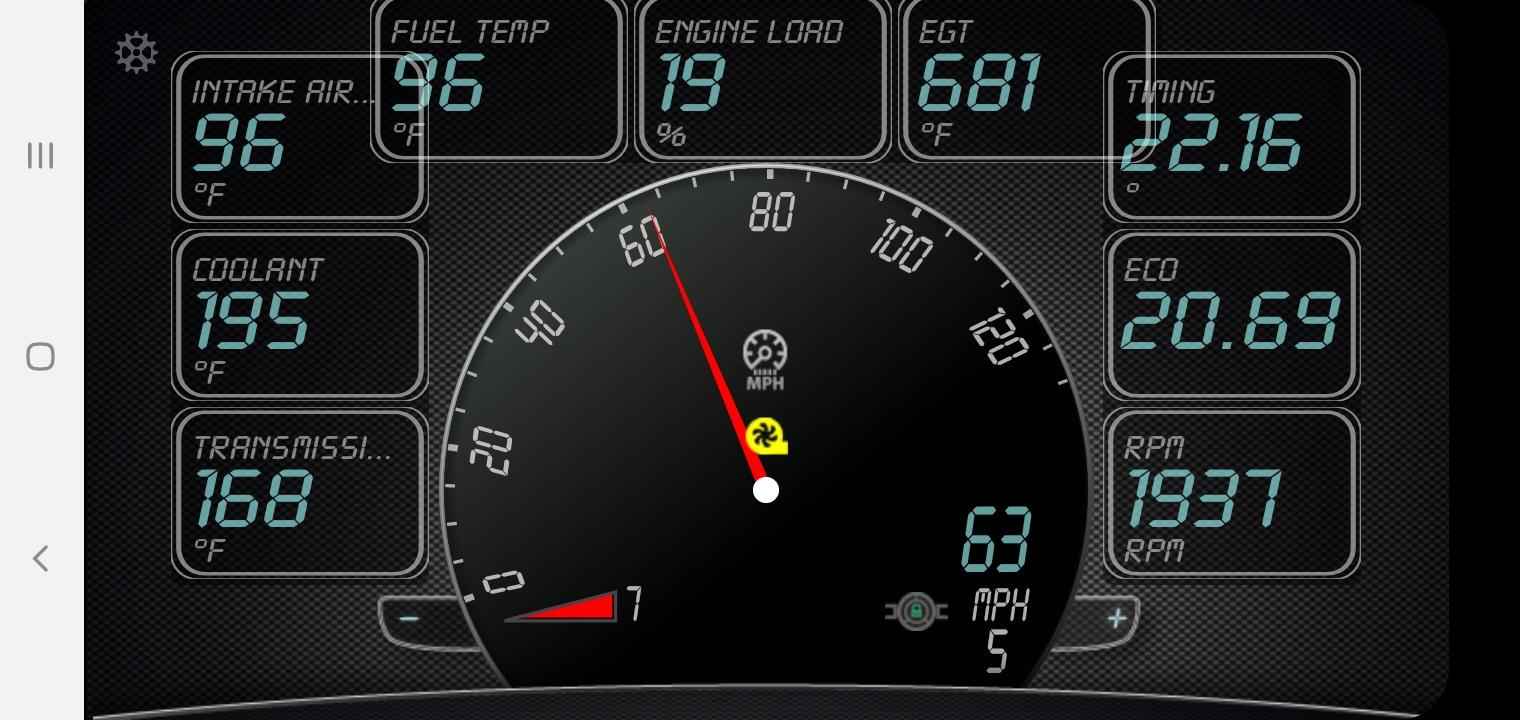
Not to mention you have a fuel supply issue too. Looking at the two screen shots you have fuel temps in the 140 to 150F range which is getting quite hot. The only reason for this problem is fuel pressure is dropping below 14 PSI and the overflow valve is closing. I run about 17 to 18 PSI of fuel pressure at 65 MPH. Notice the fuel temp and intake follow each other... You want just enough Timing reduct to spool the turbo rapidly on quick heavy throttle. I Now my RV towing Tune is set for 33% Light throttle load. My Economy tune is 25%. This one is empty truck tune and running about 16 to 18% engine load flat but allowed for small hill climbs under the cruise setting. Now you can see the enhanced load I've got different valves for my tuning tune because my average flat ground load is about 30% to 32%

-
Engine load is equal to the amount of fuel being delivered. That being said now engine load is a product of drag and speed. More drag and more speed equals more engine load to keep the truck at a constant speed. My average for my setup at 65 MPH or 2,000 RPM is roughly 16 to 18%. Now that seems much lower than what your looking it. This is because a larger injectors take much less duration to inject the same amount of fuel. Stock injectors will require more duration to inject the same amount of fuel. Hence engine loads are higher for stock injectors. Just a change of tire size say to 285's will increase engine load. Dragging brake shoes can add to drag and engine load.
-
Nothing is being done currently for clean up. ITD still saying its not safe to get under the slide to even clean up. Still a wait and see process.
-
Nope its a island stove so you can stand on the side or front if you wish. We tend to stand at the side that way you can walk past the cook and do other prep or clean up without making the cook move out of the way. As for the jelly. Man that stuff is good. Sugar free cherry jelly turned out super good. Bit tart being there is no sugar but taste very natural. Now the other batch she did with sugar is good as well but sweet. The sugar-free tasted better personally.
-
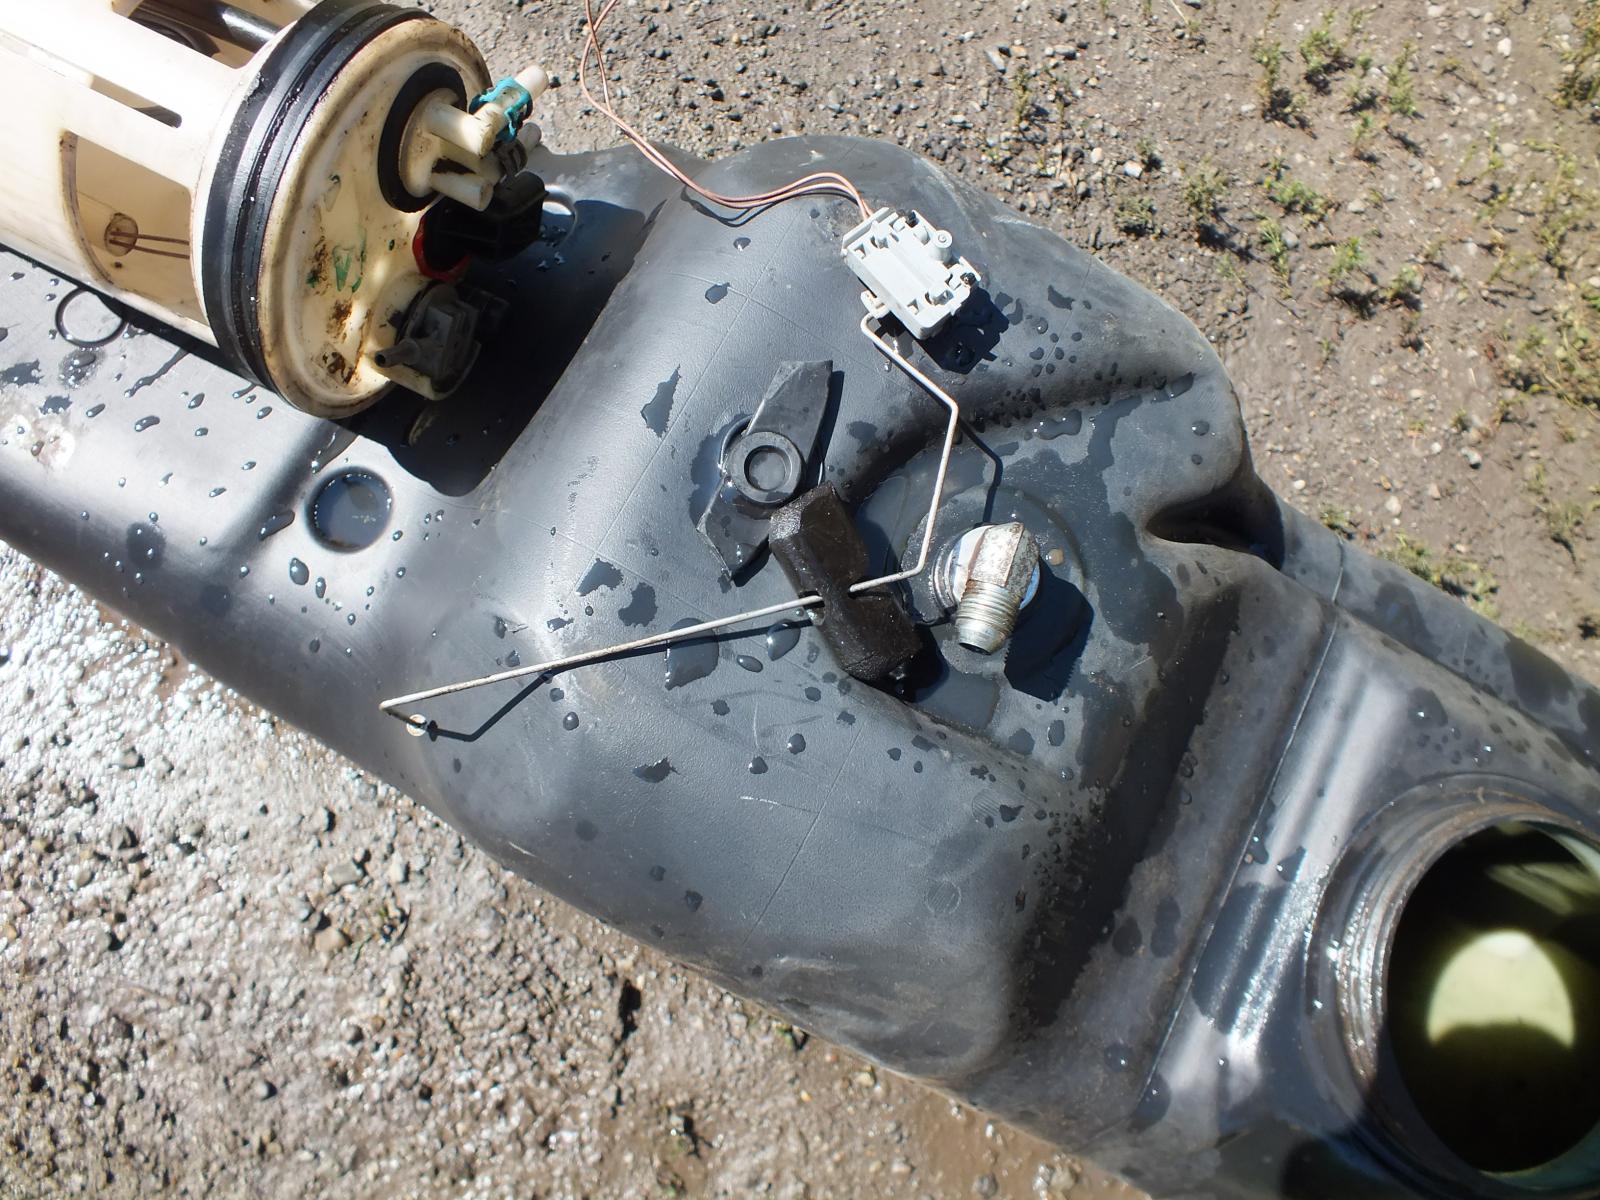
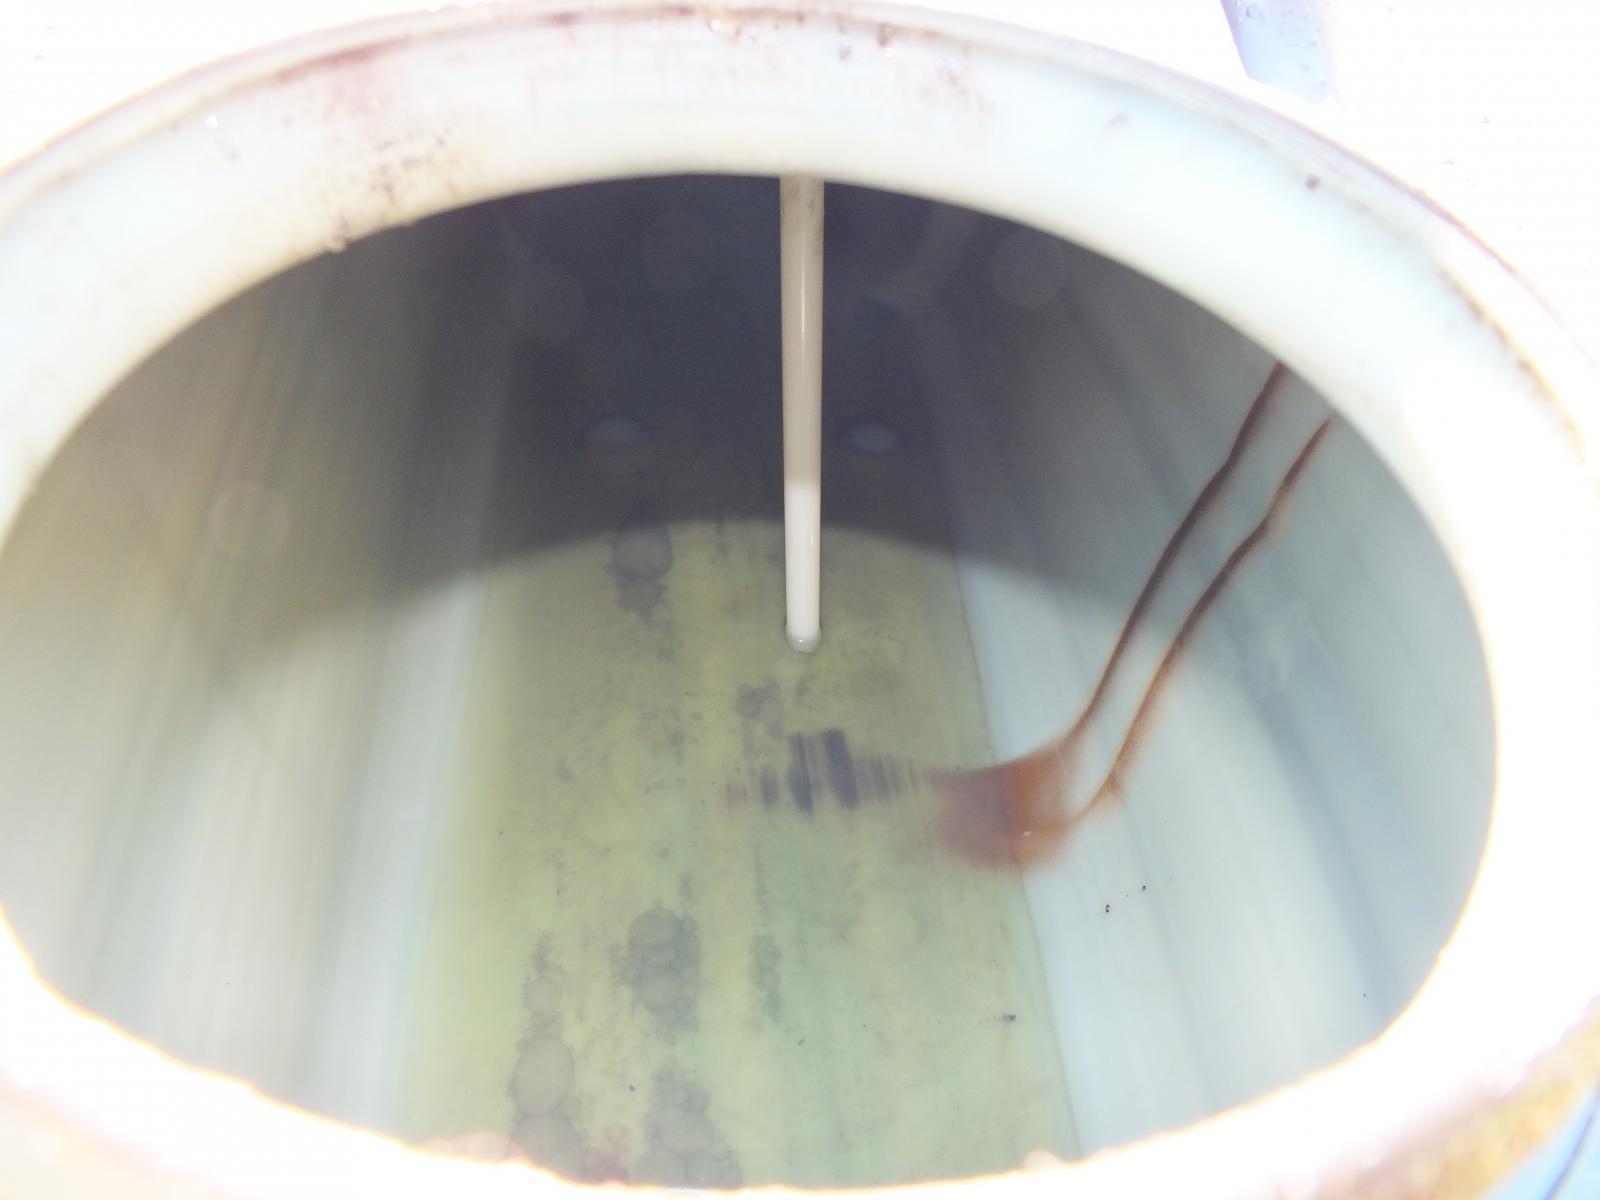
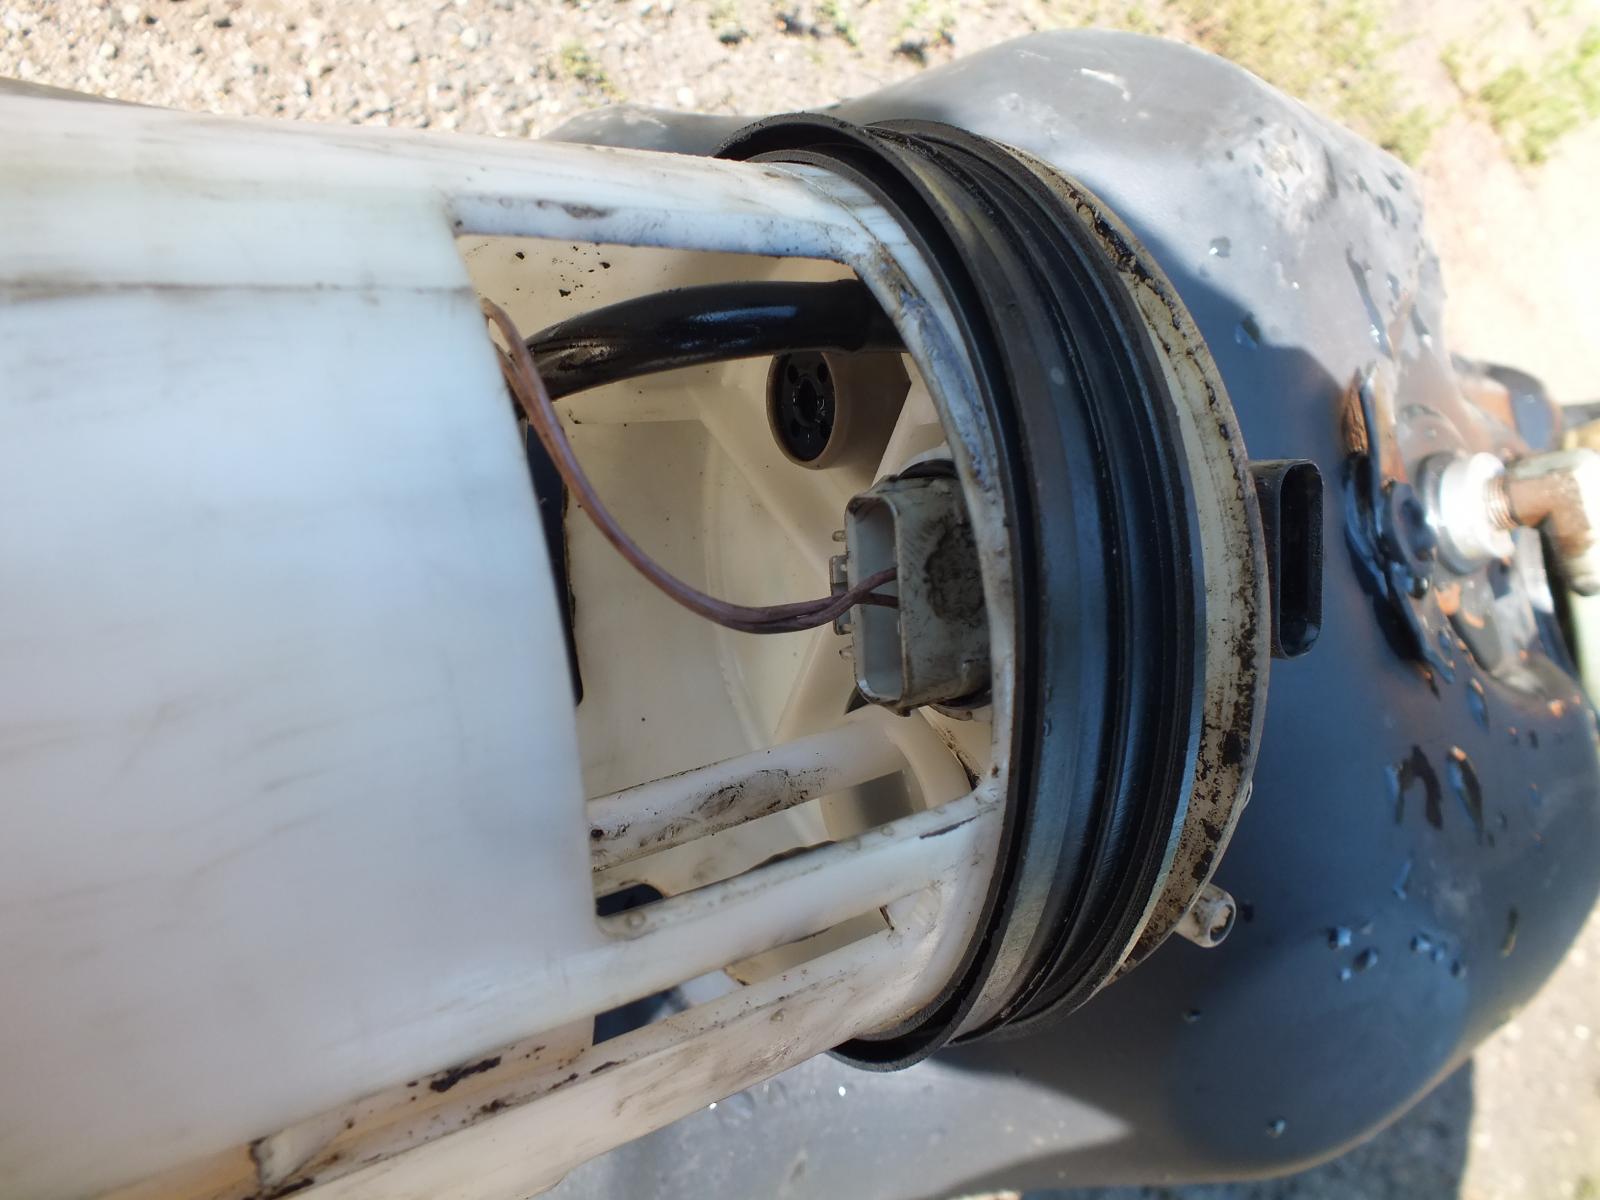
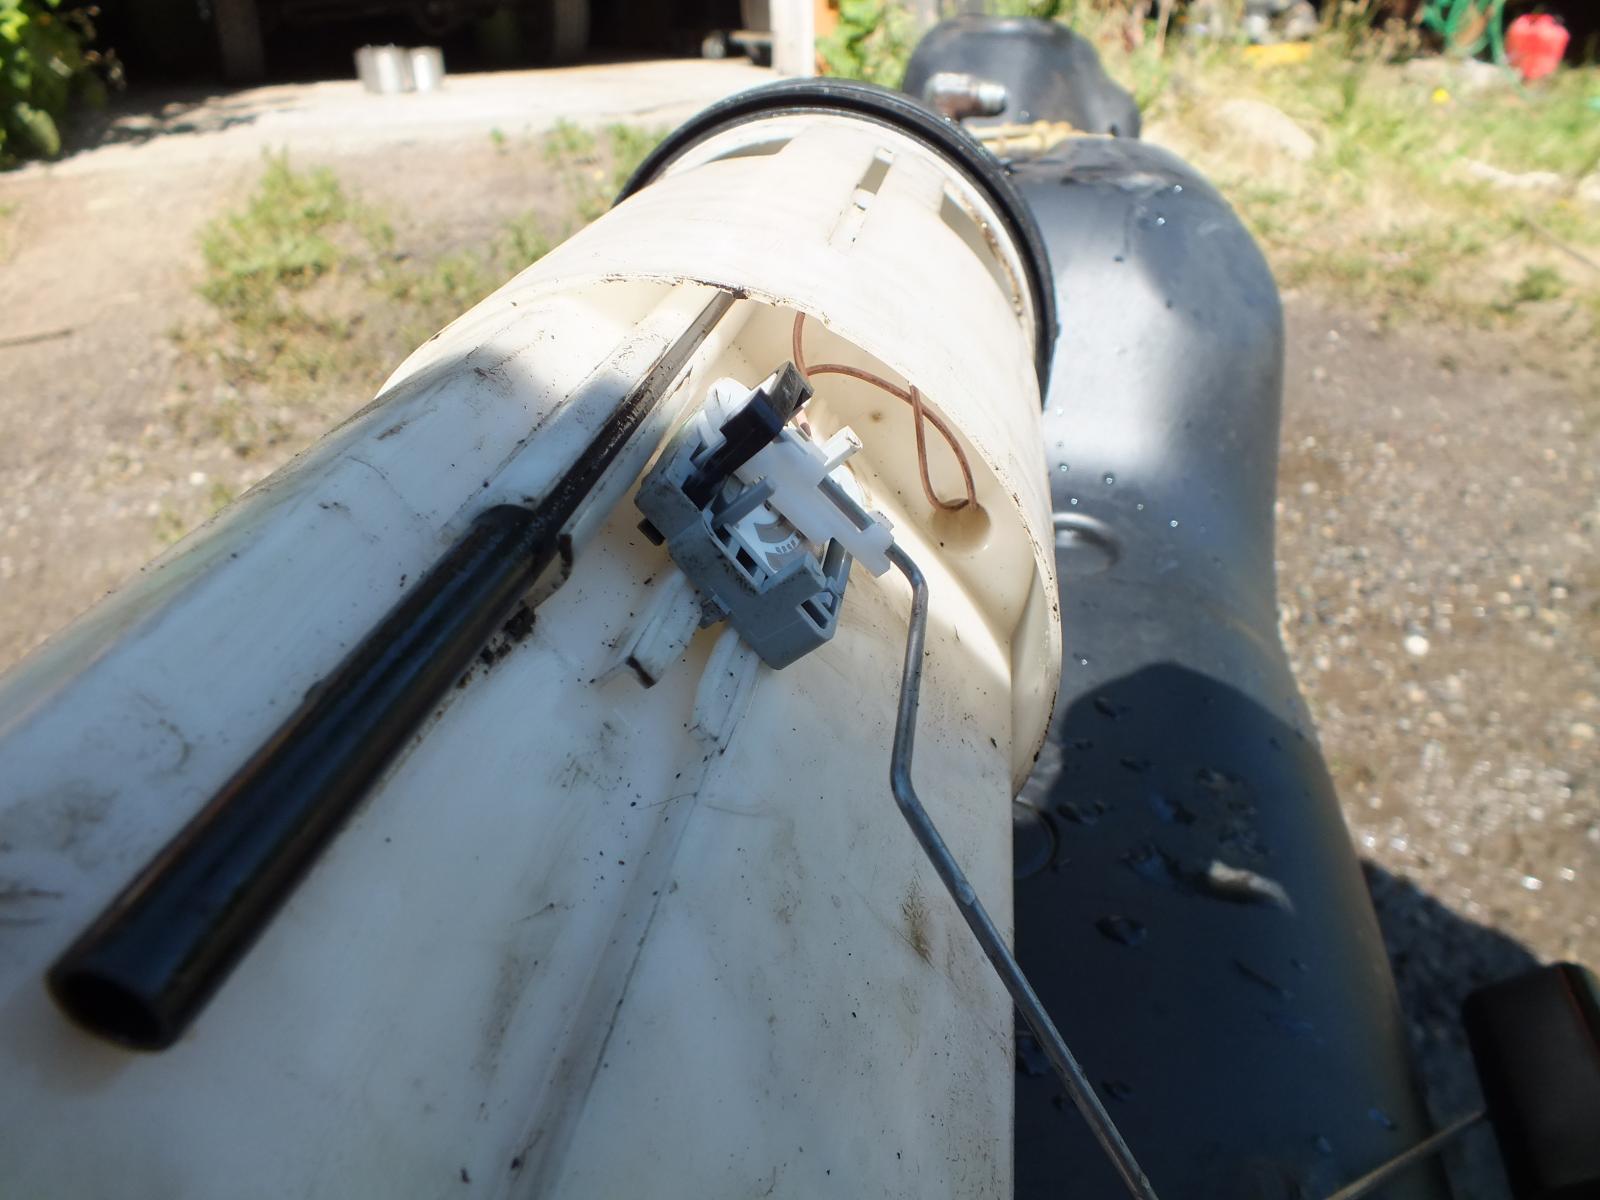
Here is the rest of it... The old float wore enough to slide up the arm so the rod just dropped to empty. Drawstraw still in a good position after 300k miles and not been messed with. No issues either. Take notice there is a plug in the bottom of the sender. It has a red tab lock and squeeze and pull loose. Then the plug has a retainer in the face. Using a pair of needle nose pull it out. Then carefully using a screwdriver and hold the lock back and carefully pull the leads from the plug. There is a hole where the wires are routed back up. Remember to route first before doing the plug! If you look close you'll see the little lock there. Pry or push it just a bit out of the notch and it slides down to remove. Reverse to install.
-
150 HP injectors you can start out at 80% easy. All my tunes are designed around the 150 HP (7 x 0.010).
-
Start at 14... Your Timing reduct will pull even more off that 12...
-
Actually you needs his competition, Kryptonite Towing https://www.google.com/search?&q=kryptonite+towing Way better towing service... He is Superman Kryptonite...
-
Thank you sir. There is a lot of articles written. I'm still writing more as times is available.
-
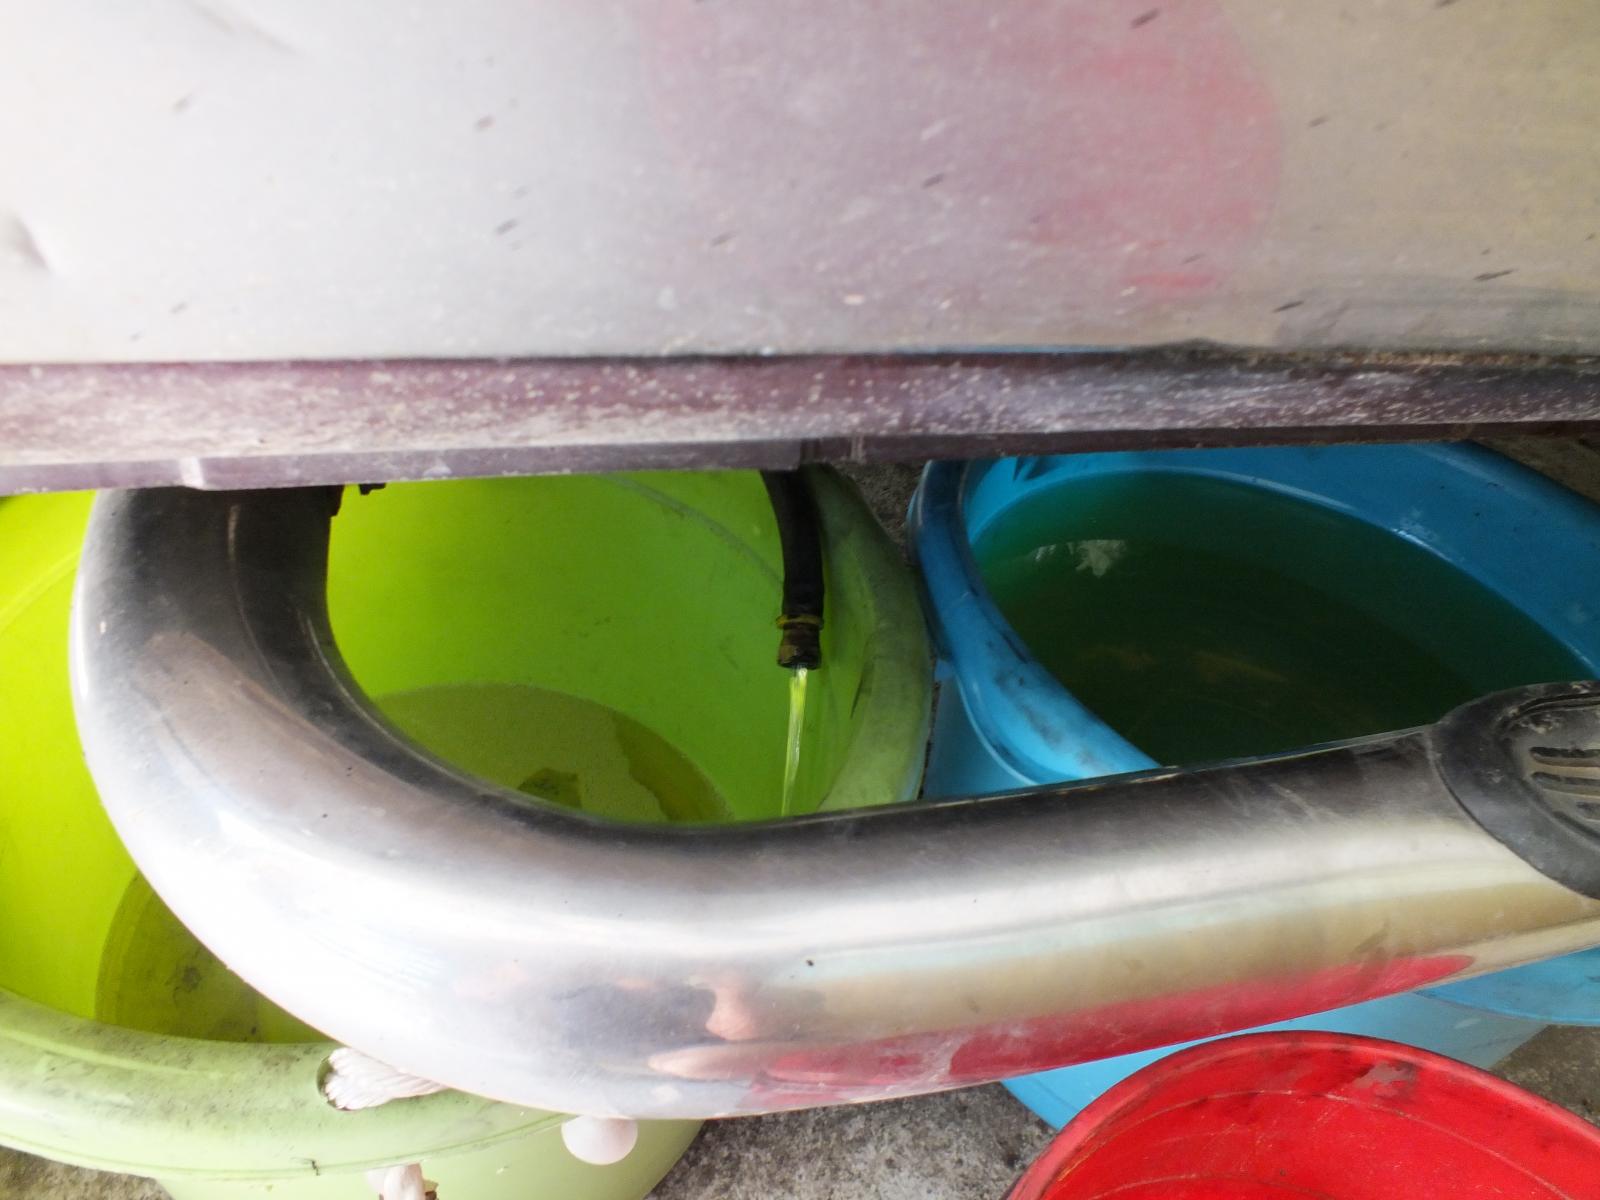
P0192 Fuel Pressure Sensor Low Theory of Operation The Powertrain Control Module (PCM) provides the Fuel Rail Pressure Sensor with a 5-Volt supply and sensor ground, and receives a signal voltage back from the Fuel Rail Pressure Sensor. This sensor signal voltage changes based on the pressure in the fuel rail. The PCM will light the MIL lamp immediately after the diagnostic runs and fails. During this time the customer may experience a power and or speed derate. The PCM will turn off the MIL light after the diagnostic runs and passes in four consecutive drive cycles. When Monitored and Set Conditions • When Monitored: With the ignition on and battery voltage greater than 10.4 Volts. Set Condition: One or both of the Fuel Rail Pressure Sensor Signals to the Powertrain Control Module (PCM) falls below a calibrated threshold for a certain period of time. Possible Causes FRP SENSOR SIGNAL CIRCUIT SHORTED TO GROUND FRP SENSOR SIGNAL CIRCUIT SHORTED TO THE SENSOR RETURN FRP SENSOR RETURN CIRCUIT OPEN/HIGH RESISTANCE FRP SENSOR POWERTRAIN CONTROL MODULE (PCM) Always perform the Pre-Diagnostic Troubleshooting procedure before proceeding. (Refer to 28 - DTC- Based Diagnostics/MODULE, Powertrain Control (PCM) - Standard Procedure). Diagnostic Test 1. ACTIVE DTC NOTE: If a 5-Volt reference DTC is present, repair that DTC before proceeding with this test. 1. Turn the ignition on. 2. With the scan tool, record all Freeze frame data. 3. With the scan tool, erase DTCs. 4. Turn the ignition off for 75 seconds. 5. Turn the ignition on. 6. With the scan tool, read DTCs. Did the DTC reset? Yes • Go To 2 No • Perform the INTERMITTENT CONDITION diagnostic procedure. (Refer to 28 - DTC-Based Diagnostics/MODULE, Powertrain Control (PCM) - Standard Procedure). 2. CHECK THE FUEL PRESSURE SENSOR 1. Turn the ignition off. 2. Disconnect the FRP Sensor harness connector. 3. Turn the ignition on. Does the DTC P0193 set? Yes • Replace the Fuel Rail Pressure Sensor in accordance with the Service Information. • Perform the POWERTRAIN VERIFICATION TEST - 6.7L. (Refer to 28 - DTC-Based Diagnostics/MODULE, Powertrain Control (PCM) - Standard Procedure). No • Go To 3 3. CHECK THE (K181) FRP SENSOR SIGNAL 1 CIRCUIT FOR A SHORT TO GROUND 1. Turn the ignition off. 2. Disconnect the PCM C1 harness connector. NOTE: Check connectors - Clean/repair as necessary. 3. Measure the resistance between ground and the (K181) FRP Sensor Signal 1 circuit in the FRP Sensor harness connector. Is the resistance below 10k Ohms? Yes • Repair the (K181) Fuel Rail Pressure Sensor Signal 1 circuit for a short to ground. • Perform the POWERTRAIN VERIFICATION TEST - 6.7L. (Refer to 28 - DTC-Based Diagnostics/MODULE, Powertrain Control (PCM) - Standard Procedure). No • Go To 4 4. CHECK FOR THE (K181) FRP SENSOR SIGNAL CIRCUIT SHORTED TO THE (K180) SENSOR RETURN 1. Measure the resistance between the (K181) FRP Sensor Signal 1 circuit and (K180) Sensor Return circuit at the FRP Sensor harness connector. Is the resistance below 10k Ohms? Yes • Repair the short between the (K181) Fuel Rail Pressure Sensor Signal 1 circuit and (K180) Sensor Return circuit. • Perform the POWERTRAIN VERIFICATION TEST - 6.7L. (Refer to 28 - DTC-Based Diagnostics/MODULE, Powertrain Control (PCM) - Standard Procedure). No • Go To 5 5. CHECK THE (K179) FRP SENSOR SIGNAL 2 CIRCUIT FOR A SHORT TO GROUND 1. Turn the ignition off. 2. Disconnect the PCM C1 harness connector. NOTE: Check connectors - Clean/repair as necessary. 3. Measure the resistance between ground and the (K179) FRP Sensor Signal 2 circuit in the FRP Sensor harness connector. Is the resistance below 10k Ohms? Yes • Repair the (K179) Fuel Rail Pressure Sensor Signal 2 circuit for a short to ground. • Perform the POWERTRAIN VERIFICATION TEST - 6.7L. (Refer to 28 - DTC-Based Diagnostics/MODULE, Powertrain Control (PCM) - Standard Procedure). No • Go To 6 6. CHECK FOR THE (K179) FRP SENSOR SIGNAL 2 CIRCUIT SHORTED TO THE (K180) SENSOR RETURN 1. Measure the resistance between the (K179) FRP Sensor Signal 2 circuit and (K180) Sensor Return circuit at the FRP Sensor harness connector. Is the resistance below 10k Ohms? Yes • Repair the short between the (K179) Fuel Rail Pressure Sensor Signal 2 circuit and (K180) Sensor Return circuit. • Perform the POWERTRAIN VERIFICATION TEST - 6.7L. (Refer to 28 - DTC-Based Diagnostics/MODULE, Powertrain Control (PCM) - Standard Procedure). No • Go To 7 7. CHECK THE (K180) SENSOR RETURN CIRCUIT FOR AN OPEN/HIGH RESISTANCE 1. Measure the resistance of the (K180) Sensor Return circuit between the FRP Sensor harness connector and the PCM C1 harness connector. Is the resistance below 5.0 Ohms? Yes • Go To 8 No • Repair the (K180) Sensor Return circuit for an open circuit or high resistance. • Perform the POWERTRAIN VERIFICATION TEST - 6.7L. (Refer to 28 - DTC-Based Diagnostics/MODULE, Powertrain Control (PCM) - Standard Procedure). 8. POWERTRAIN CONTROL MODULE 1. Disconnect all PCM harness connectors. 2. Disconnect all related in-line harness connections (if equipped). 3. Disconnect the related component harness connectors. 4. Inspect harness connectors, component connectors, and all male and female terminals for the following conditions: Proper connector installation. Damaged connector locks. Corrosion. Other signs of water intrusion. Weather seal damage (if equipped). Bent terminals. Overheating due to a poor connection (terminal may be discolored due to excessive current draw). Terminals that have been pushed back into the connector cavity. Perform a terminal drag test on each connector terminal to verify proper terminal tension. Repair any conditions that are found. 5. Reconnect all PCM harness connectors. Be certain that all harness connectors are fully seated and the connector locks are fully engaged. 6. Reconnect all in-line harness connectors (if equipped). Be certain that all connectors are fully seated and the connector locks are fully engaged. 7. Reconnect all related component harness connectors. Be certain that all connectors are fully seated and the connector locks are fully engaged. 8. With the scan tool, erase DTCs. 9. Using the recorded Freeze Frame and Environmental Data, along with the When Monitored and Set Conditions above, operate the vehicle in the conditions that set the DTC. 10. With the scan tool, read PCM DTCs. Did the DTC return? Yes • Replace the Powertrain Control Module (PCM) in accordance with the Service Information. (Refer to 08 - Electrical/8E - Electronic Control Modules/MODULE, Powertrain Control/Removal) . • Perform the PCM VERIFICATION TEST. (Refer to 28 - DTC-Based Diagnostics/MODULE, Powertrain Control (PCM) - Standard Procedure). No • Test complete. • Perform the PCM VERIFICATION TEST. (Refer to 28 - DTC-Based Diagnostics/MODULE, Powertrain Control (PCM) - Standard Procedure).P0128-THERMOSTAT RATIONALITY Theory of Operation The thermostat rationality diagnostic runs during a drive cycle that starts with the coolant temperature below 140°F. This diagnostic looks at the how cold the system is at start up, what the inlet air temperature is, and the amount of fuel burned during that drive cycle. The PCM estimates what the coolant temperature should be. If the coolant temperature is not above a calibrated threshold, the rationality fails. The PCM assumes that the thermostat is stuck open. When Monitored: While the engine is running. Set Condition: The coolant temperature does not rise above a calibrated amount over a calibrated amount of time. Possible Causes COOLANT LEVEL COOLANT TEMPERATURE SENSOR THERMOSTAT Always perform the Pre-Diagnostic Troubleshooting procedure before proceeding. (Refer to 28 - DTC-Based Diagnostics/MODULE, Powertrain Control (PCM) - Standard Procedure). 1. CHECK THE COOLANT LEVEL NOTE: If DTC P0116 is also present, repair the P0116 DTC before proceeding with this test. NOTE: An engine block heater or oil heater can cause this DTC to set erroneously. 1. Turn the ignition off. 2. With the engine cold, verify the level of coolant in the cooling system. Is the cooling system full of coolant? Yes • Go To 2 No • Fill the cooling system to the proper level. • Perform the POWERTRAIN VERIFICATION TEST - 6.7L. (Refer to 28 - DTC-Based Diagnostics/MODULE, Powertrain Control (PCM) - Standard Procedure). 2. CHECK THE COOLANT TEMPERATURE SENSOR 1. Start the engine. 2. With the scan tool, monitor the coolant temperature for 10 minutes. Did the coolant temperature change over time while the engine was running? Yes • Replace the Thermostat in accordance with the Service Information.(Refer to 07 - Cooling/Engine/THERMOSTAT/Removal) • Perform the POWERTRAIN VERIFICATION TEST - 6.7L. (Refer to 28 - DTC-Based Diagnostics/MODULE, Powertrain Control (PCM) - Standard Procedure). No • Replace the Coolant Temperature Sensor in accordance with the Service Information.(Refer to 07 - Cooling/Engine/SENSOR, Coolant Temperature/Removal) • Perform the POWERTRAIN VERIFICATION TEST - 6.7L. (Refer to 28 - DTC-Based Diagnostics/MODULE, Powertrain Control (PCM) - Standard Procedure).ECM and VP44 grounds go to the gear case next to the VP44. 5 wires Black and Tan... Alternator charge lead goes from the alternator to a 150A circuit breaker or 150 Amp fuse then to the passenger battery POSITIVE.So just got started... Pull the fuel line from the rear of my stock fuel filter and routed to holding buckets. Then created a jumper wire to run the AirDog till it pumps the tank dry. As you can see I've got it pumping the fuel out of the tank into large buckets.

 Don't watch much TV... News is so biased its not even funny. Maybe a good movie off of Hulu... Ok who would be a good independent vote? Gotta ask...Should never start a engine with a weak battery or tired batteries this will create massive heat in the batteries and alternator to make up for the loss.416k miles and my fuel gauge wigged out and dropped to EMPTY and set the low fuel light. The part number is still valid and the total cost has gone up since the article. Now the price is $108 for a new float sender for the fuel tank same one as before but just extra $30. Fun is I'll pull the fuel line from the VP44 and just pump out the fuel tank into 5 gallon buckets. Just got to jumper the AirDog 150 relay and allow the pump to do its job. Oh yeah I pulled up the Juniper bush at the corner of my drive way. While having fun with this I managed to pop a wheel joint cap loose. Broke the cir-clip and the cap slide out. I'll most likely just order a -joint and just redo that one. Even though the bearings are fine and still greased.