


Mopar1973Man
Owner
-
Joined
-
Last visited
Everything posted by Mopar1973Man
-
I doubt it... Yeah I'll agree because the fact you can't believe its GL-4 rated.
-
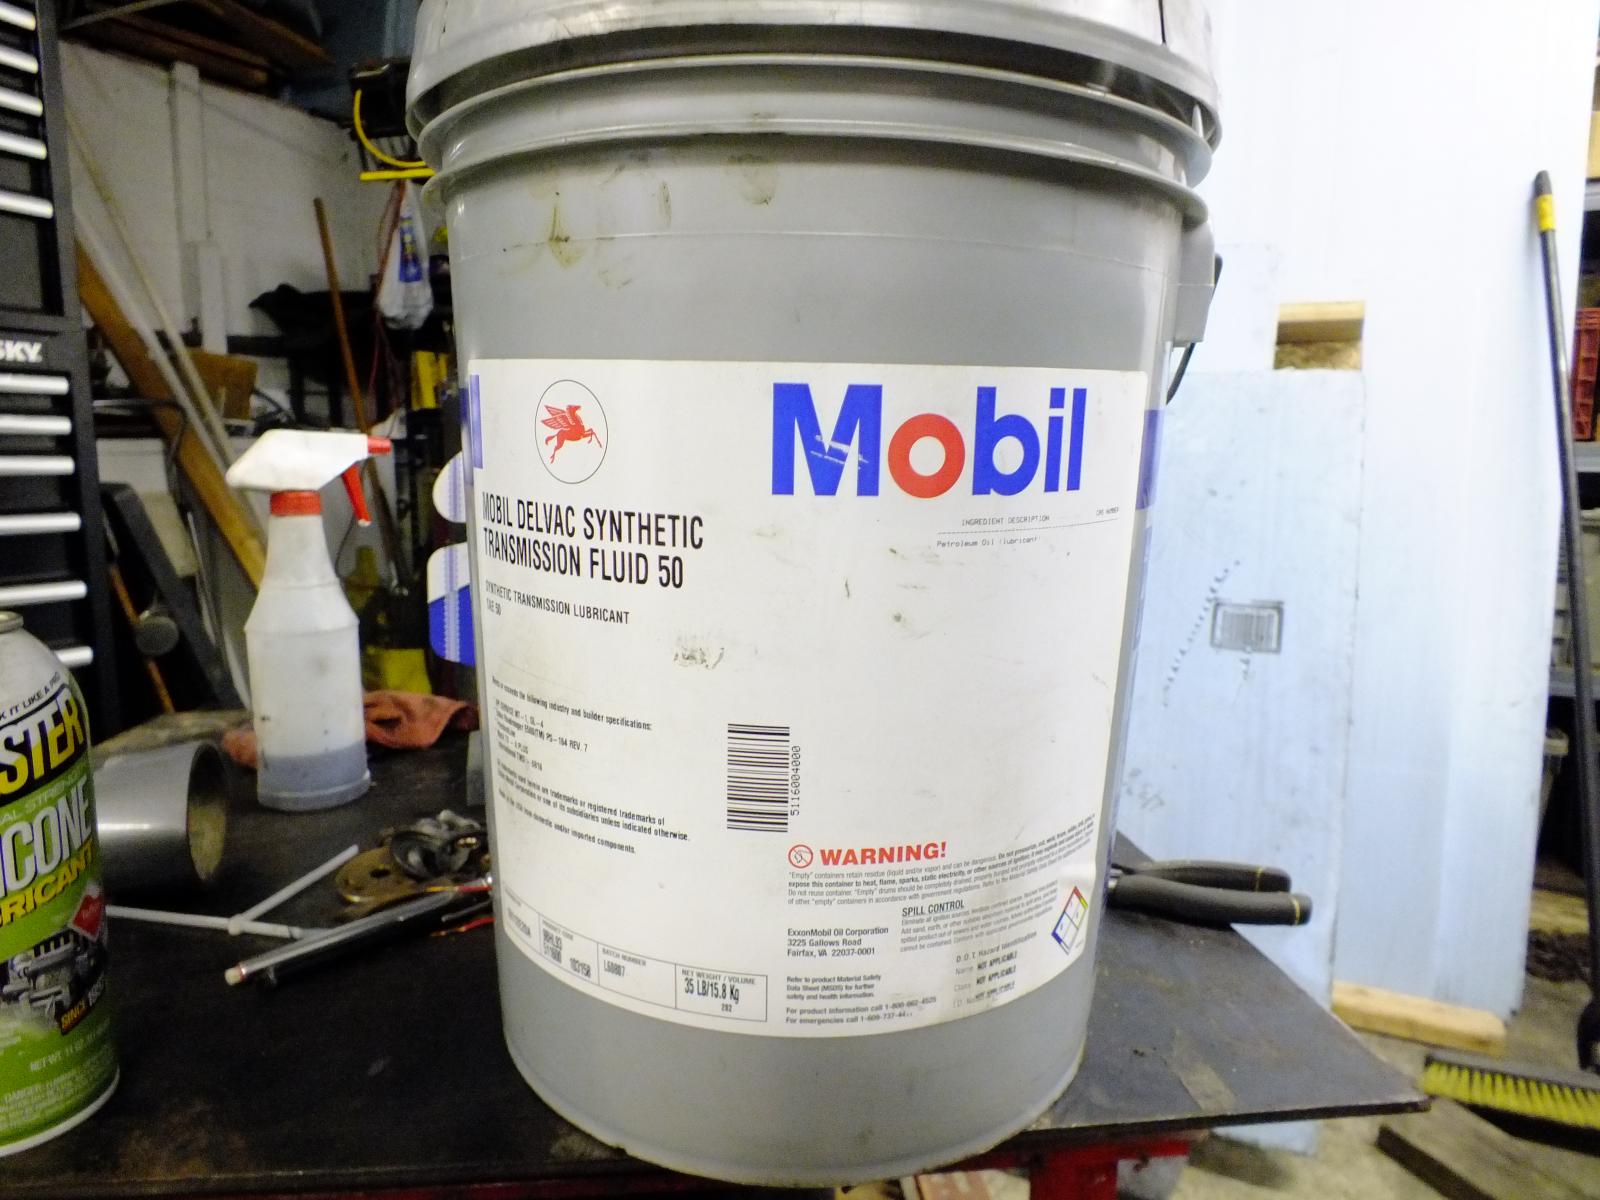
It does you got to look at the actual bucket. These pages are not telling the full truth. I've already looked at the Valvoline brand 50 SAE fluid and it does meet the spec on the bucket will also show GL-4. I don't rely on hype of spec pages I look at the actual product and like I shown on my bucket it label GL-4 and so is Valvoline the last time I checked in McCall Idaho NAPA store.
-
It's still made Mobil's web site is changed. Mobil still be provided nation wide. Valvoline produces the very same 50 SAE fluid but a bit lower price than Mobil and yes its also a GL-4 rated API gear lube as well. I can purchase the Valvoline at my local NAPA store for the $139 a 5 gallon bucket. The only difference is that the SAE lube is going to be a bit thicker in the winter time cold. Being the 50 weight is actually the high end of the 90 weight gear lube. Since I been through a full winter driving back and forth to Boise every other day at -35*F I can say without a doubt there is NO problems with winter time usage nor is there any shifting issues. (Every Tuesday, Thursday and Saturday run to Boise, ID 362 miles round trip)
-
You might have a bad wheel bearing. Even though the bear ing not loose or failing the tone ring could of broke the tack welds and be spinning on the hub. I had the very same issue on my truck. After changing both bearing the problem is gone. I use to get random period of time the light would remain out. The way I found the problem was @Chris O. CCD tool that spotted the right hub dropping speed signal after 35 MPH.
-
@AH64ID and me have gone rounds about specs on this fluid the last comment I will to concede to was I need more mileage. Being I've about ready to cross 50k miles on this fluid no issues I would say there is nothing wrong with using this a suitable transmission fluid. It is a synthetic GL-4 transmission fluid that is slightly thicker than the 75w-85 factory supplied. The big scare about straying from factory specss was the syncros falling apart due to wrong gear lube. Well the truth be told there was changes to the Mopar fluid because of the gear teeth temperatures hence why the fluid was changed up. Yes I've done my study work as well about GL rating and why the change in Mopar Fluids.
-
That page was changed since I did my research one year ago. The page was much much different 1 year ago. As for what I bought IS RATED for GL-4. Now tell me its not GL-4 rated!!! The bucket is CLEARLY marked GL-4.
-
I found out what really loose steering like and it's really frightening when the tie rod end fall off the passenger side while you still rolling at highway speed. Now that is loose and really freaky. No its not my trucks...
-
All I'm going to say is there is no issues with my transmission and working just fine. All the specs and stuff is just muddying the water Mobil is a GL-4 fluid and is not causing harm period. Syncro are not falling apart. My bearing are not grinding away. The requirements for the NV4500 is a Synthetic GL-4 fluid 75w-85
-
https://mobildelvac.com/en/automatic-transmission-fluids/mobil-delvac-1-transmission-fluid-50 ExxonMobil for use in transmissions and gear cases where API Service GL-1 through GL-4 (non-EP) gear protection is required. Mobil Delvac 1 Transmission Fluid 50 is recommended for use in: Heavy-duty manual transmissions where extended service intervals and warranties are required Commercial line haul, vocational, off-road, pick-up and delivery, and bus applications Rear axles as a companion with Mobil Delvac 1™ Gear Oil for maximum component life, service efficiency and fuel economy improvement
-
Well as I cross nearly 50k miles I can say that Mobil is a good fluid to use even though all the scare about specs and blah blah blah... Mobil is a GL-4 fluid which is clearly marked in the spec yes its ALSO MT-1 as well so it can be used for BOTH applications without problems. My fluid is still clean and clear in color and no issue with syncros which is the whole issue with the fluid scare. So no syncro issues as of yet. Being I'm driving over 250 miles every other day and driving in 100-110*F temps no issues. I've checked my fluid about once a month still going strong. I'll be checking soon again for my 50k mark which is only 3k away. I'm going to stand my ground and say its a safe fluid for NV4500 transmission as of so far.
-
Oh... I'm not worried about that... SR I've been showing off all the toys and adding more and more functions making the staff job easier but it adding more and more time on my part to create and setup all the information and layout for the new stuff. The biggest thing I've got to teach thee staff on how to use all the functions like store, payment, support tickets, etc. So far they are enjoying the site and making their jobs much easier now. Less phone call, less emails, and communication get jobs done because every see whats going on.
-
Explain that one? Like SR I know I've got a lot of hours in the site getting just converted and fired up. Then now all the conversion of data and pages is even more intense. Still got to do the 4.2.0 upgrade there and finalize the last bit of conversion with static pages which are an SEO train wreck and need some TLC to make right. At least it up and running...
-
That update is maybe 10-15 minutes to do. The fun part is configuring the new stuff depending on the client. At this point I doubt most of my clients will use much of the new stuff. Now M73M I know you guys (staff) will want a few things. Not as of yet. But I admit you got a good idea but might not quite work quite right for monthly being that updates may be far a part or several close together. I will admit good idea to think about.
-
Dealer fluid is roughly 25 to 28 dollar a quart. Making it $100 to $112 dollars a gallon. 50W Transmission Fluid $139 for 5 gallons. Making it $27 a gallon or $6.80 quart... I say skip the dealer lube it no longer manufactured what is left on the shelf is going for high prices. Even half the price of AMSOil...
-
That is one I didn't want to risk it with. If there happens to be GL-5 in it then it possible to do damage to the syncros. The whole problem is finding a GL-4 fluid that is synthetic and in the 75w-85 range. Being that Mobil SAE 50 is actual in the 90W range but the 100*C centistokes values isn't very far off from the factory fluid really close. That why I'm with Mobil 50 SAE Trans Fluid. so far I'm nearly 50k miles on it and the last inspection of fluid color still looked honey colored like right out of the 5 gallon bucket. Same stuff that Eaton Fuller transmission in big trucks uses. Now I know that I don't have to change at 50k miles because the fluid hasn't even darkened or discolored yet.
-
I would do a new Timbo and the do the APPS relearn then you should be set. Ditch the electronic sensor like Stock APPS or the Wells APPS. Timbo's APPS it completely mechanical and no electronic.
-
I would have done like a V or U sweep pattern with the stinger that should help.
-
So that is 6 CYL mode. So that means the high idle software is NOT enabled.
-
Yeah, that's a current version setup. Also looks like it's in good condition. Typically you toggle the mode BEFORE you start. So select 3 CYL or 6CYL for cold start. Then start the truck as normal. It should rise up in RPM within 5 minutes typically. It will not instantly rise up there is a period of time before the idle rises. It will step up slowly in about 100-150 RPM bumps till it reaches 1,200 RPM. 3 CYL will not work if the coolant temp is above 140*F already. 6 CYL should work at any coolant temperature. If the high idle software isn't enabled it will not engage high idle no matter how long you wait... A lot of people have issues with a Dodge Dealer and getting the high idle enable correctly. Smarty tuner is the easiest just flash a tune then flash back to stock.
-
I'm going to do the smart thing... I've got a spot in Parma, Idaho I'm going to hide the RV at for the month of August. This is only about 15 miles from Ontario, OR and about 37miles from Catfish Junction. So you all can have your crowded RV park I'll go back and hide in a quiet spot in Parma, ID.
-
That way he can ride the horses home when the Cummins fails.
-
So I gather you going to create living quarters in the trailer? Can we get an interior picture?
-
Sure will... But first I've got to have a reason to pull the head...
-
Ok... Slightly bigger compressor (+3mm over stock). Unknown on the turbine size. 14cm2 housing better exhaust flow. I'm going to say this might be slightly laggy. My 60/60/12 HX35/40W is bit laggy on just stock injectors and Quadzilla untapped. I would consider 62/68/12 turbo before the one posted.
-
Few things I've been helping him with and improving the power and economy of the truck. Been a good challenge being he's got 37" tires. I got @Snow Dodge to change up to 4.11 gears and made a good improvement in power and economy is still OK. I finally got him to pick up the High Idle Kit yesterday that he purchased back in December. I know some of his future plans are to ditch the Edge Juice and add Quadzilla Adrenaline then have me install the high idle kit. Funny part is he's got one of old "Prowelder" (i think) high idle kits from way back. The ones made in a plastic box with 3 switch before the MPG fooler came out.


