Search the Community
Showing results for tags 'valve adjustment'.
Found 13 results
-
It is suggested to be done at 135K miles which I think is too far down the road. Mine where out of adjustment a bit at 92K miles. So this is how I did my valve adjustment on my truck. Valve adjustment is fairly simple to do and does require much for tools. You need a feeler gauge set (0.010 and 0.020), 9/16" box wrench, 10mm short socket, 15/16" socket, both 3/8" and 1/2" ratchets, Allen wrench and a mirror. The first thing you need to do is pull the valve cover off the engine. You'll need a 10mm short socket and a 3/8" ratchet. Loosen all the bolt till you can lift the bolt up. Don't bother removing the bolts from the valve cover. Once you got that the valve cover will come off on the passenger side. You got to slide it towards the turbo and work it over the top of the heater hose. Take your time is will go... Now you got to remove the breather cover on the gear cover. It just twist off. Once this is removed you won't be able to see the gear unless you use a mirror. Now you need to use your 1/2" ratchet and the 15/16" socket to rotate the alternator. You want to turn it towards the passenger side (or towards coolant bottle). You want to get the gear to be in the TDC (Top Dead Center) like in the picture above. Now you'll start adjusting valves. But you can adjust all of them right now. Intake valves 1, 2, 4 and Exhaust valves 1, 3, 5 which I've circled for you. Using a feeler gauge you want to adjust all intake valves to 0.010" gap and all exhaust valves to 0.020" gap. You'll be inserting the feeler gauge like shown. This is the part you got to take your time on. As you'll notice as you tighten up your adjustment screw the feeler gauges seems to be pinched in-between but try to hold the feeler gauge flat you'll notice it get loose again. So take your time... Now when you get ready to tighten the lock nut finger spin it tight. Then as you tighten the nut you go to hold the adjustment screw still. But if you notice your gap is loose twist both nut and screw tighten a little bit. Or twist the adjustment screw loosen as you tighten the nut. This will increase or decrease the gap a little but not much. Now that you done this set now you go to do the other half of the valves. So now twist the alternator some more till you see (BDC -Bottom Dead Center) for the VP44 pump gear. Now adjust the the rest of the valves. Intakes 3, 5, 6 and Exhaust 2, 4, 6. They are marked in the picture below. Double check all the jam nuts that they are TIGHT! You now have completed a valve adjustment on you engine. Now you got to reassemble the valve cover. Replace the gasket if it damaged. Then remount the breather cover on the gear case and hook up the vent tube. You'll hear a slight difference when you start the truck up. It going to be a bit quieter. Let it idle a bit and double check your valve cover for leaks.
-
 I was turning the alternator nut to get the valves to TDC when all of a sudden the nut comes loose and now I can't get it tight because the pulley spins with the nut. I'm not familiar with how to work alternators or how to adjust them so any help is appreciated!!
 -
Hey,I'm thinking I need to set my valves on my truck sometime soon, but I have a few questions.1. Are the valves set hot or cold???2. Does the valve cover gasket have to be replaced??? Or is it reusable?? It cost $133 from O'Reilly's!!3. Do you just set the engine to TDC on any cylinder or does it have to be #1?? Then you just rotate 180 to BDC... that's right??I've set a lot of valves on VWs, but they are different as you turn the engine to every cylinder!Thanks,Winslow
-
I am going to adjust valves on my '02 and so far have the valve cover off, so far so good. Now I see that I need to move the engine to TDC which is noted on the pump gear housing. HELP...is this pump gear (with the indicator line) under the Crankcase Breather??? I have the hose off and can't seem to get the Crankcase Breather off if that's where the gear is located.Great pictures and help on the link here for adjusting valves but the part about the gear with the TDC mark was not shown. I have the Dodge Shop Manual on CD and it shows the breather as coming off....how do I get it off and if I do get it off, how do I get it back on securely? I hate to start prying on stuff and break it. Waiting for further instructions. Thanks.
-
so i work at a gas station just down the road from me, i always talk to my costumers that drive dodge cummins vehicles! there's one lady that come's in almost everyday day, she has a 96 2500 ext. cab needless to say it's not the happiest sounding 12 valve i've ever heard.... i asked her if she had ever had her valve lash checked ? she looked at me like i was talking about some sort of space shuttle part lmao i then found out the truck has 350,000 km on it (still a baby) but probably needs a valve adjustment! regardless she told me that i should come adjust them for her and that i should give her my # so i did. after talking with her i soon found out she doesn't really care about her valve lash ;) but it still needs to be done. now i know ISX is the 12 valve p7100 king here so i was hoping ISX or someone could tell me if the valve lash procedure is the same for the (94-98.5) as it is for the (89-93) motors, and if there was a write up done with a tool list and a "how to" adjust valve lash on a p-pumped 12 valve, i want to make sure i get it the first time!! thanks for any help in advance and hope ya guys get a kick out this, i sure did yet another reason to love a cummins 12 valve!!!! i know i shouldn't say it but i'm going to anyways cuz we all know she'd rather be cummin' then strokin'
-
tried to adjust my valves today and could not turn the engine using the altenator bolt. i turned it both ways and it slipped either way. i clouldnt figure out a way to put more tension on it with the tools at hand and dont own a barring tool. any of yall ever done it a differant way?
-
 New Blue Chip X, Marine Injectors and a valve adjustment, with a new filter thrown in for good measure:cool:
 -
Here is how to find absolute TDC that you must know in order to set your timing or stuff like that that needs to be tedious. You will need the cummins barring tool. It is not absolutely necessary but it does make it a lot easier as you will need to be barring then engine over very slowly. You will also need a dial indicator, doesn't have to be insanely fancy. Now the actual steps. [*]Bar the engine over until you are at TDC compression/power #1. To do this, you watch the valves on #6 and stop when they overlap. If you are going clockwise the exhaust will shut and the intake will open, when that intake moves that is when you stop. If you are barring it counterclockwise (alternator cranks this way) you would watch the intake close and stop when the exhaust starts to open. [*]Bar the engine backwards a little bit, maybe 2-3" going by the top of the damper, or at least 25* rotation, remember that this is backwards so it would be counterclockwise rotation. [*]You should now be at 25* or so before TDC. Put the dial indicator on the top of the valve and loosen the adjustment nut on the pushrod and measure about 0.150 down from where the rocker contacts the valve. DO NOT FORCE IT! It should turn easily all the way to that point, otherwise you may be hitting the piston and must not have cranked the engine back far enough. [*]Now turn the engine very slowly clockwise so that the piston will start coming up and hit the valve. You must go slow because you only want it to hit it and deflect the gauge about 0.002". So if you zero'ed it out at 0.150", you would want it to drop to 0.148" and stop. [*]At this point, mark the damper any way you want at any point of accurate reference that you want. I used tape to denote the edge of the speed sensor. If your damper is oily, clean the oil off so the tape/marker/dog hair/whatever you use to mark it will not be rubbed off. [*]Now, without touching the dial indicator (needs to stay in that exact spot and measurement) back the valve lash back off until it is just contacting the valve, or looser. It must be retracted or the piston will hit. [*]Rotate the engine clockwise about 3-4" or 35* so we know we are a good way past TDC. [*]Set the valve lash to the same 0.150". [*]Rotate the engine counterclockwise slowly until it hits the valve and deflects the dial indicator the same 0.002" (will read as 0.148"). Make another mark at this point. [*]Now back the lash back off, set it back to the stock lash setting (0.010" Intake/0.020" Exhaust) as now is just as good of time as any to set it back since it is on TDC compression/power, you will be on the inner base circle of the cam. [*]Now you take those 2 marks, measure them with calipers or something accurate though a tape measure will do if you have good eyes. You will probably get something between 1" and 1.5". [*]Divide that measurement by 2 and measure from one of your marks towards the other mark (which should be the center of those 2 marks), make a mark at this point. This mark is absolute TDC, so if you want to not have to do this every time, I suggest you make this mark permanent by various means. Some tips: [*]The permanent mark can be made with a steel cutting saw blade, cutting a 1/16"-1/8" deep slit into the damper. [*]You can use a mill to machine a mark into it. [*]The edge of a file may work as well. [*]If you think your going to move the dial indicator for some reason, you can zero the dial indicator right at the point where the valve contacts the rocker, then you can do whatever you want and just reference that point each time, going 0.150" from there. [*]Do NOT forget to back the lash off after making your mark or you risk forgetting and cranking the engine into the valve and doing damage. I can't stress this enough, take your time and read each step carefully. http-~~-//www.youtube.com/watch?v=J8YWQs_QMAU
-
- 1
-

-
- p7100 timing
- tdc
- (and 1 more)
-
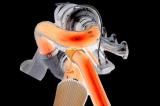
So I changed the lash to 8 intake 15 exhaust. It still spools really good but not the jump I was expecting because it was a huge difference when I went from 10/20 to 8/18 so I thought 8/15 would be a big jump again on spoolup but I don't think it changed that much. I am thinking me cleaning the turbo and all the crap off of the turbine shaft must have gave it a big kick. I will say this though, it runs reallllllly smooth now. The power just rolls on perfectly, no points on the throttle that are more powerful than others, even down at lugging speeds. I might go back and set the intakes down to 6 and see what happens.
-
http://mopar.mopar1973man.com/cummins/2ndgen24v/valve-adj/valve-adj.htm just got done running the valves.#6int and exhaust valves were out alittle.got them all adjusted in time before winter time gets here.:thumbup2:fired it up and the little tick tick was gone:thumbup2:
-
 Lately I've started to notice what sounds like a slight tapping after my engine gets up to normal temperature. It's a very light tap & hard to hear but you can definitely hear it when you listen closely....Sometimes it even sounds like a clock ticking fast when driving normally.....Only thing I know that I have changed the last month or so is that I've been running Stanadyne Performance formula in my diesel....Is this an exhaust valve or something that I'm hearing?
 -
I set my valves today, figured I would show everyone how I do it. As long as you know the firing order and valve lash (which are both on the cummins id tag) you can set the valves. This is called the valve overlap method. Basically the pistons have running mates. Running mates are pistons that go up and down together in exactly the same positions, as in they both hit TDC at the same time. The difference is that one of them is on the compression or power stroke, and the other is on the intake or exhaust stroke. To find the running mate, you simply take the firing order and split it in half. Our cummins' firing order is 153624. So splitting it in half would mean 153-624. If you put the second number under the first, you would have 1/6 5/2 3/4 So 1 is 6's running mate and 5 is 2's, 3 is 4's. Since the running mates are 360 degrees out of phase, when one of the hits TDC compression/power stroke, the other is hitting TDC exhaust/intake stroke. This is perfect for setting valves because you can simply watch the running mate of one piston and it will be on the exhaust stroke with the exhaust valve open, when it hits TDC and transitions to the intake stroke, the intake valve will open. Once you see that intake valve move, stop. This is TDC, or as close to TDC as we need to be. The running mate will be on the very end of the compression stroke and the start of the power stroke and the valves will be on the opposite side of the cam lobe since they must be shut during the compression and power strokes. You can now adjust the running mates valves, intake and exhaust. For example. To do the valves on #1, you would watch #6. The #6 will open and close the exhaust valve and once the exhaust valve closes and the intake starts to open, you stop and now you know it is at TDC. Since 1 is it's running mate, you know 1 is on TDC compression/power so you can do both valves on #1. Now look down the line and you will see that the exhaust valve on #2 will be open. Since 5 is after 1 in the firing order, 5 will be the next valves you adjust, and since you watch 2 because it is 5's running mate, you will watch #2's exhaust valve close and start to open the intake, you stop and do the valve on number 5. Basically you will be turning the engine 120* to do each valve. You will do them in the same order as the firing order. Here is the reference order. Do 1 by watching the valves on 6. Then 5 by watching 2. Then 3 by watching 4. Then 6 by watching 1. Then 2 by watching 5. Then 4 by watching 3. The next one you watch will have the exhaust valve open so that will be a clue that you are doing it in the right order. It is a very fast and bulletproof way of doing it. It works on any engine also. Just split the firing order and stack them and you have your running mates like I showed earlier, it always works.
-
 Ok - so had tranny TC + VB replaced.Just had the evap/heater core replaced.Picked up the truck and I hear a funny sound - hard to describe - like a very low/dull whir/thud that "appears" to match engine rpm - making me think drivelineInitial thought was TC bolts - so I looked at them and they seemed tight with no play.If I had to say as a "guess" it sounds more like its coming from the block itself. Hard to say. Its very low compared to fan/engine and like a low whirring/thud sound as engine shaft spins.Could it be valves or something - I know we tightened my valves a few months back and no issues and not much play to begin with ?? Any other thoughts ??No codes ........ I have noticed a little black smoke out of the back taking off the line Could the higher tranny pressure in the new VB cause that near the tranny filter besides the block ? :shrug:I know its hard one to diagnose without codes or isolating the exact point.I just changed oil and filter - no differenceCoolant a little low - will top off today.Was thinking cleaning battery terminals as well as well as any sensors ? I have already done the MAP sensor.Throw them out there - keep in mind the new VB which is when this started to happen (or pretty close).John