
IBMobile
Staff
-
Joined
-
Last visited
Everything posted by IBMobile
-
Here is one example. This type can be used to connect the exhaust manifold to the head pipe on a side mounted engine.

-
Did this last year. https://mopar1973man.com/cummins/articles.html/24-valve-2nd-generation_50/54_cab-interior/manual-air-recirculation-control-r694/
-
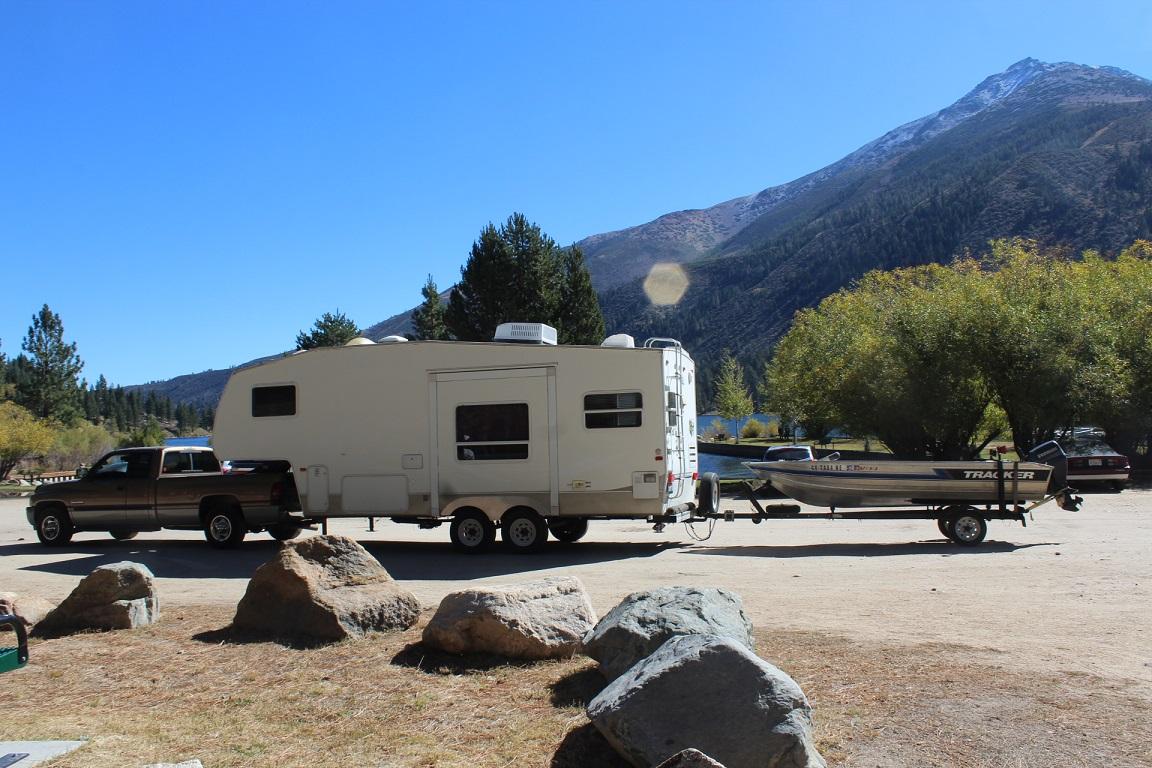
Winterized windshield washer fluid, engine coolant condition, tire pressure/condition, diff oil condition, etc. . I carry a spare belt and hoses but never needed them. I've done that route a few times I-15 to the I-70. That one stretch on I-15 through Arizonian is fun. Be safe.
-
Cardboard is all that I've used for the past 26 years. With cardboard you don't have to jack up the car very high. You can slid in and out from under easily. It helps keep the concrete floor clean under the car. When it gets dirty recycle it and get a new piece. I get all I want from the dealer's parts department or the local Costco.
-
Pandemic Party Pooper Police (PPPP) telling a bunch of questionably impaired people to get in their cars and drive away. Maybe the police set up a sobriety checkpoint at the bottom of the hill.
-
Let's see, a three day weekend, so It's either Las Vegas or replacing a heater core.
-
I've work on cars for 50 years now and I could wright a book on the incompetence, shenanigans, and outright thievery in the automotive repair sector. Here are just three. Around 1997 a customer's daughter, on a Sunday, overheated her car and since it was close to the dealer she had it towed there. Monday morning the dealer called her and gave her an estimate of $3k to RnR the cylinder head, machine work and parts and it could go up if the head is bad. She then called me and I gave her an estimate of $2K. She called the dealer right back and told them not to do any work on it. The service advisor said it was to late and the cylinder head had ben remove and sent to the machine shop for repair. T he customer relented and said OK. The service adviser then ran out to the shop and told the mechanic who had checked the car out to " quick, get the head off the engine. The lady is thinking about taking the car out of here". How do I know this? The mechanic told me; I've known him for 30 years. Around 1986 The parts department asked if I would go to another auto repair shop "show them how to install part". I go there and after showing the owner/mechanic of the place hoe it's done we get to talking. He shows me a BMW He just fixed. He tells me it had and oil leak in this one place but he's going to tell the customer that the leak was some where else so he can charge more money. He then goes on to tell me how "you have to grab the customer by the ba--s and squeeze" to get more money. He then offered me a job there. I politely said no thank you and left. Just the other day I get a call from a long time customer saying she had new tires put on and while there they did a free brake inspection. They tell her the Lexus needs rear brake pads and rotors. I pull a rear tire off and check. Sure enough, the brake pads were at 2mm left but the rotors were still plenty thick. I cleaned and lubed the brackets and calipers, installed new hardware and pads, called it good. They were ready to make money on unneeded parts and labor.
-
For Automotive engineers this is call job security. I have a cheap Airtex lift pump plumed into the system if I need to prime, like when I replaced the VP44 and then again with the injector change out; other wise the fuse is pulled and it just along for the ride.
-
I've pulled a lot of Dana differentials apart. Volvo used a Dana 30 in their 240 model and the 31 in the 740/940 model. Yes a spreader is nice to have to get the carrier out but I've seen mechanics use a big pry bar to get them out. When putting it back in a spreader is definitely need. The Dana differential are well built with tight machined tolerances. If you use the same carrier, ring and pion then, the side gears, spider gears, and all bearings can be replaced by using the same shims in the same places. I've done this dozens of times replacing spider gears , carrier and pion bearings. I even did a ring and pion change out once using the same shims with out a problem. Be sure the carrier bearing retaining caps are marked before removing them so they go back the same way they came off. Some times the cap and housing would be marked from the factory with an A on one side and a B on the other. If they aren't marked use a punch to mark them; one dot on the top of left cap and housing and two dots on the top right side cap and housing.
-
They live

-
No, they are not. CDC estimates that influenza was associated with more than 35.5 million illnesses, more than 16.5 million medical visits, 490,600 hospitalizations, and 34,200 deaths during the 2018–2019 influenza season. The US 2020 Corona (CCP) virus infections are over 19,148,000 with 337,612 deaths. Now, are all these deaths really due to the CCP virus or are they purposely misdiagnosed and reported for financial gain/control? These statistics will have to be reviewed with a jaundice eye.
-
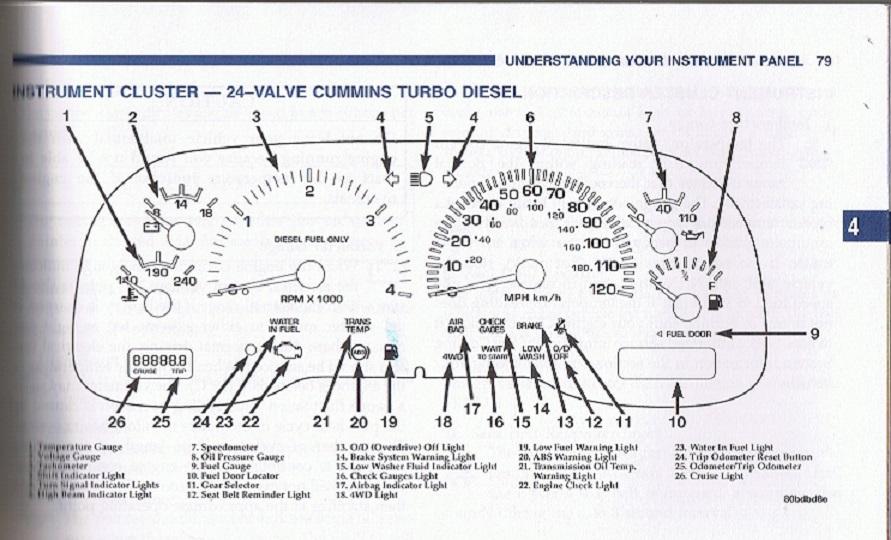
There is no oil light
-
I don't know of any oil light in the instrument cluster of a Cummins turbodiesel. Later I'll post the instrument cluster page from the owner's manual.
-
The only sensor for oil level is the oil dip stick. No need to replace.
-
A wonderful Christmas to one and all

-
Yes I would drop the entire driveshaft, Mark front and rear halves for alignment before taking the rear half off first.
-
In the parts look up for a 2001 Ram 2500 on page 310 you will find the part number is 04773014 for a 4x4 (line 7,8), 5.9L diesel (engine code ETO), 5 speed manual (transmission code DDX). This bearing has the 1.575" bearing ID.
-
Could the ECM be getting funky and turning the light on along with drivability problems?
-
Try this link https://www.autogenius.info/ford-f-53-f53motorhome-chassis-1996-fuse-box-diagram/ https://www.carknowledge.info/ford-f53-1997-wiring-diagrams-fuse-panel/
-
Most of us that run a mechanical fuel pump either have the electric fuel pump disconnected, like I do, or don't have one installed at all so we never see nor need that ¼-2 seconds of initial fuel pressure.
-
Check the connector at the rear axle for starters
-
Like your plugs aren't to us and how about that driving on the wrong side of the street.
-
Dripley ready for his moon drive.

-
I use the micro relay type that you find in the PDC for my Airtexs backup lift pump. There is no problem with it cycling with the key bump. Check out the relay in option B the article below. Installing Protective Lift Pump Relay - Fuel - Mopar1973Man's Dodge Cummins Forum
-
Manual Air Recirculation Control The HVAC control in a 1999-2002 2ed generation Ram only has the ability to recirculate air when either the controller is in the OFF or MAX A/C. In all other positions outside air is entering the cab interior. This modification will give you the ability to either have the air recirculation controlled by the factory HVAC controller or have the system in recirculation in any position. How it works The black hose supplies the vacuum to the HVAC system. The green hose supplies vacuum from the HVAC controller to the recirculation actuator. When the mode knob is in the OFF or MAX A/C positions vacuum is applied to the actuator which moves a “door” that blocks outside air from entering the cabin. The mode knob in all other positions blocks vacuum to the recirculation actuator keeping the door open and allowing fresh air into the cabin. The vacuum controller when de-energized will allow the factory settings. When the controller is energized there is constant vacuum to the actuator keeping the air recirculating door closed in all mode settings. What you will need · Vacuum controller (reversing valve) Hella 722240130 · Toggle switch (12V) · 6’ red 18-16 AWG · 3’ black 18-16 AGW · Connector SMP HP3860 or SMP S · Vacuum hose fittings (T and 90°) · Glue, solder, heat shrink, or butt connectors · 5 amp fuse I went to a Pic Your Part wrecking yard for some of these parts. The vacuum controller, connector, wire, and fuse, were from a 2001-2006 Volvo S60/V70 Turbo. The vacuum controller and connector can also be found at Rockauto. The vacuum fittings are from various vehicles. The HVAC controller is from a 2001 Dodge ram1500. What to do Remove the panel below the steering column, this will give you access to all vacuum control hoses. They are located in a bundle left of center under the dash. Find a suitable place to mount the vacuum controller next to the bundle. Cut both the dark green and black hoses and the appropriate hose fittings are installed. If the fitting is a little lose a dab of glue such as Goop for automotive use can be applied to make the connection air tight. Run the red wire from spare fuse location #16 in the junction block at the left side of the dash to the toggle switch and add a 5 amp fuse. The toggle switch can be mounted where you feel comfortable using it. Its style and size is your choice. Install the wire from the toggle switch to the vacuum controller plug and the ground wire from the vacuum controller plug to a metal part of the dash (ohm test for suitability). Push the plug into the controller then secure the controller to either the side of the HVAC housing with double sided tape or zip tie it to something that does not move. There are no warranties implied or expressed. Mockup of controller and hoses Written by: J. Daniel Martin, Martin’s Mobile Maintenance AKA IBMobile 12/17/2020