

Leaderboard
-
Dieselfuture
Yearly Subscription9Points5,783Posts -

Tractorman
Yearly Subscription8Points1,456Posts -
dripley
Retired Staff5Points11,788Posts -
Dodge48
Monthly Subscription2Points19Posts


Popular Content
Showing content with the highest reputation on 01/23/2019 in all areas
-
It took me to 250,000 miles to get a Smarty S03, then 303,000 miles to upgrade from stock injectors. So maybe I am headed that way, but at the rate I am going I should die before I am "sick". - John3 points
-
My speed varied a lot. Maximum was 65 mph, but mostly 60 mph where there was no snow pack on the road. About 250 miles of driving was on snow pack - 30 to 50 mph. Overall, I am very happy with the RV275's performance. - John3 points
-
3 pointsNext time I need a yoke on rear end ( heard they go bad) I'm getting next size up and having Sadler powertrain build me an aluminum heavy duty driveshaft. With sealed Spicer joints.3 points
-
Got the HVAC case split this evening... what foam is the best for re sealing everything? I mean everything lol. Gonna try and make a video so I can share it will yall cause I have way to many pictures to upload lol.2 points
-
Where is it from, parts store? It can be junk new, I'd get an original denso one online or nations for more money. Put your original rebuilt one on and do the 5amp fuse mode like @Tractorman mentioned and see what happens. If you didn't change brushes and/or armature, there will be some extra ac noise.2 points
-
2 points
-
So... Need to test the green and blue field leads quick. BLUE field lead - Just unplug from the rear of the alternator and start the engine. Red Probe goes to blue wire and Black Probe to battery NEG. This should show battery voltage only while running. Key ON, Engine OFF there should be no voltage present. GREEN field lead - With it still unplugged and engine running. Red Probe to the battery POS and the Black Probe to the green wire. This should show battery voltage while running. Key ON, Engine OFF there should be no voltage present. Black Charge Lead - Should show battery voltage without the key on or engine running. If not the 140 Amp fuse blew.2 points
-
@mbloom65, I would be looking for something that might have happened when you changed out the original alternator, since it was working fine. Something as simple as a poor ground like @JAG1 suggests or something else that is being overlooked could cause the problems you are experiencing. If the truck were mine I think I would rig up a complete separate temporary circuit with either a fixed resister or a variable resistor and 5 amp fuse protection to the field control circuit of the alternator. This way I could prove whether or not the alternator is working properly without risk of damaging the PCM. - John2 points
-
-
1 pointOk I know several members have done this mod and said it was easy. It sure is easy. It takes about 2 hours from start to finish to complete this project. You'll need the terminal lugs and the metric bolt that @W-T specifies in his article. First thing disconnect your batteries. I unhooked the two negative leads. You need to gain access to the loom going across the front of the engine. So you'll need to remove the upper alternator bracket and the the two loom holders on the front of the block. I did this during my coolant flush project so my upper hose and thermostat are removed. If you have my crankcase vent that will need to be removed as well. Now I started at the battery and the alternator and started unhooking the wiring from these devices bring it forward. Now you start working on getting the split loom off the wiring. Start at the tape with a small exacto knife or razor blade and carefully split the tape to release the plastic split loom cover. Carefully remove it. I found out mine was brittle after all the years of engine heat. Once you remove all that slpit loom you can again split the spiral tape holding the loom together. Now you show be able to have both the ground lead and the alternator charge lead loose now. I will admit the alternator lead took a bit of work to release at the knot of tape on mine where it breaks out of the loom heading for the PDC. Just take your time with your razor blade and your get it released. You can clearly see the splice of the ground just like @W-T mentions in his article. Once you get the alternator lead out in one piece. Then the ground lead I used a pair of wire dikes and cut the ground right at the end of the splice. Now the alternator lead I reused the wire since it was in excellent condition. I mocked up the alternator lead by hooking it back up to the alternator like it should be and gave it a nice loop of slack then cut it to meet the positive battery terminal. On my terminal lugs, I took a hacksaw and scored the plastic collars and peeled them off for soldering. Then slipped the lug on and used a propane torch with the low flame and soldered the lugs right on to the wire. Good sold weld and this will seal the wire from future rot from battery acid and vapors. This is the completed alternator connection now. All I did was grab an old nut and stacked on the battery terminal. Now we are going to do the ground side. Now trim back the old splice and free the ends of the wires. Now strip back the wire so you can fit the wires into a lug. Again I did the same thing I took the hacksaw scored the plastic collar and peeled it off the lug and then slipped it on the wires and prepped it for soldering. Again just slipped the lug on the wires and low flame with a propane torch I soldered the lug to the wires. Now I cut the old plug off the splice on the passenger side ground and then trimmed the length of the wire with the plug so it would reach between the driver side battery and the gear case. Same again I peeled the plastic collar and slipped the lugs on and soldered with low flame propane torch. This gives you an idea where the wires go. Take your metric bolt and attach the ground wires to the case. Then the ground cable to the negative battery terminal on the driver side. Beyond this is just clean up. Now you need to tape up your loom again. I'm going to replace my split loom with a smaller size being the old loom was brittle and was breaking during removal. The only thing that should run across the front of the engine now should be the ECT sensor which is a twisted pair. The A/C compressor, A/C high-pressure switch, and the alternator field lead. Before AC noise level was 0.038 AC volts now after the mod its dropped to 0.015 AC volts (or 15mV AC). About the parallel cables... There is lot of folks being told they NEED the parallel the positive and negative cables. To test if you need that or not. Take a good quality DVM meter capable of DC mV scale. Now place a Black probe on the battery terminal and the red probe on the block (clean metal). Typically I see 3mV (0.003 volts) after doing the other part of the ground wire mod. Now take a set of jumper cables and go from the negative post to negative post. Also check the AC noise voltage with the jumper cable hooked up if there is no real change then you do not require the parallel cables. If the voltage drop is the same with the jump cables then you do not require the parallel cables because there are ZERO improvements. You can do this on the positive side as well. If there is a voltage change my first thought is to replace the BAD cables first before paralleling on a bad cable. All you do is covering up a bad connection. Adding the extra cables will not improve anything if it's not changing the voltage drop from point to point. Addon: Protection fuse or fusible link Some members are suggesting to install a fusible link or fuse of the same size at 140 Amps on the charge lead as a protection method. Just in case for some reason the diode bridge happens to short the positive side to the ground and doesn't start an engine fire. As for the size of the fusible link is still unknown as of yet. The factory is 140 amp fuse. The fusible link would be better suited than a fuse. I've found a few trucks that is incapable of doing a circuit breaker because of mystery loads and causing the breaker to trip prematurely. Fuse will solve this problem but make sure to carry an extra fuse. Addon: Resettable Circuit Breaker I picked up an inexpensive 150A circuit breaker from Amazon. The breaker does the job but over time the breaker will get weak and trip prematurely. I still favor the circuit breaker over a fuse for the alternator protection. Fuses you might go through several and be left high and dry without a spare and unable to drive home. Make sure you buy plenty of spare fuses if you go that route. Even with my backcountry travels I still trust the circuit breaker better.1 point
-
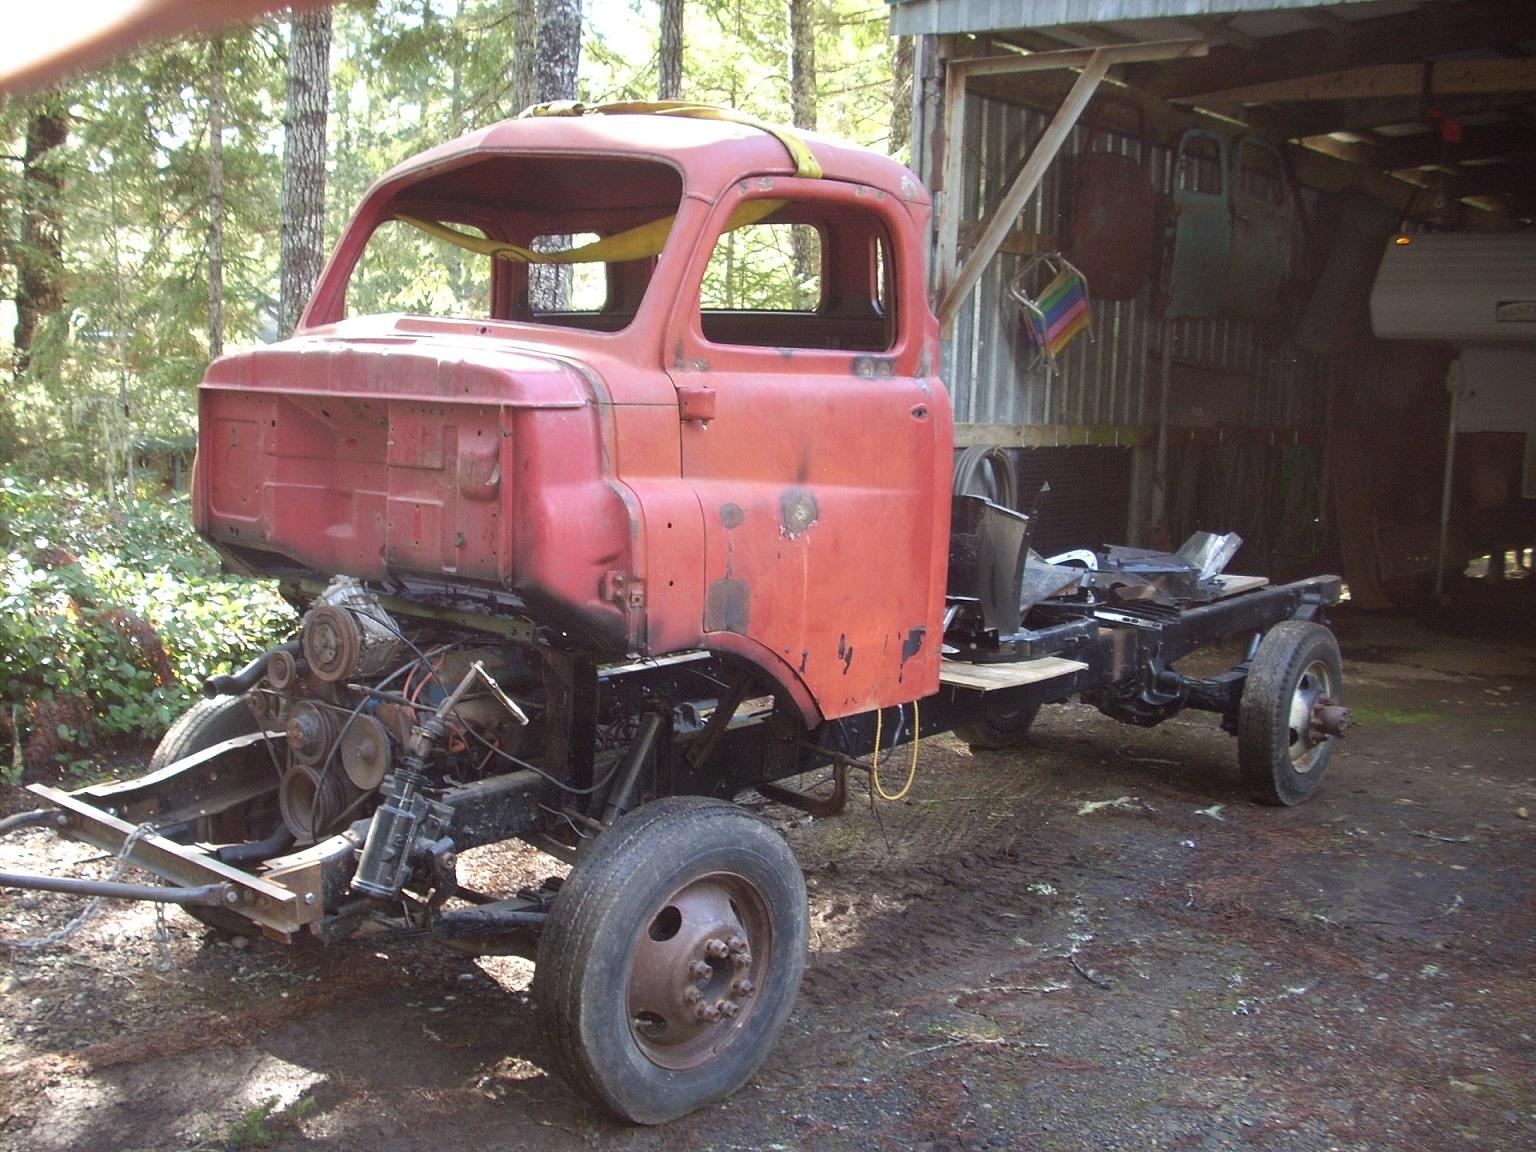
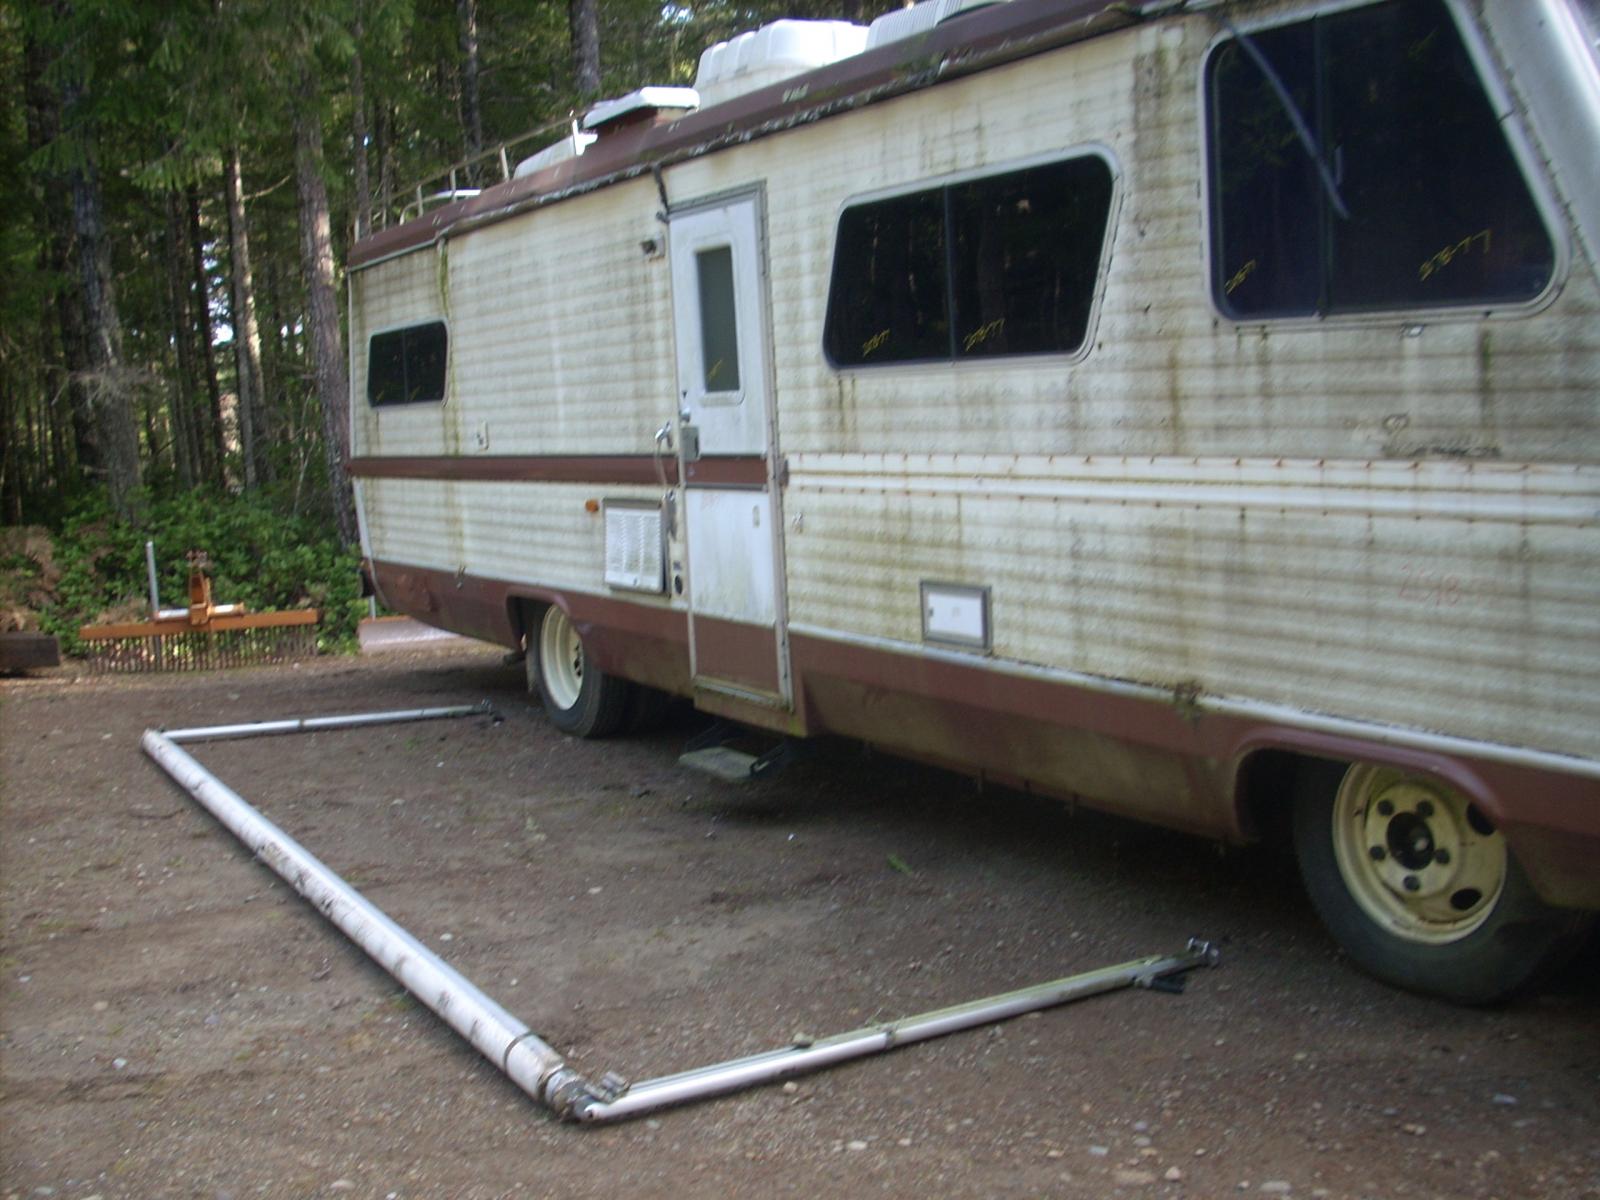
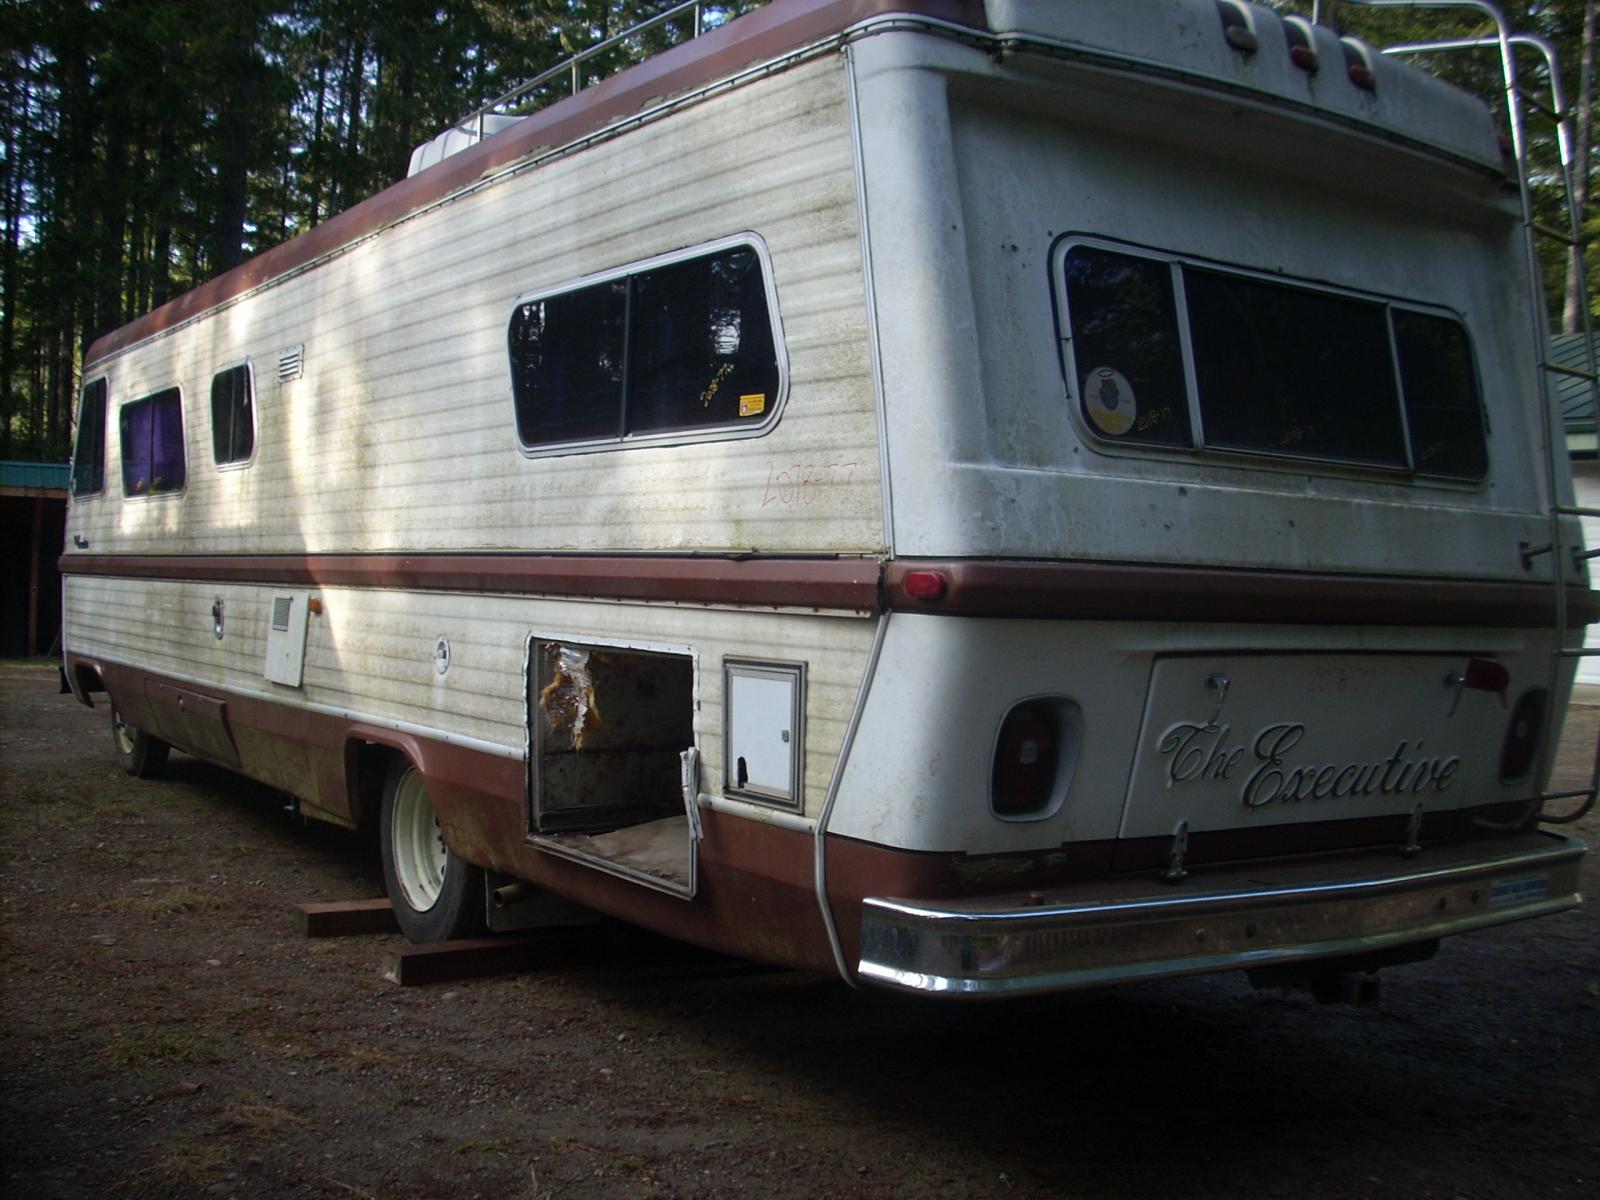
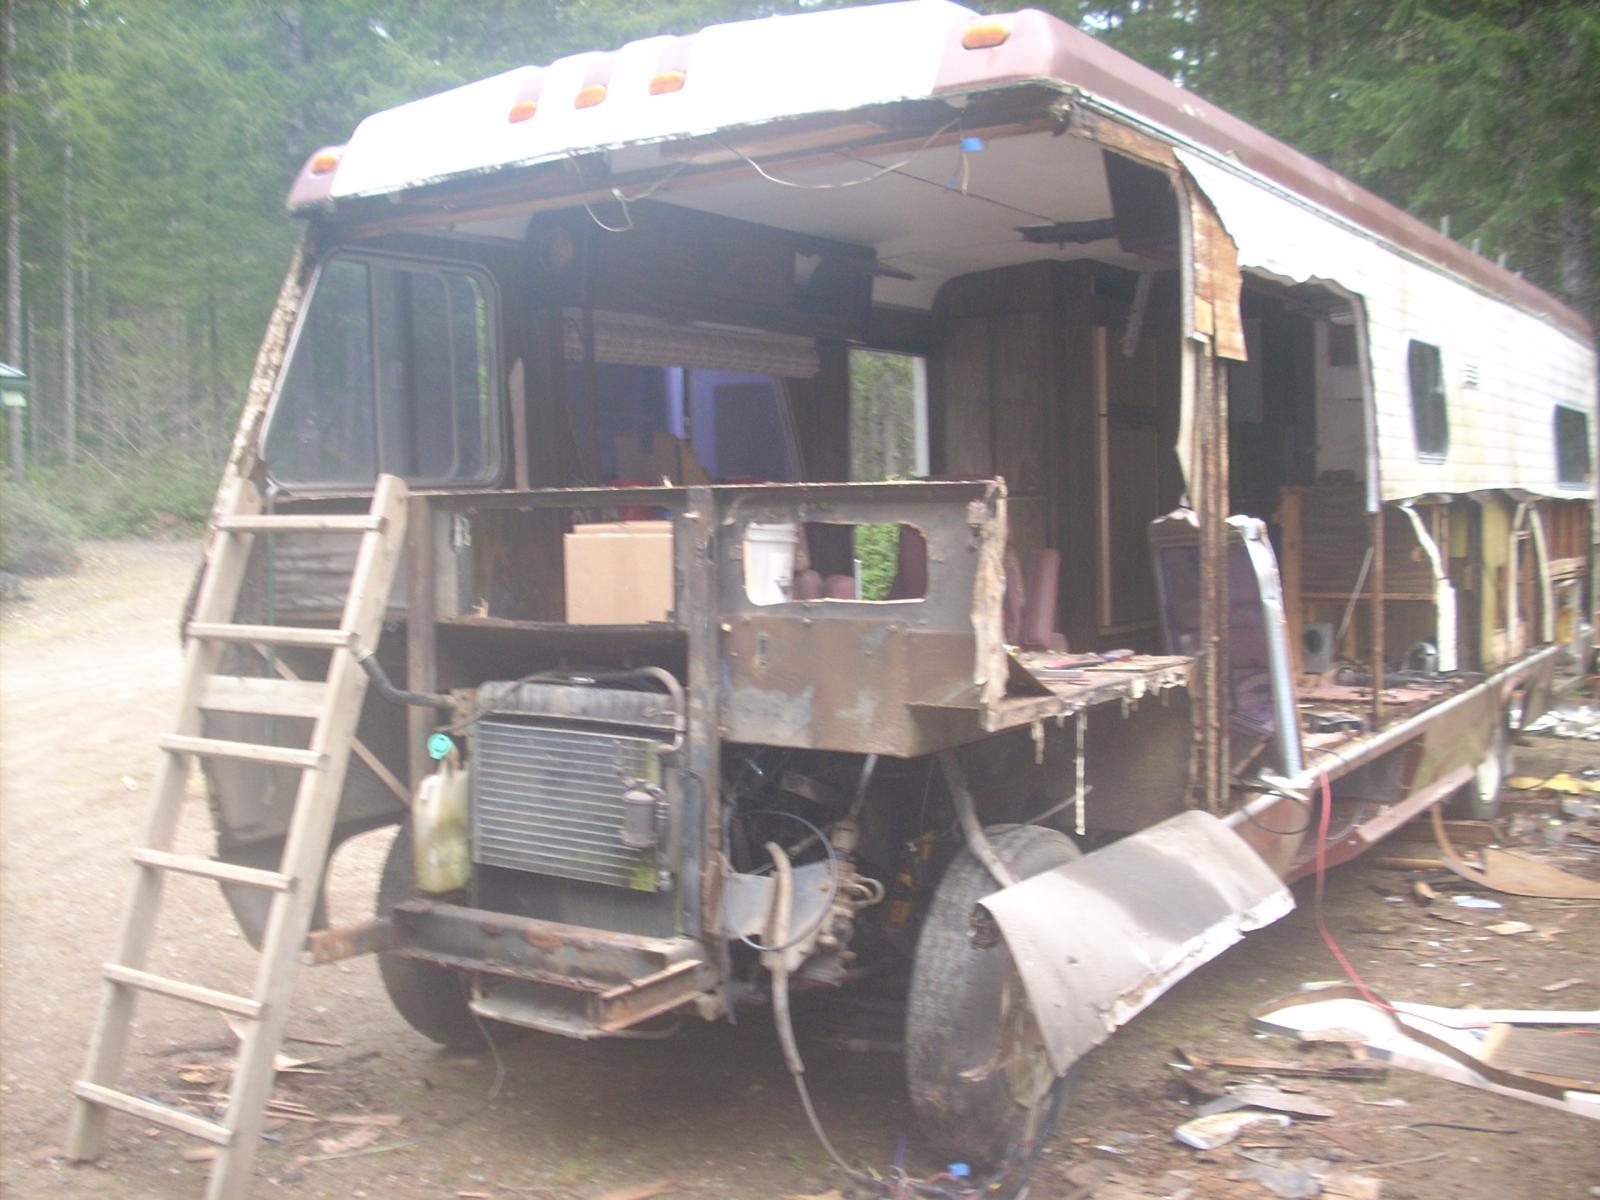
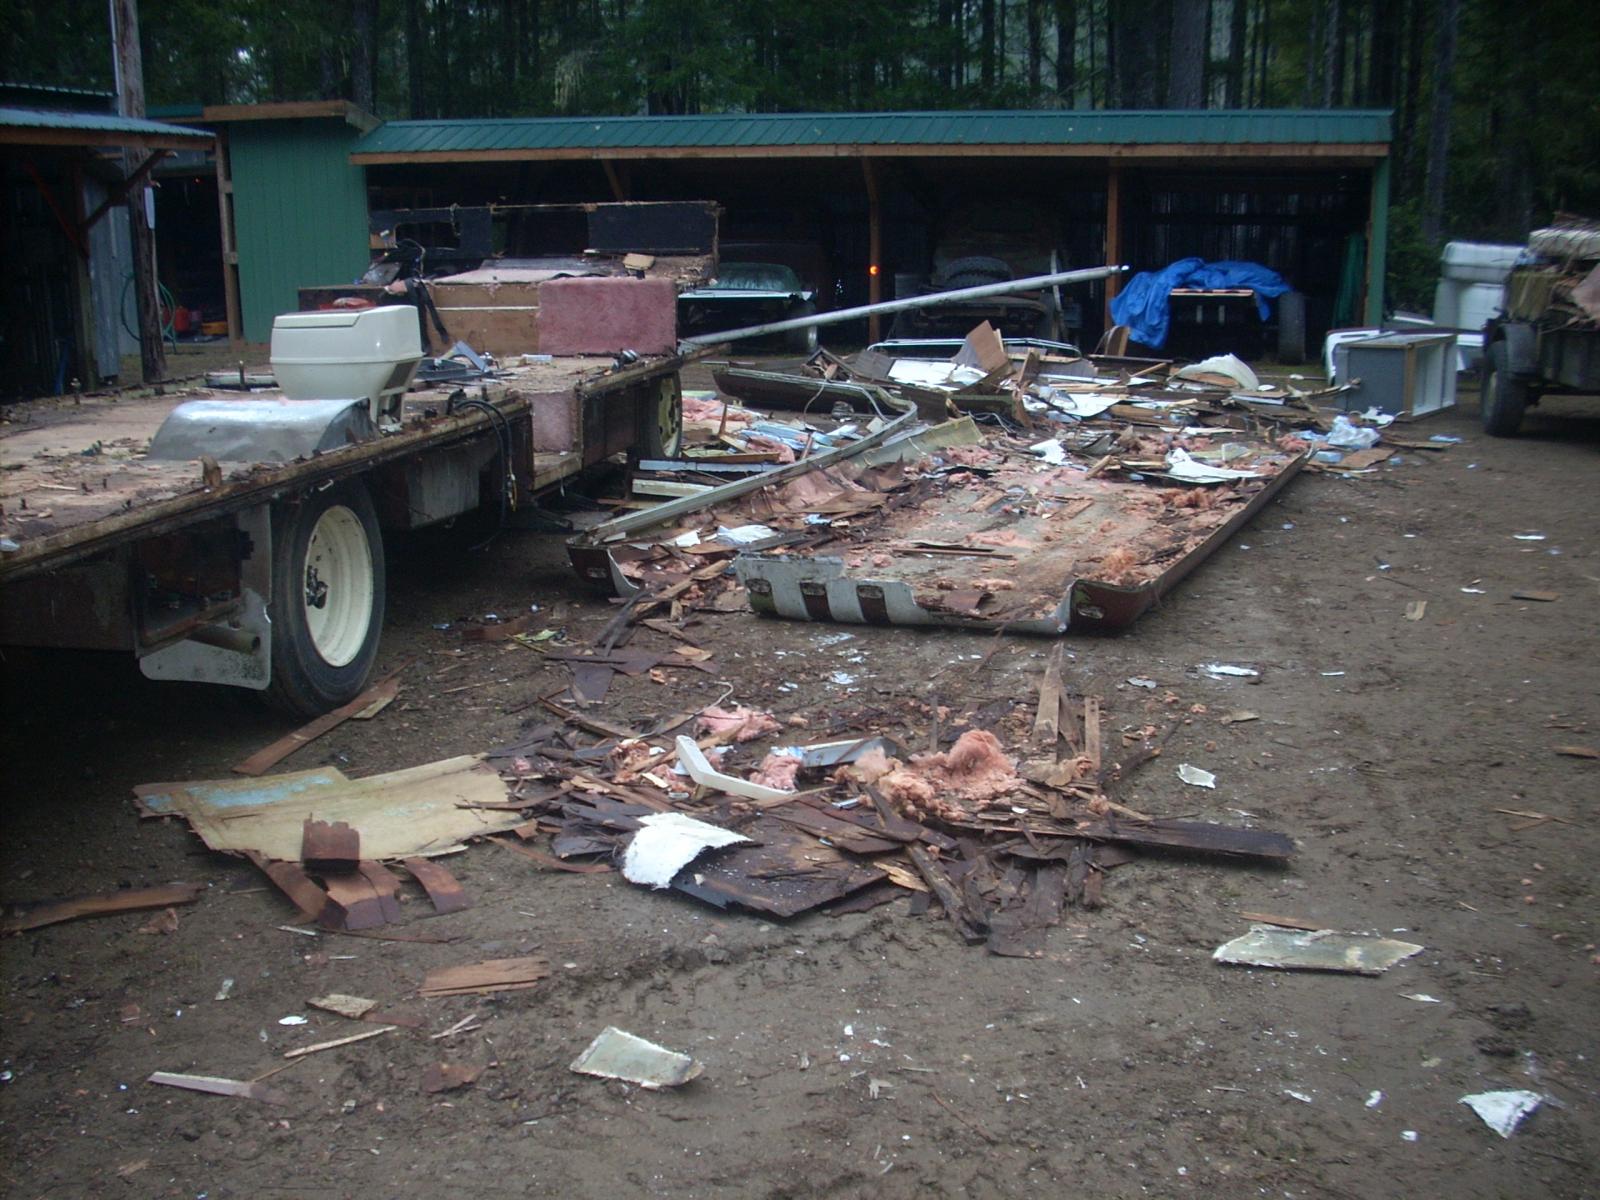
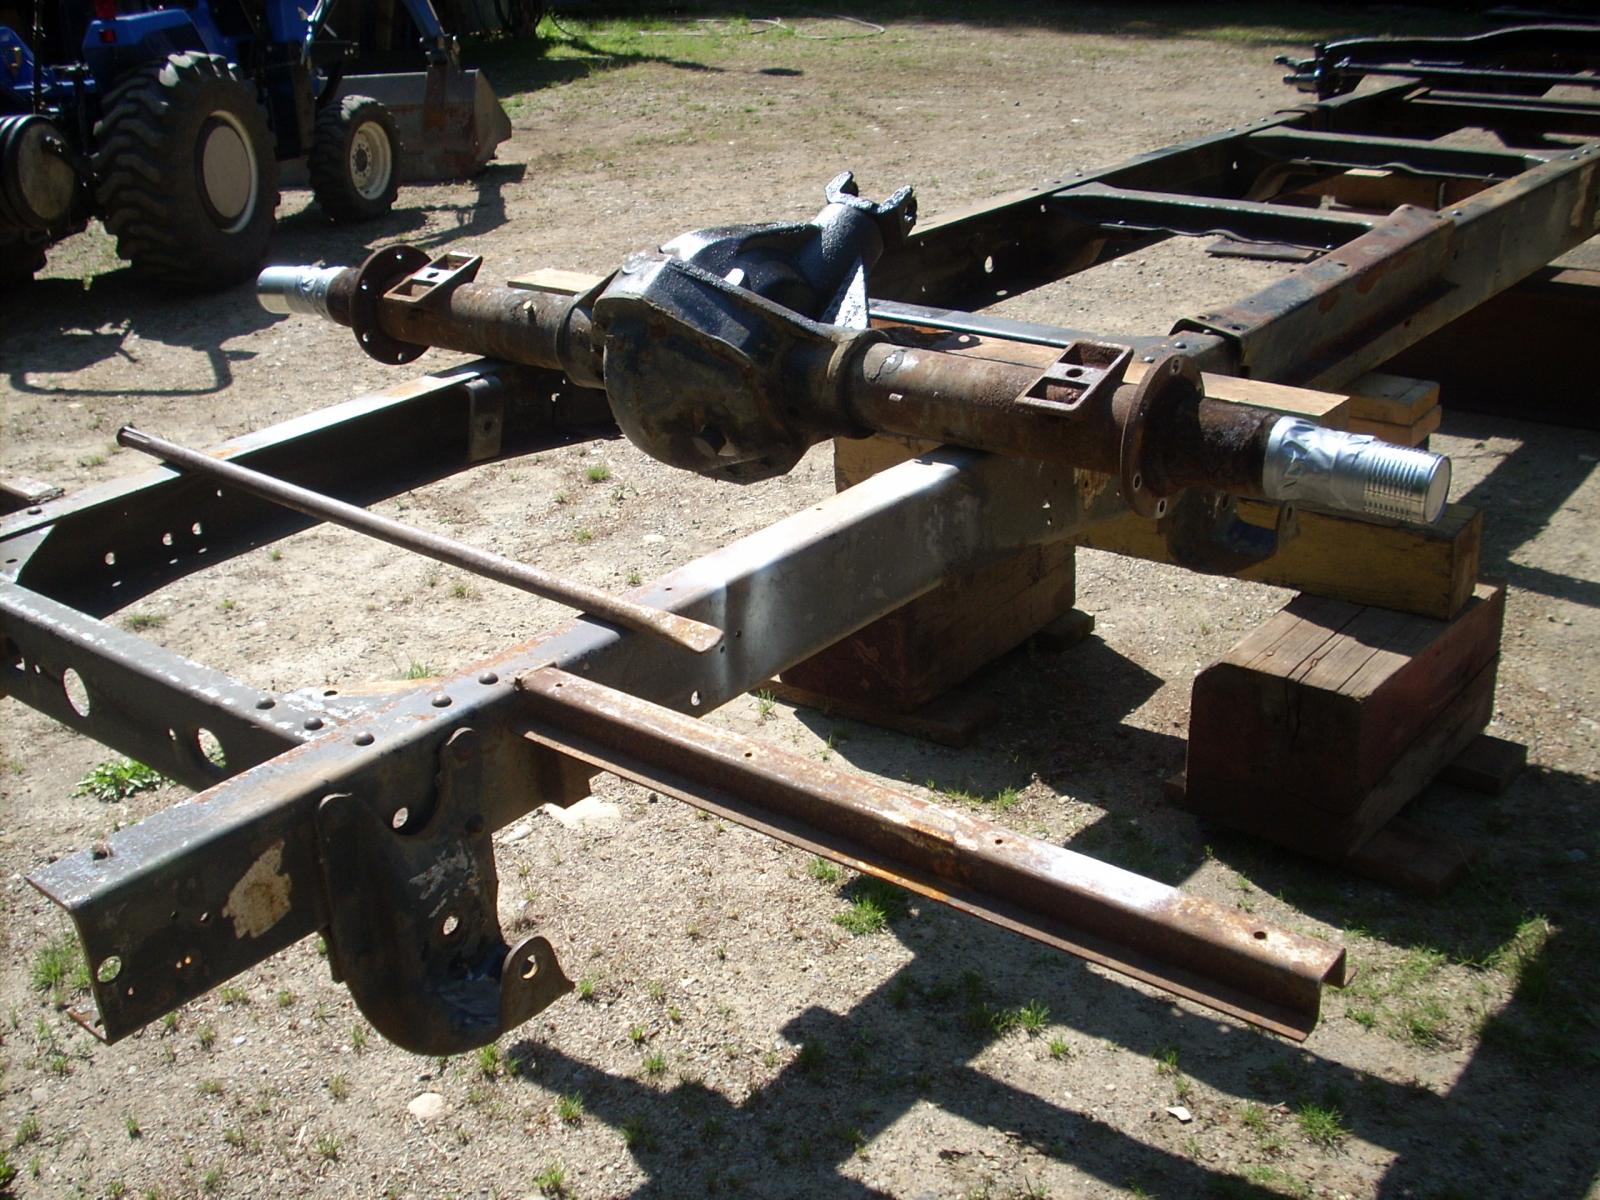
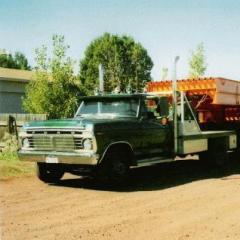
1 pointThese pictures reflect My "project" as I bought it. As you can see it has a 440/727 engine/transmission combination. In addition it is on a 1978 Dodge M300 MH chassis with 17.5 inch wheels. My intent on buying this was to restore it as a "truck", I'm not into the "slamming school", though I respect the right of others to pursue their vision; there are just too few of these particular trucks to deny them there place in history. Having said that, I always do what I call a performance upgrade to most of my projects; in this case I have opted to replace the 440/727 with a 1996 5.9BT low miles diesel and a 47re transmission. Following submissions will include the "teardown" of what became my chassis, then the "fitment" challenges (of which there were/are many). I do need some help in one area (that I know of), I badly need a 2WD wiring harness, my intent is to use a 96-98 wiring harness which accommodates the 47RE 2WD transmission. More to follow. Part 2: As I mentioned previously I wanted to build a truck, the smaller M300 Dodge MH chassis was too small for my objective. I had seen a 32 foot Executive MH in a local wrecking yard that was built on a 1977 Dodge M500 MH chassis with 19.5 inch wheels which I picked up for $800.00 delivered (so now I have two 440/727 units), also got a low hours Onan 6.5 kw generator which runs great. These pictures reflect a couple of the steps in demolition, my only concern was not to do damage to the chassis/suspension. I say to those of you who motorhome; I hope yours is better built than this one was.


 1 point
 -
1 pointQuadzillainstaller.pdf1 point
-
1 pointthe quad reads boost from the ecm for 0-16 psi then from 17+ psi it adds on top of the ecm signal reading from the sensor itself.1 point
-
1 pointGents, A few years ago I ... ok a really good friend of mine who is a wizard of a mechanic helped/did a lot of it... we stuffed a 4BT into a 71 Ford. We ended up doing a lot more then just the engine. Dana 44 out of a 78 F250 (disk brakes) Power steering box out of a 78 Power brakes using the chev bread van hydro boost 5 speed from a 90s ford with a mated 205. About all thats original is the body, frame, and dana 60 rear. I tried my hand at Youtube and still post videos from time to time. I think i am up to 8 videos, some of them are probably a little boring. My future plane is to actually tune the pump to decrease smoke and hopefully increase power. I am also thinking about flatbed-ing it this winter. Thought I would share.1 point
-
1 point
-
Makarov or ppk is small and has all kinds of safety, pretty accurate too. But I'm like @AH64ID I don't like guns1 point
-
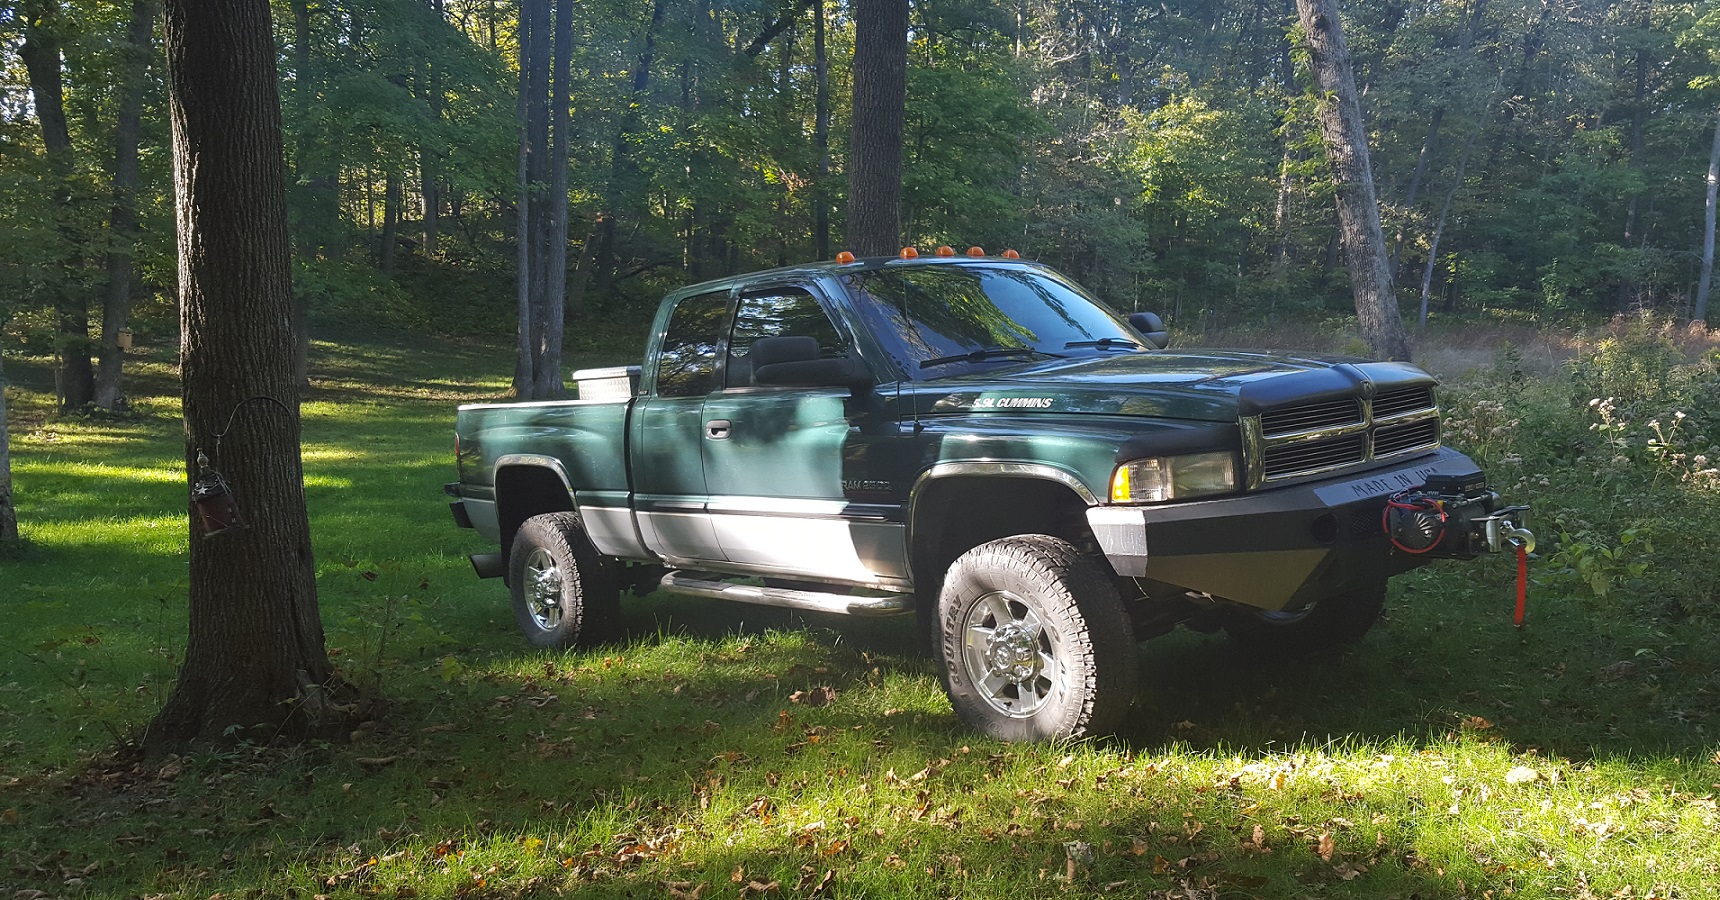
1 pointI got my truck with 295s, few years later put on 285, now 265, never 245 I am getting used to look now and actually an inch or 2 lower makes easier to load the truck and rides better all around. Taking off in 2nd is also better. Definitely more beneficial with 3.55s now if I had 3.73 I would stick with 285 and not care about wear ant tear on front end, I fix it for no reason anyway most of time. People were definitely looking at menards when I was leaving with pile of 12' sheets of drywall in a 6.5' box truck ha ha. But it did it with no effort.1 point
-
That's really good, how fast were you going. I seem to lose my mpg if I go pass 70, 65 seems to be a good place for my tuck. It sucks going places following someone you know, cause they always in a hurry to go 75-80 and then I get like 15 . Driving 60-65 is where I can get over 20.1 point
-
1 pointThanks Bacon Creek. When I get time to get back at it, I will look to see what the amp draw and rpm are supposed to be and compare them.1 point
-
1 pointWhich part of why I was able to get my 1 piece driveshaft cheaper than 3 new u-joints and a carrier bearing installed on my OE 2 piece.1 point
-
1 point
-
1 point4 Allen Screws and you can change the pump head pretty quick. Just need the filters removed to change the pump head.1 point
-
1 point265's where offered because of the large tire craze at the time. Everyone loved the larger tires and looking beefy but came at a cost. Even I bit that too it looked cool that way but not worth a darn. Now after all the years and even larger tires and all the front axle issues that people created there are very little good points about larger tires other than they float on mud much better but horrid for the snow.1 point
-
1 pointFirst off on HI there is no resistor. This why I want to be sure same voltage of the battery is present as the blower is on Hi and engine running. So, charge voltage is 14.5 Volts then you should see 14.5 or very close at the motor on HI.1 point
-
1 pointNice project, I will be following this! I like the larger M500 chassis you found over the M300. I used a front axle out of a '76 M300 for my '74 F-350 build. It had the twin I beam/coil spring front end but it wouldn't carry the weight of the Cummins. I used everything from the Dodge including the steering box. You do have to drive it tho, I kinda blame that on the weird design of the axle. It has the wishbone knuckle on the axle v/s the spindle. I almost used an axle out of a IHC with the 5 bolt 19.5's, but it had drum brakes so I passed on it, but in hindsight, I wish I would have used it anyway. That M500 looks like it has the D-80 axle and the strange front axle as the M300, just bigger. I would guess the axle has 4.88 gears, so the Cummins will need some faster ones.1 point
-
1 pointRPM loss will occur. You have not increased the HP of the motor to blow more air so, a bigger blower is just going to run slower. Ohm something out has to be disconnected. Ohming the windings isn't going to do much. I would be looking at the voltage at the blower. Just some simple theory and math... You can draw the same 20 amp but at different voltages and the workforce will change. This why I'm looking for power issues first before modifying the blower cage. If the motor is underfed and the blower cage is increased the flow will decrease too because of the lack of power to twist a heavier blower cage. watts (work force) = volts x amps 240 watts = 12 volts x 20 amps 280 watts = 14 volts x 20 amps So if the voltage is lower than battery voltage on high this means there is voltage drop between the supply and the motor. You would have to insure that the blower motor was capable of getting the same voltage on HI fan as the battery is running.1 point
-
I highly suggest you un-do the noise filter mod. Creates bigger problems with masking the problem and you'll end up eating ECM's and VP44's.1 point
-
1 point
-
1 pointMy front joints gave up around 325k. My drive shaft joints and carrier bearing are still in tbe truck at 460k. All of them sealed. The truck had all sealed joints,front end and drive line. I will always use sealed as long as I can find them and they appear to be quality. Just not sure how you can tell that for sure. I did find 3 new old stock u joints for the drive shaft but have not found a carrier bearing like that or I would have bought that too. Even the front lasted about 240k. Even the MOOG front end parts are mstill holding at 220k. They are not sealed by the way. But they were purchased before Federal Mogul bought them out.1 point
-
1 point
-
1 point
-
1 pointThe grease only goes to the quadrant with the least resistance . . . leaving the other three dry. Have always got better service from a quality sealed unit. Other folks have other experiences . . .1 point
-
1 point
-
1 point
-
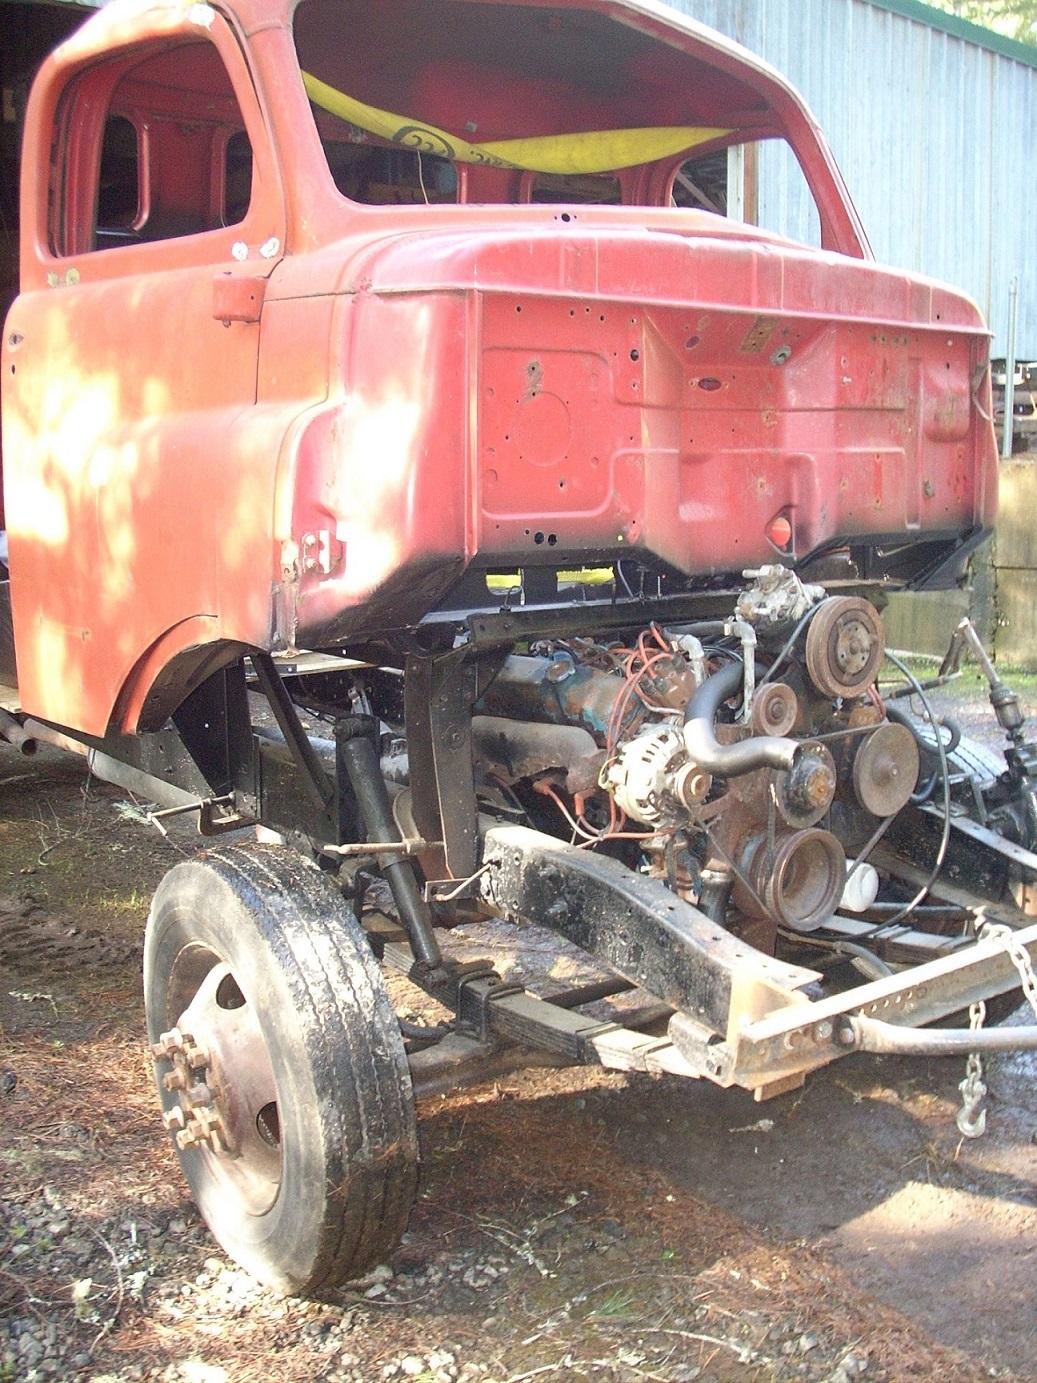
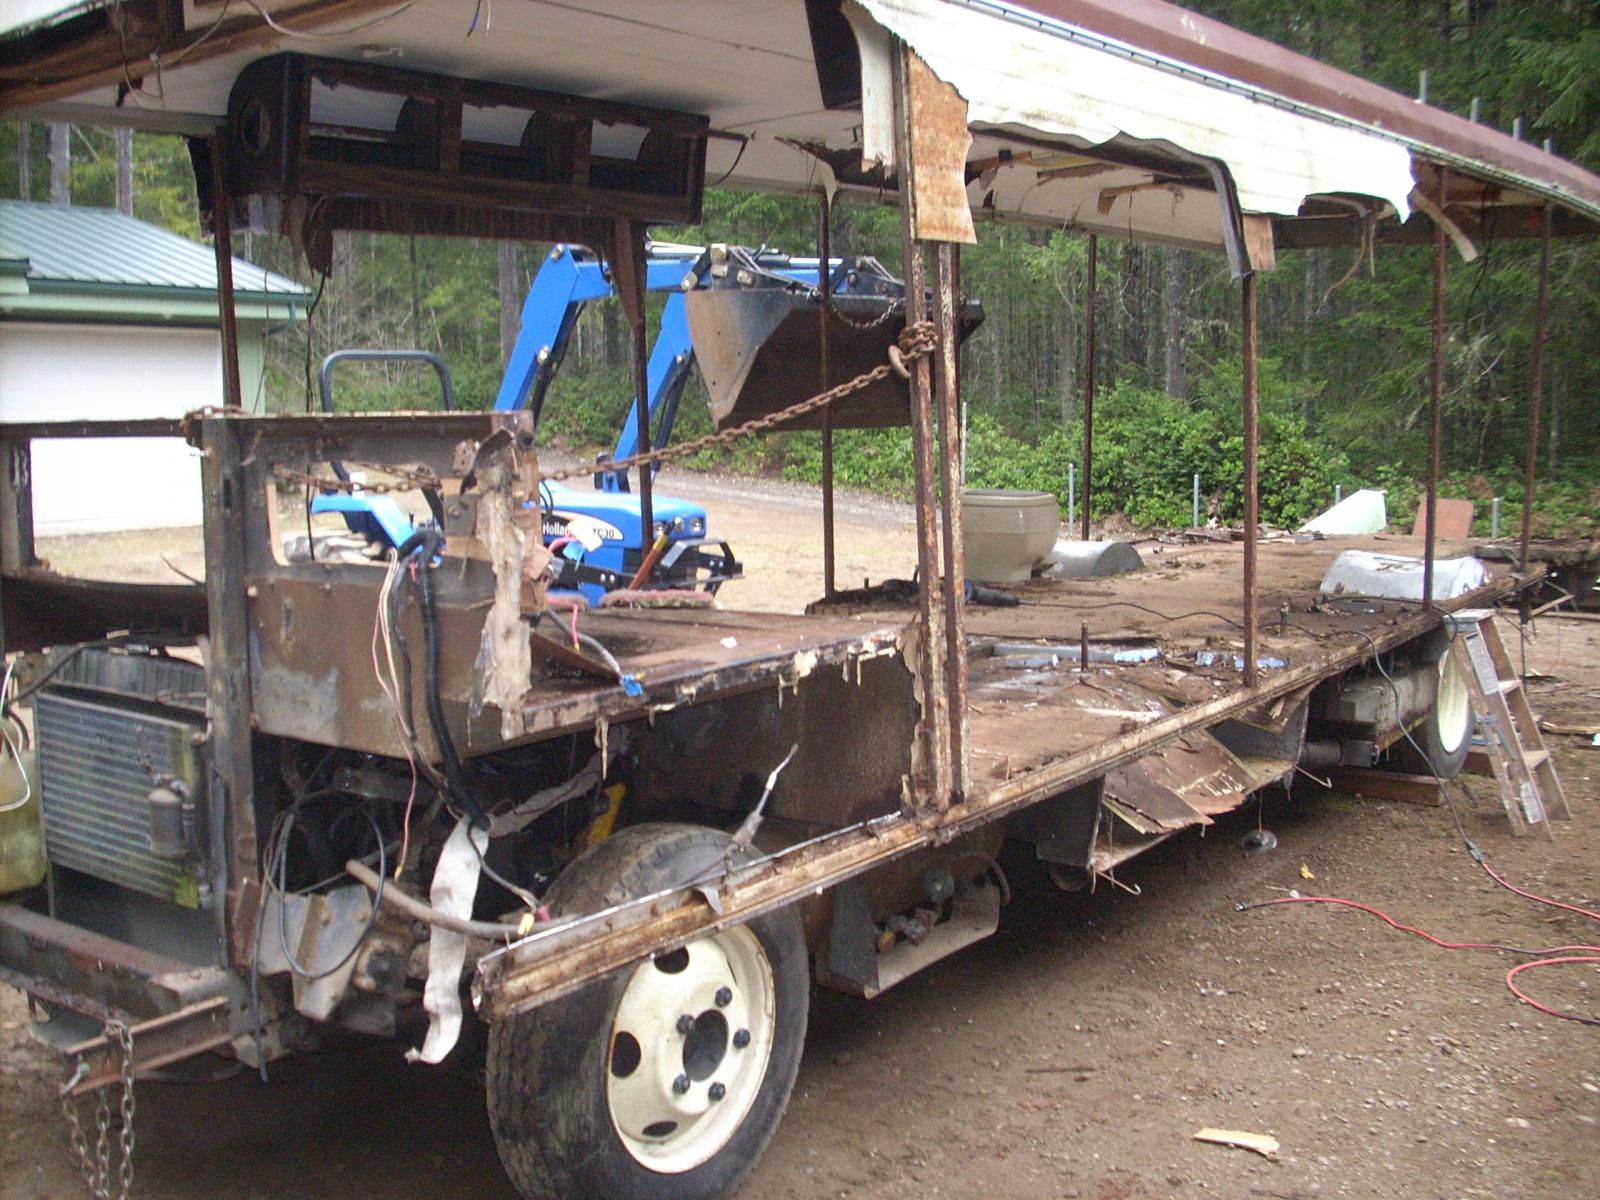
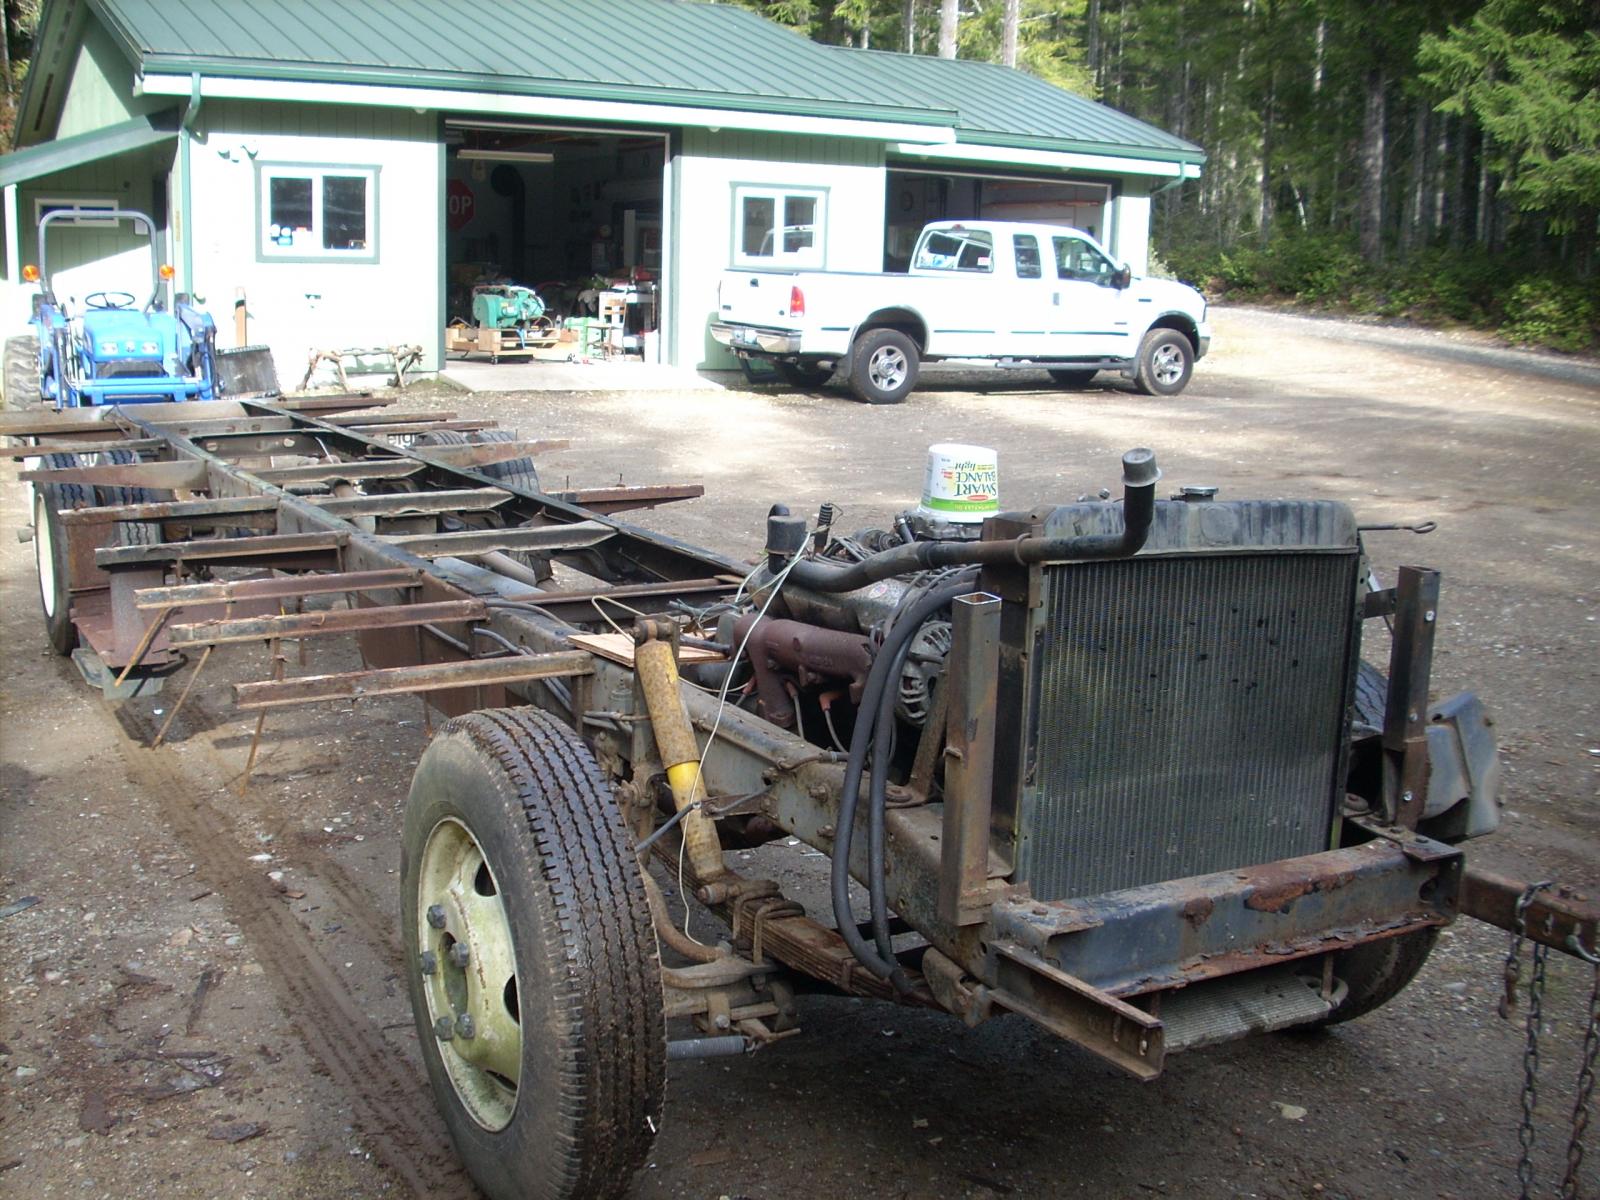
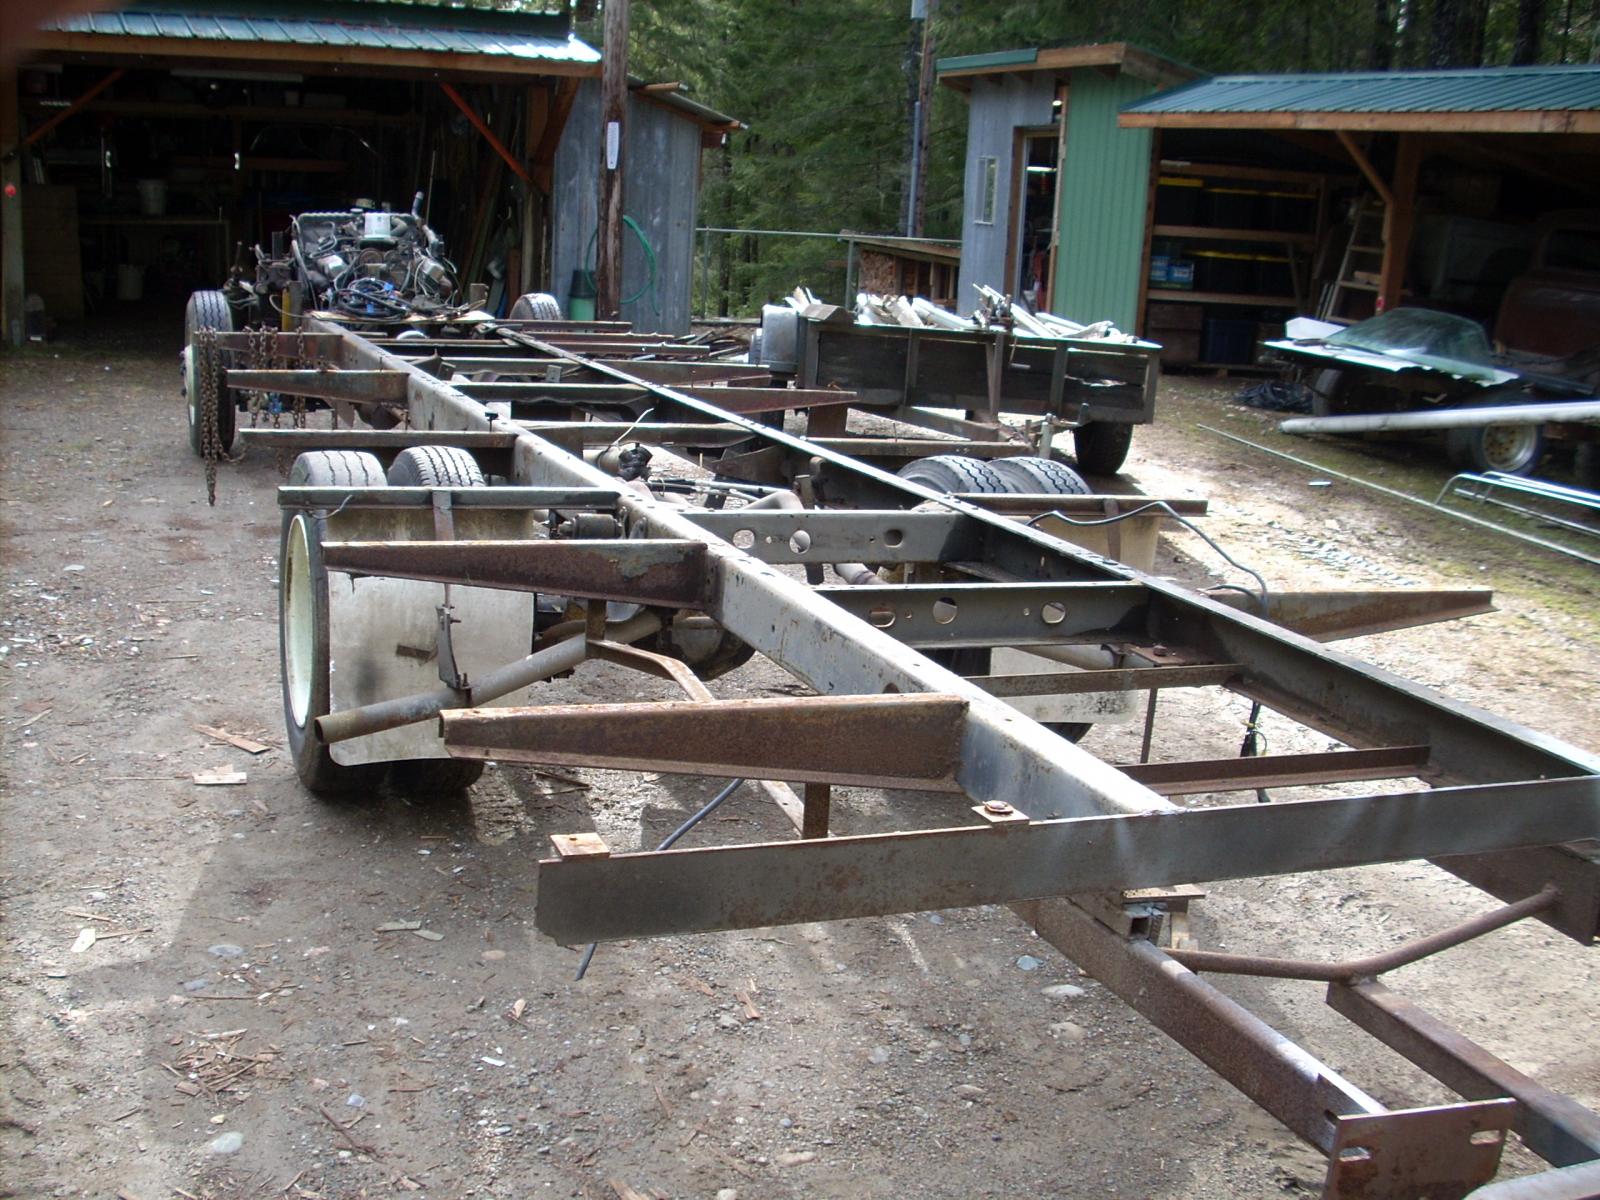
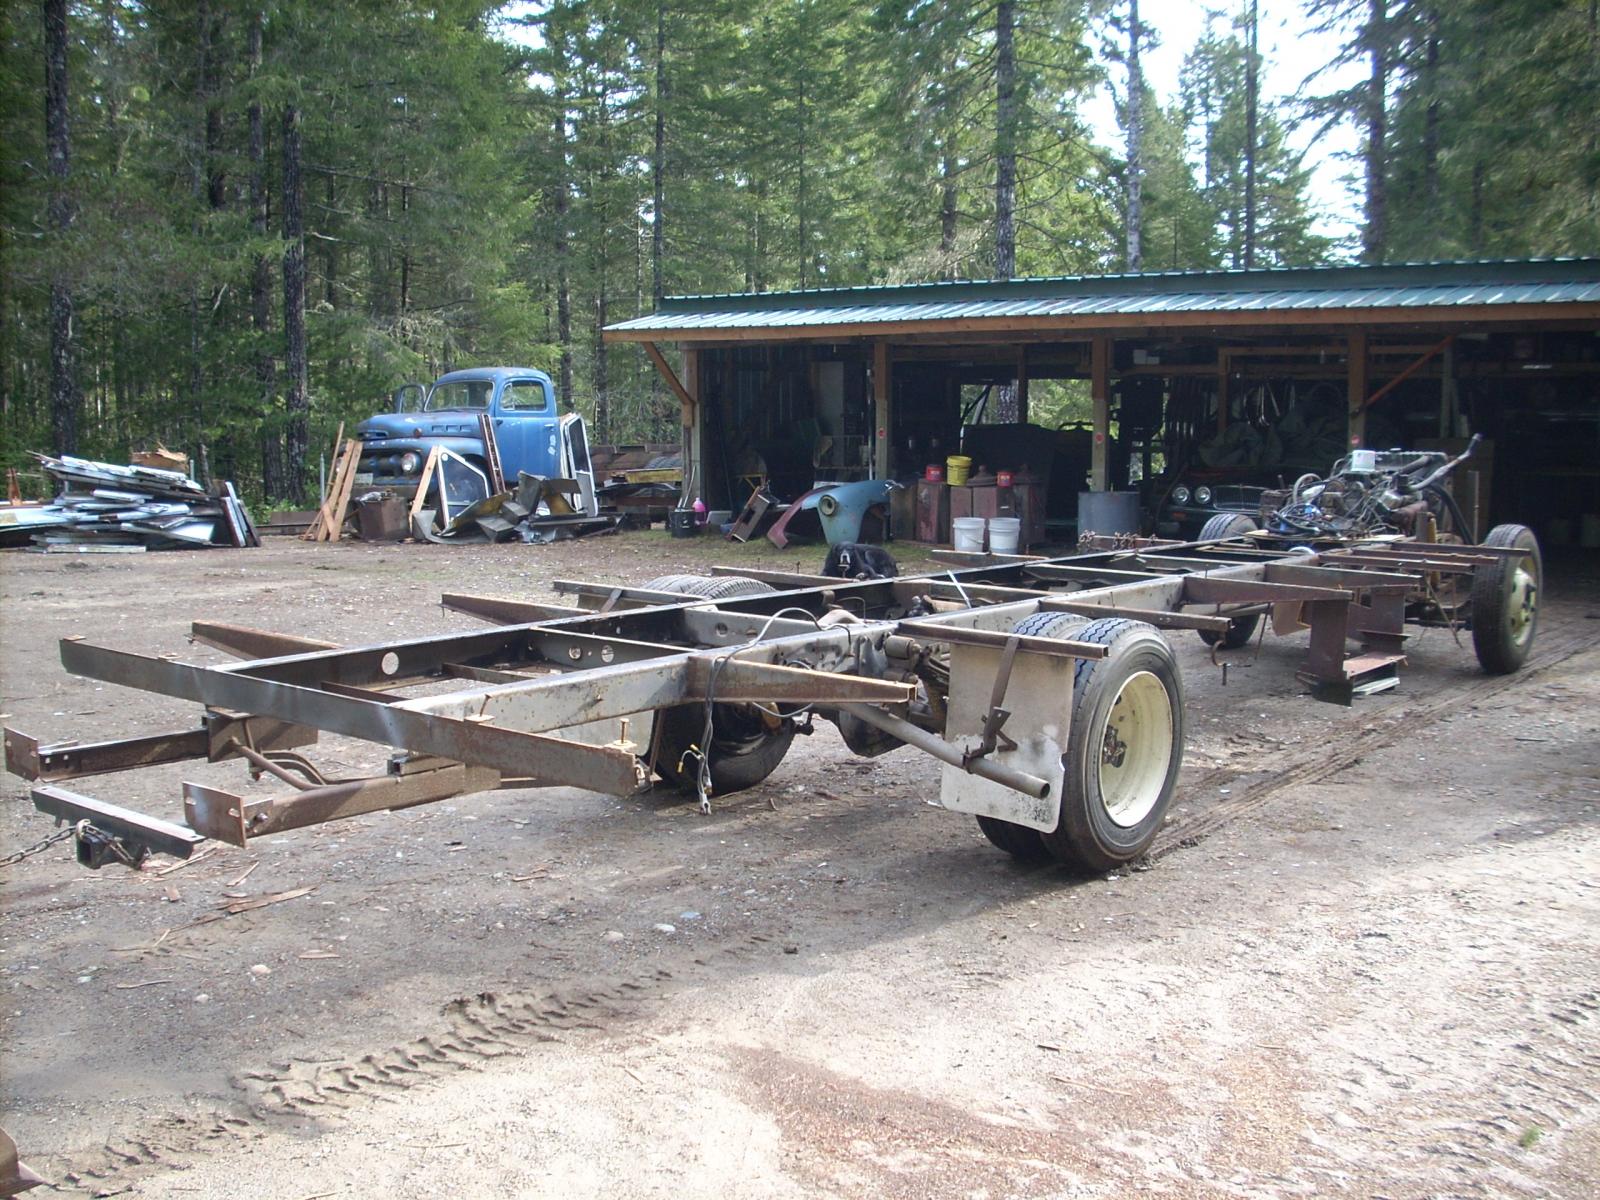
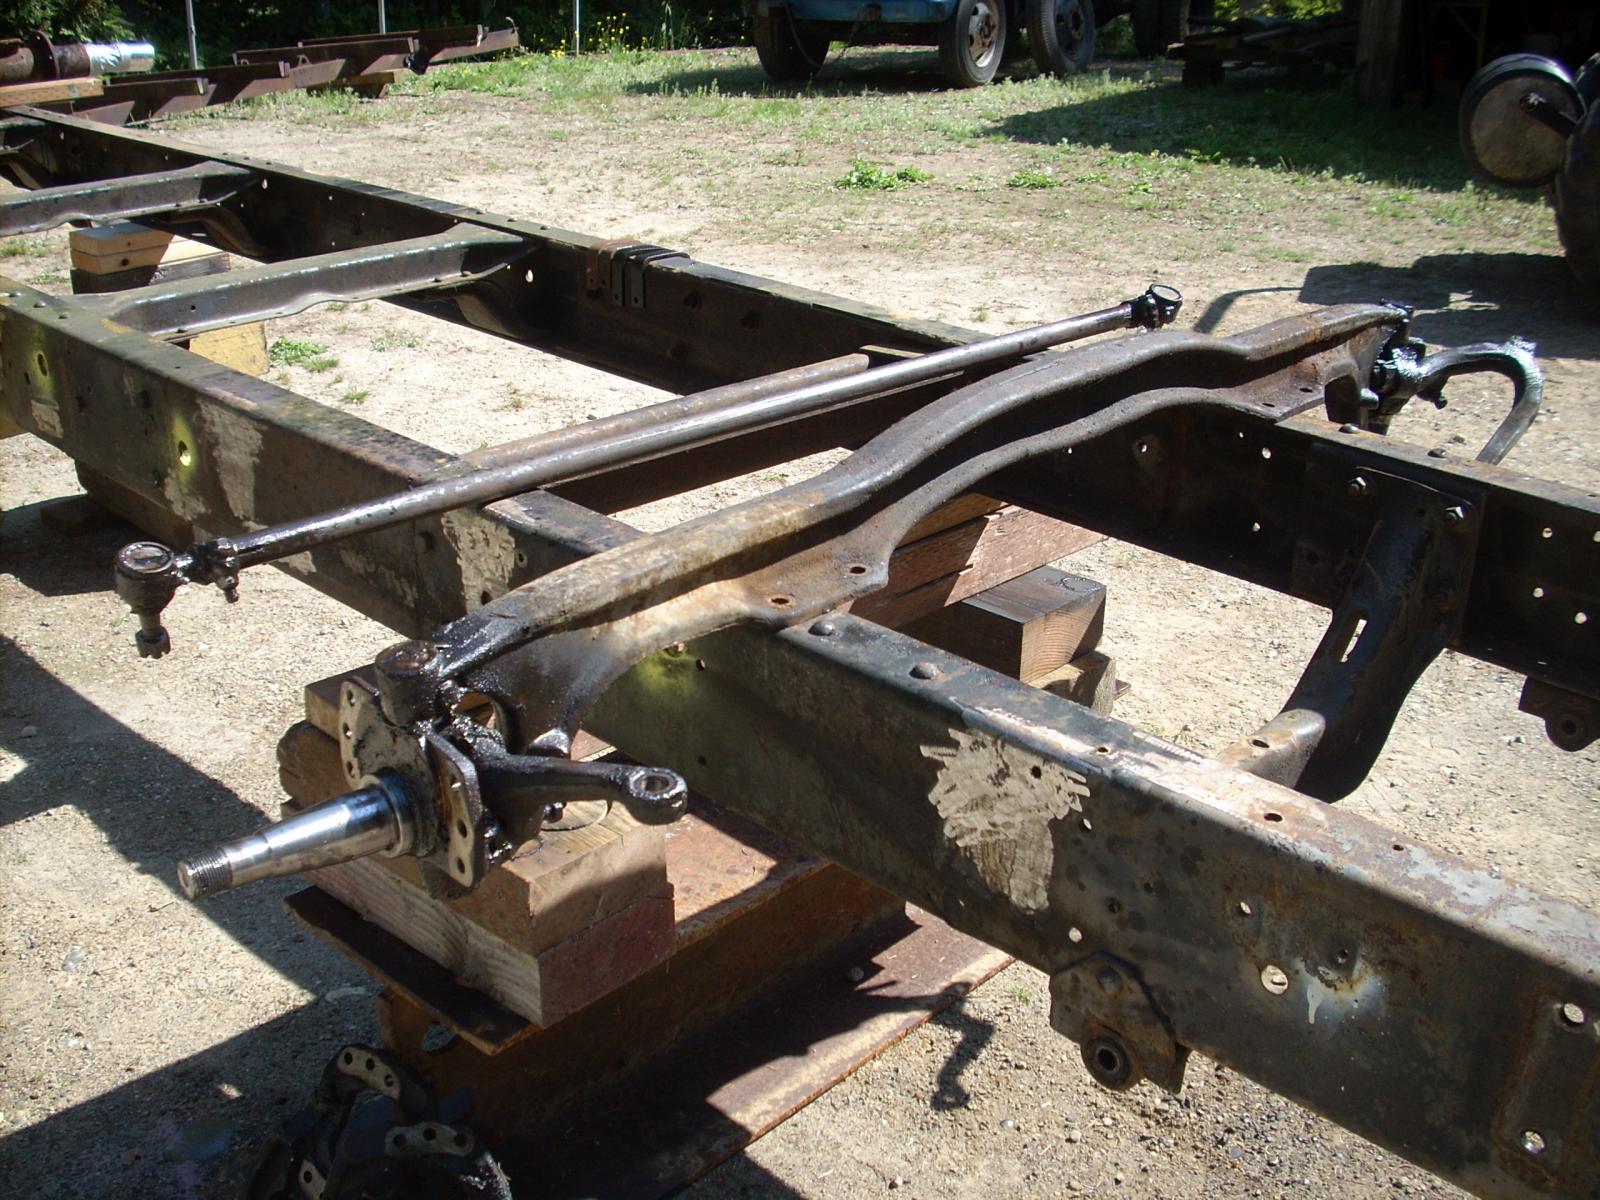
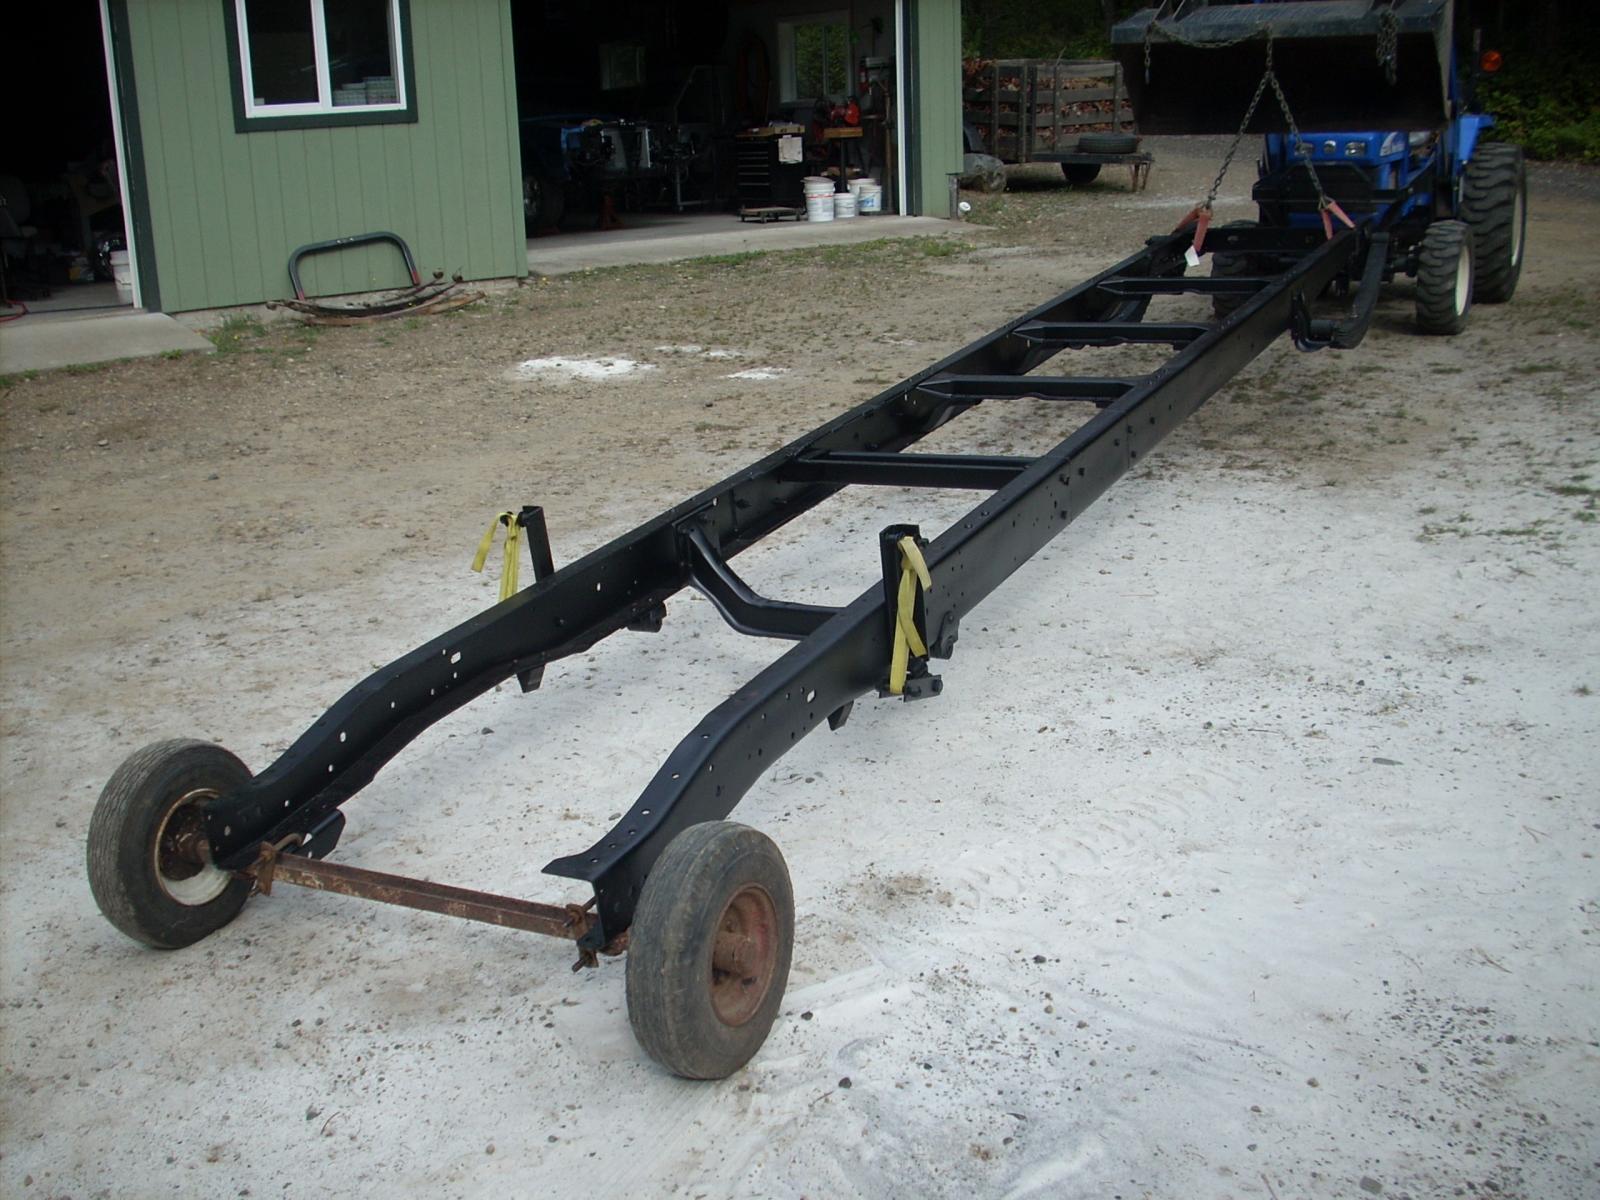
1 pointPart 3: The pictures below reflect the bare chassis that still has the "outriggers' that supported the extended floors and the long overhang behind the rear axel. I borrowed the neighbors plasma cutter to make easy work of their removal, also removed about 4ft of the rear overhang (I'm not going to need it because I'm going to be installing a tilt flatbed when I get to that point 9there is enough "tail" there to accommodate placement of the trunions when I get to that stage. You might notice the sandblast residue from my blasting the frame (both front and rear axels were removed prior to blasting and were "delicately" done separately. I thank my lucky stars for my tractor, I'm not a young guy and I'm not the hunk I used to be.


 1 point
 -
Thanks for the tip JAG1! I will test that connector ASAP. Thanks for the reassurance of the right decision Mike. Seems like if its too good to be true it probably is applicable in this instance. I am hoping to put these electrical demons to bed for good! I have a new alternator, new batteries and will do the W-T mod and circuit breakers before the ECM and PCM get repaired. My truck is about to be OOS for a week anyway. I'm putting in the RV275 injectors, an airdog lift pump, new redhead steering box, steering pump and vacuum pump rebuild. So the list keeps getting longer but i am learning something new every day! Thanks again for all your help. I will update with picture soon. Any other advice or tip will be appreciated1 point
-
1 pointI like hearing all these stories coming from our members. Makes me feel good in a very special way just reading them.1 point
-
1 pointI would like to say thank you to all of you for the prayers. As for this morning, a wonderful gent started talking to both MoparMom and I. The conversation continued and I finally gave up and told them what is happening to both of us. Being MoparMom on dialysis and me with bladder cancer. He admitted that he is not a priest but asked if he could pray for both of us. I said "yes". We all gathered in a circle in the restaurant and he proceeded to prayer for both us on the spot. Then conversation continued after the prayers and then he took our bill and paid it. Wow! What an awesome morning from a total stranger.1 point
-
1 pointBrand new. I pulled the entire dash and box out. Even installed the Heater Treater. I also vac checked the function of all the doors, and used my power probe to function test the blender door. All speeds work on the blower, I just want more air flow.1 point
-
Little bit of fiberglass It's coming upart in few places, didn't have good bond. I'll squeeze some abs glue in there this time. Maybe cow hide on top1 point
-
I would have to ask the same. Mine was cracked about that bad and I did replace it. Could not help but think if I repaired it that it would just crack somewhere else. I know my bezel did.1 point
-
Like eating a cow, one bite at a time. Take your time and it will all be good. I've used that clear JB Weld for plastic. It work good, sets up fast, makes a strong bound and stinks like....1 point
-
1 point
-
1 point
-
0 pointsDude, I'm not getting any breaks here. Got MoparMom to dialysis and then after dinner in Ontario my AirDog blows the fuse its locked up. Now finally get towed home last night yeah that was expensive and running through a snowstorm. I finally made it home and got to bed by 1am this morning. Now I'm up calling the hospital canceling my appointment till I can get repairs done on the 96 Dodge and get some sleep. I'm going to be train wreck today. I will admit that Kryptonite towing is awesome Derrick is a super nice guy and took care of us and got us home safe and sound last night. Hopefully, he made it back to Nampa, ID last night and didn't have much trouble. Now I'm going to be in repair mode getting vehicles fixed and going.0 points


This leaderboard is set to Boise/GMT-06:00