Everything posted by Mopar1973Man
-
weeping injector lines
I find that I've got to really tighten 1, 3, 4 more than typically to stop the drooling on the manifold. :whistle:So I'm not a exception to the problem but found the magic to keeping them from leaking. But after you tighten them you might find the bleed for a day or so and then stop.
-
Ethenol Question
I think it come do to quality of the mixture. Place like Chevron fuel tends to measure out proper amounts of additives. Where Mom and pop fuels (generic) tend to be a bit more sloppy about it maybe adding more ethanol to it hence why its cheaper.
-
IAT temps
Ok... Now compare the IAT temps to ECT temp in the morning with a cold start... Both numbers should be exactly the same if not then the IAT most likely is failed. Yes the IAT sensor will fail within specs at time and throw a weird high temp.
-
IAT temps
It should be +40 over outside temperature roughly.
-
Ethenol Question
Like out here there is several station with big banner saying "No Ethanol In Our Fuel"... :rolleyes:What I'm finding out they actually do have it the fuel and sometimes high quanities. Like the local chainsaw shop warned me about the local fuel station claiming this and how many fuel related failure he's had on chainsaws. So like he told me if you want to say safe use a name brand fuel like Chevron but don't use the Mom and Pop places with may or may not have the a banner out there advertising "No Ethanol".Gasoline wise I keep about 20-25 gallons around the house for ATV, lawn mower, generators, etc. But never had a problem with fuel getting funky. I guess because I'll only buy Chevron fuels.
-
Had some questions.
No back feed will occur with this setup... But your an Auto so you modify your trigger a bit differently...
-
Had some questions.
All I used for mounting was a couple of chunks of angle stock and use 2 bolts from the pumpkin then used standard old tractor rubber buckets. As for the switch the manual only has the reverse switch on the shift tower. So in your case your going to have to tap into the reverse light lead and supply power to the lead. I also used a relay in setup to keep the bulb load off the reverse lights (stock) but pulled power from the trailer (+12V) lead.
-
Error Codes
http://articles.mopar1973man.com/2nd-generation-24v-dodge-cummins/59-obdii-error-codes/190-p0500-no-vehicle-speed-sensor-signal This is not a MAP sensor issue this is a wastegate issue! http://articles.mopar1973man.com/2nd-generation-24v-dodge-cummins/59-obdii-error-codes/165-p0234-turbo-boost-limit-exceeded Got a problem with the network you might try using another OBDII reader...
-
Mopar Man's Got me convinced..... I need an aftermarket lift pump
-
98 3500 360 gas, swapping in a 95 12v, harness question
Hang on a sec... PCM only controls the Auto Transmission, fuel sender, and voltage regulator on the alternator. ECM controls all the engine... Fueling, sensors, etc... Then sent out over CCD network... http://articles.mopar1973man.com/2nd-generation-24v-dodge-cummins/26-engine-systems/74-ecm-engine-control-module Airbag is a stand alone unit it only tie is the CCD network... Instrument cluster recieves this information by CCD network.... Now remember pre 98 truck send gauge data directly to the instrument cluster...
-
Methanol injection
I know there is a member here with a methanol kit I just can't remember his name at the moment... CRS! :banghead:I'm sure he'll be along anytime...
-
P7100 Teaser Pics
If I ever get lucky and find a VP44 core I can rip apart I would do the very same thing but its so rare to just find one laying around... But once again for bring this information to the site so others may learn...I know your going to be building a article of this right?
-
getting frustrated (oil leak)
Some people are lucky... I must be unlucky to have a friend bring his 92 Dodge down and have it slobber at least a goot pint on the floor of my shop. That truck was defiantly not house broke... Well after getting out my tools and cussin' at it for a good 6 hours I fixed that problem (Tappet Cover Gasket) Some people get lucky and keep the oil leaks to a minimum and other are just a rolling oil well squirting it everywhere...
-
Mopar Man's Got me convinced..... I need an aftermarket lift pump
As for right now I know TH Racing doesn't have a current web page of products but if you give him a call I'm sure he's more than willing to discuss prices and parts with you... Does it all the time with me...
-
just purchased airdog2 i cut factory fitting
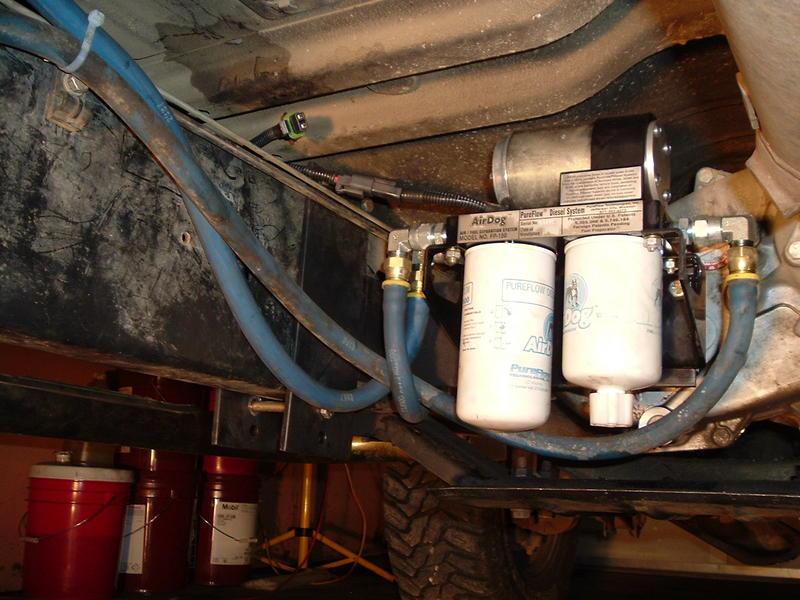
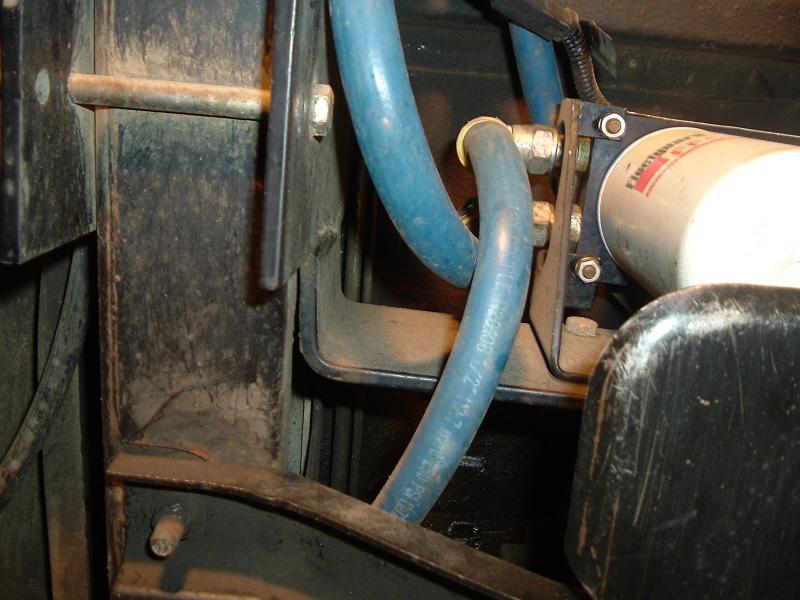
Little information about my install... When I got my AirDog 150 I need it like yesterday so I did the pump install and figured I would do the draw straw later after the trip I had to do. I found out very quickly on that trip that the AirDog 150 was choking to death on the stock pickup tube. It physically could flow the amount of fuel that the AirDog 150 could pull through it. So after I got back home from my trip which I barely kept 12 PSI for a low end number. But I dropped the fuel tank and install the old school draw straw that was included in my kit. Every since then I've never had another pressure issue related to the plumbing. Now a few times I've had problems with the regulator spring and check ball but rare. As long as I use my head and drive like a normal human I been able to draw down to 1/8 or lower with a drawstraw. Yes I see sometime the pressure gauge flops down because of sloshing air bubbles but since I've 2 cycle oil in the fuel I'm not worried about 2-5 seconds without fuel pressure. 150K on the VP44 injection pump and still going strong!
-
Tranny overheat issue
I think you got a typo... 275*F would for sure set the Trans Temp light. The factory service manual states the trans temp light will come on after 265*F... So since the fluid has been scorched I would get that changed out a few times...
-
Finally... The first real snow storm of the year...
Close... As for GPS elvation in the yard I'm 2,800 ft.... I'm only a 3/4 mile from Pinehurst.
-
Hello by AsTroSS from Europe
You got me curious... So I googled it... http://maps.google.com/maps?q=Estonia,+Europe&hl=en&ll=58.562523,24.741211&spn=18.136562,56.90918&sll=59.410849,25.224609&sspn=0.549291,1.778412&oq=Estonia+e+&vpsrc=6&hnear=Estonia&t=h&z=5
-
P7100 Teaser Pics
Right on... Thank you for your time and effort in done these pictures...
-
Why coolant flushing or changes are a must...
I guess Wild & Free forgot I'm in the middle of nowhere Idaho with a well and creek...
-
Why coolant flushing or changes are a must...
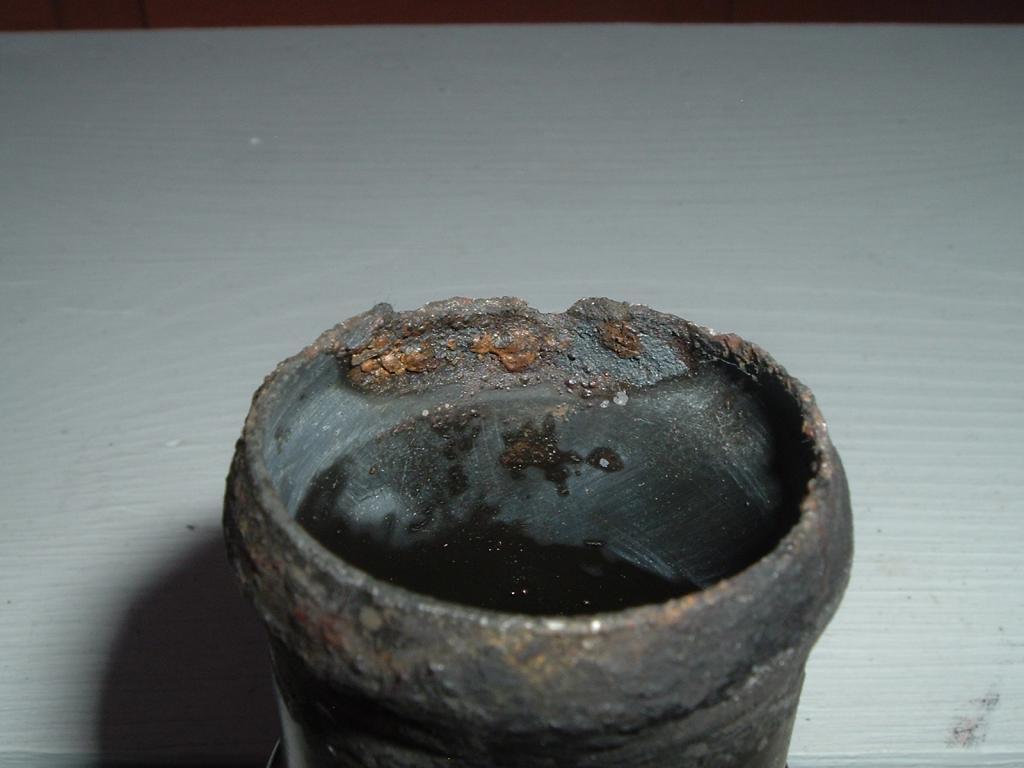
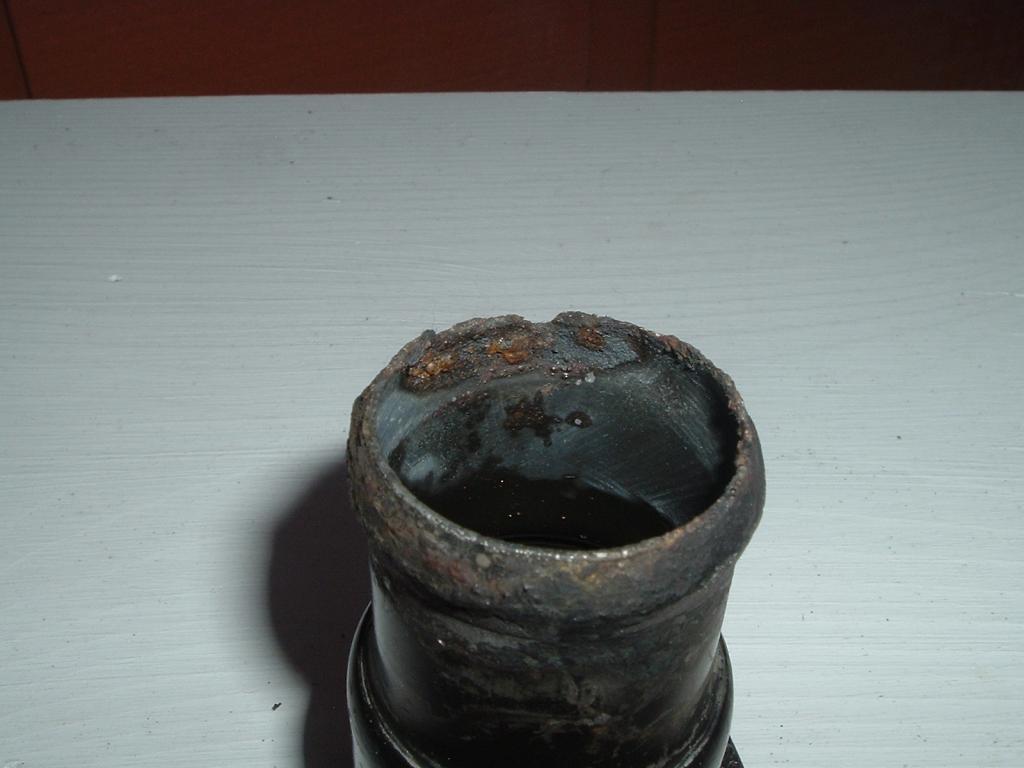
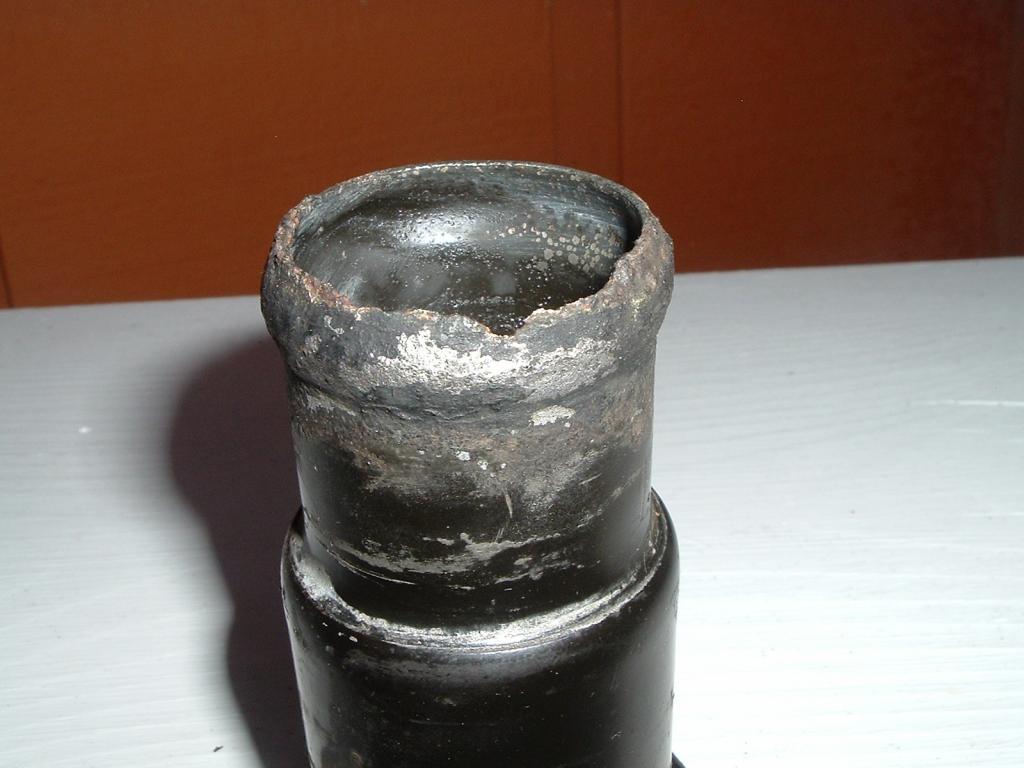
Actually I don't blame the tap water at all but the pH level change which comes with extended coolant changes. Like the little red Dodge wound up with because of lack of use and low amount of miles it used. It was well over the time limit but I don't think it was over the mile limit.This is minor damage to the thermostat neck... Next one is the Cummins... But I already know it good because it done yearly with about 25K to 30K miles on it. I'll document the Cummins when I change it too. We'll compare the pics from the last few...
-
Need to buy a OBII scanner tonight
Understandable... Money is tight these days...
-
Finally... The first real snow storm of the year...
It now just about all gone...
-
Why coolant flushing or changes are a must...
Here you go gang... I got done with the manifold gasket job on the 1996 Dodge Ram 1500 a while back and knew I needed to change coolant. The coolant was like 4 years old being I only drove the truck like 3-4K a year. So why change coolant when the truck just sits. Well here is my thermostat housing... As you'll see the housing is starting to rot away from the pH imbalance of the coolant and it attacking the metals.So needless to say I got the cooling system on the 1996 Dodge 1500 flushed out and fresh coolant and tap water back in the radiator. Call me crazy but it works fine...
-
41te transmission
Not a good sign... I would do like your saying to do and flush it out and get the fluid and filter changed out. But I'm going to assume the metalics is a aluminum...


