Mopar1973Man
Owner
-
Joined
-
Last visited
Everything posted by Mopar1973Man
-
Wild & Free started a new thread about a 911 Forum to hopefully continue this kind of aid! http://forum.mopar1973man.com/threads/5428-Possibility-of-a-911-help-forum
-
Yeap the guys are right... :smart:Vulcan Performance sells the Push Loc Tees that have a 1/8" NPT hole or you can get the JIC fitting with a tapped 1/8 NPT port. You cohice.But you want you gauge away from the water hammer source (VP44) and protected with a needle valve (suggested) or snubber.
-
Here is the article about air pockets and water hammer... http://www.siouxchief.com/Resource_/ProductMedia/133/Water%20Hammer%20FAQ%204-04.pdf As for the snubber fittings a lot of people buy them but since they are not adjustable gauge failure seems to still occur. http://www.summitracing.com/parts/ATM-3279/ As for the isolators I think part of the failure problem is the isolator is trying translate the water hammer pulse and it phyiscally wears out the isolator till if fails. Another form of isolator failure you won't see but have to check for is the diaphragm/piston leakage where fuel is on both side and the seperation of fuel / anti-freeze is no longer.
-
I'm also glad that other members dove in with both feet to your aid... I hope to keep seeing more and more of this as time goes on. Roadrunner I'm glad your back up and runinng... I would contact AirDog about the pump.Thank you Wild & Free (Bill) for your efforts...
-
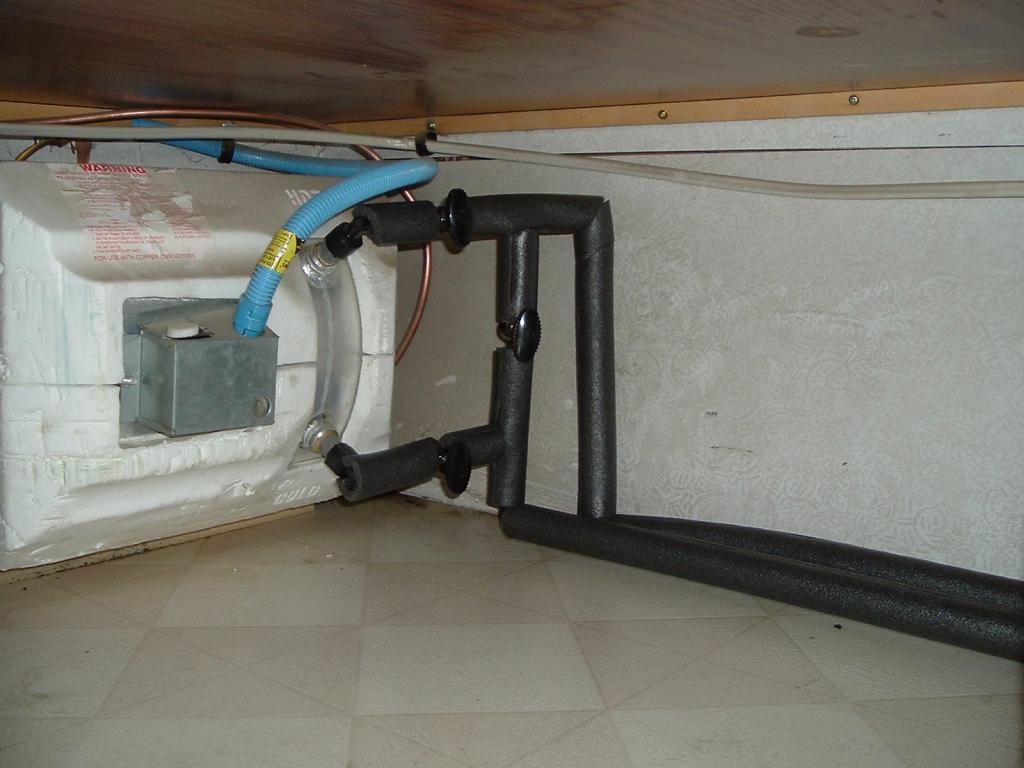
I know there is a few of you that might use your RV's through the winter time or just in cold temperatures. Like myself I wanted to keep propane bills low as possible, save water by not having to warm the pipe up again, and just prevent freezing if used in cold temps.So I went down to the local hardware store (C & M Lumber) and picked up several lengths of foam pipe insulation for the RV. You want to look for the insulation that has adhesive on the split part also RV you want 1/2" pipe insulation. It a pretty basic install cut cut to fit, slide the foam over the pipe, pull the cover tape and stick together.Now when it comes to cutting corners it will take some practice of cutting 45* angles and getting them to fit properly.


-
If you miss paths... You could buy a cheap carter lift pump from Napa and use normal barbed hose fittings. This will get you going again at least...
-
Unknown till there is some more information like the codes...
-
Yeah I know what you mean... My little 8x8 Utility Trailer has 1 Ton Dodge spring pack and a 1/2 Ton Dodge Axle under it. But it still hauls home the firewood...
-
Sorry I'm late to the intro but I've been busy keeping the site going... So let me say "Welcome to the Family".
-
The difference is SGII will have a USB function soon to hook to a laptop for data logging. Also SGII has programmable gauges so you can program in like rail pressure gauge, trans temp, etc... Check it out... http://www.pureenergysystems.com/store/ScanGauge/USB.htm
-
Interesting... Its very simular to SAR (Search And Rescue) packs... I'm geared a bit differently but typically the ATV got most of my stuff... Then both the trucks are rigged up with basic for road travel. But with sotrms like these you should be getting you property tied down and secured the best you can and consider leaving for safety. Like Flagmanruss I'm concerned about up there in Rhode Island... Rogan over there Virgina... There are many more but all you guys, gals, family be careful and be smart... MoparMom said she would say prayers for all you out there!
-
Just be careful out there... This is not to be taking lightly... :nono:I'll just keep saying prayers here...
-
Everyone on the east coast please pay attention to your weather!
-
Thank you for confirming this...
-
Actually had already been warned by the ECM of the 2 issues... APPS code and the VP44 code... So actually it right on score.
-
Here is what I got on CCD networks... http://articles.mopar1973man.com/general-cummins/34-engine-system/81-ccd-data-bus
-
Reason being is that the 98.5 to 02 Dodges tend to use a offset voltage for boost reading so it skews the SG or UG reading. JLandry is right you should consider a actual gauge for boost, fuel and pyrometer. Now on the CR engines the SG shows correct boost and rail pressure values...
-
How about this... http://forum.mopar1973man.com/downloads.php?do=file&id=221
-
From what I heard when you return the smarty back to stock you loose the speed calibration. But this is here-say...
-
Maybe I shouldn't talk... :rolleyes:CajFlynn gave me his old RV275 with over 450K miles on them had them pop tested in Lewiston, ID and they passed. The misfire issue I had was cause from dirt/debris in the pintle area. So far haven't had any problems... :shrug:Make me wonder If I'm borrowed time...
-
Click on the links above and they will take you to the diagnostic pages of each one or... Or go here and type the P codes in the title filter box and it will show each error and diagnostic... http://articles.mopar1973man.com/2nd-generation-24v-dodge-cummins/59-obdii-error-codes
-
You might be waiting awhile on information on Delphi lift pumps... Most people are running FASS, AirDog or Raptor fuel systems. But just maybe someone here might have some information...
-
Assumed... Because I UV check all the stuff under the hood and couldn't find any dye so I assumed the evaporator failed twice. Because after replacing it it ran great for over 9 months then failed again... :banghead:
-
Calibrate your speed on the ScanGauge II by using a GPS and have both display speed. Then go into the menu on ScanGauge II under setup and display speed. Then change the speed to match the GPS. Now you have a accuracte speedometer/odometer on the ScanGauge II... But this will not fix the stock cluster... Sorry...
-
P0237 code... http://articles.mopar1973man.com/2nd-generation-24v-dodge-cummins/59-obdii-error-codes/167-p0237-map-sensor-voltage-too-low You might want to run through the diagnostics on that page... That could be the source of your limp mode and lack of power. When the ECM can't see the boost pressure it goes to limp mode to protect itself from damage...