


IBMobile
Staff
-
Joined
-
Last visited
Everything posted by IBMobile
-
This will roll over your old bones and you'll feel good about it.
-
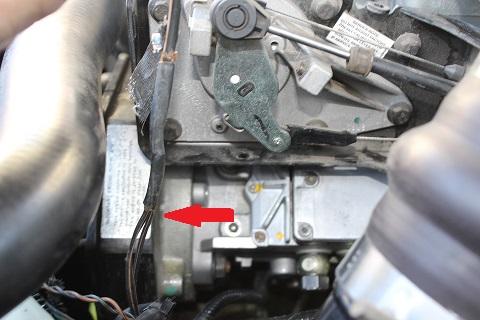
I've done mine already. This is what I did. 1 Disconnect batteries 2 Unplug ground wirer, the one (black/yellow) that comes by the alternator, at the aux. battery. 3 Remove the charging wire from the B+ terminal of the alternator. 4 Remove alternator top bracket. 5 Remover the ground and charging wire from plastic conduit removing the 3 clamps as you go. 6 Remove the 10mm nut that holds the charging wire at the PDC and throw the wire in the trash. 7 Cut the ground wire where the 4 wires are spliced into it and throw the old ground wire in the trash. 8 Strip the 4 ground wires an solder the in to a #10-12 1/4" eye lug. You may have to spread the end of the lug open to fit all the wires be for you solder. 9 Install new 1/2" conduit on remaining wire that are in front of engine and reinstall the 3 clamps. Tape ends as you go with quality electrical tape. 10 Make the ground cable from engine to main battery. Cut #6 AWG cable 18-20" long and solder lugs on. I used a small butane torch to do this. Don't for get to orientate the lugs for minimum cable twist and slid the heat shrink on the cable before you put the lugs on. 11 Attach ground wires and cable to engine case with the 5mm x0.08 bolt an a flat washer and attach other end to main battery negative clamp. 12 Make the B+ charge cable from alternator to the auxiliary battery. Cut the #4 AGW cable 20" long slide on the heat shrink and solder on the lugs. The sides of the #4-1/4" lug that goes on the alternator B+ post may have to have its side ground off by a few thousands to make it fit in the insulator. 13 Attach the B+ charge cable to the B+ terminal of the alternator and the auxiliary battery positive clamp. Refit alternator top bracket. 14 Inspect all work, reattach all battery cables to the batteries and rest APPS. 15 Start engine and test DC and AC voltage at B+ terminal and both batteries. A battery shop has the cable and lugs. The rest of the materials, (solder, heat shrink' cable cover, #12 -1/4 lug, bolt and washer), came out of my supplies, 2' #6 AWG $5.54 2' #4 AWG $5.54 1 #6 -1/4" lug .47 1 #6 -5/16" lug .47 1 #4 -1/4" lug .47 1 #4 -5/16 lug .47 TOTAL 12.96
-
That's it in a nut shell.
-
Hose for fuel evap system till I can get silicone wastegate hose from a supplier tomorrow.
-
Glade to see you're still trudging along and up graded to a third generation. Here's a pic of the bridge I took last September. It's the only bridge in the U S where it is legal to base jump from. Dripley still likes to horse around
-
Final installation after adjusting boost pressure.
-
This is the link. The part comes out of Hong Kong. When I ordered it the delivery date was posted to be 3 to 6 weeks, it came in a week. https://m.ebay.ca/itm/Adjustable-Manual-Boost-Controller-MBC-Ball-Spring-for-Turbocharged-Vehicle-O0B6/361900309685?hash=item5442f07cb5:g:HjgAAOSwNnRYmpXx
-
I just got rid of my boost elbow and installed a manual boost controller recommended by @kzimmer. It's the best $5.46 I ever spent on this truck. Now when I mash down on the go peddle the boost gauge jumps to 26psi, trans shifts up and boost goes to 28psi. When it shifts to 4th, boost hits 30psi and speedo saying 80. No more boost bleed off. There is a lot more room on the adjustment for more boost so how much more boost can I dial in and still be safe?
-
you can always go up in size but the limitation you will find is the size of the lug for the B+ terminal. I used a #4 lug with a 1/4 screw size hole for that application and had to grind a few thousands off the sides to make it fit in the plastic isolator around the B+ terminal. I think if you go any larger you will be doing a lot more grinding and may compromise the integrity of the lug. I went to the battery shop I have an account with and bought the cable and lugs. The rest of the materials, (solder, heat shrink' cable cover, #12 -1/4 lug, bolt and washer), came out of my supplies, 2' #6 AWG $5.54 2' #4 AWG $5.54 1 #6 -1/4" lug .47 1 #6 -5/16" lug .47 1 #4 -1/4" lug .47 1 #4 -5/16 lug .47 TOTAL 12.96
-
New gasket equals cheap oil leak insurance.
-
When I changed my injectors I had both the APPs and VP unplugged. When I started the engine the CEL light was on coding for the APPs and VP. I cleared the codes and then life was good. The only thing I can think of is I turned the ignition on with these things unplugged. If it comes back then do the diagnostics.
-
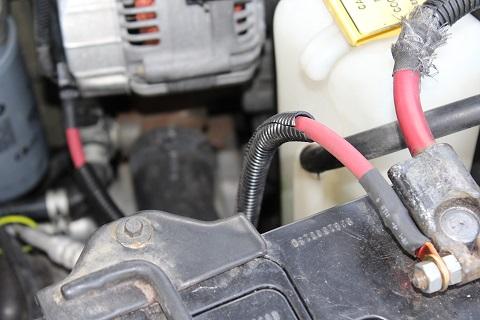
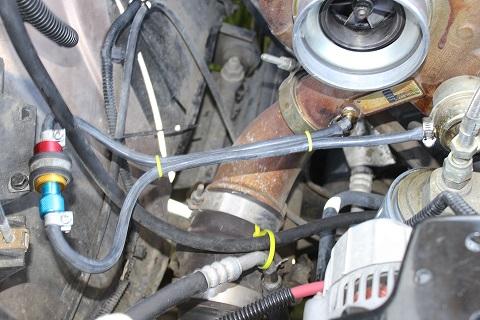
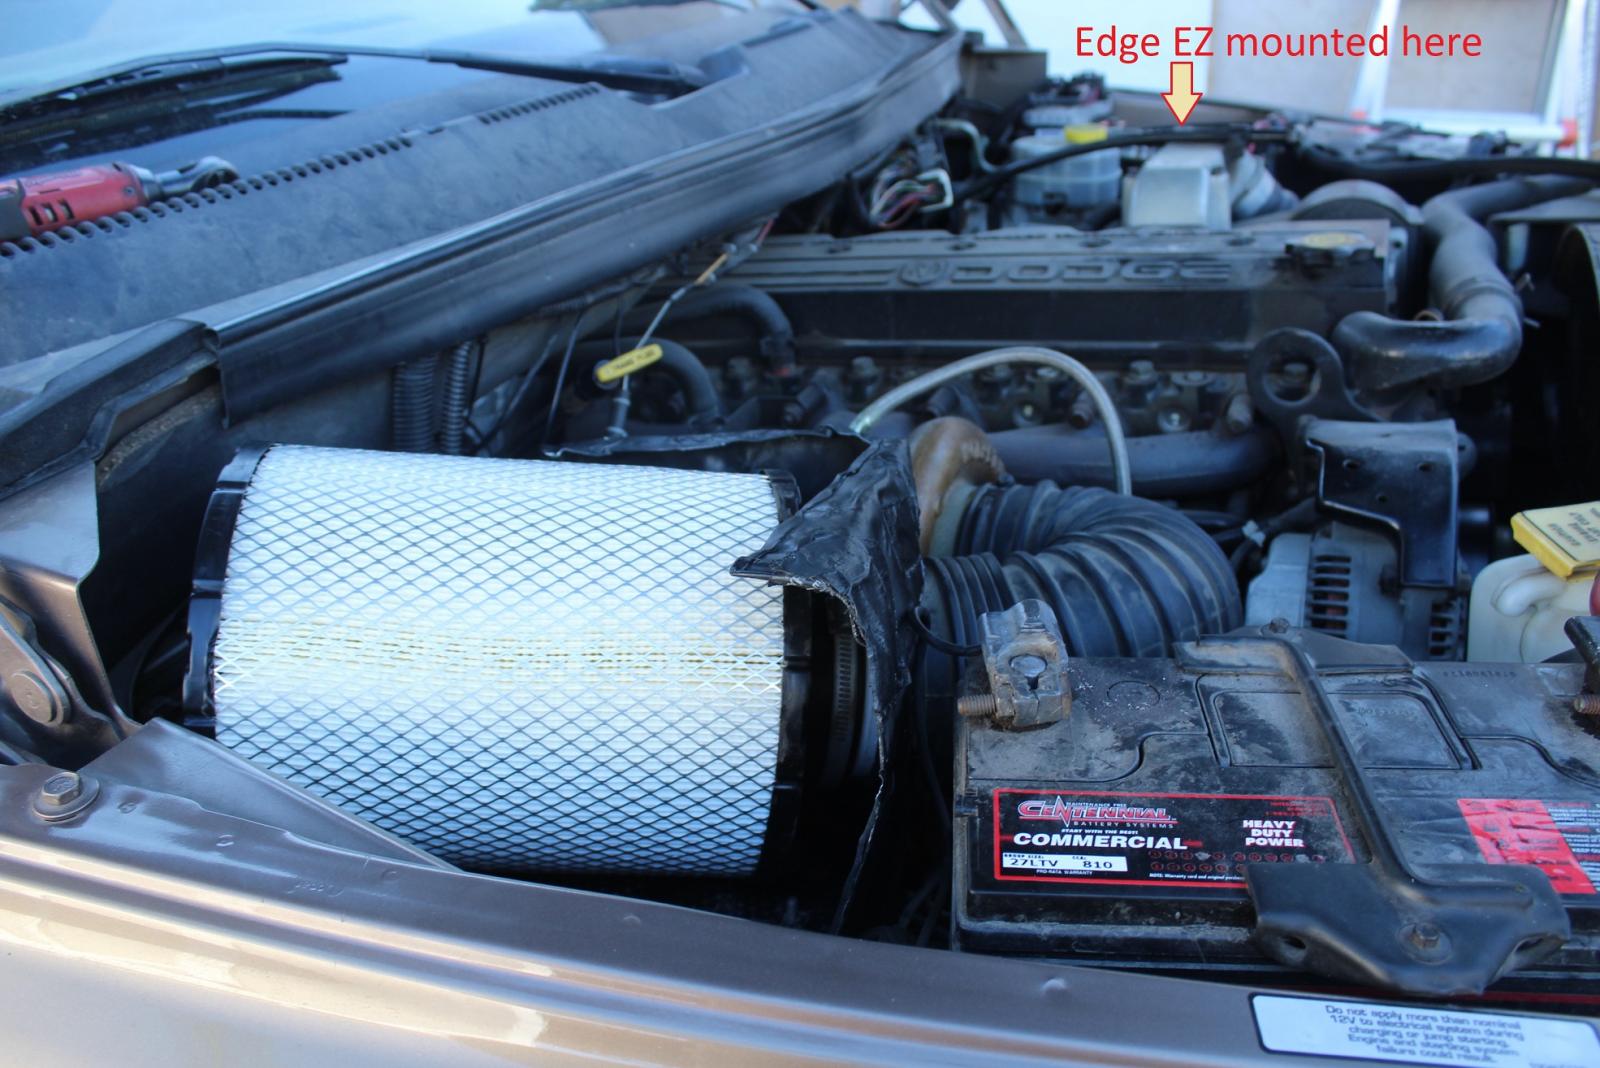
@dripleygetting ready for the rain. I finished that grounding/alternator B+ modification that @W-T did the write-up on. First time took a few hours to get everything right but now I could knock that time down to a couple of hours. Cut the grounds here and throw the rest away. #4 gauge wire from alternator B+ to aux battery.
-
@dripley I'm in the middle of doing this modification right now. I took the old cables out last night and cut, striped and soldered the 4 ground wires into a 12 gauge eyelet that I split open to accommodate all of them. I've made up a 6 ga cable for the ground from the case to the left battery and a 4 ga cable from the alternator to the right side battery. Let me know if you need any in fo on this or what I can do to help. @JAG1will probably want me to do this to his truck next time we go camping.
-
I made my heat shield setup from heat shield material used between the catalytic converter and car underside of MBZ I found in the salvage yard . Cut it with a cutting wheel on an angle grinder, bent and screwed in to shape. I drilled and mounted it to the studs that hold the air box in.
-
I'll bring you some along with the relays in May.
-
Blinker fluid, I've been looking for that stuff all over the place. I didn't know AutoZone had it. I already have the muffler bearings from E-Bay.
-
The same as the valve cover bolts, 18 ft/lb.
-
Why yes, from the same guy that told me I had to rotate the winter air in my tires and put summer air in. I don't know how it's going to help. There is a rubber seal keeping the coolant from leaking out and then the sealed bearings. Just having a quality pump, changing the coolant, using distilled water and keeping the ph level around 6-7 and your good to go.
-
That's the problem! You should have used the best--Krylon--No drips, No runs, No errors. It would have lasted twice as long. My 2000 roof started about the same time but the hood is still good. I live about 30 minuets north of Bobalos and if it's going to rain 1/4 " here they call for a storm watch. I saw a truck with the same paint combo as mine but with the roof painted gloss black. It didn't look bad at all. You can always do what JAG1 did to his hood and have it Rhino Lined®. It doesn't look bad and you don't have to wax it.
-
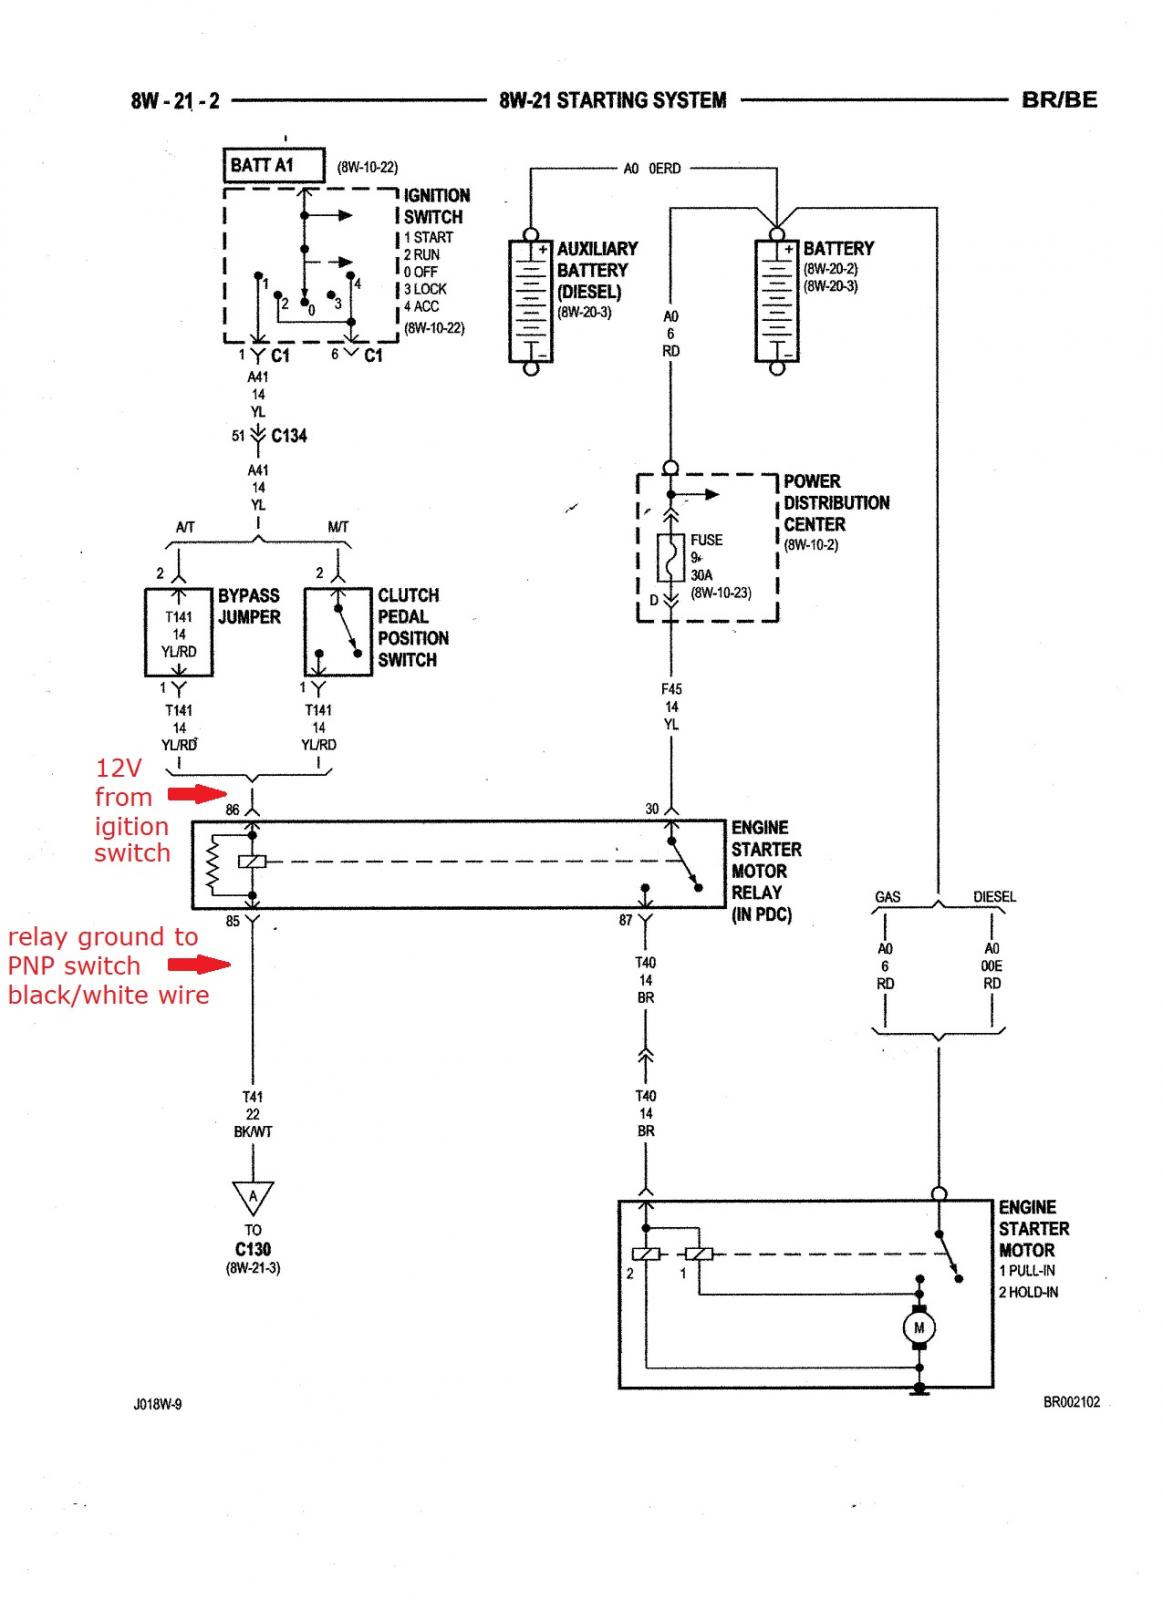
I'm looking at the factory wire diagrams and I don't see that black/white wire connected to the battery but as the grounding leg of the solenoid in the starter relay. This is why when you connected the 2 wire together the other wire was the lead (violet/black) to the back up lights and the PCM was grounding through the blubs.
.jpg.ae6d7302f85b49778def77d78b3cc66a.jpg)
-
Why is there corrosion around the battery terminals? It's because the seal between the battery post and battery case is bad, The battery gases venting there cause the corrosion.
-
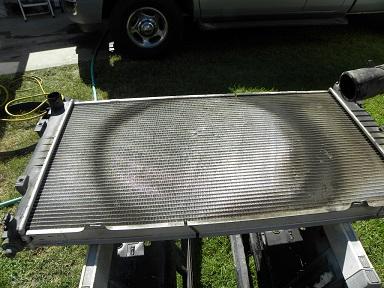
This is what my radiator looked like before cleaning
-
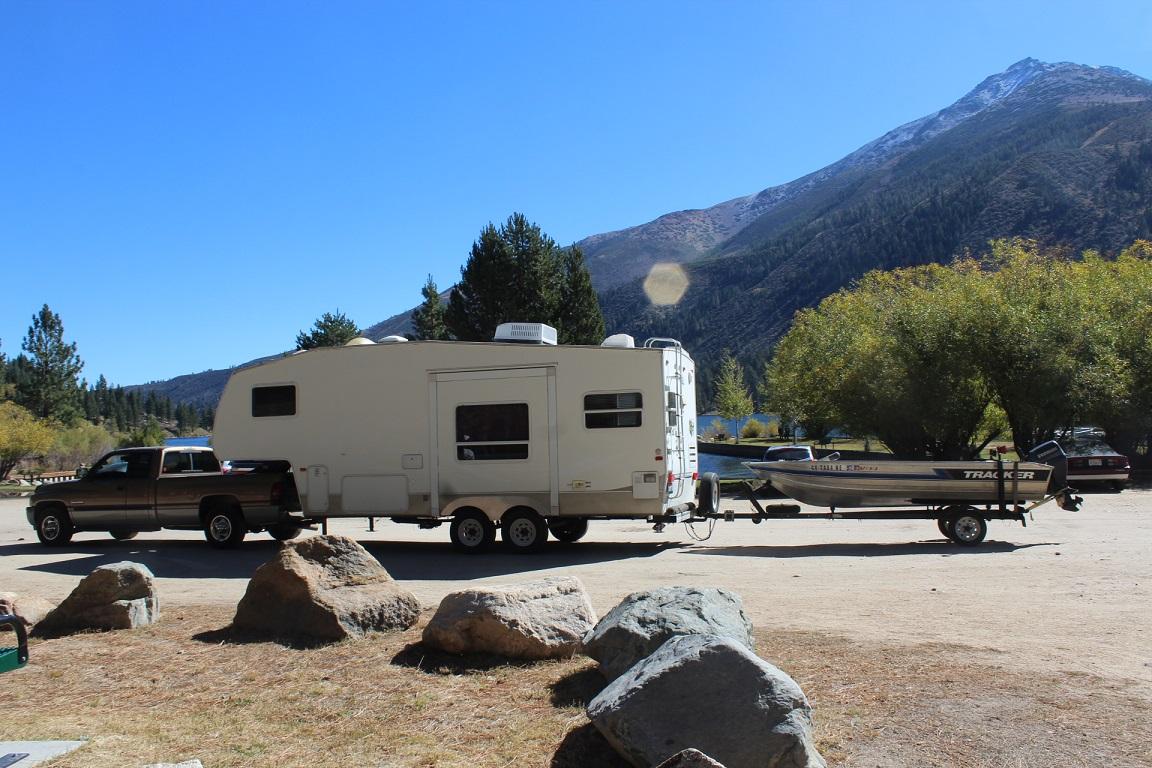
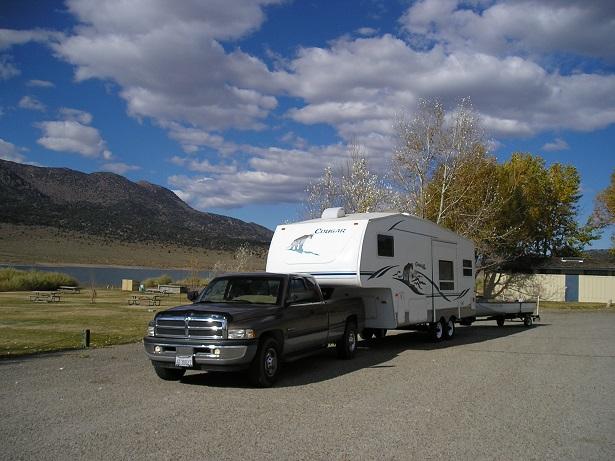
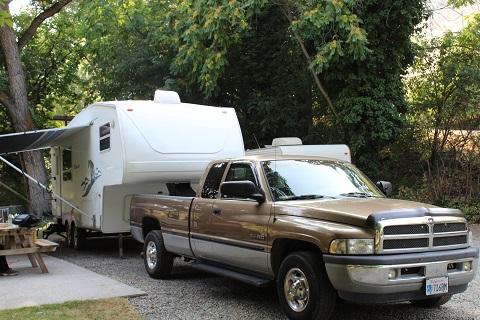
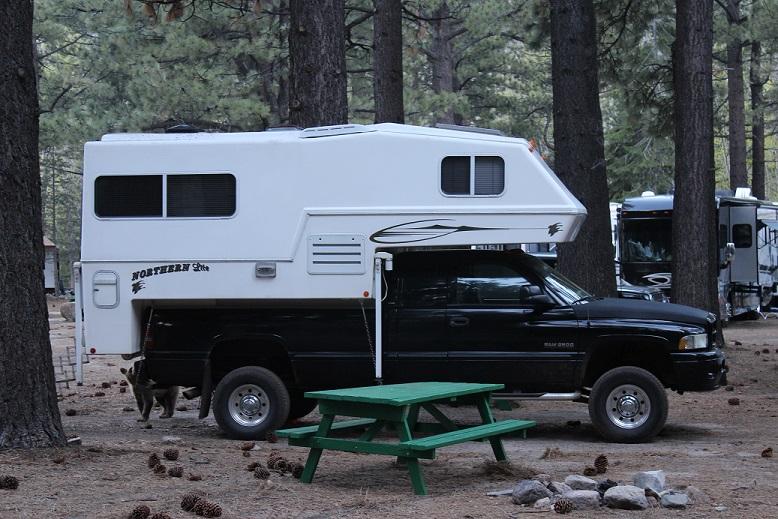
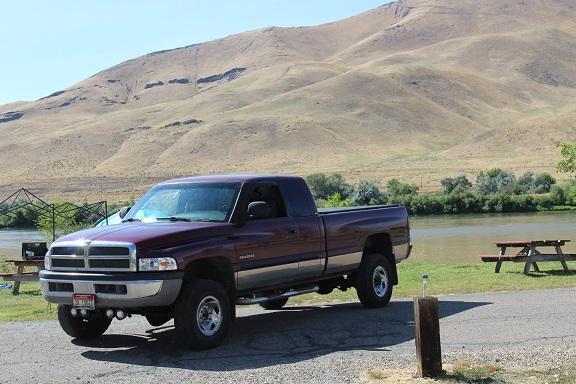
My truck and trailers This one was taken last September Below is JAG1 truck camping in the Sierra Nevada mountains. Below is another pic of Mike's truck taken in August at the Eclipse meeting
-
I buy the cheapest coffee maker WalMart sells. They cost around $12-15 and last 2-3 years making 2-3 pots a day. I rotate the new one to the 5th wheel the old one to the house and the broken one to the trash.
-
Tapping the BK/WT wire at pin #6 C1 at the PCM, install a switch and running it to ground will do the same thing but the code will still set. What if you put a resistor (33 ohm 1/2 w) in line. This works on the Mystery switch set up to keep the PCM from setting a code.


